As a sprinkler system maintenance expert, I have seen firsthand the damage that can occur when sprinkler systems are not properly winterized. One of the most important steps in preparing your sprinkler system for winter is to blow out the lines. This process ensures that all water is removed from the pipes and prevents freezing and cracking during cold weather.
Blowing out sprinklers for winter can seem like a daunting task, but with the right tools and knowledge, it can be done quickly and easily. In this article, we will discuss the importance of blowing out your sprinklers, what tools you will need, and step-by-step instructions on how to do it yourself. By following these guidelines, you will ensure that your sprinkler system is protected during the harsh winter months and ready to use again in the spring.
The Importance Of Winterizing Your Sprinkler System
Sprinkler Maintenance is an essential part of keeping your lawn and garden lush throughout the year. However, as winter approaches, it’s crucial to take necessary precautions to prevent Winter Damage. Most homeowners overlook the importance of Winterizing their Sprinkler Systems, which can lead to costly repairs in the spring.
Winter Damage can cause significant harm to your Sprinkler System if not taken seriously. The cold weather can cause water inside the pipes to freeze and expand, leading to cracking and bursting of pipes. This damage can result in leaks that can be challenging to detect and repair once the snow melts.
As a sprinkler system maintenance expert, I highly recommend winterizing your sprinkler system before temperatures drop below freezing. Proper Winterization involves removing any remaining water from the system by using compressed air or draining all water from the pipes manually. By taking these necessary steps, you’ll protect your investment and ensure that your sprinkler system operates correctly when needed next season.
Understanding Your Sprinkler System
As a sprinkler system maintenance expert, it’s important to understand the ins and outs of your sprinkler system to ensure proper functioning and avoid common problems. Understanding sprinkler maintenance can help you save money on repairs, conserve water, and keep your lawn looking healthy.
One important aspect of understanding your sprinkler system is identifying common sprinkler problems. These can include clogged nozzles, leaky pipes, broken valves, and malfunctioning controllers. Knowing how to troubleshoot these issues can help you fix them quickly and prevent further damage.
To help you enjoy a well-maintained sprinkler system, here are five important tips to keep in mind:
- Regularly check for leaks or breaks in the pipes
- Clean out clogged nozzles or heads
- Adjust the water pressure to avoid over-spraying or under-watering
- Test the controller regularly to ensure proper programming
- Inspect the soil moisture levels to determine watering needs
Understanding your sprinkler system is just the first step in proper maintenance. In the next section, we will discuss assessing your system’s needs to ensure it is prepared for winterization.
Assessing Your System’s Needs
Understanding your sprinkler system is crucial to ensure that it stays in good condition during winter. However, before blowing out your sprinklers for winter, it’s important to assess any damage that may have been caused over the course of the year. This will help you identify potential leaks and other issues that need to be addressed before turning off the water supply.
Assessing sprinkler damage is a critical step in preparing your system for winter. This involves inspecting all components of the system, including pipes, valves, and nozzles. Any signs of wear or damage should be noted and repaired before proceeding with the blowout process. Additionally, you should check for any clogs or obstructions in the system that could impede proper water flow.
Identifying potential leaks is another important step in preparing your sprinkler system for winter. Leaks can cause significant damage to your property and increase your water bill if left unaddressed. You can identify leaks by checking for wet spots around sprinkler heads or along piping. If you do find a leak, make sure to repair it promptly before proceeding with the blowout process.
Acquiring the necessary tools is essential when it comes to blowing out your sprinklers for winter. You’ll need an air compressor capable of delivering at least 60 cubic feet per minute (CFM) of air pressure, as well as an adapter that connects the compressor to your system’s main line. Additionally, you’ll need appropriate safety gear such as goggles and gloves to protect yourself during the process. By taking these steps and following proper procedure, you can ensure that your sprinkler system stays in good condition throughout the winter months.
Acquiring The Necessary Tools
Acquiring the necessary tools to blow out your sprinklers is an essential step in preparing your system for winter. The most important tool you will need is a compressor, which is used to blow air through the sprinkler lines and remove any remaining water. There are two main types of compressors that you can use: electric and gas-powered.
Electric compressors are more convenient to use, as they are quieter and do not produce any fumes. They also require less maintenance than gas-powered compressors, making them ideal for homeowners who only need to blow out their sprinklers once a year. However, electric compressors are not as powerful as gas-powered ones and may take longer to complete the job.
On the other hand, gas-powered compressors are more powerful and can complete the job faster than electric compressors. They are also more versatile, as they can be used for other tasks besides blowing out sprinklers. However, they require more maintenance and produce fumes that can be harmful if used indoors or in poorly ventilated areas. Renting or buying equipment depends on your personal preference and how often you plan on using it.
In summary, acquiring the necessary tools for blowing out your sprinklers involves choosing between electric or gas-powered compressors. Consider factors such as convenience, power, maintenance requirements, and versatility when deciding which type of compressor to use. Whether you choose to rent or buy equipment will depend on your individual needs and budget. Once you have acquired the necessary tools, you can move on to preparing your system for blowout by following these steps…
Preparing Your System For Blowout
To ensure your sprinkler system is ready for winter, it is crucial to prepare it for blowout. This process involves clearing water from the system using compressed air to prevent frozen pipes and costly damages. Before you start, remember to check your pressure requirements and safety concerns.
Firstly, make sure that your compressor meets the pressure requirements of your system. Most sprinklers require a minimum pressure of 50-60 PSI (pounds per square inch) to operate effectively. However, higher pressures can cause damage to the pipes and fittings. Therefore, check your manufacturer’s instructions or consult with a professional to determine the appropriate pressure level for your system.
Secondly, safety concerns should be taken into consideration when preparing your sprinkler system for blowout. Always wear protective gear such as earplugs and goggles when handling the equipment. Also, ensure that all electrical components are turned off before starting the process and avoid standing directly in front of the open valves when releasing air from the pipes.
Remember that proper preparation is necessary before blowing out your sprinkler system for winter. Make sure that you have checked your pressure requirements and taken necessary safety precautions before proceeding with this essential maintenance task.
Next up is opening your system’s main valve which will allow you to get started with blowing out each zone one by one in an organized fashion.
Opening Your System’s Main Valve
Before proceeding to blow out your sprinkler system, it’s important to know that opening the main valve is a crucial step. Safety precautions must be taken to avoid accidents and injuries. Wear protective gear such as safety glasses and gloves to prevent debris from entering your eyes or getting cuts on your hands.
If you’re having trouble locating the main valve, check the area where your water meter is installed. The valve is usually located near it. Once you’ve found it, turn the valve counterclockwise to open it fully. This will allow compressed air to flow through every pipe in your sprinkler system, ensuring that all water is blown out.
In case you notice any leaks while opening the main valve, troubleshoot them first before proceeding with blowing out your sprinklers. Check for any loose connections or damaged pipes that can cause air pressure loss during the process. Repairs should be made before continuing with winterizing your system.
Transition: Now that you’ve opened your system’s main valve and ensured that there are no leaks, it’s time to connect your air compressor properly for effective winterization of your sprinkler system.
Connecting Your Air Compressor
As we continue with our winter sprinkler system maintenance, it is important to take necessary precautions when using an air compressor. Air compressors are powerful tools that can pose a threat to users if not handled correctly. Therefore, it is crucial to follow safety guidelines when working with these machines.
One major safety consideration when using an air compressor is ensuring that the pressure does not exceed the recommended limit. This can lead to equipment damage and even injury. Additionally, be mindful of any debris or moisture that may be present in the air lines, which could cause blockages and potentially damage the sprinkler system.
If you encounter issues with your air compressor while blowing out your sprinklers, there are a few troubleshooting steps you can take. First, check for any leaks in the hoses or connections. If everything appears intact, ensure that the compressor’s oil level and condition are acceptable. If all else fails, consult a professional or refer to manufacturer instructions for further guidance.
Now that we have covered essential air compressor safety guidelines and troubleshooting techniques, let us move on to adjusting your compressor’s settings. By properly setting up your air compressor for this task, you can ensure an efficient blowout process without risking damage to your sprinkler system.
Adjusting Your Compressor’s Settings
Once you have selected the right compressor for your sprinkler system, it is important to adjust its settings before starting the blowout process. Compressor maintenance is crucial in ensuring that it functions optimally and safely during the winterization process. Here are some tips on how to adjust your compressor’s settings:
Check the oil level: Before starting the compressor, check its oil level and ensure that it is filled up according to the manufacturer’s instructions. Low oil levels can cause damage to the compressor’s motor and reduce its lifespan.
Set the pressure regulator: Adjusting the pressure regulator will ensure that your compressor operates at a safe pressure level during the blowout process. The recommended pressure range for most sprinkler systems is between 50-80 PSI (pounds per square inch).
Adjust the air flow: The air flow setting determines how much air will be pushed through your sprinkler system during winterization. It should be set based on factors such as pipe diameter and sprinkler head size.
Safety precautions must also be taken when adjusting your compressor’s settings. Never work on a compressor that is still connected to an electrical outlet or has not been properly grounded. Also, avoid using extension cords with your compressor as they increase the risk of electrical shock or fire.
Now that you have adjusted your compressor’s settings, you are ready to begin the blowout process by connecting it to your sprinkler system and releasing compressed air through each zone until all water has been removed from the pipes and heads.
Beginning The Blowout Process
Once you have adjusted your compressor’s settings, it is time to begin the blowout process. However, before we proceed, let us talk about blowout safety. It is essential to take all necessary precautions to avoid any injury or damage during the process. Always wear protective gear such as gloves and goggles, make sure the compressor is in good working condition, and never exceed its recommended PSI.
Now that we have addressed safety concerns, let us discuss DIY vs professional services. If you have experience with sprinkler systems and handling compressors, you may consider doing it yourself. However, if you are unsure about your skills or do not want to risk damaging your system, it is best to hire a professional service. They will ensure that your system is adequately prepared for winter while preventing any costly repairs in the spring.
Once you have chosen whether to DIY or hire professionals for your sprinkler system maintenance needs, it is time to move through your system’s zones. Begin with the zone farthest from the compressor and work towards it; this ensures maximum efficiency in removing water from every part of the system. Remember to open each valve slowly and wait until all water has been expelled before moving on to the next zone. Following these steps will ensure that your sprinkler system is adequately prepared for winter and ready for use when spring arrives.
Moving through your system’s zones may seem like a daunting task; however, with proper preparation and equipment maintenance, it can be done safely and efficiently. Remember always to prioritize safety and seek professional help if unsure of your abilities. With these guidelines in mind, you can successfully prepare your sprinkler system for winter while avoiding unnecessary costs in repairs come springtime.
Moving Through Your System’s Zones
Now that the compressor is set up and ready to go, it’s time to move through your system’s zones. Begin with the zone furthest away from the compressor and work your way back. This will ensure that all water is blown out of the lines before moving onto the next zone.
While moving through your system’s zones, be sure to keep an eye out for any potential issues or malfunctions. Troubleshooting common issues such as leaks or low pressure can save you time and money in the long run. If you notice any issues, make note of them and address them as soon as possible.
As always, safety precautions should be taken when blowing out sprinklers for winter. Wear protective gear such as gloves and safety glasses to prevent injury from high-pressure air or debris. Additionally, be aware of your surroundings and avoid pointing the air compressor towards people or animals. With these precautions in place, you can safely move through your system’s zones and prepare it for winter storage.
Transitioning into the next section about checking for water flow: It’s important to ensure that all water has been blown out of your sprinkler system before winter storage. To do this, check for water flow at each zone after blowing out the lines.
Checking For Water Flow
After turning off the main water supply and opening all of the sprinkler valves, it’s important to test for water flow before proceeding with blowing out the system. Common issues that can arise during this step include low water pressure or no water flow at all. Troubleshooting tips for these issues include checking that all valves are fully open and ensuring that there are no blockages in the pipes.
To test for water flow, attach a pressure gauge to one of the sprinkler heads and turn on the main water supply. If the pressure gauge reads between 30-50 psi, then there is sufficient water flow and you can proceed with blowing out the system. However, if the pressure is below 30 psi or there is no flow at all, then there may be an issue with your sprinkler system that requires further troubleshooting.
When troubleshooting low water flow or no water flow issues, start by checking for any leaks or damage to your pipes, as these can cause blockages and prevent proper water flow. Additionally, make sure that all valves are turned on fully and that there are no obstructions in your sprinkler heads. By taking these steps to troubleshoot any issues with your sprinkler system’s water flow, you can ensure that your blowout process goes smoothly and effectively.
Before clearing any remaining water from your sprinkler system, it’s crucial to first test for proper water flow to avoid potential damage or malfunction. In the next section, we will discuss how to clear out any remaining water from your sprinklers before winterizing them completely.
Clearing Any Remaining Water
- In order to properly clear any remaining water from a sprinkler system before winter, it is necessary to drain the pipes, shut off the water, and drain the sprinkler heads.
- It is important to start with draining the pipes, as this will allow for the water pressure to be reduced and the remaining water to be drained from the system.
- After the pipes are drained, the water should be shut off at the main water supply valve.
- Once the water is shut off, it is important to manually drain the remaining water from the sprinkler heads.
- To do this, the sprinkler heads should be opened by hand and the remaining water should be drained out.
- After the water is drained, it is important to close and secure the sprinkler heads to prevent any further water from entering the system.
Draining Pipes
To properly blow out sprinklers for winter, it is crucial to clear any remaining water from the system. One effective way to do so is by draining pipes. Draining pipes involves opening up all the valves and allowing any water inside to flow out of the system. This ensures that there is no stagnant water left behind, which can freeze and cause damage to the sprinkler system.
Before draining pipes, it is important to check if there is any pipe insulation in place. Pipe insulation helps prevent heat loss and protects against freezing temperatures, so make sure it is installed properly before proceeding with the draining process. Additionally, it is recommended to turn off the water pressure at the main valve before starting.
Once everything is ready, open each valve one at a time and let them drain until no more water comes out. It’s essential to be patient during this step and allow ample time for all the water to drain completely. Afterward, double-check each valve and ensure all water has been removed from the system. This will help protect your sprinklers during winter months and ensure they are ready for use when spring arrives.
Shutting Off Water
Clearing any remaining water from your sprinkler system is an essential task to ensure its longevity and functionality. One effective way to do this is by draining pipes, as discussed in the previous subtopic. However, it’s crucial to shut off the water pressure at the main valve before proceeding with this step. This will prevent additional water from flowing into the system during the draining process and ensure that all water is removed completely.
Common mistakes made during this process include forgetting to turn off the main valve or not allowing enough time for all water to drain out of the pipes. These mistakes can cause significant damage to your sprinkler system and result in costly repairs. It’s important to take your time and follow these steps carefully to avoid any such problems.
While draining pipes can be a DIY project, if you’re unsure of how to proceed or don’t have experience working with sprinkler systems, it’s best to seek professional services. A qualified sprinkler system maintenance expert can help you identify any potential issues before they become major problems and ensure that your system is properly winterized. By following these steps and seeking professional assistance if needed, you can protect your investment and enjoy a functional sprinkler system for years to come.
Draining Sprinkler Heads
To ensure the longevity and functionality of your sprinkler system, clearing any remaining water is an essential task before winter sets in. In the previous subtopic, we discussed draining pipes as a way to remove all water from the system. However, it’s not just pipes that need attention – sprinkler heads are also susceptible to damage from freezing water. Draining sprinkler heads is another crucial step in properly winterizing your system.
Draining sprinkler heads involves removing debris and protecting them from any potential damage during the colder months. Before starting this process, turn off the main valve to prevent any additional water from flowing into the system. Then, proceed to open each valve manually until no more water comes out. This will allow air to enter and dry out any moisture that may remain.
To protect the sprinkler heads themselves, it’s important to remove any debris that may have accumulated over time. Use a small trowel or screwdriver to carefully clear away dirt and leaves around each head. Additionally, covering them with insulated caps can help prevent damage from freezing temperatures. By following these steps and taking care of your sprinkler system regularly, you can avoid costly repairs and enjoy a functional system for years to come.
Shutting Off Your Compressor
After clearing any remaining water from your sprinkler system, it’s time to shut off your compressor. However, before doing so, it’s important to understand compressor maintenance. Your compressor is an essential tool in blowing out your sprinkler system, and proper maintenance will ensure its longevity and effectiveness.
One crucial aspect of compressor maintenance is choosing the right size for your needs. A compressor that is too small will not have enough power to effectively blow out the water from your sprinkler system, while a compressor that is too large can cause damage to your pipes and valves. It’s important to consult with a professional or do research to determine the appropriate size for your specific sprinkler system.
Once you have properly maintained and chosen the right size compressor for your needs, you can proceed with shutting it off after blowing out your sprinklers for winter. However, before completely turning it off, make sure all valves in your system are closed to prevent any residual water from entering and potentially causing damage during freezing temperatures. By taking these steps, you can ensure a properly functioning sprinkler system come springtime.
Closing Your System’s Valves
As we move further into winter, it’s important to prepare your sprinkler system for the cold weather. One of the most crucial steps in this process is closing your system’s valves. This will help prevent water from entering the pipes and potentially causing damage from freezing temperatures.
Valve maintenance is an important part of winterizing your sprinkler system without using an air compressor. Start by locating the main valve that controls water flow to your system. This could be located inside or outside your home, so be sure to check both places if you’re unsure. Once you’ve found it, turn it clockwise until it’s fully closed.
Next, locate any additional valves that control specific zones in your system and repeat the same process for each one. It’s important to make sure all valves are completely closed to prevent any water from entering the pipes during the winter months.
To ensure proper valve maintenance and prevent damage to your sprinkler system, consider these tips:
- Use a valve key to turn hard-to-reach valves
- Inspect valves for leaks or damage before closing
- Label each valve with its corresponding zone number
- Keep a record of which valves have been closed for future reference
- If you’re unsure about how to close a specific valve, consult a professional
Now that you’ve successfully closed all of your sprinkler system’s valves, you’re one step closer to protecting it throughout the winter months. But there are still a few more steps left in the winterization process before you can wrap things up and rest easy knowing that your system is safe until spring.
Wrapping Up The Winterization Process
Now that you have successfully blown out your sprinkler system, it is important to wrap up the winterization process. This includes taking steps to prevent damage and preparing for post-winter maintenance. By properly completing these final steps, you can ensure a longer lifespan for your sprinkler system and avoid costly repairs in the future.
One important step in preventing damage is to remove and store any above-ground components, such as hoses or pressure regulators. These items can be damaged by freezing temperatures and should be stored in a dry location until they are needed again in the spring. Additionally, it is important to shut off the water supply to your sprinkler system and drain any remaining water from the pipes. Any remaining water can freeze and cause damage to the pipes or fittings.
Once you have completed these preventative measures, you can start preparing for post-winter maintenance. This may include inspecting all of your sprinkler heads, valves, and other components for signs of wear or damage. You should also check any backflow prevention devices for proper operation and make sure they are not leaking. By completing these tasks now, you can identify any potential issues early on and address them before they become bigger problems.
| Preventative Measures | Post-Winter Maintenance | Storage |
|---|---|---|
| Shut off water supply | Inspect all components | Store above-ground items |
| Drain remaining water | Check backflow devices | In a dry location |
By following these steps and taking care of your sprinkler system throughout the winter season, you can enjoy a healthy lawn once spring arrives. Remember that proper maintenance is key to ensuring a long lifespan for your sprinkler system.
Conclusion
Winterization is crucial to ensure the longevity of your sprinkler system. As an irrigation expert, it is essential to understand your system’s components and how they work together. Identifying the necessary tools and assessing your system’s needs will also determine the success of winterizing your sprinklers.
Once you have prepared your system for blowout, clearing any remaining water and shutting off your compressor is critical in preventing damage to the system. Closing your system’s valves and wrapping up the winterization process will seal the deal for a well-maintained irrigation system. Remember, taking care of your sprinkler system during winter ensures its effectiveness during spring and summer when you need it most.
As an irrigation specialist, I urge you to take proper precautions when winterizing your sprinkler system. By following these steps carefully, you’ll be able to protect your investment from costly repairs while also ensuring that your lawn looks healthy and beautiful come springtime. Properly winterizing your sprinklers can be likened to tucking in a child on a cold winter night – it protects them from harm while giving them time to rest and rejuvenate before spring arrives. So let’s give our sprinklers some much-needed rest this winter season!
Image Credits
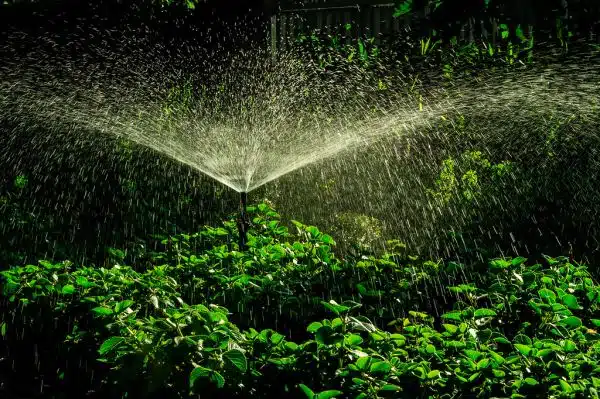
- “Garden Sprinkler” by Kumaravel (featured)

