Water heaters are essential household appliances that provide hot water for various purposes. However, over time, the accumulation of sediment and minerals in the tank can cause damage and reduce its efficiency. Flushing and cleaning your water heater regularly is a crucial maintenance task that can help extend its lifespan and ensure it operates efficiently.
As a plumbing professional or water heater specialist, it is essential to have a good understanding of how to flush and clean a water heater. This article will provide you with step-by-step instructions on how to do so effectively. By following these guidelines, you’ll be able to help your clients maintain their water heaters, save money on energy bills, and avoid costly repairs in the long run.
Understanding The Importance Of Water Heater Maintenance
Maintaining a water heater is essential to ensure its longevity and efficiency. A well-maintained water heater guarantees a consistent flow of hot water in your home, saving you from the inconvenience of cold showers during chilly mornings. Professional maintenance provides several benefits such as extending the lifespan of the unit, reducing energy bills, and ensuring safety for everyone in your household. By hiring a professional plumber or technician to conduct regular maintenance checks, you can avoid expensive repairs or replacements.
While DIY maintenance may seem like a cost-effective option, it has its pros and cons. DIY maintenance involves checking the temperature settings, cleaning the tank exterior, and inspecting the pressure relief valve. However, some tasks require professional expertise such as inspecting and replacing faulty electrical components, draining the tank completely to remove sediment buildup, and testing for gas leaks. DIY maintenance can be dangerous if not done properly and can cause more harm than good.
Professional maintenance is always recommended over DIY methods due to its numerous advantages. A plumbing expert has specialized knowledge on how to identify potential problems that could escalate into costly repairs or replacements in the long run. They have access to specialized tools and equipment needed to perform routine checks on your water heater effectively. The peace of mind that comes with knowing your water heater is functioning at optimal levels is priceless.
Signs That Your Water Heater Needs To Be Flushed And Cleaned
Flushing and cleaning your water heater is an essential task to keep it functioning well. One way to determine if your water heater needs to be flushed is by checking for signs such as cloudy or murky water, strange noises coming from the tank, and a decrease in water pressure. Neglecting these signs can lead to reduced energy efficiency, increased utility bills, and even damage to the unit.
As a plumbing professional or water heater specialist, I recommend flushing and cleaning your water heater every six months to a year. Flushing removes sediment buildup in the tank that can cause corrosion and reduce heating efficiency. It also helps prevent mineral buildup on the heating elements that can result in premature failure of the unit. Benefits of flushing include improved performance, longer life expectancy of the unit, and lower energy costs.
While some people prefer to do it themselves, others prefer hiring professionals for this task. DIY vs professional cleaning depends on factors such as knowledge about plumbing systems, experience with maintenance tasks, access to proper tools and supplies, etc. Hiring professionals ensures that you get quality service and minimizes risks associated with DIY projects.
Before gathering the necessary tools and supplies for flushing your water heater, it’s important to understand why this task is crucial in maintaining the longevity of your unit. In the next section, we will discuss what tools are needed and how to gather them efficiently without spending too much time or money.
Gathering The Necessary Tools And Supplies
Before starting, gather all the necessary tools and supplies that are required to flush and clean a water heater. The process can be messy, so it is advisable to wear old clothes or protective gear. A garden hose, a bucket, a screwdriver, gloves, and a cleaning solution are some of the essential tools needed for this task.
To begin with, turn off the power supply of the water heater. For electric water heaters, this can be done by shutting off the circuit breaker in your home’s electrical panel. If you have a gas water heater, turn off the gas supply valve present on top of the unit. After turning off the power supply, allow the water heater to cool down for at least an hour before proceeding further.
Next, turn off the water supply valve present on top of your heater. This will prevent any new cold water from entering into the tank while you drain out the hot water from it. Additionally, connect one end of a garden hose to the drain valve located at or near the bottom of your water heater tank and place another end outside or into a nearby bucket. With these necessary tools and supplies gathered and steps completed successfully, you can now move on to draining out your water heater safely without causing any damage or harm to yourself or your property.
Turning Off The Power And Water Supply
Turning Off the Power and Water Supply:
Before starting any maintenance work on a water heater, it is essential to prioritize safety. Turning off the power and water supply is the first step in ensuring that no accidents occur during the cleaning process. Safety measures must be taken to prevent burns caused by hot water or electric shocks from live wires.
The importance of safety when turning off the power and water supply cannot be overstated. Water heaters are powered by electricity or gas, and both can be dangerous if not handled properly. Before starting, it is necessary to turn off the main power source or switch off the circuit breaker that powers the unit. In addition, shutting off the water supply will prevent any potential leaks or bursts while cleaning.
Draining techniques must also be considered when turning off the power and water supply. Water heaters store hot water under high pressure, which can lead to serious injury if not drained correctly. Careful attention should be paid to valves and drain plugs during this process to ensure that all of the water is drained safely and efficiently.
Transition into next section:
Now that you have turned off the power and water supply, it is time to move on to draining the tank. Proper draining techniques are crucial for maintaining your water heater’s efficiency and prolonging its lifespan.
Draining The Tank
How can you get rid of sediment buildup and ensure the longevity of your water heater? Draining the tank is a crucial step in maintaining your water heater’s efficiency. Drainage techniques vary based on the type of water heater, but the basic process is relatively simple. Begin by turning off power to your heater or switching off the gas. Wait for the water in your tank to cool down before proceeding.
Next, attach a garden hose to the drainage valve at the bottom of your water heater. Ensure that the other end of the hose is placed somewhere that won’t be damaged by hot water or sediment. Open up the drainage valve and let all of the water drain out of your tank. If you have difficulty draining everything, try opening up a nearby hot water faucet to increase flow. When all of the water has been drained, use disposal methods in accordance with local regulations for disposing any sediment that may have accumulated.
By draining your tank regularly, you’ll prevent future problems such as leaks or damage from excessive sediment buildup. Next, we’ll cover how flushing your tank with cold water further benefits its efficiency and lifespan.
Flushing The Tank With Cold Water
- Before flushing the water heater tank, it is important to turn off the power supply and shut off the cold water supply valve.
- To effectively flush the water heater tank, the tank must be filled with cold water and then allowed to drain completely.
- After the tank has been drained, it must be refilled with cold water, and the flushing process should be continued until the water appears to be clear.
- After the flushing process is complete, the tank should be drained once more before the power supply and cold water supply valve are turned back on.
Preparing The Tank
To ensure the longevity of your water heater, it is essential to conduct routine tank maintenance. One of the crucial steps in this process is flushing the tank with cold water. However, before you do so, preparing the tank is necessary to prevent corrosion and other damage.
Firstly, turn off the power supply or gas connection to the water heater. If you have an electric water heater, switch off its circuit breaker. On the other hand, if it’s a gas-powered unit, turn off its gas valve. Next, close the cold water inlet valve that supplies water to the heater. This step prevents new water from entering the tank while you’re draining and flushing it.
Secondly, attach a garden hose to the drain valve located at the bottom of your tank. Ensure that you place a bucket under the drain valve when opening it to collect excess water initially. Afterward, open up all hot water taps in your home and allow them to run until no more hot water flows through them. Then open up your drain valve and let out all remaining water from your tank until it runs clear. This step will remove any sediment buildup or mineral deposits that could lead to corrosion or damage inside your tank.
By following these simple steps for preparing your tank before flushing it with cold water regularly, you can prevent costly repairs and extend your unit’s lifespan significantly. Remember to consult with a professional plumber if you encounter any problems during this process or if you need further advice on maintaining your water heater.
Flushing The Tank
Flushing the tank is an essential step in maintaining your water heater’s longevity. Over time, mineral deposits and sediment can accumulate inside your tank, leading to corrosion and damage. This buildup can also reduce your unit’s efficiency and increase energy costs. Flushing techniques can remove these deposits, ensuring that your water heater works efficiently for years to come.
The optimal frequency for flushing your tank depends on several factors, such as the hardness of your water and how often you use hot water. In general, it is recommended to flush your tank at least once a year or every six months for higher usage households. However, some experts suggest conducting this task quarterly or every three months if you have hard water or live in areas with high sediment levels.
To flush the tank properly, follow the preparation steps discussed earlier before opening up the drain valve and letting out all remaining water from your tank until it runs clear. Afterward, close the drain valve and open up the cold water inlet valve to fill up the tank again. Remember to turn on all hot water taps in your home to allow air pockets to escape before turning on the power supply or gas connection back on. By incorporating regular flushing techniques into your routine maintenance schedule, you can prevent costly repairs and extend the lifespan of your water heater significantly.
Removing The Anode Rod
The anode rod is a critical component of a water heater, as it helps to prevent corrosion by attracting minerals and other debris that would otherwise adhere to the tank walls. Over time, however, the anode rod will become corroded and need to be replaced. To remove a corroded anode rod, you will need to first turn off power to the water heater and shut off its water supply.
Next, locate the anode rod’s hex head on top of the water heater tank. Using a socket wrench or adjustable wrench, unscrew the anode rod counterclockwise until it is loose enough to be removed by hand. If the anode rod is stuck in place due to corrosion, you may need to use additional tools such as penetrating oil or a breaker bar in order to break it free.
Once you have successfully removed the old anode rod, it’s time to install a new one. Make sure that you purchase an anode rod that is compatible with your specific type of water heater. Then, simply insert the new anode rod into its socket and tighten it clockwise until it is snug against the tank wall. Be careful not to overtighten the anode rod as this can cause damage to both the tank and the rod itself.
Transition: Now that you have successfully removed and replaced your corroded anode rod, it’s important to inspect it regularly for signs of wear and tear so that you can replace it before more serious damage occurs.
Inspecting And Replacing The Anode Rod
As the old saying goes, “an ounce of prevention is worth a pound of cure.” This idiom holds true when it comes to maintaining your water heater. One essential component to inspect and replace in your water heater is the anode rod. This rod is responsible for keeping the inside of your tank from rusting and corroding.
To ensure that your anode rod functions properly, it’s best to follow some best practices when replacing it. First, turn off the electricity or gas supply to your water heater and let it cool down before attempting any maintenance. Next, locate the anode rod by referring to your owner’s manual or consulting with a professional plumber. Once you’ve removed the anode rod, inspect it for any signs of wear or corrosion. If it’s heavily worn, then it’s time to replace it.
The lifespan of an anode rod varies depending on several factors such as water hardness and usage frequency. On average, these rods last anywhere from 3-5 years before needing replacement. However, if you notice that your hot water has a metallic taste or smell or if there are visible signs of rust inside your tank, then you may need to inspect and replace your anode rod sooner than expected. By following these best practices and monitoring the lifespan of your anode rod, you can ensure that your water heater stays in good condition for years to come.
When it comes to maintaining a healthy water heater system, flushing and cleaning the tank with vinegar or a descaling solution is another crucial step in preventing damage and extending its lifespan.
Cleaning The Tank With Vinegar Or A Descaling Solution
Once the tank has been drained, it is important to clean the inside of the water heater. One option for cleaning is to use vinegar or a descaling solution. Using citric acid is another effective way to clean the tank and remove mineral buildup. Citric acid is a natural cleaner that works by breaking down mineral deposits without damaging the tank.
To use citric acid, first, turn off the power to the water heater and let it cool down completely. Then, mix one pound of citric acid with one gallon of water in a bucket. Pour this mixture into the water heater and let it sit for at least two hours, but preferably overnight. Afterward, drain the solution from the tank and flush it out with clean water.
Regular cleaning of your water heater has many benefits, including prolonging its lifespan and improving efficiency. Without regular cleaning, sediment can build up in the bottom of the tank, which can reduce heating efficiency and even lead to premature failure. By cleaning your water heater annually or bi-annually, you can prevent these issues and keep your unit running smoothly for years to come.
Once you have finished cleaning your water heater with vinegar or citric acid, it’s time to refill the tank with water. This step is crucial because filling too quickly can damage your plumbing system or cause leaks in your pipes. To refill your tank properly, open all hot-water faucets in your home and slowly turn on the cold-water supply valve until you hear water coming from all faucets at full force. Then close all hot-water faucets and wait until no more air bubbles appear before turning on electricity or gas supply again for heating purposes.
Refilling The Tank With Water
After cleaning the tank with vinegar or a descaling solution, it’s time to refill the water heater. Before starting the refilling process, make sure that all valves are closed, including the drain valve and pressure relief valve. Next, turn on the cold water supply valve and open a hot water faucet to let air escape from the tank as it fills.
It’s important to note that the quality of water used to refill the tank can affect its performance and lifespan. Water quality standards vary depending on location, so it’s best to consult with local authorities or a water treatment specialist for guidance. In general, using hard water can cause sediment buildup and premature corrosion in the tank, while using soft water can lead to excessive mineral deposits and reduced efficiency.
Once the tank is full, check for leaks around all fittings and connections. If any leaks are detected, tighten them as needed or replace faulty parts. Finally, reconnect power if necessary and allow sufficient time for the water heater to heat up before using hot water again. By performing regular maintenance tasks like flushing and cleaning your water heater, you can extend its lifespan and ensure optimal performance for years to come.
Checking For Leaks And Reconnecting Power
As the old adage goes, “an ounce of prevention is worth a pound of cure.” This saying applies to maintaining your water heater. After flushing and cleaning the unit, it’s essential to check for leaks and reconnect the power safely. Here are some steps to follow:
- First, ensure that you check all electrical connections before reconnecting the power supply. If any wires or connections show signs of wear or damage, replace them immediately. Failure to do so may result in electrocution, which can be fatal.
- When reconnecting the power supply, wear protective gear such as rubber gloves and shoes with non-conductive soles. It’s crucial to follow safety precautions when working around electrical equipment.
- As an added safety measure, ensure that you turn off the circuit breaker before working on any electrical connection.
After taking these safety precautions during reconnection, it’s time to test the water temperature and pressure levels. By following these steps and conducting regular maintenance checks on your water heater, you can prolong its lifespan and save yourself from costly repairs in the future.
Testing The Water Temperature And Pressure
After checking for leaks and reconnecting power, it is important to test the water temperature and pressure before proceeding with flushing and cleaning the water heater. Testing accuracy is crucial to ensure that the water heater operates efficiently and safely. A professional plumber or water heater specialist should use a thermometer to measure the temperature of the hot water at different locations in the house, including the kitchen, bathroom, and laundry room. The ideal temperature range for hot water is between 120°F and 140°F.
When testing the pressure, safety measures should be taken to prevent accidents from occurring. The plumber or specialist should turn off the power supply to the water heater and close the shutoff valve on both cold and hot pipes before attaching a pressure gauge to the drain valve on the tank. The pressure reading should be below 80 psi (pounds per square inch). If it exceeds this limit, then a pressure reducing valve may need to be installed.
Once testing has been completed, it is recommended that flushing and cleaning of a water heater occur at least once a year. This frequency will help prevent sediment buildup in your tank which can cause rusting or corrosion leading to leaks or other issues down-the-line. Flushing your tank involves removing any buildup from inside by draining out all of its contents while cleaning takes place through scrubbing away debris on parts such as heating elements or valves so they operate more smoothly over time without causing damage like overworking due sediment build-up inside their equipment & piping systems.
Recommended Frequency For Flushing And Cleaning
Frequency is an important aspect when it comes to flushing and cleaning a water heater. It is recommended that homeowners flush their water heaters at least once a year to prevent sediment buildup, optimize efficiency, and prolong the lifespan of the appliance. However, the frequency may vary depending on the quality of water in your area and how often you use hot water.
Best practices for flushing and cleaning a water heater involve turning off the power supply or gas valve, allowing it to cool down, draining the tank completely, and rinsing it with clean water. It is also essential to check and replace faulty components, such as anode rods or pressure relief valves, during routine maintenance. Neglecting these steps may cause irreparable damage to your water heater, resulting in costly repairs or replacement.
Overall, adhering to recommended frequency guidelines and best practices can help maintain your water heater’s performance and extend its lifespan. Additionally, consulting with a professional plumber or water heater specialist can provide valuable insights on how frequently you should flush and clean your appliance based on its age, usage patterns, and environmental factors. By following these simple steps regularly, you can avoid potential problems down the line and ensure safe and efficient operation of your system.
As we have discussed best practices for flushing and cleaning a water heater in the previous section; it is equally important to be aware of common mistakes that homeowners make while performing this maintenance task. Understanding these mistakes can help avoid potential hazards like gas leaks or electrical shocks during the process.
Common Mistakes To Avoid
When flushing and cleaning a water heater, it is of the utmost importance to remember to turn off the power to the heater before beginning any work. Additionally, one should take care to avoid overfilling the tank and use the proper amount of water for the size of the tank. It is also critical to disconnect the cold water supply before beginning the flushing process. Lastly, it is important to take the necessary safety precautions when working on the water heater.
Forgetting To Turn Off The Power
Forgetting to turn off the power is one of the common mistakes that homeowners make when flushing and cleaning their water heaters. This simple oversight can lead to serious electrical accidents, which can cause injuries or damage the unit. As a plumbing professional, I highly recommend taking safety precautions when working on your water heater.
Before starting any maintenance work on your water heater, ensure that you turn off the power supply from the circuit breaker or main switch. This will prevent any electrical current from flowing through the unit while you are working on it. Additionally, it’s essential to label the circuit breaker or switch with a warning sign that indicates not to turn it back on until you have completed your work.
Preventing electrical accidents is critical when flushing and cleaning a water heater. To avoid any mishaps, never touch any wires or components inside the unit without wearing rubber gloves and shoes. Furthermore, disconnect all cables connected to the thermostat before removing it for cleaning purposes. By following these safety measures, you can protect yourself and your equipment from potential hazards.
In conclusion, forgetting to turn off the power is a common mistake when flushing and cleaning a water heater. However, by taking safety precautions and preventing electrical accidents, you can avoid any mishaps that may cause harm or damage to the unit. Remember always to turn off power at the circuit breaker or main switch before starting any maintenance work on your water heater.
Overfilling The Tank
Preventing overfilling and controlling overpressure are essential aspects of maintaining your water heater’s optimal performance. Overfilling the tank can cause significant damage to your unit and even lead to a potential explosion, which can harm you or your property. As a plumbing professional, it is imperative to educate homeowners on the importance of following safety measures when draining their water heaters.
To prevent overfilling, ensure that you turn off the water supply valve before opening the drain valve. Additionally, place a bucket or container underneath the drain valve and monitor the water level closely while flushing the tank. Once you notice that the water has stopped flowing from the drain valve, close it immediately and turn on the water supply valve again. This will prevent any excess water from entering and overfilling your tank.
Dealing with overpressure is also crucial in preventing any potential accidents that may occur when maintaining your water heater. Overpressure can cause severe damage to your unit’s components, such as valves, pipes, and fittings. To avoid this issue, make sure to check your pressure relief valve regularly for any signs of wear or tear. If you notice any leaks or cracks in the valve, replace it immediately with a new one.
In summary, preventing overfilling and dealing with overpressure are necessary steps in maintaining a safe and efficient operation of your water heater. By following these safety precautions and regularly inspecting your unit’s components, you can ensure that it continues to perform at its best without any potential hazards or damages. Remember always to prioritize safety when working on your water heater to protect yourself and your property from potential mishaps.
Benefits Of Regular Water Heater Maintenance
Despite the numerous resources available on the internet, people still commit mistakes in flushing and cleaning their water heaters. These blunders can lead to serious damage to the unit, thus resulting in costly repairs or replacements. Ironically, while DIY enthusiasts aim to save money by doing things on their own, they end up spending more due to these oversights.
One way to avoid such mishaps is through regular maintenance of your water heater. Professional plumbers recommend that homeowners schedule a professional check-up at least once a year. This preventive measure not only ensures that your unit is functioning efficiently but also extends its lifespan. Cost-saving benefits come along with this practice as well since minor issues are detected early on and addressed before they escalate into major problems.
If you want to maximize the cost-saving benefits and prolong the life of your water heater, flushing and cleaning it should be part of your annual maintenance routine. Flushing removes sediment buildup from the tank, which can cause corrosion and reduce heating efficiency over time. Cleaning, on the other hand, eliminates bacteria growth that may pose health hazards to you and your family. By doing these tasks regularly, you not only extend the lifespan of your unit but also ensure that it operates safely and efficiently for years to come.
Conclusion
Water heaters are like the engines of our homes, providing us with hot water whenever we need it. But just like an engine needs regular maintenance to keep it running smoothly, so too does a water heater require flushing and cleaning to ensure its longevity and efficiency.
By neglecting your water heater, you risk damaging its internal components and reducing its overall performance. Signs that your water heater needs attention may include strange noises, foul odors, or discolored water. To flush and clean your water heater properly, you will need some basic tools and supplies such as a hose, bucket, gloves, and cleaning solution.
Before beginning any work on your water heater, be sure to turn off the power supply and the water source. Once you have drained the tank and tested the temperature and pressure of the water, you can begin flushing it out with your chosen cleaning solution. Remember to avoid common mistakes such as using the wrong type of cleaner or neglecting to inspect or replace any damaged parts.
Regular maintenance of your water heater is essential for ensuring its proper functioning over time. As a plumbing professional or water heater specialist would tell you, taking care of this vital component of your home is not only cost-effective but also essential for maintaining a safe living environment. Don’t wait until something goes wrong with your water heater before giving it the attention it deserves – start today!
Image Credits
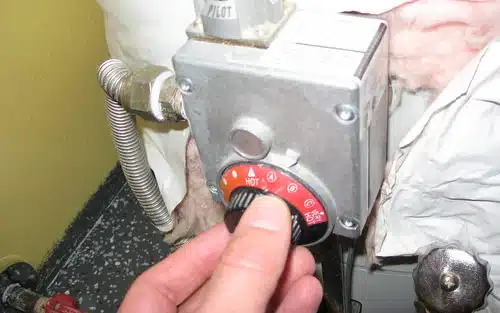
- “Water Heater Thermostat” by Mark Florence (featured)

