As an expert in the field of humidifier cleaning, I understand the importance of maintaining a clean and functional portable humidifier. Portable humidifiers are essential for creating a comfortable living space with optimal air quality by adding moisture to dry indoor environments. However, if not properly maintained, portable humidifiers can become a breeding ground for bacteria, mold, and mildew, leading to potential health hazards.
Therefore, it is crucial to learn how to clean your portable humidifier correctly. In this article, I will provide you with step-by-step instructions on how to clean your portable humidifier thoroughly. By following these simple steps regularly, you can ensure that your portable humidifier operates efficiently and effectively while providing you and your family with clean and healthy air to breathe.
Why Cleaning Your Portable Humidifier Is Important
The importance of cleaning a portable humidifier cannot be overstated. A clean humidifier not only ensures that the device functions appropriately, but it also improves your indoor air quality. A dirty and unmaintained humidifier can lead to the growth of harmful microorganisms, which can cause respiratory problems and other health issues.
The benefits of clean humidifiers are numerous. They help to keep the air in your home moist, which is good for your skin, sinuses, and overall health. A clean humidifier also prevents the buildup of mineral deposits that can clog the device and reduce its effectiveness. When you keep your portable humidifier clean, it will last longer and work more efficiently.
Cleaning a portable humidifier is essential to ensure its proper functioning and prevent any health risks associated with contaminated water or filters. If you neglect this maintenance task, you run the risk of spreading harmful bacteria or mold spores throughout your home. Therefore, it’s important to follow proper cleaning procedures regularly to maintain a healthy living environment. In the next section, we’ll discuss some safety precautions to take before cleaning your portable humidifier to protect yourself from potential hazards.
Safety Precautions Before Cleaning
As an expert in the field of humidifier cleaning, I cannot stress enough the importance of keeping your portable humidifier clean. Not only does regular cleaning ensure that your unit functions at optimal levels, but it also reduces the risk of mold and bacteria growth, which can lead to respiratory problems.
Before you begin cleaning your portable humidifier, there are a few pre-cleaning preparation steps you should take to ensure safety. First and foremost, always unplug your unit before attempting any cleaning. Additionally, make sure that all parts of the unit have cooled down completely before handling them. Finally, if you plan on using any cleaning solutions during the process, be sure to read the instructions carefully and follow them closely.
When it comes to cleaning safety tips for your portable humidifier, there are a few things to keep in mind. Always use gloves when handling any potentially hazardous materials such as bleach or vinegar. Also, never mix different types of cleaning solutions together as this can produce harmful vapors. Always use a soft cloth or brush when scrubbing away any build-up and take care not to damage any delicate parts.
- Use distilled water instead of tap water for better air quality
- Clean all parts separately for thoroughness
- Regularly replace filters according to manufacturer recommendations
- Allow all parts to dry completely before reassembling
Now that you understand some safety precautions before starting the cleaning process let’s gather your cleaning supplies and get started on making your portable humidifier function like new again!
Gather Your Cleaning Supplies
To properly clean a portable humidifier, it is essential to gather all the necessary cleaning supplies beforehand. These supplies include distilled water, a soft-bristled brush or toothbrush, white vinegar, hydrogen peroxide, and a microfiber cloth. It’s important to note that using tap water to clean the humidifier can lead to mineral buildup and bacterial growth over time.
When it comes to the cleaning solution alternatives, there are different options available. One effective technique is to use vinegar, which is a natural disinfectant that can kill bacteria and mold. For this method, mix one part of white vinegar with one part of water and pour the mixture into the humidifier’s tank. Let it sit for at least 30 minutes before rinsing thoroughly with distilled water. Another alternative is using hydrogen peroxide instead of vinegar; it has similar properties as vinegar but with less odor.
Effective cleaning techniques involve taking apart your humidifier and cleaning each part individually. Start by unplugging the unit and emptying any remaining water from the tank. Then remove any detachable parts such as the filter, nozzle, or tray. Use a soft-bristled brush or toothbrush dipped in your chosen cleaning solution to scrub away any dirt or grime buildup on each piece carefully. Rinse everything thoroughly with distilled water before reassembling your humidifier.
Regularly maintaining your portable humidifier is crucial in ensuring its longevity and efficiency. But how often should you clean your humidifier? The answer varies depending on usage frequency and personal preference, but generally speaking, you should aim to clean it once every week or two weeks if used daily. By following these simple steps regularly, you can keep your portable humidifier in tip-top shape for years to come!
How Often Should You Clean Your Humidifier?
As the saying goes, cleanliness is next to godliness. This applies not only to our personal hygiene but also to the gadgets we use daily, such as a portable humidifier. Cleaning your humidifier frequently is essential to maintain its efficiency and prevent the accumulation of harmful bacteria.
Cleaning frequency depends on how often you use your humidifier. If you use it daily, it’s advisable to clean it every three days. However, if you use it occasionally or seasonally, cleaning it once a week or after every use is sufficient. Regular cleaning ensures that your humidifier produces clean mist free from germs that can cause respiratory infections.
Apart from preventing bacterial growth, cleaning your humidifier regularly has numerous health benefits. Humidifiers moisturize dry air, easing symptoms of dry skin, allergies, asthma and enhancing sleep quality. A clean humidifier ensures that you enjoy these benefits without compromising your health.
To ensure that your humidifier functions correctly and lasts long enough, regular cleaning is necessary. The first step towards achieving this objective is unplugging and disassembling the gadget.
Step 1: Unplug And Disassemble Your Humidifier
Cleaning a portable humidifier is an essential maintenance task that should be performed regularly to ensure the device functions correctly. To begin cleaning your humidifier, you must first unplug and disassemble it. This step is necessary because it allows you to access all the internal components of the device, making it easier to clean them thoroughly.
When disassembling your humidifier, be sure to read the manufacturer’s manual carefully first. Different models may have unique design features that require specific disassembly processes. Generally speaking, however, most portable humidifiers consist of a water tank, a base, and a misting mechanism. To begin disassembling the device, start by removing the water tank from the base and then detach any other removable parts.
Cleaning tips for each component can vary based on their material composition. For example, plastic parts can be cleaned using mild soap and warm water or a solution of white vinegar and water. On the other hand, metal parts should only be wiped down with a damp cloth to avoid rusting. By following these simple steps during the disassembly process and knowing how to clean each part properly, you can help extend your portable humidifier’s lifespan while ensuring its optimal performance.
Moving on from this step 1: Unplug and Disassemble Your Humidifier, we can now proceed with step 2: Clean the Water Tank. It is important to clean your humidifier’s water tank since it tends to accumulate mineral deposits over time that can affect its functionality negatively. To learn more about this crucial step in purifying your air quality at home or office through efficient humidity control, please continue reading below!
Step 2: Clean The Water Tank
As an expert in cleaning portable humidifiers, I recommend that you start by emptying the water tank and using a cleaning solution to effectively remove any mineral buildup or bacteria. Before using any cleaning solution, be sure to check your humidifier’s manual to ensure that it is safe for use with the specific materials of your humidifier. This will prevent damage to your device and ensure effective cleaning.
When selecting a scrub brush, opt for one made from soft bristles so as not to scratch or damage the surface of the water tank. A soft-bristled brush will also allow you to reach all areas of the tank for thorough cleaning. Use this brush along with the cleaning solution to scrub away any buildup or residue inside the tank. Be sure to rinse thoroughly with clean water after scrubbing.
Cleaning the water tank is an important step in maintaining your portable humidifier’s performance and preventing potential health hazards caused by bacterial growth. Once you have completed this step, move on to cleaning the humidifier base in order to ensure that all parts of your device are clean and free from harmful substances.
Step 3: Clean The Humidifier Base
Once you have removed the water tank, it is time to move on to cleaning the humidifier base. The first step is to unplug the unit from the electrical outlet. This ensures that there is no risk of electrocution during the cleaning process. Once unplugged, remove any excess water that may be in the base.
Next, prepare a cleaning solution using warm water and a mild detergent. Avoid using harsh chemicals or bleach as this can damage the humidifier’s components. Dip a scrub brush into the solution and gently scrub all surfaces of the base, paying particular attention to any areas with visible dirt or buildup. Rinse thoroughly with clean water and wipe dry with a clean cloth.
Regular cleaning of your humidifier base not only ensures its longevity but also helps to keep it functioning properly. Now that you have cleaned the base thoroughly, it is time to move on to step 4: Clean the mist nozzle.
Step 4: Clean The Mist Nozzle
Moving on to the next step of cleaning your portable humidifier, we will now focus on cleaning the mist nozzle. This component is responsible for producing the mist that helps to increase humidity levels in your home. Over time, mineral deposits and other impurities can build up in this component, which can affect its efficiency and performance.
To clean the mist nozzle, you will need a cleaning solution and a nozzle brush. In a small container, mix equal parts of white vinegar and water to create a cleaning solution. Insert the nozzle brush into the opening of the nozzle and gently scrub away any buildup or deposits. Be careful not to damage any delicate parts of the nozzle while doing this.
Once you have thoroughly cleaned the mist nozzle with the cleaning solution and brush, rinse it off under running water. Again, be gentle while doing so to avoid damaging any parts of the nozzle. After rinsing, dry it off with a clean cloth or towel before reassembling your humidifier. With these steps completed successfully, you are now ready to move on to Step 5: Rinse and Dry Your Humidifier to ensure your device is fully sanitized for future use.
Step 5: Rinse And Dry Your Humidifier
- To rinse the humidifier, first remove the filter, if present, and empty the tank. Fill the tank with clean, warm water and use a damp cloth to gently wipe the inside of the tank.
- Once the tank is clean, empty the rinse water and fill it with fresh, clean water and a few drops of a mild, unscented detergent. Allow the detergent solution to sit in the tank for 15 minutes before draining.
- To dry the humidifier, empty the tank and rinse it with clean water. Allow the tank to air dry in an upright position. Use a soft cloth to wipe any moisture off the outside of the tank.
- For optimal care, it is recommended to rinse and dry the humidifier at least once a week and replace the filter every few months.
Rinse The Humidifier
To ensure the longevity and efficiency of your portable humidifier, it is imperative to clean it regularly. One of the essential steps in cleaning a humidifier is to rinse it thoroughly. Rinsing removes any residual cleaning solution, disinfectant or mineral buildup that may have accumulated inside the unit.
The importance of disinfecting a humidifier cannot be overstated. The warm, moist environment inside a humidifier can create an ideal breeding ground for bacteria and other microbes. Rinsing your humidifier with water alone may not be sufficient to eliminate these harmful microorganisms. Therefore, it is recommended to use a disinfectant solution approved by the manufacturer or one that has been deemed safe for use with your particular model.
When rinsing your humidifier, using the best cleaning solutions can help achieve optimal results. For instance, vinegar is an effective natural cleaner that can dissolve mineral buildup and remove odors from your unit. Alternatively, you may opt for hydrogen peroxide or bleach-based solutions that are strong enough to kill germs but gentle enough not to damage the unit’s components. After rinsing with water and disinfectants, make sure to dry the unit thoroughly before reassembling and refilling it with water.
In conclusion, rinsing your portable humidifier is a critical step in keeping it clean and functioning optimally. By using appropriate cleaning solutions and following manufacturer instructions on disinfection frequency, you can safeguard yourself against harmful pathogens while enjoying the benefits of maintaining an appropriate level of humidity in your living space.
Dry The Humidifier
As a humidifier cleaning expert, I can attest that drying your humidifier thoroughly is just as important as rinsing and disinfecting it. After all the cleaning solutions and water have been removed from the unit, you need to ensure that there is no moisture left inside or outside the humidifier. Leaving any residual dampness in the unit can lead to mold growth, which can cause health problems when inhaled.
To dry your humidifier effectively, start by using a clean cloth or paper towel to wipe down all surfaces and components of the unit. Make sure to remove any excess water from crevices and hard-to-reach areas. Once you have wiped away all visible moisture, allow the unit to air dry completely for at least an hour. Keep in mind that some components may take longer to dry than others, so be patient and thorough with your drying process.
One of my favorite tips for ensuring efficient drying of a portable humidifier is to use a fan or hairdryer on low heat setting. Place the unit in front of the fan or hairdryer and allow it to blow air into each opening for ten minutes or until completely dry. This technique will help speed up the drying process while also ensuring that no moisture remains inside or outside your humidifier. By following these tips and techniques for proper maintenance of your humidifier, you can ensure that it functions optimally for years to come without posing any risks to your health.
Step 6: Reassemble Your Humidifier
Once you have thoroughly cleaned all the components of your portable humidifier, it’s time to reassemble it. Before starting the reassembly process, ensure that all the parts are dry and free of any residue. Reassembly tips include double-checking that all the components are in their correct positions and tightening any screws or fasteners.
One common issue with reassembling a humidifier is difficulty fitting the pieces back together. If this happens, try disassembling and reassembling again while paying closer attention to how each piece fits together. Sometimes, small adjustments can make a big difference in getting everything to fit correctly.
If you encounter any issues during the reassembly process, don’t hesitate to consult your user manual or contact the manufacturer for troubleshooting assistance. Properly reassembling your humidifier is crucial for ensuring its optimal performance and longevity. Once you’ve successfully reassembled your humidifier, you’re ready to fill it with fresh water and enjoy its benefits once again.
Transition: Now that you have successfully reassembled your portable humidifier, it’s important to keep up with regular maintenance tasks like cleaning the filters. Here’s what you need to know about how to clean and maintain your humidifier filters.
How To Clean Humidifier Filters
As we have discussed, maintaining a clean humidifier is crucial to ensure its optimal performance. One essential step in cleaning your humidifier is to clean or replace its filter regularly. How often you should clean or replace the filter depends on several factors such as how frequently you use your humidifier, the humidity level of your room, and the quality of water you use.
Cleaning frequency for humidifier filters varies depending on the manufacturer’s recommendations and usage. Some manufacturers suggest changing the filter every three months, while others advise monthly replacements. However, it would be best to check your humidifier’s manual for specific cleaning instructions and recommended frequency. If you notice any signs of mold or fungus growth in your humidifier, it is crucial to clean it immediately.
Apart from regular cleaning practices, there are alternative methods that can help maintain a clean filter. For instance, using distilled water instead of tap water can reduce mineral buildup that can clog filters over time. Additionally, running vinegar through your humidifier tank before rinsing it with water can help dissolve mineral deposits and sanitize the tank. If you opt for this method, ensure that you rinse thoroughly after using vinegar.
As mentioned earlier, cleaning or replacing your humidifier filter regularly is essential in ensuring optimal performance and reducing risks associated with poor air quality. While there are several alternative cleaning methods available, always refer to your manufacturer’s recommendations to avoid damaging your unit. In the next section, we will discuss tips for maintaining a clean humidifier further.
Tips For Maintaining A Clean Humidifier
Proper maintenance of your portable humidifier is essential to keep it running smoothly and effectively. Here are some tips to help you maintain a clean and healthy environment in your home or office.
Firstly, make sure to empty and refill the water tank daily. Stagnant water can harbor bacteria, mold, and other harmful microorganisms that can negatively affect indoor air quality. Additionally, using distilled or demineralized water can help prevent mineral buildup in the tank and on the humidifier’s components.
Secondly, regularly clean your humidifier according to the manufacturer’s instructions. This typically involves disassembling the unit, washing all parts with soap and water, rinsing thoroughly, and allowing them to dry completely before reassembly. Neglecting proper cleaning can lead to unpleasant odors, reduced effectiveness, and even illness due to bacterial growth.
Lastly, consider investing in a humidifier with built-in cleaning features such as UV-C lights or antimicrobial materials. These features can further reduce the risk of bacterial growth and make maintenance easier overall.
Benefits of following these tips include improved indoor air quality, reduced risk of respiratory infections or allergies caused by contaminated moisture output from the unit, increased lifespan of the machine itself due to proper care and attention paid towards it over time.
Moving on from maintaining a clean humidifier system, let’s look at common issues that may arise when using one and how to troubleshoot them effectively.
Troubleshooting Common Humidifier Issues
When it comes to owning a humidifier, there are common issues that can arise. One of these is dealing with noises that come from your device. The first thing to do is check the water level in the tank, as low water levels can lead to gurgling and bubbling sounds. If this isn’t the issue, then check for any loose or broken parts, such as a fan blade or motor mount. Tightening or replacing these parts can often fix any unwanted noises.
Another common issue is dealing with leaks in your humidifier. If you notice water pooling around your unit, the first step is to turn it off and unplug it. After draining the water tank, inspect all of the surrounding areas for any cracks or damage in the plastic housing. Replace any damaged pieces and ensure that everything is properly tightened before filling your tank with water again.
Overall, proper maintenance and cleaning of your humidifier can prevent many issues from occurring in the first place. However, if problems do arise, take quick action to troubleshoot and fix them before they cause further damage or inconvenience.
As we’ve discussed some common issues with humidifiers and how to troubleshoot them, it’s important to know when it’s time to replace your unit altogether. In our next section, we’ll discuss key signs that indicate it may be time for a new humidifier so that you can continue enjoying optimal indoor air quality and comfort.
When To Replace Your Humidifier
Have you noticed that your portable humidifier doesn’t seem to be working as effectively as it once did? Perhaps it’s time to consider replacing your unit. Over time, even with proper cleaning and maintenance, humidifiers will begin to wear down and lose their effectiveness.
There are several signs of wear and tear that can indicate it’s time to replace your humidifier. These include:
- The unit emits strange odors or has mold buildup
- The humidity output is no longer consistent
- The unit starts making unusual noises
If you notice any of these signs, it’s best to start looking for a replacement humidifier. Continuing to use a worn-out unit can lead to decreased air quality and potentially harmful health effects.
Replacing humidifiers may seem like an unnecessary expense, but in the long run, it’s essential for maintaining good air quality in your home or office. By being aware of the signs of wear and tear, you can ensure that you’re always breathing in clean and healthy air. In the next section, we’ll discuss some final thoughts on keeping your portable humidifier clean and effective.
Final Thoughts On Portable Humidifier Cleaning
Now that you know how to clean your portable humidifier, it’s important to understand the benefits of using them. Humidifiers can help alleviate dry skin, sinus congestion, and even reduce snoring. Additionally, they can improve the overall air quality in your home by reducing allergens and preventing the spread of airborne viruses.
There are several types of portable humidifiers available on the market. Ultrasonic humidifiers use high-frequency vibrations to produce a fine mist, while evaporative humidifiers work by blowing air through a wet wick filter. Warm mist humidifiers boil water to produce steam, providing additional relief for respiratory issues. Selecting the right type of humidifier for your needs is essential.
Regular maintenance and cleaning of your portable humidifier not only ensures its longevity but also guarantees that it continues to function efficiently. Neglecting proper cleaning can lead to mold growth and cause health problems for you and your family. By following these steps and incorporating routine cleaning into your household chores, you can enjoy the benefits of using a clean and well-maintained portable humidifier for years to come.
Conclusion
Cleaning your portable humidifier is essential to ensure that it functions efficiently and effectively. Neglecting this task can lead to the buildup of mineral deposits, mold, and bacteria, which can affect the air quality in your home and pose a health risk.
Before cleaning your humidifier, it is crucial to take safety precautions such as unplugging it from the power source and wearing gloves if necessary. It is also important to gather your cleaning supplies, including vinegar, water, a brush or sponge, and a soft cloth.
Regular cleaning of your humidifier should be carried out at least once a week. The process involves disassembling the device, washing each part with vinegar and water solution or using bleach for deeper cleansing where necessary. Additionally, maintaining proper humidity levels in your home can prevent issues such as dry skin and respiratory problems.
If you experience any problems with your humidifier despite regular cleaning maintenance efforts, troubleshooting common issues such as unusual noises or leaks may help resolve them. However, if all else fails, it may be time to replace your humidifier altogether.
As an expert in humidifier cleaning maintenance routines, I urge you to prioritize regular cleaning of your portable humidifiers to maintain healthy air quality in your home. Remember always to follow safety guidelines when handling electrical appliances.
Image Credits
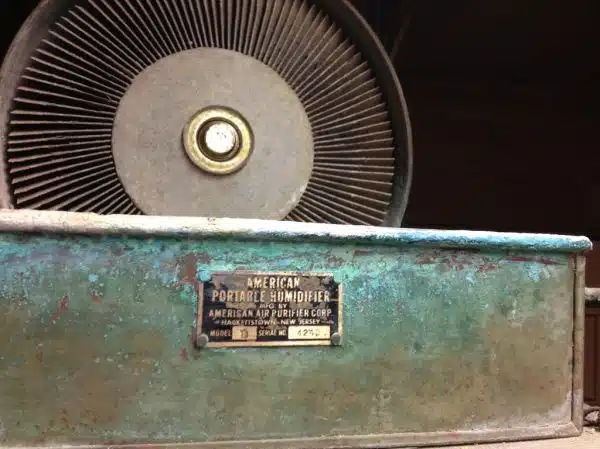
- “American Portable Humidifier” by savagecats (featured)

