Baseboard heaters are an efficient and cost-effective way to add warmth to your home. Installing a baseboard heater requires a basic understanding of electrical wiring and heating principles. As a HVAC technician, I have installed numerous baseboard heaters in residential homes, and in this article, I will provide step-by-step instructions on how to install a baseboard heater.
Before starting any installation process, it is important to gather all the necessary tools and materials. These include a voltage tester, wire strippers, screws, brackets, electrical wire, and of course the baseboard heater itself. It is also important to ensure that you have the proper permits and inspections from local authorities before beginning any electrical work. By following these guidelines and ensuring proper safety protocols are in place, you can successfully install a baseboard heater in your home for optimal comfort during colder months.
Assessing Your Home’s Heating Needs
It’s an unfortunate truth that many homeowners tend to ignore their home’s heating needs until it’s too late, resulting in higher energy costs and compromised comfort levels. The first step in installing a baseboard heater is assessing your home’s heating requirements. This involves evaluating the size and layout of your room, insulation levels, and other factors that could affect your heating needs.
When estimating costs, you need to consider several factors, such as the size of the room where you want to install the heater. Larger rooms will require more powerful heaters which can be more expensive than smaller ones. Additionally, energy efficiency considerations should also be taken into account when choosing a baseboard heater. Choosing an energy-efficient unit can help you cut down on your utility bills.
Ultimately, assessing your home’s heating needs is crucial in determining which type of baseboard heater is appropriate for your space. By taking into consideration factors like room size and insulation levels, along with energy efficiency considerations, you can make an informed decision about which type of heater to purchase. In the next section, we’ll look at how to choose the right baseboard heater for your home.
Choosing The Right Baseboard Heater
After assessing your home’s heating needs, the next step is to choose the right baseboard heater. Before making a purchase, it is essential to understand the pros and cons of each type of heater available in the market. Baseboard heaters are an efficient option for homes that require zone heating or supplemental heat. They are easy to install, cost-effective, and can be controlled individually.
When choosing a baseboard heater, it is essential to consider their efficiency ratings. The efficiency of a heater is measured by its ability to convert electricity to heat. Higher efficiency ratings mean that the heater will consume less energy and lower your electricity bills. Electric baseboard heaters typically have an efficiency rating between 95-100%, whereas hydronic baseboard heaters have an efficiency rating between 70-90%.
To install a baseboard heater, you need to gather the necessary tools and materials. These include a screwdriver, wire stripper, electrical tape, cable connectors, and mounting hardware. You also need to ensure that you have access to an electrical outlet or circuit breaker panel nearby as this will provide power to the heater. Once you have gathered all the necessary materials, you can proceed with installing the baseboard heater.
In summary, choosing the right baseboard heater requires understanding their pros and cons and considering their efficiency ratings. Installing a baseboard heater requires gathering all necessary tools and materials before proceeding with installation. By following these steps correctly, you can efficiently install a baseboard heater in your home and enjoy its benefits for years to come.
Gathering The Necessary Tools And Materials
Measuring tape is needed to accurately calculate the length of the baseboard heater and length of the wall before installation. A drill and screwdriver are essential tools to attach the baseboard heater to the wall. A saw is needed to cut the baseboard to the desired length. Screws, wall anchors, power drill, wire cutters, electrical insulation tape, electrical wire, junction box, electrical box, wall plate, and wire nuts are all necessary materials for the installation of the baseboard heater.
Measuring Tape
As a HVAC technician, one of the most important steps in installing a baseboard heater is measuring the space where it will be installed. Using a measuring tape, accurately measure the length and width of the room to determine the appropriate size for your baseboard heater. This is crucial to ensure that your heater will provide adequate warmth and efficiency.
Once you have measured the dimensions of the room, it is important to determine the appropriate wattage for your baseboard heater. The correct wattage will depend on several factors such as insulation, ceiling height, and window size. A general rule of thumb is to use 10 watts per square foot of space for rooms with good insulation, while poorly insulated rooms may require up to 15 watts per square foot.
Using accurate measurements and determining the appropriate wattage for your baseboard heater are essential steps in ensuring its proper installation and functionality. Take your time with these steps to avoid any potential issues down the line. By doing so, you can be confident that your new heating system will efficiently warm up your home or office space during colder months.
Drill
As a HVAC technician, it is essential to have all the necessary tools and materials before starting any installation project. One of the important tools needed for installing baseboard heaters is a drill. The drill is used to create holes in walls or baseboards for mounting brackets and attaching wires. In addition to the drill, specific drill bits are required for drilling into different types of surfaces such as wood, drywall, or brick.
When using a drill during installation, it is important to take safety precautions. Always wear appropriate personal protective equipment such as safety glasses and gloves to prevent injuries from flying debris or accidental electric shock. Before drilling into any surface, ensure that there are no hidden electrical wires or pipes behind the wall. Finally, make sure that the drill bit is securely fastened in place before use.
To avoid any mishaps during installation and ensure that your baseboard heater functions properly, use a high-quality drill with appropriate drill bits and follow all safety protocols when operating it. Taking these steps will help you achieve professional results and provide customers with efficient heating systems that meet their needs.
Checking For Permits And Inspections
One example of the importance of checking for permits and inspections is a scenario where a homeowner installed a baseboard heater without obtaining the necessary permits or scheduling an inspection. The homeowner thought they could save money and time by doing it themselves, but after completing the installation, they experienced electrical issues and had to hire a professional to fix the problem. Upon inspection, it was discovered that the installation did not meet code requirements, resulting in additional costs for correcting the issue and paying fines.
Permit requirements vary depending on location, so it’s important to research what is required in your area before beginning any HVAC project. Failure to obtain necessary permits can result in legal consequences and can also leave you with substandard work that may pose safety risks. Additionally, scheduling an inspection ensures that your installation meets safety standards and local building codes.
The inspection process typically involves having a licensed inspector come to your home to assess the installation. Inspectors look for compliance with code regulations such as proper wiring, grounding, and ventilation. If any issues are found during the inspection, repairs must be made before receiving approval. It’s important to note that passing an inspection does not necessarily mean that everything is perfect, but rather that it meets minimum safety standards set forth by local codes. Once your installation has passed inspection, you can rest assured knowing that your baseboard heater was installed safely and efficiently. With these permit requirements and inspections in place, we can now move on to the next step – turning off the electricity.
Turning Off The Electricity
After securing the necessary permits and inspections, the next step in installing a baseboard heater is to turn off the electricity. This is an essential safety precaution that should never be overlooked as it can prevent electrocution and other accidents. Before proceeding with any installation work, it’s important to identify the electrical panel and shut off power to the area where you’ll be working.
To identify the electrical panel, start by looking for a gray metal box usually located in a utility room or basement. Once you find it, open the door and locate the main breaker switch. This switch controls all of the electricity coming into your home and should be turned off before proceeding with any installation work. It’s also worth noting that some older homes may not have an electrical panel or breaker switch. In this case, you’ll need to turn off power to your entire home by unplugging all appliances and shutting down your circuit breakers.
Always take safety precautions when working with electricity. Never touch live wires or attempt to install a heater without first turning off power. Additionally, wear protective gear such as insulated gloves and goggles when handling wires or working near electrical panels.
Next up: mounting the brackets… …Ensure that the brackets are securely mounted to a sturdy surface using appropriate screws or bolts. Double-check the level and alignment of the brackets before proceeding to attach the heater to them.
Mounting The Brackets
Accurate measurement of the wall is essential for the successful installation of a baseboard heater. Mounting the brackets requires a secure fit and should be done in accordance with the manufacturer’s instructions. Wall measurements should be taken at multiple points to ensure accuracy. The brackets must be firmly attached to the wall to ensure the baseboard heater is properly supported.
Measuring The Wall
As an HVAC technician, one of the key steps in installing a baseboard heater is measuring the wall for accurate placement of brackets. Measuring accuracy is critical to ensure that the heater fits properly and functions effectively. It is important to measure both the height and width of the wall accurately.
When measuring the height, start by checking if there are any obstructions along the baseboard such as electrical outlets, light switches, or molding. Next, measure from the floor to the desired height of the heater. Make sure to measure at multiple points along the wall to account for any inconsistencies in the floor level. For added safety, allow a few inches of clearance between the top of the heater and any nearby combustible materials.
Wall material considerations are also crucial when determining bracket placement. Drywall walls require different mounting hardware than brick or concrete walls. Take into account whether you need anchors or screws and make sure that they can support the weight of your chosen heater model. Additionally, be mindful of any pipes or wires that may be hidden behind drywall when drilling holes for mounting brackets.
Overall, measuring accurately and considering wall material are essential for successful bracket placement during baseboard heater installation. Taking these steps with care will ensure a safe and efficient heating system for years to come without any issues caused by improper installation measures.
Mounting The Brackets
A crucial step in baseboard heater installation is mounting the brackets properly. After measuring the wall accurately and accounting for any obstructions or wall material considerations, HVAC technicians must level the brackets before securing them to the wall. This involves using a level tool to ensure that the brackets are straight and even at all points along the wall. Measuring distances between brackets is also important to avoid any gaps or overlaps that could affect heater placement.
Once the brackets are leveled, they can be mounted onto the wall using screws or anchors depending on the type of wall material. It is essential to use appropriate hardware that can support the weight of the heater and withstand any movement or vibrations. HVAC technicians should also take into account any pipes or wires that may be hidden behind drywall and avoid drilling close to them.
After mounting the brackets, HVAC technicians can attach the baseboard heater by sliding it into place on top of them. Make sure that it fits snugly against the wall without any gaps or wobbling. Finally, connect any necessary wiring according to manufacturer instructions and turn on power to test if it is functioning correctly. By following these steps with precision, HVAC technicians can install a baseboard heater safely and efficiently for their clients’ comfort and satisfaction.
Wiring The Baseboard Heater
Before wiring your baseboard heater, you must ensure that the power supply is turned off. Checking voltage is important to avoid any electrical accidents while connecting wires. Use a voltage tester to make sure the power supply is completely cut off before beginning to work. It’s also crucial to follow safety precautions when dealing with electricity. Wear insulated gloves and keep the working area dry.
Once you have confirmed that the power supply is disconnected, it’s time to start wiring your baseboard heater. Before starting, refer to the manufacturer’s instructions for specific details on how to wire your particular model of heater. In general, you’ll need to connect two wires: one hot wire and one neutral wire. The hot wire should be connected to a double pole circuit breaker in the electrical panel and run through a thermostat before connecting it to the baseboard heater’s connection box.
It’s imperative that you follow all safety protocols when wiring a baseboard heater, as incorrectly installed heaters can cause fires or other hazards. Refer back to your manufacturer’s instructions often during installation and testing phases of installation.
| Wire Color | Function | Location in Circuit | Voltage |
|---|---|---|---|
| Black | Hot Wire | Circuit Breaker – Thermostat – Heater Connection Box | 120/240 volts |
| White | Neutral Wire | Electrical Panel – Heater Connection Box | 0 volts |
Now that you have wired one baseboard heater, it’s possible that you may want to connect multiple units together for more efficient heating in larger spaces. In order to do this correctly, refer back again to your manufacturer’s instructions for specific details on how many heaters can be connected together and any additional wiring steps required for doing so safely and effectively.
Connecting Multiple Baseboard Heaters
As the number of rooms in a house increases, it is necessary to install more baseboard heaters. Connecting multiple baseboard heaters can be accomplished in two ways: parallel wiring and series wiring. Parallel wiring is the most common method of connecting multiple baseboard heaters. This method involves running separate wires from each heater to the thermostat. Each wire connects directly to the thermostat without passing through any other unit.
Before beginning the installation process, it’s important to ensure that you have all the necessary tools and materials. You will need wire strippers, screws, electrical tape, a drill with a masonry bit (if mounting on concrete walls), and a voltage tester. Once you have gathered all the necessary tools and materials, follow these steps:
- Turn off the power supply.
- Mount each baseboard heater on its designated wall using screws.
- Connect wires from each heater to their respective thermostats using either parallel or series wiring methods.
- Turn on power supply and test voltage levels.
By following these simple steps and using either parallel or series wiring methods for connecting multiple baseboard heaters, you can ensure that your home is heated effectively during even the coldest months of the year.
Testing The Voltage
After successfully connecting multiple baseboard heaters, it is crucial to measure the voltage before proceeding with the installation of the thermostat. This step is essential in ensuring that your baseboard heater system is functioning correctly and efficiently. Measuring voltage is a simple process that can be done using a voltmeter.
Before measuring voltage, it is necessary to take safety precautions. Turn off the power supply to avoid electrical shock or injury. Make sure that your hands are dry and that you are wearing rubber-soled shoes. Always use a voltmeter with insulated probes and ensure that it is in good working condition.
After taking all necessary precautions, insert the probes of the voltmeter into the wires connected to the circuit breaker or fuse box. If you receive a reading between 220-240 volts, then your baseboard heater system is functioning correctly, and you can proceed with installing the thermostat. However, if there is no reading or if it’s below 220 volts, then there may be an issue with your wiring or circuit breakers/fuse box, and you should call a licensed electrician for further assistance.
Transition: Now that we have measured the voltage and ensured that our baseboard heater system functions correctly let’s move on to installing the thermostat.
Installing The Thermostat
As a seasoned HVAC technician, I am all too familiar with the challenges that homeowners face when installing a thermostat. While it may seem like a simple task, there are many factors to consider before programming your thermostat. If you’re not careful, a poorly programmed thermostat can wreak havoc on your energy bills and leave you feeling frustrated.
To ensure that your thermostat is working properly, follow these three tips:
Read the Manual: Before attempting to program your thermostat, take the time to read through the user manual carefully. This will give you a better understanding of how the device works and what features are available to you.
Check Compatibility: Not all thermostats are compatible with all HVAC systems. Make sure that your new thermostat is compatible with your heating system before attempting to install it.
Troubleshooting: If you encounter any issues while programming or using your thermostat, don’t hesitate to troubleshoot the problem. Check for loose wires or connections, low batteries, or other common issues that could be causing problems.
Once you have successfully installed and programmed your thermostat, it’s time to secure the cover in place.
Securing The Cover
After installing the thermostat, the next step is to proceed with mounting the baseboard heater on the wall. Before starting, ensure that the heater is compatible with your home’s electrical system and that you have all the necessary tools. Safety precautions must be taken when installing a baseboard heater, as it involves electrical wiring and can be dangerous if not done correctly.
Firstly, turn off the power supply to the room where you will be installing the heater to avoid any electrical hazards. Then, measure and mark where you want to install the heater on the wall. It is important to make sure that there is enough clearance between the heater and any combustible materials such as curtains or furniture. Place mounting brackets at each end of the heater and attach them securely to the wall using screws.
Decorative covers can be added after securing the heater in place. These covers not only add aesthetic appeal but also protect against accidental contact with hot elements. Simply slide them over each end of the heater until they click into place. Finally, before turning on electricity back on, double-check all connections are secure and there are no exposed wires or loose screws that could cause a short circuit.
With these instructions, you should now have a basic understanding of how to properly install a baseboard heater without compromising safety standards. Remember always to take extreme caution when dealing with electrical installations as they can lead to serious injuries or even death if done carelessly. After completing installation steps, it’s essential to follow up with regular maintenance checks for optimal performance of your heating system.
Turning The Electricity Back On
As the saying goes, “safety first.” When it comes to turning the electricity back on after installing a baseboard heater, electrical safety should be your top priority. Before you do anything else, make sure that all power to the area is turned off and that the wires are not live. You can use a voltage tester to double-check if necessary.
Once you’ve confirmed that there is no electrical current flowing through your baseboard heater installation area, you can begin turning the power back on. But before you do so, take some extra precautions during installation. Make sure that all wires are properly connected and secured, and that there are no exposed or frayed wires. It’s also important to ensure that all wiring is properly grounded.
By following these electrical safety guidelines and taking extra precautions during installation, you can safely turn the electricity back on for your new baseboard heater. But before you start using it regularly, it’s important to check for proper functionality. In the next section, we’ll go over how to do just that.
Checking For Proper Functionality
Once the baseboard heater is installed, it is important to check for proper functionality. This means ensuring that the unit is heating up and producing warm air as expected. It is also important to check that the thermostat is working properly and accurately controlling the temperature. If needed, adjustments should be made to ensure optimal performance.
Another crucial aspect of checking for proper functionality is ensuring that there is adequate insulation around the baseboard heater. This will prevent heat loss and improve energy efficiency. In addition, proper ventilation must be maintained to avoid any potential safety hazards such as carbon monoxide buildup or fire risks.
In summary, checking for proper functionality after installing a baseboard heater involves making sure it heats up and produces warm air, checking the thermostat accuracy, insulating properly to prevent heat loss and improving energy efficiency, and maintaining proper ventilation to avoid safety hazards. By taking these steps, you can ensure your baseboard heater functions efficiently and safely for years to come. In the next section, we will discuss how to maintain your baseboard heater for optimal performance.
Maintaining Your Baseboard Heater
Now that you have installed your baseboard heater, it is important to maintain it properly. One of the most crucial steps in maintaining your heater is cleaning it regularly. Dirt and dust can accumulate on the fins of the heater, which can reduce its efficiency. To clean your baseboard heater, turn off the power and let it cool down completely. Then, use a soft brush or vacuum cleaner to remove any dirt or debris from the fins.
Another important aspect of maintaining your baseboard heater is improving its energy efficiency. This not only helps you save money on energy bills but also reduces your carbon footprint. One effective way to improve energy efficiency is by sealing any gaps around windows and doors to prevent heat loss. You can also install a programmable thermostat that will automatically adjust the temperature based on your schedule.
By following these cleaning instructions and energy efficiency tips, you can ensure that your baseboard heater operates efficiently for years to come. However, if you notice any unusual noises or reduced heating performance, it may indicate a problem that requires professional attention. In the next section, we will discuss some common issues with baseboard heaters and how to troubleshoot them effectively.
Troubleshooting Common Issues
Possible causes of common baseboard heater issues include power supply problems, thermostat malfunction, and faulty wiring. If the heater is not receiving power, the issue may lie with a tripped breaker or blown fuse. A malfunctioning thermostat can result in erratic heating or no heating at all. Faulty wiring is another possible cause of baseboard heater issues, which can lead to electrical hazards if not addressed promptly.
Solutions to these issues depend on the specific cause of the problem. For power supply issues, check the circuit breaker or fuse box and reset any tripped breakers or replace any blown fuses. If the thermostat is malfunctioning, it may need to be replaced entirely or recalibrated. Faulty wiring should be repaired by a professional electrician to ensure safety.
Preventive measures can be taken to avoid common baseboard heater issues. Regular maintenance such as cleaning dust and debris from the unit and checking for loose connections can help prevent malfunctions. Safety tips include turning off power to the unit before attempting any repairs or maintenance, avoiding placing flammable materials near the unit, and never using an extension cord with a baseboard heater.
Remember to always prioritize safety when dealing with baseboard heaters. If issues persist even after attempting solutions or if there are concerns about electrical hazards, it is best to seek professional assistance from a licensed electrician. By taking preventive measures and following safety tips, homeowners can ensure their baseboard heaters work efficiently and safely for years to come.
Conclusion
As a skilled HVAC technician, it is my responsibility to ensure that your home’s heating needs are met. Installing a baseboard heater can be a simple and efficient way to provide warmth in any room of your house. However, it requires careful planning and execution.
Choosing the right baseboard heater is crucial for optimal functionality and efficiency. Make sure you gather all the necessary tools and materials before starting the installation process. Checking for proper permits and inspections is also important to ensure safety and compliance with local regulations.
Once the installation is complete, it’s vital to maintain your baseboard heater regularly. Troubleshooting common issues such as overheating or malfunctioning can prevent more significant problems down the line. Symbolically speaking, a well-installed baseboard heater can bring warmth and comfort not just to a room but to your entire home. Trust us as HVAC technicians to guide you through every step of the process and keep your family cozy throughout those cold winter months.
Image Credits
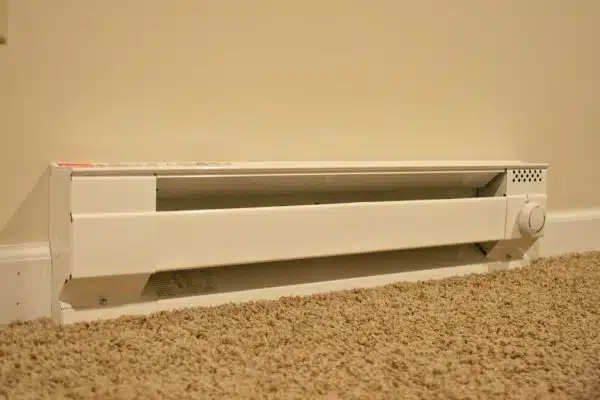
- “Baseboard Heater” by HomeSpot HQ (featured)







![How To Replace A Single-Pole Wall Switch 18 '... All in all it's just another [switch] in the wall.' ...](https://green-life.blog/wp-content/uploads/2023/05/17xmP5qMtVjq-150x150.jpg.webp)


