As a paint sprayer technician, I have seen many people struggle with using an electric airless paint sprayer. These machines are powerful tools that can make painting easier and faster, but they require some know-how to use properly. In this article, we will go over the basics of how to use an electric airless paint sprayer so that you can achieve professional-quality results on your next painting project.
Firstly, it is important to understand the components of an electric airless paint sprayer. There are three main parts: the motor, the pump, and the spray gun. The motor powers the pump which draws paint from a container and pressurizes it. The pressurized paint then travels through a hose and out of the spray gun in a fine mist. Understanding how these parts work together is crucial for achieving a smooth and even finish when using an electric airless paint sprayer. In the following paragraphs, we will delve into more detail about each component and provide step-by-step instructions on how to use them effectively.
The Components Of An Electric Airless Paint Sprayer
As a paint sprayer technician, I have worked with electric airless paint sprayers for many years. These devices are essential in the painting industry as they save time and produce quality finishes. Before using an electric airless paint sprayer, it is crucial to understand its components. The major parts of this device include the spray gun, hose, pump, and tip.
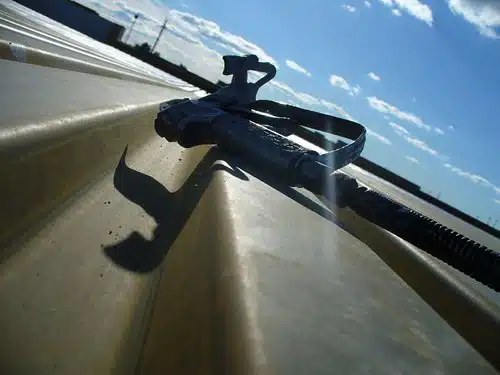
The spray gun is the part that you hold when spraying paint on surfaces. It has a trigger that controls the flow of paint from the tip. The hose connects the spray gun to the pump that draws paint from the container and pushes it through to the gun. The pump is responsible for pressurizing and atomizing the paint while also regulating its flow rate. Lastly, we have the tip which plays a significant role in determining how much paint will be sprayed and how it will be distributed on surfaces.
It’s essential to note that cleaning techniques are crucial when using an electric airless paint sprayer. Keeping your device clean ensures longevity and eliminates any clogging issues that may arise during use. Additionally, recommended accessories such as filters help remove impurities from your paint before spraying while extension wands help reach high areas without having to climb ladders. Understanding these components is key to ensuring optimal performance of your electric airless paint sprayer; let’s dive into understanding its motor next!
Understanding The Motor
Having covered the different components of an electric airless paint sprayer in the previous section, it is important to understand how to maintain and troubleshoot the motor. The motor is responsible for powering the pump that delivers the paint to the spray gun. As such, it is crucial that it remains in good working condition.
To ensure the longevity of your motor, you should perform regular maintenance checks. One common issue with motors is overheating, which can cause damage if not addressed promptly. To prevent this, make sure the fan blades are clean and free from debris that can obstruct airflow. Additionally, check that the brushes are not worn out or sticking as this can cause excessive heat buildup.
If you encounter any issues with your motor during use, troubleshooting is necessary before proceeding with painting. Some common issues include a lack of power or strange noises emanating from the motor. If this occurs, first check that all wires are connected properly and there are no obstructions in the intake or exhaust ports. If these do not resolve the issue, consult a technician for further assistance.
Understanding The Pump
- Preparing a pump for use involves checking the air filter, lubricating the piston rod, and replacing any worn parts.
- Regular maintenance of the pump is necessary to ensure optimal performance, including daily greasing of the pump, weekly inspection of the air filter, and monthly inspection of the inlet screen.
- Connecting a pump to the paint container requires careful consideration of the material, pressure, and hose length specified in the user manual.
- Before engaging the pump, it is essential to ensure that the pressure has been set correctly and that the connections are secure.
- The pump must be disconnected from the power supply and the pressure must be released before any maintenance or cleaning is performed.
- The pump should be disconnected from the paint container before it is stopped or started to prevent any further leakage.
Preparing The Pump
The first step in using an electric airless paint sprayer is to prepare the pump. As a paint sprayer technician, I highly recommend adhering to safety measures before starting any task. Ensure that the power source has been disconnected from the unit before proceeding with any maintenance or adjustments on the machine. Before disassembling the pump, it is necessary to release pressure by pulling the trigger of the spray gun into a waste container until no more paint comes out.
Equipment maintenance is an essential aspect of ensuring optimal performance and longevity of your electric airless paint sprayer. As part of preparing the pump, you must check for any wear and tear on all parts, including hoses, gun filters, tips, and seals. Replace any damaged components before starting your painting project to avoid possible complications during operations. Regular cleaning of your equipment after each use will help prolong its life span.
In conclusion, preparing your electric airless paint sprayer’s pump is crucial to achieving a smooth painting experience with excellent results. Following safety measures and carrying out routine maintenance will ensure that your device remains in good condition for many years. Remember always to clean your equipment after every use and replace any worn-out parts as soon as possible.
Pump Maintenance
As a paint sprayer technician, it is crucial to understand the importance of pump maintenance in achieving optimal performance from your electric airless paint sprayer. One essential aspect of maintaining your device’s pump is regularly checking and replacing filters to avoid contamination that can affect the quality of the paint job. It is also necessary to check fluid levels regularly and top up when necessary to ensure efficient operations.
Replacing filters is an important part of maintaining your electric airless paint sprayer’s pump. Clogged filters can cause a drop in pressure, leading to poor performance during painting operations. As a technician, you should check for signs of wear and tear on all filters, including gun filters, manifold filters, and inlet strainers, and replace them as needed. New filters will help maintain high-quality output, prolong the life span of your equipment, and save you time and money on costly repairs.
Checking fluid levels is another essential aspect of maintaining your electric airless paint sprayer’s pump. Low fluid levels can result in reduced pressure or even cause damage to the pumping system. As a technician, always inspect fluid levels before starting any project and top up as needed using recommended fluids for your unit. Regular maintenance will ensure that you achieve optimal performance from your electric airless paint sprayer while avoiding downtime due to unnecessary repairs or replacements.
Connecting The Pump
As a paint sprayer technician, it is important to understand the proper way of connecting the pump for your electric airless paint sprayer. Connecting the pump properly ensures efficient operations and optimal performance during painting projects. Before connecting the pump, make sure that all components are clean and free from any debris or contaminants.
To connect the pump, start by attaching the spray gun to the hose using appropriate fittings and tighten them securely. Then, attach the other end of the hose to the inlet fitting on the pump and again ensure that it’s tightened properly. Afterward, connect the pressure hose to both ends of the pump ensuring they’re attached securely as well.
In case you encounter issues with your electric airless paint sprayer’s pump, here are some troubleshooting tips you can follow: Check for leaks in hoses or fittings; examine if there are any worn-out seals or gaskets; inspect if fluid levels are adequate; verify if filters are clogged or need replacement; check if there is sufficient supply voltage for your unit. By following these steps in maintaining and troubleshooting your equipment, you can ensure that your electric airless paint sprayer will function optimally while delivering high-quality results in every painting project you undertake.
Understanding The Spray Gun
As the age-old adage goes, “a craftsman is only as good as their tools.” A paint sprayer technician knows that one of the most essential tools in their arsenal is the spray gun. Understanding the spray gun and its proper use is critical to achieving a successful paint job with an electric airless paint sprayer.
One of the first things a painter must learn when using an electric airless paint sprayer is how to hold and grip the spray gun properly. The wrist should be kept straight, and the grip should be firm yet comfortable. It’s crucial to keep a steady hand while spraying, so practice gripping and holding the spray gun before starting any project.
Another important aspect of understanding the spray gun is knowing which nozzle type to use for each painting task. Different nozzle types produce different patterns, allowing for more precise control over where the paint lands. Some common nozzle types include fan pattern nozzles, round pattern nozzles, and flat pattern nozzles. Knowing which nozzle type to use for each job can save time and produce better results.
Understanding how to hold and grip a spray gun properly, as well as knowing which nozzle type to use for specific tasks, are just two aspects of comprehending the importance of using a spray gun efficiently when painting with an electric airless paint sprayer. However, before using any power tool or equipment like this one, it’s crucial to understand safety precautions that must be taken first- let’s delve into them in our subsequent section.
Safety Precautions Before Using An Electric Airless Paint Sprayer
Proper safety precautions are essential before using an electric airless paint sprayer. One of the key factors to consider is ventilation. It is crucial to have adequate ventilation in the work area, as paint fumes can be hazardous to health. Before beginning any painting job, ensure that windows and doors are open and fans are turned on to provide proper airflow.
Another important aspect of safety is the use of appropriate protective gear when operating an electric airless paint sprayer. Protective gear includes goggles or a face shield, gloves, and a respirator mask. These items help protect against potential hazards such as eye irritation, skin burns, and inhalation of paint particles.
In summary, taking necessary safety precautions before using an electric airless paint sprayer is vital for your personal health and safety. This includes ensuring proper ventilation in the workspace and wearing appropriate protective gear during operation. By following these guidelines, you can help prevent accidents and injuries while achieving professional-quality results in your painting projects.
As we move on to preparing the paint for use with an electric airless paint sprayer, it is important to remember that this step also requires careful consideration of safety measures.
Preparing The Paint For Use
Preparing the paint for use is crucial in achieving a smooth and even finish with your electric airless paint sprayer. Before starting, ensure that you have all the necessary tools and materials, such as a clean bucket or container, a stir stick, and a paint filter. These will help to prevent clogging of the spray tip during application.
The first step is to mix the paint thoroughly using appropriate mixing techniques. It is recommended to use an electric drill with a paddle mixer attachment to ensure the pigment is evenly distributed throughout the paint. This will also help to break up any lumps or clumps that may have formed in the paint. Be sure not to introduce too much air into the mixture as this can cause bubbles in the spray pattern.
Next, check the consistency of the paint using a viscosity cup or measuring device. Follow manufacturer’s instructions on thinning if necessary for optimal performance with your specific electric airless paint sprayer. The consistency of your paint can significantly impact its ability to be sprayed evenly and smoothly onto surfaces. A properly mixed and thinned paint ensures that it flows easily through the spray gun without clogging or spitting.
Transitioning into setting up your electric airless paint sprayer, it is important to note that having properly prepared and mixed paint sets up a strong foundation for successful spraying operations. With your prepared bucket of correctly mixed and thinned paint at hand, you are now ready to set up your electric airless paint sprayer for use.
Setting Up The Electric Airless Paint Sprayer
As a paint sprayer technician, I understand the importance of setting up your electric airless paint sprayer correctly. To begin, make sure you have all the necessary components including the spray gun, hose, and pump. The first step is to connect the hose to the pump and then attach the spray gun to the other end of the hose. Once you have connected everything, turn on the power and check for leaks.
Common mistakes made during setup include not properly securing connections which can lead to leaks and uneven spraying. Best practices include double-checking connections before turning on power and keeping all components clean to prevent clogging. Troubleshooting tips include checking for blockages in the hose or spray gun if there are issues with pressure or uneven coverage.
Maintenance advice for your electric airless paint sprayer is critical for optimal performance. After each use, flush out any leftover paint by running clean water through all components. Be sure to store your sprayer in a dry location and protect it from extreme temperatures. By following these maintenance practices, you can extend the life of your equipment.
Next up: adjusting the spray pattern and pressure. As you become more familiar with using your electric airless paint sprayer, it’s essential to adjust both of these settings according to your needs for each job. This will ensure that you achieve even coverage and avoid wasting time and materials.
Adjusting The Spray Pattern And Pressure
After setting up your electric airless paint sprayer, it’s time to adjust the spray pattern and pressure. This step is crucial as it will determine the quality of your paint job. Adjusting the spray pattern refers to altering the fan width and shape of the spray being emitted from the gun while adjusting pressure refers to regulating the amount of fluid being released.
To adjust the spray pattern, start by testing on a scrap piece of cardboard or paper. Hold the gun perpendicular to the surface you’re painting and pull the trigger. If you notice that there’s an uneven distribution of paint, adjust the knob until you achieve an even fan pattern. Additionally, if you want a narrower fan, turn clockwise but for a wider fan turn anti-clockwise.
When it comes to adjusting pressure, avoid making common mistakes such as using too much pressure which can cause overspray and using too little pressure which can result in uneven coverage. Adjusting pressure depends on several factors such as viscosity of paint, tip size and type of surface being painted. Start with low pressure then gradually increase until you reach your desired coverage.
Adjusting spray pattern: tips and tricks
- Test on a scrap piece first before starting on your project.
- Always hold gun perpendicular to surface when spraying.
- Turn knob clockwise for a narrower fan and anti-clockwise for a wider one.
- Use overlapping strokes for even coverage.
In conclusion, adjusting spray pattern and pressure is critical in achieving high quality results with an electric airless paint sprayer. Avoid common mistakes by following these tips and tricks mentioned above. However, spraying techniques differ depending on different surfaces which we will discuss in detail in our subsequent section.
Spraying Techniques For Different Surfaces
Symbolism is an important aspect of painting, and understanding the different techniques for spraying various surfaces is no exception. Just as a painter must carefully consider their brush strokes and color choices when creating a masterpiece, a paint sprayer technician must also be mindful of the surface they are working with to achieve optimal results.
Before beginning any painting project, it is crucial to properly prepare the surface to ensure the paint will adhere correctly. This includes cleaning the surface and allowing it to dry completely before spraying. Additionally, understanding the viscosity of the paint being used is essential in achieving an even coat. Thicker paints may require more pressure from the sprayer or even thinning with water or other solvents.
Different surfaces require different techniques when using an electric airless paint sprayer. The table below outlines some common surfaces and recommended spraying techniques:
| Surface | Recommended Technique |
|---|---|
| Wood | Horizontal or vertical strokes |
| Metal | Overlapping circular motions |
| Concrete | Back and forth motions with overlapping passes |
By following these recommendations, a paint sprayer technician can achieve professional-looking results on any surface. However, it is important to note that each project may require slight variations based on factors such as environmental conditions and desired finish. Always refer to manufacturer guidelines for specific instructions.
Transitioning into cleaning the electric airless paint sprayer is an essential step in maintaining its longevity and performance. Neglecting proper cleaning can lead to clogs in the sprayer tip and damage to internal components. In the next section, we will discuss step-by-step instructions on how to effectively clean your electric airless paint sprayer after use.
Cleaning The Electric Airless Paint Sprayer
Proper cleaning techniques are essential for maintaining your electric airless paint sprayer’s longevity. The following maintenance checklist is recommended after every use. First, unplug the machine and relieve pressure by turning off the spray gun trigger. Then, remove the spray tip guard and tip and clean them thoroughly with water or solvent depending on the type of paint used.
Next, empty any remaining paint from the hopper or container and fill it with clean water or appropriate cleaning solution. Turn on the machine and run it for a few minutes to flush out any residual paint left in the system. Once done, turn off the machine, empty the water or cleaning solution from the container, and rinse it thoroughly.
Lastly, disassemble all removable parts such as filters, hoses, and nozzles. Soak them in an appropriate cleaning solution for at least 30 minutes before rinsing them off with clean water or solvent depending on what was used. Once you have cleaned all parts thoroughly, reassemble them back onto your electric airless paint sprayer.
The above-listed maintenance checklist should be followed religiously after every use to optimize your electric airless paint sprayer’s performance. It will also prevent common issues that arise due to poor maintenance such as clogging of filters or nozzles leading to uneven spraying patterns. By keeping your equipment clean using proper techniques, you can ensure its longevity while enjoying high-quality painting results consistently without interruption.
Troubleshooting Common Issues
After cleaning your electric airless paint sprayer, it’s time to troubleshoot any common issues you may encounter during the painting process. The most common problem is clogging. If your paint sprayer starts to spit or spray unevenly, then it’s likely that the tip or filter is clogged. You can easily fix this issue by removing the tip and filter, soaking them in a cleaning solution, and then rinsing them thoroughly with water.
Another common issue that painters face is pressure problems. Sometimes, the pressure from the electric airless paint sprayer may not be enough to spray the paint evenly on surfaces. To fix this problem, check if there are any leaks in the hoses or connections. If everything seems fine, then adjusting the pressure settings on your paint sprayer can help solve this issue.
Here are some other tips to keep in mind while troubleshooting:
- Always wear protective gear like gloves and masks while handling an electric airless paint sprayer.
- Use only recommended cleaning solutions and avoid harsh chemicals that can damage your equipment.
- Regularly check for leaks or damage in hoses and connections.
- Keep spare parts like tips, filters, and gaskets handy for quick replacements.
- Refer to the manufacturer’s manual for specific troubleshooting steps for your electric airless paint sprayer.
As a technician who understands how frustrating it can be when painting comes to a halt due to equipment failure, I hope these tips will help you troubleshoot any issues with your electric airless paint sprayer effectively. With proper maintenance and care, you can ensure that your equipment stays in good condition for a long time. In the next section, we’ll discuss some practical steps you can take to maintain your electric airless paint sprayer regularly.
Maintaining Your Electric Airless Paint Sprayer
Regular maintenance is essential for keeping your electric airless paint sprayer in top condition. Neglecting to maintain it can lead to clogs, leaks, and other issues that can be costly to repair. Fortunately, with the right cleaning techniques and tools, you can keep your sprayer working smoothly for years.
To clean your electric airless paint sprayer after use, you’ll need a bucket of warm water and a cleaning solution designed specifically for this type of equipment. Begin by flushing out any remaining paint from the system by running clean water through the spray gun until it runs clear. Then, remove the nozzle tip and filter screen and soak them in the cleaning solution for 15-20 minutes. Use a soft-bristled brush to scrub away any dried-on paint or debris before rinsing them thoroughly.
In addition to post-use cleaning, it’s also important to perform routine maintenance tasks on your sprayer. This includes checking the fluid filter regularly and replacing it as needed, inspecting hoses and connections for wear or damage, and lubricating moving parts with oil or grease as recommended by the manufacturer. By following these simple steps, you can ensure that your electric airless paint sprayer stays in good working order for many projects to come.
Transition: Now that you’ve learned about regular maintenance and cleaning techniques for your electric airless paint sprayer, let’s move on to some tips for efficient and effective use of this powerful tool.
Tips For Efficient And Effective Use
For efficient and effective use of an electric airless paint sprayer, it is important to consider the paint viscosity. The viscosity of the paint will determine the amount of pressure required to spray it effectively. If the paint is too thick, it may require a higher pressure setting or a larger tip size. On the other hand, if the paint is too thin, it may result in overspray or uneven coverage.
Another important factor to consider is the spray distance. It is recommended to maintain a consistent distance from the surface being painted for even coverage and to avoid creating runs or drips. The ideal distance varies depending on factors such as the type of tip being used and the pressure setting of the sprayer. As a general rule of thumb, maintaining a distance of 10-12 inches from the surface is recommended.
To ensure optimal performance and longevity of your electric airless paint sprayer, proper maintenance is essential. This includes cleaning and flushing out any remaining paint after each use and regularly inspecting and replacing worn-out parts such as filters and tips. Neglecting maintenance can lead to clogged tips, reduced performance, and ultimately damage to your equipment.
To continue optimizing your painting experience with an electric airless paint sprayer, choosing the right one for your needs is crucial. Different models have varying capabilities that cater to specific painting projects such as residential or commercial applications. Consider factors such as maximum pressure output, hose length, and compatibility with different types of paints when selecting an electric airless paint sprayer that suits your requirements.
Choosing The Right Electric Airless Paint Sprayer For Your Needs
After mastering the tips for efficient and effective use of an electric airless paint sprayer, it is time to choose the right one that suits your needs. It can be overwhelming to select a brand among the variety of options available in the market. Brands comparison is essential in determining which electric airless paint sprayer meets your requirements.
When buying an electric airless paint sprayer, several factors should be considered. The most critical factor is the type of project you are undertaking; this will determine the size and power output required for the job. Secondly, consider the spraying capacity, as this dictates how much paint can be sprayed before refilling. Additionally, choosing a model with adjustable pressure settings allows more control over spray patterns and flow rates.
A buying guide comes in handy when selecting an electric airless paint sprayer. It offers insights into what to look for when making a purchase, including features such as ergonomic design, easy cleaning and maintenance, and durable materials used in construction. A good buying guide also highlights safety precautions that should be taken during use and maintenance of an electric airless paint sprayer to ensure longevity and optimal performance.
Transitioning smoothly into frequently asked questions about electric airless paint sprayers, it’s essential to keep in mind that knowing how to use your equipment correctly makes all the difference in achieving professional results without damaging surfaces or endangering yourself or others around you.
Frequently Asked Questions About Electric Airless Paint Sprayers
Electric airless paint sprayers are an excellent tool for painting large surfaces quickly and efficiently. However, like any machine, they can be prone to malfunctions and common mistakes if not used correctly. Here are some frequently asked questions that might help you troubleshoot your electric airless paint sprayer.
- What are some common mistakes people make when using electric airless paint sprayers?
- Not cleaning the machine after use
- Using the wrong tip size for the paint being used
- Not properly thinning the paint before use
- How do I troubleshoot my electric airless paint sprayer?
- Check for clogs in the hose or nozzle
- Adjust the pressure to ensure proper flow of paint
- Make sure the filters are clean and functioning properly
- Do I need to wear protective gear when using an electric airless paint sprayer? Yes, it is recommended that you wear a respirator mask, safety glasses, and gloves to protect yourself from fumes and overspray.
As a technician who has worked with many electric airless paint sprayers, I highly recommend taking the time to properly learn how to use these machines before attempting to use them on a large project. Common mistakes can be costly and time-consuming to fix, but with proper care and maintenance, these machines can save you time and money in the long run. Remember to always wear protective gear when using an electric airless paint sprayer and troubleshoot any issues as soon as they arise.
Conclusion
An electric airless paint sprayer is an efficient and effective tool for painting large surfaces quickly. As a paint sprayer technician, it is important to understand the components of this machine, including the motor, pump, and spray gun. Before using an electric airless paint sprayer, safety precautions should be taken to avoid accidents and ensure proper functioning.
Proper maintenance is key to ensuring your electric airless paint sprayer lasts longer and continues to function effectively. Tips for efficient and effective use include selecting the right machine for your needs, adjusting the pressure settings correctly, and using the correct nozzle size for the job at hand.
For example, if you are painting a large exterior surface such as a house or building, it is important to select a machine with a high horsepower motor and large capacity pump. This will ensure that you can cover more area in less time. Additionally, using a larger nozzle size will allow you to apply thicker coats of paint without having to make multiple passes.
Overall, understanding how to use an electric airless paint sprayer properly can save time and money while producing professional-looking results. By taking safety precautions, maintaining your machine regularly, and following these tips for efficient use, you can achieve great results with ease.
Image Credits
- “Paint Gun” by The Other Dan (featured)

