As a freezer maintenance expert, I am often approached by individuals who are experiencing issues with their freezers. One of the most common problems that I encounter is the buildup of ice and frost in the freezer compartment, which can lead to reduced cooling efficiency and higher energy consumption. Fortunately, defrosting your freezer is a relatively simple process that can be completed in eight easy steps.
In this article, I will provide a step-by-step guide on how to defrost your freezer effectively. By following these simple instructions, you can ensure that your freezer continues to operate efficiently and effectively for years to come. Whether you are an experienced home chef or simply looking to keep your frozen foods fresh and tasty, taking the time to properly defrost your freezer is an essential part of maintaining optimal freezer performance. So without further ado, let’s dive into the eight simple steps for defrosting your freezer!
Gather Your Supplies
As a freezer maintenance expert, it is important to gather all the necessary equipment before beginning the defrosting process. This includes a large container or bucket to collect water runoff, towels or rags for wiping up excess moisture, and a plastic scraper or spatula to gently scrape away any built-up ice. It is also recommended to wear gloves to protect your hands from the cold and wet environment.
While manual defrosting is the most common method of removing ice buildup in freezers, there are alternative defrosting methods that can be used. These include using a hairdryer set on low heat to melt the ice or placing bowls of hot water inside the freezer to speed up the melting process. However, it should be noted that these methods may take longer and require more effort than manual defrosting.
By gathering all necessary supplies and considering alternative defrosting methods, you can ensure a successful and efficient defrosting process. Once you have everything you need, it’s time to move onto the next step: emptying out your freezer.
Empty The Freezer
Before you start defrosting your freezer, it is important to empty its contents. This step may seem obvious, but it is crucial to ensure that the food does not spoil during the defrosting process. Begin by removing all the frozen items and placing them in coolers or insulated bags. It is advisable to use this opportunity to organize your freezer and dispose of any expired or unidentifiable items.
Once you have emptied the freezer, take note of any removable shelves, drawers, or baskets. These should be removed and cleaned separately using warm soapy water. If they are too frosty to remove easily, leave them out for a few minutes until they defrost slightly before gently pulling them out. Alternatively, you can wait until the freezer has defrosted entirely before cleaning these parts.
If you are looking for alternative methods to defrost your freezer, there are eco-friendly options available. One popular method is placing bowls of hot water inside the freezer and closing the door for a few hours. The steam created by the hot water will help melt the ice without damaging the appliance or harming the environment.
- Place a towel at the bottom of the cooler or insulated bag where you store your frozen goods.
- Sort through your stored items for potential waste before returning them to your newly cleaned freezer.
- Use baking soda and vinegar solution instead of harsh chemicals when cleaning removable shelves.
- Consider donating unexpired food items that you no longer need instead of throwing them away.
Now that you have emptied your freezer and prepared yourself with eco-friendly alternatives, it’s time to proceed with defrosting by unplugging your appliance.
Unplug The Freezer
Before unplugging your freezer, it is important to take some safety precautions. One of the first things you should do is to turn off the power supply to the appliance. This will help prevent any electrical shocks or accidents while you are working on defrosting your freezer. You can do this by either switching off the circuit breaker or unplugging the freezer from the wall socket.
If you cannot unplug your freezer, there are alternatives to consider. For instance, you can use a hairdryer to melt the ice buildup manually. Ensure that you keep a safe distance between the hairdryer and the ice so as not to damage your appliance or cause any accidents. Another alternative is using a hot towel or warm water applied directly on the ice buildup to loosen it up.
Once you have taken all necessary precautions and unplugged your freezer, it’s time to remove excess ice. This step involves removing any remaining chunks of ice using a plastic scraper or spatula. It’s essential not to use sharp tools like knives as they may damage your freezer’s interior walls. You can then use a sponge or cloth dipped in warm water to wipe down any remaining moisture before plugging back in your appliance.
Remove Excess Ice
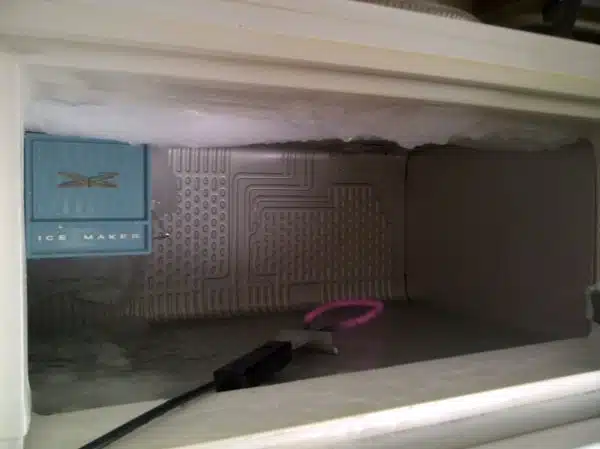
To effectively remove excess ice from your freezer, there are various techniques that you can use. One of the most common methods is to use a plastic scraper or a spatula to gently chip away at the ice. Ensure that you do not use sharp objects, such as knives, as they may damage the freezer coils and lead to costly repairs later on. Additionally, you can use a hairdryer or a heat gun to melt the ice.
Another effective technique for removing excess ice from your freezer is by using warm water. You can either fill a container with warm water and place it in the freezer or use a cloth dipped in warm water to wipe down the walls and shelves of the freezer. This technique will help to soften the ice and make it easier to remove using a plastic scraper or spatula.
It is important to note that preventing excessive frost buildup in your freezer is crucial for maintaining its efficiency. To achieve this, ensure that you do not keep your freezer door open for extended periods as this allows warm air into the unit leading to frost buildup. Additionally, regularly defrosting your freezer will help prevent frost accumulation and prolong its lifespan.
As we move onto the next section about how to use hot water when defrosting your freezer, it is important to have an understanding of why this method works so well. By using hot water, you can quickly melt any remaining ice in hard-to-reach areas while also sanitizing your freezer at the same time.
Use Hot Water
- To successfully defrost a freezer using hot water, begin by filling a clean bucket with hot water.
- Ensure the bucket contains enough hot water to submerge the items stored in the freezer.
- Place the bucket inside the freezer and allow the hot water to circulate for several minutes.
- Carefully remove the bucket and discard the used water before continuing with the defrosting process.
Fill A Bucket
Freezer maintenance can be a daunting task, but with some useful tips, it can be made much easier. When defrosting your freezer using hot water, one important step is to fill a bucket with the hot water. This is necessary because you will need to collect the excess water that comes out of the freezer during defrosting.
There are several alternatives to using a bucket when defrosting your freezer. For instance, you can use a large bowl or plastic container if you don’t have a bucket available. However, it’s important to ensure that whatever alternative you choose is large enough to hold all the excess water that comes out of the freezer.
When filling your bucket with hot water for defrosting your freezer, ensure that the water is not too hot as this could damage your freezer. It’s recommended that you use warm or tepid water instead. Additionally, make sure that the bucket is placed close enough to the freezer for easy access during the defrosting process. With these simple steps, you can easily and safely defrost your freezer without any hassle or stress.
Use Hot Water
When it comes to freezer maintenance, using hot water is a common method for defrosting. There are pros and cons to using hot water, but with the right safety precautions, it can be an effective way to keep your freezer in top condition.
One benefit of using hot water is that it can speed up the defrosting process. The warmth from the water helps to melt ice faster, which means you can get back to using your freezer sooner. However, there are also some potential drawbacks to consider. For one thing, if the water is too hot, it could damage your freezer. Additionally, using hot water requires careful handling to avoid burns or other injuries.
To use hot water safely when defrosting your freezer, there are a few important things to keep in mind. First and foremost, make sure that the water is not too hot – lukewarm or tepid temperature is ideal. You should also be careful not to spill any water on the floor or nearby electrical outlets. To prevent this from happening, consider placing a towel or tray underneath your freezer before starting the defrosting process.
In summary, while there are both pros and cons to using hot water for freezer maintenance purposes, taking appropriate safety precautions can help ensure that this method is effective and safe overall. By following these tips and being mindful of potential hazards, you can successfully defrost your freezer without any issues or concerns.
Let The Ice Melt Naturally
After using hot water to defrost your freezer, the next option is to let the ice melt naturally. This process has natural defrosting advantages that can save time and energy. Natural defrosting means waiting for the ice to melt on its own without any external intervention, unlike manual defrosting.
One of the advantages of natural defrosting is that it’s a slow process that allows you to work on other tasks while waiting for the ice to melt. Slow defrosting also prevents damage to your freezer walls or any electrical parts in the freezer. However, one disadvantage of natural defrosting is that it takes longer than manual defrosting.
The optimal time for natural defrosting varies depending on the amount of ice buildup in your freezer. If you have a small amount of frost buildup, it may take only a few hours for the ice to melt naturally. However, if there’s a significant buildup of ice, then it could take up to 24 hours for all the ice to completely melt. In summary, while slow and easy-going, natural defrosting may not be suitable if you’re in a hurry and need quick results or want to use your freezer immediately after cleaning it without allowing enough time for proper drying.
As we conclude this section on “Letting Ice Melt Naturally,” we must note that after all the ice has melted away from your freezer, don’t forget to clean it before putting back any food items into it. The next section will guide you through how best to clean your freezer efficiently and effectively without damaging any part of your appliance.
Clean The Freezer
Maintaining a clean freezer is essential for its longevity and optimal performance. A dirty freezer can lead to unpleasant smells, reduce energy efficiency, and even cause foodborne illnesses. Therefore, it is important to keep your freezer clean and organized.
Tips for maintaining a clean freezer include cleaning spills immediately, wiping down the interior regularly with a damp cloth, and disposing of expired or spoiled food promptly. It is recommended to clean your freezer at least once every three months or more often if you notice any buildup or odors. Additionally, defrosting your freezer regularly will not only help maintain its cleanliness but also improve its energy efficiency.
When cleaning your freezer, make sure to unplug it first and remove all the contents. Use a mild detergent or baking soda solution to wipe down the interior and shelves thoroughly. Avoid using harsh chemicals as they may damage the finish of your freezer. Once you have finished cleaning, dry the interior with a clean towel before plugging it back in and restocking it with food.
Transition: Now that you have cleaned your freezer thoroughly, it’s time to move on to drying it out before restarting it once again.
Dry The Freezer
Once the freezer has been defrosted, it is important to dry it thoroughly. There are two main methods of drying a freezer – air drying and towel drying. Air drying involves leaving the freezer door open for several hours to allow all remaining moisture to evaporate. Towel drying, on the other hand, involves manually wiping down the interior of the freezer with a clean, dry cloth.
There are benefits and drawbacks to both methods of drying. Air drying is generally considered more effective as it allows any remaining moisture to evaporate completely. However, it can be time-consuming and may not be practical for those who need to use their freezer immediately after defrosting. Towel drying is quicker and more convenient but may not remove all traces of moisture, which can lead to ice buildup and other issues in the future.
To prevent moisture buildup after defrosting, it is recommended to use a dehumidifier in or near your freezer. This will help draw out any excess moisture from the air and prevent it from condensing inside the freezer. Additionally, keeping your freezer organized and free from clutter can also help prevent moisture buildup by allowing air to circulate freely throughout the unit.
Moving forward, once your freezer is dry and free from excess moisture, you can begin reorganizing its contents. This will ensure that everything is stored in an orderly fashion and easy to access whenever needed.
Reorganize The Freezer
- Before beginning the process of defrosting a freezer, it is important to arrange the items inside in order to make the process easier.
- After the items are properly arranged, the next step is to discard any outdated food to prevent food-borne illnesses.
- Once the outdated food has been removed, the inside of the freezer should be thoroughly cleaned to ensure that no food remains that can spoil.
- The defrosting process should commence by removing all remaining items from the freezer and unplugging it from the wall.
- Once the freezer is unplugged and empty, the ice buildup can be scraped away using a plastic spatula.
- After the ice has been removed, the freezer should be wiped dry and then plugged back in to begin the cooling process before items can be returned.
Arrange Items
When it comes to defrosting your freezer, reorganizing the contents can be a daunting task. However, it is crucial to take the time to do so in order to maximize space and efficiency. One of the most important steps in this process is arranging items properly.
There are various organizing methods that can help you make the most of your freezer space. For instance, categorizing items by type such as meats, vegetables and fruits can make it easier to find what you need. In addition, using clear containers or bags for storage allows you to quickly identify contents without having to dig through piles of frozen goods.
Food storage tips are also essential when it comes to arranging items in your freezer. Make sure to label all containers with the date and contents for easy identification. Additionally, consider storing smaller items in baskets or bins rather than loose on shelves. This not only saves space but also makes it easier to access items without causing a disorganized mess.
By following these simple steps for arranging items in your freezer, you can save time and energy while efficiently utilizing your storage space. Remember that organization is key when it comes to maintaining a well-functioning freezer, so take the time to implement these tips and tricks into your routine for optimal results.
Discard Outdated Foods
As a freezer maintenance expert, it is important to not only reorganize the contents of your freezer, but also discard outdated foods. This is crucial for ensuring that your freezer remains in good condition and prevents future buildup of unnecessary items. It is important to regularly check expiration dates on items stored in your freezer and dispose of anything that has passed its prime.
Discarding outdated foods does not necessarily mean throwing them away. Consider donating unused items to local food banks or organizations that accept food donations. This not only helps prevent waste, but also serves those in need within the community. By doing so, you can make a positive impact while maintaining a clean and organized freezer.
Incorporating discarding outdated foods into your routine of reorganizing your freezer can help maintain its efficiency and functionality. Regularly checking and disposing of expired items not only prevents clutter, but also ensures that the remaining contents are fresh and safe for consumption. Remember to always donate unused items when possible, as it serves both yourself and others in the community.
Clean Inside
As a freezer maintenance expert, it is important to ensure that the inside of your freezer is clean in addition to reorganizing its contents and discarding outdated foods. A dirty freezer can lead to unpleasant odors, buildup of ice, and even potential health hazards. Therefore, incorporating a routine of cleaning the inside of your freezer can help maintain its efficiency and functionality.
When it comes to cleaning the inside of your freezer, it is important to use only the best cleaners that are safe for both you and your freezer. Using harsh chemicals or abrasive materials can damage the interior and potentially affect the quality of food stored within. Green alternatives such as baking soda or vinegar mixed with water are effective at removing stains and odors without harming your freezer.
Regularly cleaning the inside of your freezer not only promotes cleanliness and hygiene but also helps improve its overall lifespan. By using safe and effective cleaners, you can ensure that your freezer remains in good condition while serving others by providing a safe storage space for food items. Remember to always follow proper safety precautions when cleaning your freezer for optimal results.
Consider Adding Baking Soda
Using Baking Soda during the freezer defrosting process can be a helpful addition to your cleaning routine. Not only does it help with the deodorization of your freezer, but it also aids in absorbing any excess moisture left behind from the defrosting process. This means that by adding baking soda to your routine, you can not only clean your freezer but keep it smelling fresh and prevent future frost build-up.
One benefit of adding baking soda to your freezer defrosting routine is its ability to absorb odors. Over time, food particles and other debris can accumulate in the corners and crevices of your freezer, causing unpleasant smells. By placing an open box of baking soda in the freezer during defrosting, it can absorb these odors and leave your freezer smelling clean.
Another benefit of using baking soda during defrosting is its ability to absorb excess moisture. This helps prevent any future frost build-up in the freezer. Moisture left behind after defrosting can lead to more frost accumulation over time, causing damage to the freezer’s components. By adding baking soda to your cleaning routine, you’re helping maintain the overall health and longevity of your appliance.
To incorporate baking soda into your freezer-defrosting routine:
- Remove all items from the freezer
- Empty any remaining ice or water
- Sprinkle a generous amount of baking soda on a damp cloth
- Wipe down all surfaces inside the freezer
Adding baking soda may seem like a small step, but it has significant benefits for both odor control and preventing future frost build-up in your freezer. With this simple addition to your maintenance routine, you can keep your appliance running efficiently for years to come.
As you finish cleaning and deodorizing with baking soda, it’s essential to check if there are any issues with the seal around the door or if there are any cracks present that could cause further problems down the line. A faulty seal can lead to excess moisture and frost build-up inside the freezer, undoing all the good work you’ve done with the baking soda. Therefore, checking the seal is an essential aspect of maintaining a healthy freezer.
Check The Freezer Seal
It is important to ensure that your freezer seal is in good condition before starting the defrosting process. A faulty seal can lead to increased energy consumption and reduced efficiency of your freezer. The most common cause of a faulty seal is wear and tear over time, but it can also be caused by damage from sharp objects or improper cleaning techniques.
Inspecting your freezer seal is a quick and easy task that should be done regularly. Simply run your hand along the edge of the door to feel for any gaps or cracks in the seal. You can also visually inspect the seal for any signs of wear or damage. If you find any issues with your seal, it may need to be replaced.
Replacing a faulty freezer seal is not a difficult task, but it does require some basic tools and knowledge of how the seal attaches to the door. It is recommended that you consult your freezer’s manual or contact a professional if you are unsure about the replacement process. By ensuring that your freezer seal is in good condition, you will save money on energy bills and prolong the life of your appliance.
As part of regular maintenance, it is important to schedule regular defrosting of your freezer. This will prevent ice buildup on the walls and increase its efficiency. A good rule of thumb is to defrost every six months or when there is more than 1/4 inch of ice buildup. By taking these simple steps, you can keep your freezer running smoothly for years to come.
Schedule Regular Defrosting
It is important to schedule regular defrosting of your freezer for several reasons. First and foremost, it helps prevent damage to the freezer itself. If ice builds up too much, it can cause damage to the coils and other internal components. Additionally, regular defrosting ensures that your freezer operates at maximum efficiency, saving you money on energy costs in the long run.
To make sure you stay on top of your defrosting schedule, consider setting reminders for yourself. This can be as simple as putting a note on your calendar or setting an alarm on your phone. Depending on how often you use your freezer and how quickly ice accumulates, you may need to defrost every few months or even more frequently.
Another way to prevent damage and maximize efficiency in your freezer is to avoid overloading it with too many items at once. When there are too many items in the freezer, air cannot circulate properly, leading to increased ice buildup. Additionally, try not to leave the door open for extended periods of time, as this can also lead to excess moisture and ice formation.
Incorporating these practices into your routine will help keep your freezer functioning properly for years to come. However, even with regular maintenance, issues may arise from time to time. In the next section, we will discuss some common troubleshooting techniques for common issues that may occur with freezers.
Troubleshooting Common Issues
Are you experiencing frost buildup in your freezer despite following the defrosting steps? Don’t worry; it’s a common issue that many people face. Frost buildup can cause your freezer to work harder than usual, which ultimately leads to higher energy bills. In this section, we’ll discuss some common causes of frost buildup and prevention methods to keep your freezer frost-free.
One common cause of frost buildup is leaving the freezer door open for extended periods. When the door is open, warm air enters the freezer, leading to condensation. The moisture from condensation then freezes inside the freezer, causing frost buildup over time. To prevent this from happening, make sure to close the freezer door immediately after use and check if it’s properly sealed.
Another reason for frost buildup in freezers is improper storage of food items. When food items are not stored correctly, they release moisture into the air, leading to an increase in humidity levels inside the freezer. The excess humidity then turns into frost on surfaces inside the unit. To prevent this, store food items in airtight containers or resealable bags before placing them inside the freezer.
Preventing future frost buildup is essential to ensure that your freezer runs efficiently and lasts longer without any damage. One effective method is to clean your unit regularly as dirt or debris can also lead to frost accumulation inside your unit. Another way is by ensuring proper ventilation around your refrigerator as inadequate airflow can lead to temperature fluctuations inside and cause condensation resulting in frosting up over time. By following these preventive measures alongside defrosting techniques discussed earlier, you can keep your freezer running smoothly while saving money on energy bills.
Preventing Future Frost Buildup
Now that we have addressed common issues with freezers, it’s time to focus on how you can prevent future frost buildup. A well-maintained freezer will not only save energy but also keep your food fresh for longer periods.
To maintain a frost-free freezer, there are several tips you should follow. Firstly, ensure that the door seals are tight and free of any cracks or tears. This helps keep the cold air inside and prevents warm air from entering, which can contribute to frost buildup. Secondly, avoid overloading your freezer as this can reduce airflow and cause temperature fluctuations. Lastly, clean your freezer regularly to remove any spills or debris that can obstruct airflow.
One common question is how often should you defrost your freezer? The answer varies depending on the model and usage frequency. However, a good rule of thumb is to defrost it at least once a year or when the frost layer reaches ¼ inch thick. Regular defrosting not only prevents excessive frost buildup but also improves energy efficiency and extends the lifespan of your appliance. By following these simple steps, you can enjoy a well-maintained and frost-free freezer for years to come.
Now that you know how to troubleshoot common issues with freezers and maintain them properly, it’s time to enjoy your freshly defrosted freezer! Remember to follow these tips regularly and check for any signs of malfunctioning such as unusual noises or temperature fluctuations. With proper care and maintenance, your freezer will continue serving you and your family for years without any complications.
Enjoy Your Freshly Defrosted Freezer!
Ah, the sweet sound of a defrosted freezer. There’s nothing quite like it. You’ve put in the hard work, followed the steps, and now you can sit back and enjoy the benefits of a defrosted freezer. But wait, there’s more! As a freezer maintenance expert, I want to share some tips for maintaining a frost-free freezer so you can avoid this tedious process in the future.
Firstly, let’s talk about the benefits of a defrosted freezer. Not only will your freezer operate more efficiently, but it will also prolong the lifespan of your appliance. A buildup of ice can cause damage to your freezer’s components and lead to costly repairs or replacement. Plus, a defrosted freezer means you’ll have more space for storing food without having to navigate around unwanted ice crystals.
Now, onto some tips for maintaining a frost-free freezer. The key here is to prevent ice buildup before it even begins. Make sure to check the seal on your freezer door regularly as cold air escaping can cause condensation and ultimately lead to frost accumulation. Additionally, avoid putting hot or warm foods directly into your freezer as this can also contribute to excess moisture buildup.
In summary, take pride in your freshly defrosted freezer and reap the benefits that come with it. With proper maintenance techniques such as checking seals and avoiding excess moisture buildup, you’ll be able to enjoy a frost-free environment for years to come without ever having to endure another round of defrosting again.
-Create space for new culinary adventures! -Enjoy peace of mind knowing your appliance is running smoothly -Save money by avoiding unnecessary repairs or replacements
Conclusion
Freezers are an essential appliance in any home, and regular maintenance is crucial for their longevity. Defrosting your freezer is one of the most important tasks in maintaining its efficiency. To defrost your freezer, gather your supplies, empty the freezer and unplug it. Then remove excess ice and use hot water to melt stubborn ice buildup.
Regular defrosting should be scheduled to prevent future frost build-up. Troubleshooting common issues such as leaks or malfunctioning heating elements can also help maintain your freezer’s optimal performance. Preventative measures such as keeping the door closed and avoiding over-stuffing can reduce frost accumulation.
In conclusion, defrosting your freezer in eight simple steps is easy with a little know-how. With regular maintenance and preventative measures, you will enjoy a freshly defrosted freezer that maintains its efficiency over time. As a freezer maintenance expert, I urge you to take care of your appliance regularly to avoid costly repairs down the line. So go ahead and give it a try- you won’t regret it!
Image Credits
- “Defrosting the Freezer, the Old-Fashioned Way” by artistmac (featured)

