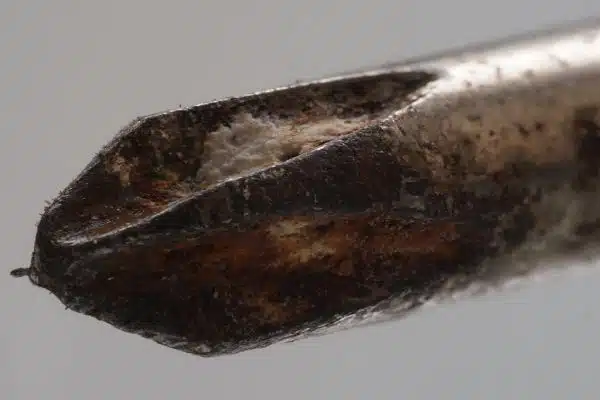
Removing rusted screws can be a daunting task, especially if you’re not familiar with the different methods available. Whether it’s a screw that has been left in place for too long or one that has corroded due to exposure to moisture, there are several ways to remove it without causing damage to the surrounding material. In this article, we will explore three effective methods for removing a rusted screw.
Firstly, we will look at using penetrating oil and heat as a solution for removing rusted screws. Secondly, we will examine how to use vinegar and baking soda to dissolve the rust and loosen the screw. Lastly, we will discuss how to use alternative tools such as pliers, wrenches or drill bits to remove stubborn screws. By following these simple steps, you can save time and money by avoiding unnecessary damage to your project while also satisfying your DIY cravings!
Understanding The Causes Of Rusted Screws
Imagine you are a carpenter who has been working on a project for weeks. Everything is going smoothly until one day, you come across a rusted screw that refuses to budge. You try everything in your power to loosen it up but it just won’t give. Frustration sets in as the project comes to a halt. This is a common occurrence for many DIY enthusiasts and handymen/women around the world.
The causes of rusted screws are varied and complex. One of the most common reasons is exposure to moisture or water. Screws that are used in outdoor projects or those that come into contact with liquids tend to rust faster due to oxidation. Other factors that contribute to rust include exposure to saltwater, chemicals, and humidity levels. The type of metal used for the screw also plays an important role in its resistance to rust.
Prevention of rusted screws can save time, effort, and money in the long run. One way of preventing rust is by using screws made from stainless steel, brass or other corrosion-resistant materials instead of regular steel screws. Another way is by coating the screws with anti-rust products before use, which creates a protective barrier between the metal and moisture/air.
Assessing the severity of the rust on your screw will determine which method you should use when attempting to remove it. It’s crucial to understand how deep or extensive the rust has become before applying any force or using any tools on it. This will prevent further damage or breakage of the screw during removal attempts.
Assessing The Severity Of The Rust
Before attempting to remove a rusted screw, it is important to assess the severity of the rust. This will help determine the best method for removing the screw without causing further damage. One way to assess rust severity is to examine the color and texture of the rust. Light surface rust can typically be easily removed with minimal effort, while deep rust may require more intensive methods.
Another way to assess rust severity is to check for structural damage caused by corrosion. If there are signs of corrosion on surrounding metal surfaces, such as flaking or pitting, it may indicate that the affected area has weakened and may require professional attention. In some cases, attempting to remove a severely rusted screw on your own may cause further damage or compromise structural integrity.
Prevention Tips:
- Keep metal surfaces clean and dry to prevent moisture from accumulating.
- Apply a protective coating such as wax or oil to prevent rust from forming.
- Store metal objects in a dry place away from moisture and humidity.
- Use stainless steel or galvanized screws instead of standard steel screws when possible.
Assessing the severity of rust before attempting screw removal can save time, effort, and money in the long run. By following prevention tips such as keeping surfaces clean and dry, applying protective coatings, storing objects properly, and using appropriate materials for fastening, you can avoid encountering severe cases of rust altogether.
Transition: Now that you have assessed the severity of the rust and implemented prevention tips in your routine maintenance tasks, it’s time to prepare your tools and materials for removing that stubborn screw.
Preparing The Tools And Materials
- To remove a rusted screw, the right tools and materials are essential.
- A selection of wrenches, screwdrivers, hammers, pliers, and ratchets should be available.
- A socket set, penetrating oil, rust remover, and lubricant are also recommended.
- A vice grip, Allen wrench, and protective goggles should also be included in the toolkit.
- The lubricant should be applied to the screw and surrounding area before attempting to remove it.
- It is also important to wear safety gear such as gloves and safety glasses.
Tools
As a DIY expert, the frustration of encountering a rusted screw can be overwhelming. However, it’s essential to have the right tools on hand to tackle this issue efficiently. There are three types of tools you can use for removing rusted screws: pliers, screw extractors, and impact drivers. Pliers are an excellent choice for small screws that have rusted around the head, as they allow you to grip and turn with precision. Screw extractors are ideal for larger or embedded screws that require more force and leverage. Lastly, an impact driver is perfect for removing stubborn or corroded screws.
Using the right technique when removing a rusted screw is crucial to avoid damaging the surrounding materials. First, ensure that your chosen tool is appropriate for the size and type of screw. Second, apply penetrating oil or lubricant to loosen the rusted area around the screw head before attempting removal. Third, use gentle but firm pressure while turning your tool clockwise (righty-tighty) to avoid stripping or breaking the screw.
In conclusion, preparing your tools and materials properly before attempting to remove a rusted screw will save you time and prevent unnecessary damage. Remember to choose the correct tool for the job and apply lubrication before turning. With patience and persistence, even the most challenging screws can be removed successfully!
Materials
As a DIY expert, it’s crucial to prepare your tools and materials correctly before attempting any project. When dealing with rusted screws, the right materials can make all the difference in successfully removing them. One essential material to have on hand is penetrating oil or lubricant, which helps loosen rust and corrosion around the screw head. Applying this before attempting to remove the screw can significantly reduce the risk of damaging surrounding materials.
Another useful material for tackling rusted screws is sandpaper or a wire brush. These tools can be used to remove surface-level corrosion before applying lubricant or attempting removal. However, it’s important to use caution when using abrasive materials near delicate surfaces as they can cause damage if not used correctly.
When working with metal objects that are prone to corrosion, prevention is always better than cure. DIY techniques such as applying a protective coating or storing items in a dry area can help prevent rust from forming in the first place. By taking these proactive measures and having the right tools and materials on hand, you can ensure that your DIY projects run smoothly without any frustrating setbacks caused by metal corrosion.
Safety Gear
As a DIY expert, it’s essential to prioritize safety when preparing tools and materials for any project. One crucial aspect of safety is the use of protective gear. When dealing with rusted screws, there are specific types of safety gear that can prevent injury and protect against harmful chemicals.
The importance of safety gear cannot be overstated when working with rusted screws. Some common types of safety gear include gloves, goggles, and respiratory masks. Gloves protect hands from sharp edges and corrosive substances like penetrating oil or lubricants. Goggles shield eyes from debris that may fly off when removing rusted screws, while respiratory masks prevent inhalation of noxious fumes produced by these procedures.
In conclusion, before embarking on any DIY project involving rusted screws, it’s essential to have the right safety gear on hand. Protective equipment like gloves, goggles, and respiratory masks can prevent injuries and ensure a safe working environment. By prioritizing safety along with the correct tools and materials, you can tackle any project with confidence and achieve successful results without risking your health or well-being.
Method 1: Using Penetrating Oil And Heat
Using penetrating oil and heat is a popular method for removing rusted screws. One of the biggest benefits of this method is that it can be done with relatively inexpensive materials that are readily available at most hardware stores. Penetrating oil helps to loosen the rust, while heat expands the metal, making it easier to remove the screw. This method can be used on a variety of surfaces, including metal, wood, and plastic.
However, there are some common mistakes that you should avoid when using this method. First and foremost, make sure that you use the right type of penetrating oil for the job. Some oils may not be suitable for certain types of surfaces or may not work as well as others. Additionally, it is important to apply the oil properly so that it can penetrate into the rusted area effectively. Finally, make sure that you do not overheat the surface as this can cause damage or make it more difficult to remove the screw.
To begin using this method, start by applying penetrating oil to the rusted screw. Make sure to apply enough oil so that it can seep into all of the crevices around the screw. Let the oil sit for at least 15 minutes before attempting to remove the screw. During this time, you can prepare your heat source by using a propane torch or heat gun on low heat. Once you have heated up the surrounding area of the screw for a few minutes, try turning it with a wrench or pliers until it comes loose.
By following these tips and tricks, you should be able to successfully remove even highly rusted screws with ease. Remember to always take your time and avoid rushing through any steps in order to prevent damaging your materials or injuring yourself in any way during this process.
Step 1: Applying The Penetrating Oil
After applying the penetrating oil, it is important to give it time to fully penetrate the rust. Common mistakes include not waiting long enough or not applying enough oil. It is recommended to wait at least 15-20 minutes before attempting to remove the screw. During this time, you can prepare for the next step by gathering your heat source and protective gear.
If the penetrating oil does not work, there are alternative oils that may be more effective such as vinegar or lemon juice. However, these alternatives may require longer soaking times and multiple applications before showing results. It is important to remember that using excessive force or tools on a rusted screw can cause damage to both the screw and surrounding materials.
Before moving onto step 2, make sure you have all necessary equipment ready such as a heat gun or propane torch and appropriate safety gear including gloves and eye protection. Applying heat helps expand the metal around the screw which can break up any remaining rust and allow for easier removal. However, overheating the area can also cause damage so it is important to use caution and take breaks if needed.
Transitioning into step 2: Applying heat to the screw requires careful attention to detail in order to avoid causing further damage or injury.
Step 2: Applying Heat To The Screw
When it comes to rusted screws, applying heat can be an effective way of loosening them. However, it’s important to do so safely and with the right heat source. One option is using a propane torch, which can provide intense heat quickly. However, this method requires caution as the high heat can damage surrounding materials or cause injury if used improperly.
Another option is using a soldering iron or electric heating tool. These tools provide more controlled and precise heat application, making them ideal for smaller screws or those located in tight spaces. Additionally, they produce less smoke and fumes than propane torches, making them safer to use indoors or in poorly ventilated areas.
No matter which heat source you choose, it’s crucial to follow proper safety precautions when applying heat to a rusted screw. Wear protective gear such as gloves and goggles to protect yourself from sparks and hot metal fragments. Be mindful of flammable materials nearby and keep a fire extinguisher on hand just in case. By taking these steps, you can safely apply heat to the screw and increase your chances of successfully loosening it.
Transition: Now that you’ve applied heat safely with the right tool for your situation, it’s time to move on to attempting to loosen the screw itself.
Step 3: Attempting To Loosen The Screw
Now that you have prepared the rusted screw and loosened it with a hammer and punch, it’s time to try to loosen it further. The next step involves using lubricants and applying force to the screw.
Firstly, apply a lubricant such as WD-40 or PB Blaster to the rusted screw. This will make the screw slippery and easier to turn. Wait for a few minutes to allow the lubricant to penetrate the rust before attempting to turn the screw.
If the screw still won’t budge, try applying force by using a wrench or pliers. Make sure to grip the head of the screw tightly with the appropriate tool and apply pressure in a clockwise direction. Be careful not to strip the head of the screw by applying too much force.
With these techniques, you should be able to successfully remove a rusted screw from your project. If this method still doesn’t work, don’t worry! There are other methods available that may work better for your particular situation. In fact, let’s move on to our next method: using vinegar and baking soda.
Method 2: Using Vinegar And Baking Soda
- To begin the process of removing a rusted screw with vinegar and baking soda, mix two parts of vinegar with one part of baking soda to make a paste.
- Once the paste is made, it should be applied to the screw head and allowed to sit for 15 minutes.
- After the paste has soaked the screw, carefully unscrew the screw with a screwdriver.
- If the screw is too rusted to unscrew, submerge the screw in a bowl of the vinegar and baking soda paste and allow it to soak for 24 hours.
Mix Vinegar And Baking Soda
Mixing vinegar and baking soda for cleaning is a tried-and-tested method that can be used to tackle rusted screws. Vinegar, a natural acid, works wonders in breaking down rust while baking soda acts as an abrasive agent to help loosen the screw. To use this method, start by pouring a generous amount of vinegar onto the rusted screw and allow it to sit for at least 10 minutes. Then sprinkle baking soda on top of the vinegar and let it fizz for several minutes. Finally, use a screwdriver or pliers to try and remove the screw.
Aside from removing rusted screws, there are other household uses for vinegar and baking soda. For instance, mixing them together can create an all-purpose cleaner that is effective at removing stains and grime from various surfaces such as countertops, floors, and even appliances. Additionally, adding some vinegar to your laundry cycle can help remove stubborn stains while also acting as a natural fabric softener.
It’s important to note that although mixing vinegar and baking soda is generally safe for household use, it should not be used on certain surfaces such as marble or granite as it can cause damage. Overall, with its versatility and effectiveness in tackling rusted screws and other cleaning needs around the house, mixing vinegar and baking soda is definitely worth considering.
Soak Screw
Moving on to Method 2: Using Vinegar and Baking Soda, another effective way to remove rusted screws is by soaking them in a solution of vinegar and baking soda. This method works by allowing the acid in the vinegar to break down the rust while the baking soda acts as an abrasive agent to help loosen the screw. Soaking screws in this solution is especially beneficial for stubborn or hard-to-reach screws.
One of the benefits of soaking screws in a vinegar and baking soda solution is that it requires less physical effort compared to using pliers or a screwdriver. Simply submerge the rusted screw into the solution and let it sit for several hours or overnight. The longer you soak it, the more effective it will be in breaking down the rust. Additionally, this method is safer for delicate surfaces compared to using penetrating oil which can damage certain materials.
However, there are precautions that should be taken when using this method. First, make sure that you are using enough vinegar and baking soda to fully submerge the screw as any exposed metal may not be cleaned properly. Second, avoid leaving the screw in the solution for too long as prolonged exposure can cause further damage or corrosion. Lastly, always wear protective gloves and goggles when handling vinegar as it is an acidic substance that can irritate skin and eyes.
In summary, soaking rusted screws in a vinegar and baking soda solution is an effective method that requires minimal physical effort and is safe for delicate surfaces when used correctly with proper precautions. Keep these tips in mind when tackling your next DIY project at home!
Step 1: Soaking The Screw In Vinegar
To effectively remove a rusted screw, one of the DIY rust removal techniques is using vinegar for cleaning. This technique is easy to execute and requires minimal tools. Before starting, make sure to gather all necessary materials such as a container, white vinegar, and a pair of gloves to protect your hands.
To start the process, fill a container with enough white vinegar to cover the entire rusted screw. Place the screw in the container and ensure it is fully submerged in the vinegar. Let it soak for at least an hour or until you notice some bubbling around the affected area. This physical reaction indicates that the acid in vinegar is breaking down rust particles on the screw.
After soaking, remove the screw from the vinegar solution and use a wire brush or steel wool to scrub away any remaining rust residue on its surface. Rinse it thoroughly with water then dry it completely with a clean cloth before proceeding to the next step: applying baking soda to the screw.
Transitioning into our next step, we will now apply baking soda to further loosen up any remaining rust particles on our screwed object.
Step 2: Applying Baking Soda To The Screw
After soaking the rusted screw in vinegar, the next step is to apply baking soda to the affected area. Baking soda is an effective alternative to harsh chemicals that can damage the metal or surrounding surfaces. It works by creating a chemical reaction that breaks down the rust and allows for easier removal of the screw.
When applying baking soda, it’s important to ensure that it covers the entire surface area of the rusted screw. This can be done by gently rubbing or brushing the baking soda onto the affected area with a soft-bristled brush or cloth. The baking soda should be left on for at least 30 minutes before attempting to remove the screw.
Here are some tips for effectively using baking soda for rust removal:
- Use a small amount of water to create a paste with the baking soda for more stubborn rust.
- For larger screws or bolts, wrap a cloth soaked in vinegar around the affected area before applying baking soda.
- Be patient and allow enough time for the chemical reaction to occur before attempting to remove the screw.
If you don’t have access to baking soda, there are other alternatives that can be used instead. Lemon juice and salt can be mixed together to create a paste that works similarly to baking soda. White vinegar can also be used on its own without mixing it with anything else.
Now that we’ve covered how to use vinegar and baking soda for removing rust from a screw, it’s time for step three: attempting to loosen the screw.
Step 3: Attempting To Loosen The Screw
Now that you have prepped the screw and selected the appropriate screwdriver, it is time to attempt to loosen the screw. Using lubricants can be an effective way to break down rust and corrosion on screws. Apply a liberal amount of lubricant to the rusted area of the screw and wait for it to soak in for a few minutes. You may need to repeat this process a few times before the screw becomes loose enough to remove.
It is important to prioritize safety when attempting to remove a rusted screw. Wear protective gear such as gloves and eye goggles to prevent any accidents or injuries from occurring. Additionally, make sure that your work area is stable and secure so that you can work without any disturbances.
Take your time when attempting this method, as applying too much force could cause damage or breakage of the tools being used. If after several attempts, the screw remains stubbornly stuck in place, it may be time to move on to alternative methods for removing rusted screws.
Method 3: Using Alternative Tools
According to a recent study, up to 50% of DIY enthusiasts encounter rusted screws during their projects. While traditional methods like using pliers or a wrench may not work, there are alternative tools and innovative solutions available for removing stubborn rusted screws.
Alternative Tools:
- Impact driver: This tool is specifically designed for removing stubborn screws and bolts. It delivers high torque power that can remove even the most corroded screws.
- Rotary tool: A rotary tool with a cutting wheel attachment can be used to cut through the screw head, making it easier to remove the remaining shank.
- Bolt extractor set: A bolt extractor set includes drill bits and extractors specifically designed for removing stripped or stuck screws.
Innovative Solutions:
- Heat: Applying heat directly to the rusty screw can help expand the metal and loosen its grip on the threads.
- Penetrating oil: Soaking a rusted screw in penetrating oil for several hours can help break down rust and corrosion.
- Vibrating tool: Using a vibrating tool like a reciprocating saw or oscillating multi-tool can help loosen rusted screws by shaking them loose.
By using alternative tools and innovative solutions, you can easily remove even the most stubborn of rusted screws. But before you begin, it’s important to choose the right tool for the job. In the next section, we’ll discuss step 1: choosing the right tool for removing rusted screws.
Step 1: Choosing The Right Tool For The Job
Choosing the right tool for the job is crucial when it comes to removing a rusted screw. The most common tools used for this task are pliers, screwdrivers, and wrenches. However, not all screws are created equal; some may require specialty tools such as impact drivers or torque wrenches. Before embarking on the removal process, be sure to assess the screw’s size, shape, and condition to select the appropriate tool.
Tips and tricks can come in handy when dealing with stubborn rusted screws. One useful tip is to apply heat directly to the screw using a soldering iron or a propane torch. The heat will cause the metal to expand and loosen its grip on the surrounding material. Another trick is to spray penetrating oil around the screw’s head and let it sit for several hours or overnight before attempting removal.
When selecting your tool, keep in mind that you may need multiple tools for different steps of the process. For example, if you’re using pliers to grip the head of a rusty screw but encounter resistance during turning, you may need a wrench or vice grips to provide more leverage. Additionally, having a set of interchangeable bits for your screwdriver can save time by allowing you to switch between flathead and Phillips head bits as needed.
With these tips in mind, you should be well-equipped to choose the right tool(s) for removing your rusted screw effectively. The next step involves applying pressure to loosen its hold on the material surrounding it.
Step 2: Applying Pressure To The Screw
After selecting the right tool for the job, it’s time to apply pressure to the screw in question. However, if the screw is rusted and won’t budge, you’ll need to resort to a few tricks of the trade to loosen it up. Applying lubricants is an effective way to loosen rusted screws. There are many types of lubricants on the market, but WD-40 is a popular choice among DIY enthusiasts.
To apply lubricant, spray it onto the screw and let it sit for a few minutes. This will help break down any corrosion that has formed around the screw. Once you’ve given it some time to work its magic, try turning the screw again with your chosen tool. If this still doesn’t work, you can try using pliers for added leverage.
Using pliers can be particularly helpful when dealing with stripped screws or those that are hard to grip due to their rusted state. Simply clamp down on the head of the screw with a pair of pliers and turn them counterclockwise until the screw comes loose. Be sure not to use too much force when doing this as you could damage the material surrounding the screw.
Now that you’ve applied pressure and tried different techniques such as applying lubricant and using pliers, it’s time for step 3: removing the screw from the material. In order to do this, simply continue turning your chosen tool counterclockwise until the screw comes out completely. If you encounter any resistance along the way, stop and reassess your approach before continuing. With these tips in mind, you should be able to remove even stubbornly rusted screws from any material with ease!
Step 3: Removing The Screw From The Material
When it comes to removing a rusted screw, the process can be quite frustrating and time-consuming. However, with the right tools and techniques, it is possible to make this task much easier. In this section, we will discuss two effective methods for removing rusted screws: using pliers and using a drill.
Using pliers is one of the most common ways to remove rusted screws. To do this, you will need a pair of needle-nose pliers or vise-grips. First, grip the head of the screw tightly with the pliers. Apply steady pressure while turning counterclockwise until the screw begins to loosen. If the screw is still stuck, try tapping it gently with a hammer to loosen any corrosion around it.
Another method for removing rusted screws is using a drill. This method requires a power drill and a drill bit that matches the size of the screw head. Start by making a small pilot hole in the center of the screw head using a small drill bit. Then, switch to a larger bit and continue drilling until you reach the bottom of the screw shaft. Once you have done this, use a flathead screwdriver to turn counterclockwise and remove the screw.
Overall, there are several effective methods for removing rusted screws from materials. Whether you choose to use pliers or a drill, it’s important to take your time and be patient while working on this task. By following these tips and using the right tools for your project needs, you’ll be able to remove even stubborn rusted screws with ease!
Conclusion
Rusted screws can be a frustrating problem for any DIY enthusiast. However, with the right tools and techniques, it is possible to remove them without damaging the surrounding material. Understanding the causes of rust, assessing its severity and preparing the necessary tools and materials are crucial steps in successfully removing a rusted screw.
One method involves using penetrating oil and heat to loosen the screw, while another involves using alternative tools such as pliers or a hammer. It is important to choose the right tool for the job and apply pressure carefully to avoid causing further damage. With patience and persistence, even the most stubborn rusted screw can be removed.
While some may argue that replacing the entire piece of material would be easier than attempting to remove a rusted screw, this approach can be costly and time-consuming. By following these simple steps, anyone can become an expert at removing rusted screws and save themselves both time and money. So next time you encounter a stubborn rusty screw, don’t give up – with these techniques in hand, you’ll be able to tackle any DIY project with confidence!
Image Credits
- “Screwed by rust, not Alan” by Ronald van der Graaf (featured)

