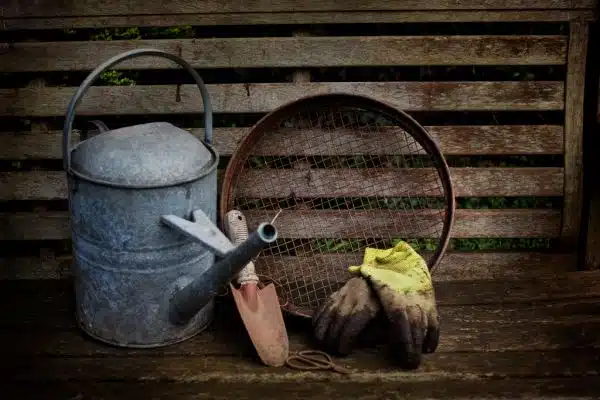
As a garden tools cleaning expert, I have come to understand the importance of keeping gardening equipment clean and well-maintained. Not only does it help to extend the lifespan of the tools, but it also ensures that they function efficiently when used in the garden. Dirty and rusted tools can become a breeding ground for harmful bacteria and fungi, which can then spread to your plants and cause damage. Therefore, regular cleaning of your garden tools should be an important part of your gardening routine.
In this article, I will provide you with all the necessary information on how to clean different types of garden tools effectively. From hand-held pruners to lawn mowers, each tool requires a specific method of cleaning and maintenance. You will learn about the various cleaning solutions that are effective in removing dirt and debris from your tools without causing any damage. Additionally, you will discover some useful tips on how to store your tools properly after cleaning them so that they remain in good condition for years to come. So let’s get started on this journey towards maintaining healthy gardens by properly cleaning our gardening equipment!
The Importance Of Cleaning Your Garden Tools
As a garden tools cleaning expert, I cannot stress enough the importance of regularly cleaning your gardening tools. Not only does it benefit the longevity and performance of your tools, but it also promotes healthy plant growth and prevents the spread of disease. Neglecting to clean your garden tools can result in rust, dirt buildup, and sap accumulation, which can ultimately damage your plants and impede their growth.
There are several techniques for cleaning garden tools that are both effective and easy to implement. One simple method is using soap and water to wash off any dirt or debris from your tools. For tougher grime buildup, you can use steel wool or sandpaper to scrub away at the affected areas. Afterward, make sure to dry off your tools thoroughly to prevent any moisture from promoting rust.
Another technique is using vinegar as a natural cleaner for your garden tools. Simply soak your tools in a mixture of vinegar and water for 30 minutes before wiping them down with a cloth or brush. This helps remove any sap residue left behind by plants while also disinfecting against potential diseases.
When it comes to maintaining a beautiful garden, taking care of your gardening tools should be a top priority. By implementing these cleaning techniques regularly, you’ll not only extend the life of your tools but also promote healthy plant growth in your garden. Now that we understand the benefits and techniques of cleaning our gardening equipment let’s take a closer look at the different types of garden tools that require special attention during the cleaning process.
Different Types Of Garden Tools
As we have discussed in the previous section, cleaning your garden tools is crucial for their longevity and effectiveness. The process of garden tool maintenance requires attention to detail and proper care. Neglecting this important task can result in damage to your tools, rust, and even the spread of plant diseases.
To properly clean your garden tools, you will need specific tool cleaning supplies. These include a bucket of warm water mixed with dish soap or bleach, steel wool or a wire brush for tougher grime, rubbing alcohol to disinfect blades, and oil or wax to prevent rust. After gathering these supplies, begin by wiping down each tool with a damp cloth to remove any surface dirt or debris. Then, use the appropriate cleaner for each tool type before drying them thoroughly and applying oil or wax as needed.
Now let’s focus on one of the most common types of garden tools: hand-held pruners. These are essential for trimming back bushes and shrubs in your garden but can quickly become dull if not cleaned regularly. To clean hand-held pruners, start by removing any excess debris from the blades with a dry cloth or brush. Next, soak them in warm soapy water for 10-15 minutes before using steel wool to scrub off any remaining residue. Finally, rinse with clean water and dry thoroughly before applying oil to prevent rusting. By following these steps, you will keep your hand-held pruners sharp and efficient all season long.
Hand-Held Pruners
Hand-held pruners are essential tools for any gardener. Whether you’re trimming shrubs or snipping flowers, keeping your pruners clean is crucial for their longevity and functionality. The first step in cleaning hand-held pruners is to remove any debris or dirt that may have accumulated on the blades. This can be done using a soft-bristled brush or an old toothbrush.
Once the blades are clean, it’s time to sharpen them. Dull blades can damage plants and make cutting more difficult. To sharpen the blades, use a honing stone or a file to remove any nicks or burrs. Be sure to sharpen both sides of the blade evenly, and test the sharpness by making a few cuts on a piece of paper.
Finally, after cleaning and sharpening your hand-held pruners, it’s important to lubricate the joints. This will prevent rust from forming and keep the tool functioning smoothly. Use a small amount of oil or WD-40 on the pivot point and other moving parts of the pruner. Wipe away any excess oil with a cloth, and store your pruners in a dry place.
Transition into subsequent section about ‘secateurs’: Now that you’ve learned how to clean and maintain your hand-held pruners, let’s move onto another essential gardening tool: secateurs.
Secateurs
- Secateurs require regular sharpening to ensure clean and precise cuts, best achieved by using a sharpening stone.
- Rust prevention is essential for extending the life of secateurs; regular cleaning with a detergent solution and applying a rust protection oil are recommended.
- Cleaning secateurs after each use is necessary to remove any organic material and potential contaminants, best achieved by wiping with a dry cloth.
- It is important to oil the moving parts of secateurs after cleaning, so that the blades are able to move freely when cutting.
- For effective rust prevention, secateurs should be stored in a dry area, preferably with a rust inhibitor oil applied to the blades.
- To ensure longevity of secateurs, regular sharpening, rust prevention and cleaning are essential.
Sharpening
When it comes to maintaining the functionality and longevity of your secateurs, sharpening is a crucial aspect that should not be overlooked. Sharpening techniques vary depending on the type of blade and severity of dullness. For instance, if you notice minor nicks or scratches on your blade, you may use a sharpening stone or diamond file to carefully remove them. However, for more severe bluntness, an electric sharpener may be necessary.
Sharpening tools are essential for adequately maintaining secateurs. A honing oil or lubricant can be used in conjunction with a sharpening stone to ensure the blade is sharpened evenly and without causing damage. Additionally, investing in a pair of quality pruning shears will also save you time and money in the long run as they are less likely to dull quickly.
In conclusion, mastering sharpening techniques and utilizing proper sharpening tools are fundamental aspects of cleaning garden tools such as secateurs. Not only will this help maintain your tool’s performance but it will also increase its lifespan and save you time and money in the long run.
Rust Prevention
Preventing rust is an essential aspect of maintaining the performance and longevity of secateurs. Rust can cause corrosion, which can negatively affect the blade’s sharpness and overall functionality. Therefore, it is crucial to adopt best cleaning methods that will help prevent rust from forming on your secateurs.
One effective method of preventing rust is by wiping down the blades with a clean cloth after each use. This will remove any moisture or debris that may have accumulated on the blade during use. Additionally, storing your secateurs in a dry place will also help prevent rust from forming. Avoid storing them in damp areas as this can accelerate the formation of rust.
Investing in quality secateurs made of materials that are resistant to rust such as stainless steel or high-carbon steel is another effective way to prevent rust. However, even with these materials, it is still important to clean them regularly and follow best cleaning practices to ensure their longevity. By following these simple but effective techniques for preventing rust, you can prolong the life of your secateurs and enjoy their functionality for many years to come.
Cleaning
Secateurs are essential tools for any gardener, and proper maintenance is crucial to ensure their longevity. Cleaning is one of the most crucial aspects of maintaining secateurs, and it involves more than just wiping down the blades after use. Proper cleaning techniques involve removing any dirt or debris that may have accumulated on the blades during use.
Cleaning tools such as secateurs require a gentle approach to avoid damaging their delicate parts. Using a soft bristle brush or toothbrush can help remove stubborn dirt and debris from hard-to-reach areas. Additionally, using warm soapy water can help break down any buildup that may have accumulated on the blade. After cleaning, drying the blades thoroughly is equally important to prevent rust formation.
Maintenance tips for secateurs include regular sharpening to keep them in good working condition. Sharpening should be done every few months or whenever you notice that they are not cutting as well as they used to. A honing stone or sharpening file can be used to sharpen the blades gently. Lastly, oiling your secateurs with machine oil or another type of lubricant can help prevent rust formation and prolong their lifespan.
In conclusion, cleaning and maintaining secateurs are vital steps in ensuring their longevity and functionality. By following these simple maintenance tips, you can keep your tools in excellent working condition for many years to come. Remember always to handle your secateurs with care when cleaning them, and if you’re unsure about anything, consult with an expert before making any adjustments that could damage your tool.
Hedge Trimmers
As the saying goes, “a dull tool is a dangerous tool.” This applies to hedge trimmers as well. Proper maintenance of your hedge trimmer will not only make it safer to use but also extend its lifespan. One essential aspect of maintenance is sharpening the blades.
Sharpening the blades of your hedge trimmer is crucial for efficient and clean cutting. A dull blade will tear through the branches instead of making a clean cut. To sharpen the blades, use a file or sharpening stone and follow the angle of the bevel on each blade. Be sure to wear gloves and eye protection while doing this. It’s recommended to sharpen them at least once every season or more often if you use them frequently.
Preventing rust on your hedge trimmer is another important part of maintenance. Rust can weaken the metal and cause it to break, making it unsafe to use. After each use, wipe down the blades with a dry cloth to remove any moisture or debris that may have accumulated during use. Use a lubricant like WD-40 to prevent rust from forming on the metal surface.
Moving onto shovels and spades, these tools are essential for any gardener or landscaper. However, they can become rusty over time if not properly maintained. To prevent rust from forming on your shovel or spade, clean them thoroughly after each use with soap and water then dry them off completely using a towel or rag. You can also apply a coat of oil or wax to protect against rust when storing them away for extended periods.
Properly maintaining garden tools like hedge trimmers, shovels, and spades is vital for their longevity and safety during use. Remember to sharpen blades regularly and prevent rust from forming by wiping down tools after each use and applying protective coatings when necessary. With proper care, your garden tools will last longer and perform better in all your outdoor projects.
Shovels And Spades
Shovels and spades are essential tools for any gardener, but they can get quite dirty after using them in the garden. Cleaning these tools is crucial to ensure their longevity and prevent rust. Begin by wiping off any dirt or mud from the shovel or spade with a damp cloth. Then, use a stiff-bristled brush to scrub away any remaining debris.
Sharpening tools are an essential part of maintaining shovels and spades. Dull tools can make it harder to dig into the soil, creating more work for you. You can sharpen your shovel or spade using a metal file or a sharpening stone. Be sure to follow the angle of the blade when sharpening and take care not to remove too much metal.
Preventing rust is another vital aspect of maintaining garden tools. After cleaning, dry your shovel or spade thoroughly before storing it away. You can also apply a thin layer of vegetable oil to the blade to help prevent rust from forming. Remember always to store your gardening tools in a dry place.
A well-maintained shovel or spade will last longer and make gardening tasks easier for you. In the next section, we will discuss how to clean rakes and hoes without damaging them as we did with shovels and spades earlier.
Rakes And Hoes
After cleaning your shovels and spades, it’s time to move on to the other essential garden tools: rakes and hoes. These tools are used for different purposes, but they both require proper cleaning to prolong their lifespan. Rakes are used for collecting leaves, debris, and other materials in the garden, while hoes are used for cultivating soil and removing weeds.
The cleaning frequency of rakes and hoes depends on how often you use them. If you’re using them daily or weekly, they should be cleaned after every use. On the other hand, if you only use them occasionally, they can be cleaned once a month or after every use. The best way to clean these tools is by using a mixture of warm water and dish soap. You can also use a wire brush to remove any rust or debris.
When it comes to choosing the best cleaning tools for rakes and hoes, there are several options available. A stiff-bristled brush or a wire brush is effective in cleaning these tools thoroughly. You can also use sandpaper to remove any rough spots or rust from metal parts. Once you’ve finished cleaning these tools, make sure to dry them completely before storing them.
As with all garden tools, proper maintenance is key to ensuring their longevity. By regularly cleaning and maintaining your rakes and hoes, you’ll be able to enjoy their benefits for years to come. In the next section, we’ll discuss how to clean another important tool in your gardening arsenal: lawn mowers.
Lawn Mowers
- Regular maintenance and repair of lawn mowers is essential for ensuring their efficiency and longevity.
- Lawn mowers should be stored in a dry, covered space to protect them from the elements, dirt, and debris.
- To prevent accidental start-ups, store your lawn mower with the spark plug disconnected, and the battery removed if it is electric.
- When performing maintenance and repair tasks, always disconnect the spark plug and remove the battery before beginning work.
- When using a lawn mower, it is important to wear appropriate safety gear and follow the safety instructions provided by the manufacturer.
- Periodic cleaning of your garden tools is necessary to prevent rust, dirt buildup, and other damage that can reduce their performance.
Maintenance And Repair
Garden tools are essential for maintaining a healthy and beautiful lawn. However, they can become dirty and damaged over time. Preventive measures are necessary to keep your garden tools in good condition. Regular cleaning after use can prevent rust formation, which is a common problem in metal tools. Also, it is advisable to store them in a dry place to avoid moisture that can cause rusting.
Common repairs for garden tools include sharpening the blades of cutting tools such as pruning shears and hedge trimmers. Dulling of blades reduces the efficiency of cutting and might even damage the plant when used. Additionally, regular oiling of moving parts such as hinges and joints prevents wear and tear that may cause malfunctioning of the tool. Lastly, replacing broken handles or grips on hand-held tools like shovels or rakes is necessary to maintain their functionality.
To sum up, maintenance and repair are vital aspects of keeping your garden tools efficient and functional. Preventive measures like regular cleaning and proper storage go a long way in prolonging their lifespan. However, when repairs are required, it is essential to address them promptly to avoid further damage or injury during use. By following these simple tips, you can ensure that your garden tools will serve you well for years to come.
Storage
When it comes to lawn mowers, proper storage is crucial in keeping the machine running smoothly. Organizing tools and equipment after use is necessary for preventing rust formation, which can damage the internal components of a lawn mower. It is advisable to store the mower in a dry place like a garage or shed, away from moisture that can cause corrosion.
One effective way of storing a lawn mower is by cleaning it thoroughly before putting it away. This involves removing any grass clippings or debris that may have accumulated during use. Additionally, draining the fuel tank and oil reservoir helps prevent corrosion caused by stale gasoline or oil. After cleaning, cover the mower with a tarp or protective cover to keep dust and debris out.
Lastly, it’s essential to maintain proper alignment when storing your lawn mower. This means storing it upright and not on its side or upside down, as this can cause fuel leakage and engine damage. By following these simple guidelines for storage, you can ensure your lawn mower stays in top condition for years to come!
Safety Practices
When it comes to lawn maintenance, using a lawn mower is an essential tool to keep your grass looking neat and tidy. However, using a lawn mower can be dangerous if proper safety practices are not followed. That’s why it’s important to understand the importance of safety practices when handling lawn mowers.
First and foremost, always wear protective gear when operating a lawn mower. This includes eye protection, hearing protection, and sturdy shoes or boots. Additionally, never remove safety guards or shields from the machine as they are designed to prevent injury.
When cleaning your lawn mower after use, choosing the right cleaning products is crucial for both safety and effectiveness. Avoid harsh chemicals that can damage the internal components of the machine or harm the environment. Instead, opt for gentle cleaning solutions like soap and water or specialized cleaners designed specifically for lawn mowers.
By implementing proper safety practices and choosing appropriate cleaning products when maintaining your lawn mower, you can ensure that both you and your machine stay safe and in top condition for years to come. Remember to always prioritize safety in all aspects of lawn care!
Pressure Washers
As garden tools owners, we all know how daunting it can be to clean them. It requires a lot of elbow grease and time, especially when you have a variety of tools to clean. This is where pressure washers come in handy. They are a fantastic tool for cleaning garden tools, as they remove dirt and grime with ease.
One of the benefits of using pressure washers for cleaning garden tools is that they save time. Instead of spending hours scrubbing your tools by hand, you can quickly blast away dirt and debris with a high-pressure stream of water. Additionally, pressure washers are incredibly effective at removing even the toughest stains from your garden tools.
However, there are some drawbacks to using pressure washers for cleaning garden tools. Firstly, they can damage delicate parts of your equipment if used incorrectly. Secondly, they require electricity or gas to operate, which adds an extra cost to your gardening budget. Fortunately, there are alternatives to pressure washers that you can use to clean your garden tools effectively.
In conclusion, while pressure washers are an excellent tool for cleaning garden tools due to their effectiveness and time-saving capabilities; they also have their drawbacks such as the potential for damaging delicate equipment parts and additional operating costs. However, there are alternatives available that may suit your needs better. In the next section, we will discuss different cleaning solutions for garden tools that you can use instead of pressure washers.
Cleaning Solutions For Garden Tools
After pressure washing your garden tools, it’s important to focus on the smaller details to ensure that they’re thoroughly clean. While many cleaning solutions exist in the market, you can also create effective homemade cleaners using natural ingredients. These methods are not only cost-effective but also eco-friendly, making them a great option for anyone looking to reduce their carbon footprint.
One of the most popular natural cleaning methods is using vinegar and water. Mix equal parts of white vinegar and water in a spray bottle and use it to clean your garden tools thoroughly. Vinegar is an effective disinfectant that can kill bacteria and mold, making it ideal for cleaning garden tools that have been exposed to soil and plants.
Another effective natural cleaning method is using baking soda. Mix baking soda with water to create a paste and apply it on your garden tools. Leave it on for 10-15 minutes before rinsing it off with water. Baking soda is excellent in removing stubborn grime and rust from metal surfaces, which makes it ideal for cleaning garden tools such as shovels and pruning shears.
Transition: Now that we’ve explored some natural cleaning methods for garden tools, let’s dive into some DIY cleaning solutions that you can easily make at home.
Diy Cleaning Solutions
- Homemade cleaners can be a cost-effective and environmentally-friendly option for cleaning garden tools.
- Natural ingredients such as vinegar, baking soda, and lemon can be used to create effective cleaning solutions for garden tools.
- The type of cleaner and the amount of ingredients used will depend on the type and size of garden tool being cleaned.
- It is important to clean garden tools regularly to prevent rusting and other damage that can occur over time.
Homemade Cleaners
As a garden tools cleaning expert, it is essential to know how to clean your tools effectively. One of the best ways to do this is by using homemade cleaners. Not only are they eco-friendly alternatives to harsh chemicals, but they are also affordable and easy to make.
One of the most popular homemade cleaners for garden tools is vinegar-based solutions. Vinegar is a natural disinfectant that can help remove dirt and grime from your tools. To create a vinegar-based solution, mix one part white vinegar with two parts water in a spray bottle. You can also add a few drops of essential oils such as lavender or lemon for a refreshing scent.
Another great homemade cleaner for garden tools is baking soda. Baking soda can help remove rust and stubborn stains from your tools. Mix equal parts baking soda and water to create a paste, then apply it onto the affected areas of your garden tool with a scrub brush. Let it sit for 10-15 minutes before rinsing off with water.
In conclusion, using homemade cleaners such as vinegar-based solutions and baking soda paste are effective ways to clean your garden tools without harming the environment or breaking the bank. So next time you need to clean your pruning shears or shovel, try out these eco-friendly alternatives instead of reaching for harsh chemicals. Your garden will thank you!
Natural Ingredients
When it comes to cleaning garden tools, DIY cleaning recipes using natural ingredients are becoming increasingly popular for those seeking eco-friendly options. Using all-natural ingredients not only helps protect the environment but also ensures that no harmful chemicals come in contact with your skin or plants. It’s important to note that when making homemade cleaning solutions, it’s crucial to follow proper measurements and use only safe ingredients.
One of the best natural ingredients for cleaning garden tools is citrus fruits. Lemons, oranges, and grapefruits have high levels of acid that can help remove dirt and grime from your tools. To create a citrus-based cleaner, simply mix the juice of one or two lemons with water in a spray bottle. You can also add a few drops of essential oils such as tea tree oil for added disinfecting properties.
Another great natural ingredient for cleaning garden tools is hydrogen peroxide. This chemical compound has strong antibacterial properties that can help disinfect your tools and prevent the spread of plant diseases. To make a hydrogen peroxide-based cleaner, mix equal parts hydrogen peroxide and water in a spray bottle. You can also add a few drops of essential oils such as eucalyptus or peppermint for an invigorating scent. By incorporating these natural ingredients in your DIY cleaning solutions, you’ll be able to maintain clean garden tools without harming the environment or spending too much money on expensive commercial cleaners.
Commercial Cleaning Solutions
Using commercial cleaning solutions is an effective way to clean garden tools. When choosing a commercial solution, it is important to consider eco-friendly alternatives. Many traditional cleaning solutions contain harsh chemicals that can be harmful to the environment and may pose a risk to your health. Opting for eco-friendly solutions will not only protect the environment but also ensure safer and healthier usage.
When using commercial cleaning solutions, it is best practice to follow the manufacturer’s instructions on how to use and dilute the product. This will help ensure that you are using the product correctly and effectively. Additionally, it is important to wear protective gear such as gloves and goggles when handling these products, as they can be corrosive or irritants.
Some eco-friendly alternatives include vinegar, baking soda, and hydrogen peroxide. These products are readily available in most households and are safe to use on garden tools while also being environmentally friendly. Mixing equal parts of vinegar and water or baking soda with water can create an effective cleaning solution for removing dirt and grime from garden tools. Hydrogen peroxide can be used as a disinfectant by pouring it directly onto the tool’s surface.
Moving forward, implementing eco-friendly alternatives when cleaning garden tools should become a best practice for all gardening enthusiasts. Not only does this reduce harm on the environment, but it also promotes safer usage of these tools in the long run. In the subsequent section, we will discuss some tips for storing your garden tools properly so that they remain in good condition for years to come.
Tips For Storing Your Garden Tools
Once you have thoroughly cleaned your garden tools and allowed them to dry, it is important to store them properly. Storing your tools improperly can lead to rusting or damage, rendering them unusable. One important factor in proper storage is where you keep your tools. Ideally, they should be stored in a cool, dry place that is protected from the elements.
It is also important to consider what other items you are storing with your garden tools. Storing chemicals such as fertilizers or pesticides with your tools can cause damage over time. These chemicals can corrode metal and cause rusting, which can shorten the lifespan of your tools. It’s best to store these items separately in a safe location away from your garden tools.
Another key consideration for proper storage of garden tools is rust prevention. Rust can compromise the integrity of metal tools and cause them to break down over time. To prevent rusting, consider using a rust-prevention spray or coating on metal parts before storing them away for long periods of time. This will help protect against moisture and humidity that can cause rust to form.
Moving forward, proper storage techniques are essential for maintaining the longevity of your garden tools. By taking care when storing chemicals, preventing rust formation, and keeping your tools out of harm’s way, you’ll ensure that they remain in tip-top shape for years to come. In the next section, we’ll explore some additional tips for proper tool storage that will help keep your gardening equipment in excellent condition.
Proper Storage Techniques
Proper Storage Techniques:
Cleaning your garden tools is an essential task to maintain their longevity and keep them in good condition. However, proper storage techniques are equally important to prevent rust and corrosion. Storing your garden tools correctly not only ensures their durability but also saves you time and money.
The first step towards proper storage of garden tools is to ensure they are dry before storing them. Any moisture left on the tool can lead to rust or corrosion over time. Use a clean cloth or towel to dry the tool thoroughly before placing it in storage. Additionally, it is vital to store each tool separately to avoid direct contact with other metal objects that may cause scratches or damage.
Another technique for proper storage of garden tools involves using oil or lubricant on the metal parts of the tool. Applying a thin coat of oil or lubricant onto the metal surfaces can help prevent rust and corrosion from occurring. This technique is especially useful for long-term storage situations such as over the winter months when tools may not be used regularly.
Proper storage techniques are crucial for maintaining your garden tools’ longevity and functionality while preventing rust and corrosion. By ensuring that your tools are completely dry before storing them, storing each tool separately, and applying oil or lubricant to metal surfaces, you can extend their lifespan significantly. In the subsequent section, we will discuss common mistakes to avoid when cleaning and storing garden tools.
Common Mistakes To Avoid
In the previous section, we discussed the importance of proper storage techniques for garden tools. Now, let us move to the next crucial aspect of garden tool maintenance – cleaning. Garden tools are exposed to dirt, debris, and moisture, which can lead to rusting and wear and tear. Therefore, it is essential to clean them regularly to maintain their longevity.
One common mistake that people make while cleaning garden tools is rushing through the process. Cleaning garden tools require patience and attention to detail. Rushing through the process can result in missing spots that may harbor dirt or debris leading to rust or damage over time. Another common mistake is using harsh chemicals that can corrode metal surfaces or erode wooden handles. It is best to avoid harsh chemicals and opt for natural cleaning agents instead.
After cleaning your garden tools, it is crucial to dry them thoroughly before storing them away. Moisture left on the surface of your tools can lead to rusting and damage over time. Use a clean cloth or towel to wipe off any excess moisture from your garden tools after washing them. Additionally, sharpening your garden tools regularly will ensure that they perform at their best when you need them in use.
By avoiding common mistakes such as rushing through the cleaning process and using harsh chemicals, you can keep your garden tools in excellent condition for years to come. Remember always to dry your tools thoroughly before putting them away and sharpen them regularly for optimum performance. With these additional tips in mind, you are well on your way towards maintaining your garden tool collection like a pro!
Conclusion
The proper maintenance of garden tools is crucial to their longevity and effectiveness. Neglecting to clean your tools after use can lead to rust, corrosion, and dull blades. It is essential to understand the various types of garden tools and how they should be cleaned.
Hand-held pruners and secateurs should be wiped down with a damp cloth after each use to remove any debris or sap. Hedge trimmers require a more thorough cleaning, as they tend to accumulate more dirt and debris. A wire brush can be used to remove any stubborn residue, followed by wiping down the blades with a cloth.
Commercial cleaning solutions can also be used for tougher jobs. Soaking tools in a solution of water and dish soap can help break down any grime or dirt buildup. Additionally, oiling the blades of your garden tools will help prevent rust and keep them in good condition.
Proper storage techniques are also critical in maintaining the lifespan of your garden tools. Storing them in a dry, cool place out of direct sunlight is ideal. Avoid storing them on the ground or in damp areas where they can become exposed to moisture.
In conclusion, keeping your garden tools clean is essential for their longevity and effectiveness. Understanding the different types of garden tools and how to clean them properly will ensure that they remain in good condition for years to come. With regular cleaning and proper storage techniques, you can maintain the quality of your gardening equipment and enjoy successful gardening for many seasons.
Image Credits
- “Gardening tools” by horrigans (featured)

