Gardening enthusiasts often find that watering their plants is an essential but time-consuming task. Soaker hoses are a popular solution to this problem as they can water plants directly at the root zone, saving time and reducing water waste. However, purchasing soaker hoses can be expensive, and many gardeners may already have old garden hoses lying around. In this article, we will explore how to repurpose an old garden hose into a DIY soaker hose that will keep your plants hydrated without breaking the bank.
By transforming your old garden hose into a soaker hose, you can create an efficient irrigation system for your garden. Not only will this save you money in the long run, but it’s also an eco-friendly option as it reduces water usage. In this article, we will provide step-by-step instructions on how to make a soaker hose out of an old garden hose and offer tips on how to use it effectively in your garden. With just a few simple tools and some basic knowledge, you can give new life to your old garden hose while keeping your plants healthy and happy.
The Benefits Of Using A Diy Soaker Hose
Soaker hoses have become increasingly popular among gardeners due to their efficiency in watering plants. One of the main benefits of using a DIY soaker hose is its cost-effectiveness. By converting an old garden hose into a soaker hose, you can save money on purchasing new equipment while still achieving the same results.
In addition to being cost-effective, a DIY soaker hose is also sustainable and environmentally friendly. Creating your own soaker hose from an old garden hose reduces waste and helps keep materials out of landfills. Additionally, using a soaker hose instead of traditional sprinklers can conserve water by delivering it directly to the roots of plants, reducing evaporation and runoff.
Overall, making your own soaker hose not only saves you money but also has positive environmental impacts. By reusing materials and conserving water, you can enjoy a beautiful garden while minimizing your carbon footprint.
To prepare your old garden hose for conversion into a soaker hose, there are several steps you’ll need to follow.
Preparing Your Old Garden Hose For Conversion
According to a recent survey, more than 75% of gardeners prefer using soaker hoses for their irrigation needs. The simplicity and efficiency of this method make it an ideal choice for anyone looking to reduce water waste while keeping their garden healthy and thriving. However, purchasing new soaker hoses can be expensive, which is why many garden enthusiasts opt to make one out of an old garden hose.
Before converting your old garden hose into a soaker hose, you must thoroughly clean it to ensure that no debris or contaminants are present. Cleaning techniques vary depending on the material of the hose, but most methods involve flushing the hose with hot water and soap or vinegar solution. Once the cleaning process is complete, you should rinse the hose several times to remove any remaining residue.
It’s essential to take safety precautions when making a soaker hose from an old garden hose. Be sure to wear gloves and protective eyewear during the conversion process. Additionally, use sharp scissors or a utility knife to cut the holes in the hose evenly, taking care not to damage the inner tube or outer shell. With proper preparation and attention paid to safety measures, you can create a reliable and long-lasting soaker hose that will keep your plants hydrated without breaking the bank.
When creating a DIY soaker hose from an old garden hose, choosing the right tools for the job is crucial. A pair of sharp scissors or utility knife will allow you to cut precise holes in your garden hose with ease. You may also want to invest in a flow control valve that attaches between your spigot and soaker hose inlet; this will enable you to regulate water pressure more efficiently and prevent wastage due to excessive flow rate. By selecting appropriate tools for your project, you can streamline the conversion process and create a high-quality soaker hose that will serve you well for years to come.
Choosing The Right Tools For The Job
Tool selection is crucial when making a soaker hose out of an old garden hose. You will need to gather the necessary tools before starting the project. Some essential tools include a utility knife or scissors, a drill with a small drill bit, and pliers. A pair of gloves is also recommended to ensure your safety during the process.
When selecting your tools, make sure they are in good working condition and appropriate for the job. Ensure that your utility knife or scissors are sharp enough to cut through the garden hose easily. Your pliers should be able to grip and twist the fittings tightly onto the hose without causing any damage. Additionally, it is crucial to follow all safety precautions when handling tools to prevent any accidents or injuries from occurring.
Before you begin your project, it is important to take some safety precautions. Make sure you wear protective gloves while cutting and drilling through the garden hose to avoid any potential injuries that may arise from sharp edges. Also, ensure there are no children around as they may accidentally get hurt during the process. By taking these necessary precautions, you can safely create your soaker hose without any issues.
Now that you have gathered all necessary tools and taken safety precautions, you can proceed with measuring and marking your hose for cutting.
Measuring And Marking Your Hose
Choosing the right tools for the job is essential in making a soaker hose out of an old garden hose. This project requires specific tools, such as a drill, measuring tape, and scissors. Using the appropriate tools will ensure that your project is successful and that you achieve the desired results.
When it comes to measuring accuracy, it is crucial to measure twice and cut once. Measuring your hose accurately will determine how long your soaker hose will be and how many holes you need to drill for optimal water flow. Moreover, Hose length considerations are essential when deciding where to place your soaker hose and how much water pressure you need to maintain consistent watering.
The length of the hose determines how many holes you should drill. If you decide on a shorter soaker hose, fewer holes are needed than if you choose a longer one. It’s important to note that drilling too many holes could cause water pressure issues, resulting in uneven watering or no watering at all. Therefore, it’s essential to follow these instructions with precision and care to ensure optimal water flow through your soaker hose.
With accurate measurements in hand, it’s time to move onto drilling holes for optimal water flow. Now that we have taken into account the length of our garden hose and where we plan on placing our new soaker system, let’s proceed with drilling precise holes throughout its length.
Drilling Holes For Optimal Water Flow
Drilling holes in the old garden hose is an essential step to create a soaker hose. When it comes to drilling techniques, it’s essential to be precise and consistent. The size of the holes determines the water flow rate, and larger holes will result in more water being released at a faster rate. Therefore, it’s necessary to use a drill bit that creates small-sized holes for optimal water flow.
Water conservation tips should also be kept in mind when drilling holes for your soaker hose. It’s best to drill the holes on one side of the hose only as this ensures that all the water flows into your plants, minimizing wastage. Additionally, drilling holes too close together can cause uneven watering and lead to pooling of water around your plants’ roots.
To ensure proper hole spacing, use a ruler or tape measure and mark where you want each hole. A table can also help you keep track of your measurements and maintain consistency. Below is an example of how to space out your holes for proper water distribution:
| Hole Number | Distance between Holes (inches) |
|---|---|
| 1 | 6 |
| 2 | 12 |
| 3 | 18 |
| 4 | 24 |
| 5 | 30 |
Drilling holes for optimal water flow requires precision and consideration for water conservation tips. Remember to use small-sized drill bits to create evenly spaced holes on one side of the hose only. By following these steps, you’ll have a functional soaker hose that delivers maximum benefits without wasting any resources. In the next section, we’ll discuss how to create a connector for your newly made garden soaker hose.
Creating A Connector For Your Hose
Imagine your garden hose as a lifeline that connects you to your plants, delivering the essential nutrients they need to flourish. But what happens when that lifeline is damaged or no longer fits your needs? Don’t fret, for there is a solution – create a connector for your hose! With this simple DIY project, you can transform an old garden hose into a soaker hose and watch as your plants thrive.
When it comes to creating a connector, there are numerous designs to choose from. One popular option is the compression fitting, which works by squeezing the hose between two pieces of metal or plastic. Another alternative is the barbed fitting, which uses small teeth to grip onto the inside of the hose. No matter which design you choose, make sure it fits snugly onto your garden hose and doesn’t leak water.
If you don’t have an old garden hose lying around or want to explore alternative materials, fear not – there are plenty of options available. PVC pipes and flexible tubing are both great alternatives that can be easily found at hardware stores. Just make sure to choose a material that is durable and won’t kink or break under pressure. With these DIY connector designs and alternative materials in mind, you’re ready to take the next step in creating your soaker hose.
Attaching Your Hose To Your Connector
- Preparing a soaker hose requires the assembly of a few materials, such as an old garden hose, a connector and a water source.
- Connecting the hose to the connector requires the end of the hose to be inserted into the connector and then secured with a hose clamp.
- To ensure secure connection, the hose should be firmly inserted into the connector and the clamp should be tightened securely.
- When the hose and connector are properly connected, a water source can be connected to the connector.
- To test the connection, the water source should be turned on at a low pressure and the connection should be checked for any leaks.
- If the connection is secure and there are no leaks, the pressure can be increased to the desired level for the soaker hose.
Assembling Materials
Assembling materials for attaching your hose to your connector is a critical step in making a soaker hose out of an old garden hose. Before anything else, you need to have the necessary upcycling tips and sustainability practices at hand. Firstly, prepare the garden hose by cutting it into the desired length and removing any fittings or attachments. It is essential to ensure that the cut ends are smooth and even.
Next, gather all the materials needed for this task, including a connector and clamps. Consider using metal clamps as they can withstand high pressure without breaking or getting damaged easily. You may also want to use plastic ones for their durability and affordability. Additionally, check that the connector fits well with your garden hose’s diameter before proceeding.
Finally, attach the connector to one end of your garden hose by sliding it over the cut end until it reaches the desired position. Secure it in place using clamps on both sides of the connector firmly. Repeat these steps on the other side of your garden hose to complete assembling materials. With these simple steps, you can make a soaker hose out of an old garden hose while minimizing waste and promoting sustainable practices in gardening.
In conclusion, assembling materials for attaching your hose to your connector requires careful preparation and attention to detail. By upcycling unused garden hoses instead of throwing them away, you are not only saving money but also contributing positively towards environmental conservation efforts. These tips will help you achieve an efficient soaker hose setup that will keep your plants hydrated while saving water in the long run.
Connecting Hose
To effectively water your garden, connecting hoses is a crucial step in the process. There are various alternative methods for connecting hoses that you can use depending on what works best for you. One option is to use a soaker hose system that consists of several hoses connected together to create an efficient and even watering system. This method has several benefits, including reducing water waste and saving time by watering multiple areas at once.
When connecting hoses, it is essential to ensure that all connections are snug and secure to prevent leaks and wastage. You can achieve this by using metal clamps or plastic ones, depending on your preference. Additionally, it would be best if you considered using connectors with shut-off valves which allow you to control the flow of water through each hose independently. This feature comes in handy when dealing with different plant varieties or when adjusting watering schedules.
Finally, another alternative method for connecting hoses is by using quick-connect fittings that eliminate the need for complicated assemblies. These fittings allow easy attachment and detachment of hoses without twisting or tangling them up. Using quick-connect fittings makes it possible to switch between different types of nozzles or sprinklers with ease, making garden maintenance more straightforward and enjoyable. By following these tips on connecting hoses correctly, you can create an efficient watering system that will keep your plants healthy while conserving water resources.
Securing Connector
Now that you have connected your hoses, it is essential to secure the connectors to prevent leaks and water wastage. Securing the connector involves using sealants or other means to keep the hose in place and ensure a tight connection. When using sealant, make sure to apply it evenly around the connector’s threads to create a tight seal that will not loosen over time. Additionally, you can use Teflon tape, which acts as a lubricant and prevents water from leaking through gaps between the connector and hose.
There are various types of connectors available for attaching hoses, including compression fittings, push-fit connectors, barbed fittings, and threaded connectors. Compression fittings require a wrench or pliers to tighten the nut around the hose’s outside diameter. On the other hand, push-fit connectors snap onto the hose without tools and provide a secure fit due to their locking mechanism. Barbed fittings have ridges that grip onto the inside of the hose when inserted, while threaded connectors screw onto both ends of two hoses.
When selecting a connector type, consider factors such as durability, compatibility with your garden hose size and material, ease of installation/removal, and resistance to corrosion or rusting. Furthermore, choose connectors with built-in shut-off valves for more control over water flow and pressure regulation. By securing your connectors correctly and choosing suitable types of connectors for your garden needs, you can ensure an efficient watering system that conserves water resources while keeping your plants healthy.
Testing Your Soaker Hose For Leaks
Now that you have attached your old garden hose to the connector, it’s time to test it for leaks. Common leaks can be found at the connection points and along the length of the hose. Troubleshooting tips include tightening the connections or replacing any damaged parts with new ones.
Water conservation is an important consideration when using a soaker hose. By delivering water directly to plant roots, soaker hoses minimize evaporation and run-off compared to traditional sprinklers. This not only saves water but also reduces your environmental impact by conserving this precious resource.
Adjusting water pressure for maximum efficiency is essential when using a soaker hose. Too much pressure can cause the hose to burst or create uneven watering patterns, while too little pressure may not effectively soak the soil around your plants. In the next section, we will discuss how to adjust your water pressure for optimal performance of your homemade soaker hose.
| Common Leaks | Troubleshooting Tips |
|---|---|
| Connection points | Tighten connections |
| Along length of hose | Replace damaged parts |
| Check for kinks in hose |
Table 1: Troubleshooting common leaks in a homemade soaker hose.
Adjusting Water Pressure For Maximum Efficiency
As the old adage goes, “water is the lifeblood of plants.” However, it’s not just about how much water your plants get. It’s also important to ensure that they are receiving optimized water distribution. This is where adjusting water pressure comes in.
Adjusting water pressure is crucial in maximizing the efficiency of your soaker hose. Too much pressure can cause the hose to spray water instead of distributing it evenly into the soil. On the other hand, too little pressure may result in insufficient watering and dry spots in your garden. To adjust water pressure, you can use a flow meter or a simple regulator valve that attaches to your spigot.
Here are some tips for optimizing water distribution with adjusted water pressure:
- Before connecting your soaker hose, flush out any dirt or debris from the hose first.
- Test run your soaker hose before burying it to check for potential leaks or uneven watering.
- Position your soaker hose parallel to the plant rows and at a distance that allows for even coverage without overlapping.
By adjusting water pressure and optimizing water distribution through these tips, you can ensure that every plant in your garden receives an adequate amount of moisture necessary for growth and survival. In the next section, we will discuss placing your soaker hose in your garden.
Placing Your Soaker Hose In Your Garden
Now that you have created your soaker hose, it’s time to place it in your garden. The first thing to consider is the types of plants you have in your garden. Certain plants require more water than others, so you will need to adjust the placement of your hose accordingly. For example, vegetables such as lettuce and spinach require consistent moisture, so you may want to place the soaker hose closer to these plants.
The next thing to consider is your watering schedule. Soaker hoses are designed to provide slow, consistent watering over a longer period of time. This means that you can water less frequently but for longer periods of time. Keep this in mind when deciding how often to turn on your hose. It’s important not to overwater or underwater your plants, as both can lead to problems such as root rot or dehydration.
Proper placement and watering schedule are key factors in ensuring the success of your garden. In the next section, we will discuss how covering your soaker hose with mulch can further improve its performance and protect it from damage.
Covering Your Soaker Hose With Mulch
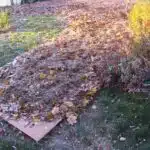
While it may seem counterintuitive to cover your soaker hose with mulch, doing so can actually improve its effectiveness. Mulching provides several benefits that can help your plants thrive. One of the primary benefits is moisture retention. By creating a layer of mulch around your plants, you can reduce evaporation and keep the soil moist for longer periods of time. This is particularly useful in hot, dry climates where water conservation is important.
There are several different types of mulch available, each with its own advantages and disadvantages. Organic mulches like wood chips, straw, and leaves break down over time, adding nutrients to the soil as they decompose. Inorganic mulches like gravel and rocks don’t break down but can help control weeds and erosion. When choosing a mulch type, consider factors such as cost, availability, and aesthetics.
To apply mulch around your plants, start by clearing any debris or weeds from the area. Then spread a layer of mulch about 2-3 inches thick around the base of your plants, taking care not to cover the stems or leaves. Avoid piling up the mulch too high against the plant’s stem as this can lead to rotting or disease problems.
By following these simple mulching techniques, you’ll be able to provide a healthy growing environment for your plants while also conserving water with your soaker hose. In our next section, we’ll discuss how to use your soaker hose for optimal watering results.
Watering Your Plants With Your Soaker Hose
Once you have your homemade soaker hose set up, it’s important to use it efficiently to ensure water conservation and promote plant health. Here are some tips for watering your plants with your soaker hose:
Adjust the water pressure: Soaker hoses work best at low pressure, around 10 PSI. If the pressure is too high, the water will come out too fast and potentially damage your plants or wash away soil. Use a pressure regulator to adjust the flow.
Time it right: Watering in the early morning or late evening is best because there is less evaporation due to cooler temperatures. Avoid watering during peak sun hours when the heat can cause water loss.
Use mulch: Mulching around your plants helps retain moisture in the soil, which means you can use less water and still keep your plants healthy.
Rotate your crops: By rotating where you plant each year, you can give different areas of your garden a break from constant watering and allow them to naturally replenish their moisture levels.
By following these tips, not only will you save on water usage but also help improve plant health by providing consistent, deep watering that reaches all parts of their root systems. Monitoring soil moisture levels is another crucial aspect of maintaining a healthy garden.
Monitoring Your Soil Moisture Levels
Importance of soil moisture cannot be overstated when it comes to gardening. Plants need water to grow, but too much or too little can cause harm. It is essential to maintain the proper moisture level in your garden, and that’s where monitoring soil moisture levels comes in handy.
Techniques for measuring moisture levels include using a soil moisture meter, digging a hole and feeling the soil, or observing plant behavior. A soil moisture meter is an inexpensive tool that measures the amount of water in the soil. Digging a hole and feeling the soil is an old-fashioned yet effective method to determine if your plants need watering. You can also observe your plants’ behavior – wilted leaves signify that they may need watering.
To ensure healthy growth, it’s necessary to monitor your garden’s moisture level regularly. Using a simple table can help you track how often you should water your plants based on their needs and the weather conditions. The table below shows some general guidelines for watering frequency based on various factors such as plant type, sunlight exposure, and temperature.
| Plant Type | Sunlight Exposure | Temperature | Watering Frequency |
|---|---|---|---|
| Succulents | Full sun | High | Once every 2 weeks |
| Vegetables | Partial shade | Moderate | Twice a week |
| Flowers | Full sun | Low | Once every 3 days |
Now that you know how crucial it is to monitor your garden’s moisture levels let’s move onto maintaining your soaker hose. By following some basic tips like cleaning out debris from time to time or checking for leaks periodically, you can extend the life of your soaker hose and ensure that it works efficiently for years to come.
Maintaining Your Soaker Hose
As gardeners, we understand the importance of monitoring soil moisture levels to maintain healthy vegetation. However, watering plants manually can be time-consuming and labor-intensive. That’s why a soaker hose is an excellent solution for consistent and efficient watering. Plus, making one out of an old garden hose is a cost-effective and environmentally friendly option.
To start, cut the garden hose into the desired length and seal one end with a plug or cap. Using a drill bit or nail, poke holes along the length of the hose every few inches on each side. These holes will allow water to seep through slowly and evenly, providing your plants with a steady supply of moisture.
Troubleshooting leaks can be frustrating but fixable. Check the connections and tighten if necessary or replace any damaged portions of the hose. By properly maintaining your soaker hose, you can extend its lifespan and continue using it for years to come. A soaker hose is an excellent investment for any gardener who wants to conserve water while keeping their plants healthy and happy.
Recycling and reusing your soaker hose is another way to reduce waste in our environment. When it’s time to replace your old soaker hose, don’t throw it away just yet! Cut off any damaged sections that cannot be repaired and use the remaining good portions as connectors or extensions for other hoses in your garden. Alternatively, you can repurpose them into creative DIY projects like a wreath or outdoor rug. The possibilities are endless when it comes to recycling and reusing materials in our gardens!
Recycling And Reusing Your Soaker Hose
As gardeners, it’s important to find creative applications for old materials that can still be of use. One such item is your old garden hose, which can be repurposed into a soaker hose with a few simple steps. Not only does this save you money, but it also reduces the environmental impact of throwing away perfectly good materials.
To recycle your old garden hose into a soaker hose, start by cutting the hose to the desired length. This will depend on the area you want to water and the location of your plants. Then, using a drill or hammer and nail, create holes along the length of the hose. These holes should be evenly spaced and sized small enough to prevent excessive water loss.
Once your soaker hose is complete, there are numerous ways to utilize it in your garden. You can bury it under mulch or soil to deliver water directly to plant roots, or lay it on top of soil for more surface-level watering. By recycling your old garden hose into a soaker hose, you not only reduce waste but also provide efficient irrigation for your plants while saving money on costly watering systems.
- Use a timer: To conserve water and ensure efficient use of your new soaker hose, consider investing in an automatic timer that controls when and how long it runs.
- Customize your watering: With a homemade soaker hose, you can easily adjust hole size and spacing based on the needs of different plants in various areas of your garden.
- Connect multiple hoses: If you have an expansive garden area or several different planting beds, connect multiple pieces of recycled soaker hoses together for comprehensive irrigation coverage.
By reusing materials in innovative ways like creating a homemade soaker hose from an old garden hose, we can all do our part as responsible community members who value sustainability and resourcefulness in gardening practices.
Conclusion
Soaker hoses are a great way to water your plants without wasting precious resources. By repurposing an old garden hose, you can create a cost-effective solution that delivers water directly to the roots of your plants. However, it is important to follow the proper steps in order to ensure optimal performance and longevity.
To begin, prepare your old garden hose by cleaning it thoroughly and cutting off any damaged or worn sections. Then, choose the right tools for the job and measure and mark your hose accordingly. Drill small holes along the length of the hose, spaced evenly apart for optimal water flow.
Once you have installed your soaker hose, it is important to monitor soil moisture levels and maintain the hose regularly. With proper care, your DIY soaker hose can last for years and help reduce water waste while keeping your plants healthy. Remember, sustainability starts in our own backyards – every little bit counts towards creating a greener future.
As gardening experts, we understand the importance of conserving resources while maintaining beautiful landscapes. By utilizing simple solutions like DIY soaker hoses made from repurposed materials, we can make a positive impact on both our environment and our communities. So next time you find yourself with an old garden hose lying around, don’t throw it away – transform it into a sustainable watering system that benefits both you and your plants!
Image Credits
- “new soaker hose layout” by saeru (featured)

