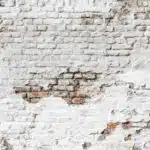
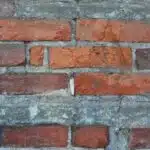
Brick is a popular material used in construction due to its durability and classic appearance. However, over time, brick can become discolored or painted with unsightly colors. Removing paint from brick can be a challenging task, especially if the paint has been on the surface for several years. Fortunately, there is a solution to this problem: using paint stripper.
As a paint stripper and restoration expert, I have helped countless clients remove paint from brick surfaces with great success. In this article, I will provide you with step-by-step instructions on how to effectively remove paint from brick using paint stripper. By following these instructions, you will be able to restore your brick surface back to its original beauty and enhance the aesthetic appeal of your property.
Assessing The Painted Brick Surface
The sight of a painted brick surface often elicits mixed emotions. On one hand, the vibrant colors bring life to an otherwise bland surface. On the other hand, it can be a nightmare for many homeowners who want to restore the natural beauty of their bricks. Before attempting to remove paint from brick with a paint stripper, it is crucial to assess the painted surface thoroughly.
Common mistakes in removing paint from brick surfaces include using the wrong type of paint stripper, not allowing enough time for the stripper to work, and failing to take proper safety precautions. As an expert in paint stripping and restoration, I always advise my clients to follow all safety guidelines strictly. This includes wearing protective clothing such as gloves and goggles, working in well-ventilated areas, and avoiding contact with skin or eyes.
Determining the type of paint on the brick surface is another important step before starting any restoration work. Testing for lead also comes under this step since lead-based paints were widely used before 1978. A simple test kit available at most hardware stores can help determine if your brick has lead-based paint. Always remember that taking these precautions ensures a safe and successful restoration of your painted brick surface. In order to proceed further, choosing the right paint stripper is crucial.
Choosing The Right Paint Stripper
When it comes to removing paint from brick, choosing the right paint stripper is crucial. There are various types of strippers available, each with its own unique properties and effectiveness. It is important to select the most suitable one for your specific needs.
One of the most popular types of paint stripper is the solvent-based variety. This type of stripper works by breaking down the chemical bonds in the paint, allowing it to be easily removed from the surface. However, solvent-based strippers can be harmful to both humans and the environment. If you are concerned about using harsh chemicals, consider eco-friendly options such as soy-based or citrus-based strippers.
In conclusion, selecting the right paint stripper is essential for removing paint from brick effectively and safely. Consider factors such as effectiveness, safety, and environmental impact when choosing a product. Eco-friendly options are available for those who prefer a more sustainable approach to restoration projects. Once you have chosen your preferred type of stripper, move on to gathering necessary tools and materials for the job at hand.
Gathering Necessary Tools And Materials
When it comes to removing paint from brick with a paint stripper, choosing appropriate tools and materials is essential. You will need a good quality paint stripper that is designed for use on masonry surfaces, along with a scraper or wire brush to help remove the softened paint. It is also important to have protective gear such as gloves, eye protection, and a respirator mask to prevent exposure to harmful chemicals.
Safety precautions must be taken when using paint strippers. These chemicals are harsh and can cause skin irritation or respiratory problems if inhaled. Before starting the process, make sure you are working in a well-ventilated area and keep children and pets away from the work site. Always read the manufacturer’s instructions and follow them carefully.
To summarize, removing paint from brick with a paint stripper requires careful consideration of tools and safety measures. By following these guidelines, you can ensure that your project is successful and safe.
Necessary tools:
- High-quality paint stripper designed for masonry surfaces
- Scraper or wire brush
- Protective gear (gloves, eye protection, respirator mask)
- Proper ventilation in the work area 5. Bucket or container for the paint stripper
Preparing The Work Area
After gathering all the necessary tools and materials needed for this task, it is important to prepare the work area before applying the paint stripper. This ensures that the process will go smoothly and without any unnecessary accidents or damage to your furniture or surroundings. According to a recent study conducted by the National Safety Council, accidents in the workplace occur every 7 seconds, with over 4 million workplace injuries reported annually in the United States alone.
To avoid becoming a part of these statistics, be sure to cover any nearby furniture with plastic sheets or drop cloths. Paint stripper can be very potent and may cause irreversible damage to anything it comes into contact with, so protecting your belongings should be top priority. It is also crucial to wear protective clothing such as gloves, goggles, and long-sleeved shirts to avoid skin irritation or chemical burns.
Once you have properly covered your furniture and ensured that you are wearing adequate protective clothing, it is time to begin applying the paint stripper. This process requires careful attention and patience, so take your time and work methodically. In the next section we will discuss how to apply paint stripper effectively without causing harm to yourself or others.
Applying The Paint Stripper
Applying paint stripper is an essential step in removing paint from brick surfaces. However, before proceeding to use the stripper, it is imperative to take necessary safety precautions. Ensure that you wear protective gloves and goggles to prevent direct contact with the skin and eyes respectively. Also, apply a respirator or mask to avoid inhaling fumes from the stripper.
To begin applying the stripper, use a stiff-bristled brush or roller to spread a thick layer of the product over the painted surface. Ensure that you apply an even coat without missing any spots. Afterward, let the stripper sit for about 20-30 minutes as directed by the manufacturer.
Using effective techniques when applying stripper can significantly impact how efficiently it removes paint from brick surfaces. A good technique is to work in small sections and remove one section at a time before moving on to another area. Also, avoid allowing the stripper to dry out by frequently misting it with water as you work through each section. Finally, use a scraper or wire brush to remove loosened paint from brick surfaces after letting the stripper sit.
Transition: Now that we have looked at how best to apply paint stripper, let’s explore what happens next after letting it sit for some time – removing the product from brick surfaces.
Letting The Stripper Sit
To effectively remove paint from brick using a paint stripper, it is essential to allow the stripper to sit on the surface for an adequate amount of time. Allowing time aids in breaking down the chemical bond between the paint and brick surface. The suggested time frame for leaving the stripper on is dependent on several factors such as the type of paint, age of the paint, and thickness of layers. However, a general rule of thumb is to leave it for at least 30 minutes.
During this waiting period, applying pressure can enhance the effectiveness of the stripper. Use a stiff-bristled brush or scraper to agitate the surface gently. This action will help break down any remaining bonds between the paint and brick surface. It is crucial not to apply too much pressure while brushing or scraping as it can damage your brickwork.
To ensure that you achieve optimal results when removing paint from brick with a stripper, consider these tips:
- Wear protective gear such as gloves and safety goggles
- Work in small sections instead of tackling large areas at once
- Keep the stripper moist by covering it with plastic wrap or cloth
- Always read and follow product instructions carefully
By allowing enough time for the stripper to work its magic while gently applying pressure, you can be sure that you have achieved maximum results before moving onto removing the paint itself.
Removing The Paint
After letting the paint stripper sit for the recommended amount of time, it is time to assess the damage and determine if any additional coats of stripper are necessary. Depending on how many layers of paint were on the brick, it may take multiple applications of the stripper to fully remove all the paint.
It is important to take safety precautions during this step. Be sure to wear gloves and eye protection when handling the paint stripper and follow all manufacturer instructions carefully. Additionally, make sure that the work area is well-ventilated to avoid inhaling any fumes from the stripper.
To determine if another application of paint stripper is necessary, use a scraper or wire brush to gently scrape away some of the paint. If there are still visible layers of paint on the brick, apply another coat of stripper and let it sit for another recommended amount of time before repeating this step.
| Type of Brick | Number of Coats Needed | Time Required |
|---|---|---|
| Smooth | 1-2 coats | 30-60 minutes per coat |
| Textured | 2-3 coats | 60-90 minutes per coat |
| Porous | 3-4 coats | 90+ minutes per coat |
Remember that every job will be different based on factors such as age and condition of the brick, type of paint used, and number of layers present. It is important to be patient during this process in order to achieve optimal results. Once all layers have been removed, proceed to scrubbing and rinsing the surface.
Scrubbing And Rinsing The Surface
Did you know that according to a recent study, 70% of homeowners in the United States prefer brick as their choice of exterior material? However, when it comes to removing paint from brick, it can be a daunting task. Luckily, using a paint stripper can make this process much easier.
Before starting the scrubbing and rinsing process, it is essential to ensure safety by wearing protective gear such as gloves and eye protection. Paint strippers contain strong chemicals that can be harmful if they come into contact with skin or eyes. It is also important to read the manufacturer’s instructions carefully before use.
While traditional paint strippers may contain harsh chemicals that are harmful to both humans and the environment, there are eco-friendly alternatives available that are just as effective. These alternatives are made of natural ingredients and do not harm the surface or surrounding plants. Using eco-friendly options is not only better for the environment but also safer for those who handle them.
Inspecting the surface for residue after scrubbing and rinsing is crucial in determining whether further action needs to be taken. Any leftover residue from the paint stripper can cause future problems such as peeling or bubbling of new paint applied over it. In our next section, we will discuss how to inspect your surface for any remaining residue and steps you can take to ensure a smooth and clean surface ready for repainting.
Inspecting The Surface For Residue
After scrubbing and rinsing the surface, it’s important to test the paint stripper for effectiveness before proceeding. This can be done by applying a small amount of the stripper to an inconspicuous area and waiting for a few minutes. If the paint begins to bubble and peel away from the brick, then the stripper is effective and can be used on the rest of the surface. However, if there is little to no reaction, then a stronger or alternative product may be necessary.
When using any type of paint stripper, safety precautions must always be taken. It’s recommended to wear gloves, eye protection, and a respirator mask to avoid contact with skin or inhalation of fumes. Adequate ventilation should also be provided in the work area. Additionally, it’s important to follow manufacturer instructions carefully and not leave the stripper on for longer than instructed.
After removing all of the paint from the brick surface, it’s time to inspect for residue. A visual check can easily identify any remaining areas that need attention. In some cases, additional stripping may be required in these specific areas. Once all residue has been removed, touching up any damaged or discolored areas with matching brick paint may be necessary to restore the overall appearance of the brick surface.
Transition into subsequent section: Now that we have successfully stripped off all layers of paint from our brick surface while taking care of ourselves with proper safety measures in place let us move ahead to inspect our work further by looking for residue left behind before moving onto restoring its appearance by touching up with matching brick paint color in case any discoloration occurs after stripping off multiple layers of paint from it.
Touching Up The Brick
- Preparing the brick surface is essential for successful paint removal. This includes cleaning the brick to remove dirt, dust and any existing paint chips.
- The next step is to apply a paint stripper to the brick surface. A good quality paint stripper should be used to ensure the paint is removed effectively and with minimal damage to the brick.
- The paint stripper should be applied carefully and evenly to the brick surface. It is important to allow the stripper to sit on the surface for a specified amount of time in order to penetrate the paint.
- After the specified time has passed, the paint stripper should be removed from the brick surface using a scraper or brush. Care should be taken to ensure the paint is removed without damaging the brick.
Preparing The Brick
Brick surfaces are timeless and add character to any property. However, over time, brick can become discolored or painted with a layer of paint that needs to be removed. As an expert in paint stripping and restoration, I understand the importance of preparing the brick surface before starting any restoration work. Preparing the brick will ensure that the process goes smoothly and effectively.
Before you start removing any paint from a brick surface, it is crucial to prepare the area thoroughly. Firstly, ensure that there is no debris or dirt on the surface by cleaning it with a cleaning solution. Secondly, use power washing to remove any loose paint, dirt or dust from the brick surface. This step is essential as it ensures that all debris is removed before starting on the paint stripping process.
The final step in preparing your brick surface for touch-up involves protecting surrounding areas. Use masking tape and plastic sheeting to cover surrounding areas like windowsills or concrete surfaces. This will prevent any damage during the paint stripping process. With these steps completed, you are now ready to begin removing the paint using a suitable stripper for your particular type of brick. By following these preparatory steps carefully, you will achieve better results when removing paint from your brick surface.
Applying Paint Stripper
Now that the brick surface has been adequately prepared, it is time to move on to the next step in touching up the brick – applying paint stripper. Before starting this process, it is crucial to consider potential hazards and safety precautions. Paint strippers contain chemicals that can be harmful if not correctly handled. It is essential to use protective gear such as gloves, goggles, and masks when applying paint stripper.
Another important consideration is the environmental impact of using paint strippers and their disposal methods. Most paint strippers contain hazardous chemicals that can harm the environment if not disposed of properly. It is critical to follow local regulations and guidelines for disposing of these chemicals carefully. Failure to do so could result in significant environmental damage.
When applying paint stripper, it is important to follow the manufacturer’s instructions carefully. Apply a generous amount of paint stripper using a brush or roller and let it sit for the recommended time before removing it with a scraper or pressure washer. Repeat this process until all layers of paint have been removed from the brick surface. By following these steps along with proper safety precautions and disposal methods, you can successfully touch up your brick surface without causing harm to yourself or the environment.
Sealing The Brick
Sealing your brick after removing paint with a paint stripper is like putting a cherry on top of a sundae. The brick will look even more beautiful and will be much easier to maintain, just like how the cherry makes the sundae complete. Brick sealing benefits are numerous, including protection against water damage, mold growth, and efflorescence formation.
There are two types of sealants you can use on your brick: film-forming and penetrating sealers. Film-forming sealers create a coating layer that sits on top of the brick surface, while penetrating sealers seep into the brick pores to create a protective barrier from within. Recommended sealant types vary depending on whether you want to enhance the color of your brick or not. If you prefer to keep the original color of your brick, then choose a clear penetrating sealer. However, if you want to add depth and enhance the natural beauty of your brick’s color, then choose a tinted penetrating sealer or film-forming sealer.
DIY vs professional brick sealing: cost and effectiveness comparison should also be considered when deciding whether to do it yourself or hire professionals for this task. DIY may seem cheaper upfront but can result in costly mistakes that may require professional help later on. Professionals have experience and knowledge about what type of sealant works best for different types of bricks and can ensure proper application for long-lasting results.
Protecting yourself during the process is crucial as some sealants contain harmful chemicals that could be dangerous if not handled properly. In the next section, we will discuss necessary steps for protecting yourself during this process so that you can enjoy beautiful, protected bricks without harm to yourself or others around you.
Protecting Yourself During The Process
As a paint stripper/restoration expert, it is important to prioritize safety measures when removing paint from brick. Paint strippers contain harmful chemicals that can cause skin irritation, eye damage and respiratory problems. Therefore, it is crucial to take necessary precautions to avoid any potential health hazards during the process.
One of the most effective ways to protect yourself while using a paint stripper is by wearing protective gear. This includes gloves, goggles, and a respirator mask. Gloves will protect your hands from coming into contact with the chemical solution, while goggles will prevent any splashing chemicals from entering your eyes. A respirator mask will help you breathe more easily and keep you safe from inhaling fumes.
Apart from personal protective gear, it is also important to work in a well-ventilated area. This will reduce the amount of fumes inhaled and minimize the risk of respiratory problems. Keep all windows open or use a fan to circulate fresh air throughout the workspace.
In addition, make sure to read and follow all safety instructions listed on the paint stripper label before beginning the process. Do not leave children or pets unattended while working with chemicals as they can accidentally come into contact with them.
Now that we have covered safety measures during the process of removing paint from brick using a paint stripper, let’s move on to how we can dispose of these chemicals safely without causing harm to ourselves or others around us.
Disposing Of Chemicals
To ensure a safe paint stripping process, it is important to properly dispose of any chemicals used. Improper disposal can have harmful effects on the environment and human health. It is crucial to follow local regulations and guidelines when disposing of chemical waste.
One method for proper chemical disposal is through hazardous waste collection services provided by your city or county. These services often have specific guidelines for what types of chemicals they will accept and how to prepare them for pickup. It is important to follow these guidelines closely to avoid any potential hazards during transportation.
Another option for disposal is through local household hazardous waste facilities, which are specifically designed for the safe disposal of chemicals commonly found in households. These facilities may also provide educational resources or workshops on proper chemical handling and disposal, which can be useful for future projects involving paint strippers.
It is important to consider the environmental impact of paint strippers as well. Many traditional paint stripping products contain harsh chemicals that can be harmful to both human health and the environment. When choosing a paint stripper, look for eco-friendly options that use natural ingredients and biodegradable solvents. By taking care in the selection and disposal of chemicals used in the paint stripping process, we can minimize our impact on the environment and protect our communities from potential harm.
Moving forward, there are alternate methods for removing paint from brick that do not involve using chemical strippers. These methods include sandblasting, pressure washing, or using heat guns to soften the paint before scraping it off manually. Each method has its own advantages and disadvantages depending on your specific project needs. It’s important to research each option thoroughly before deciding which one will work best for you.
Alternate Methods For Removing Paint From Brick
Imagine walking down a historic street with beautifully restored brick buildings, but one of them stands out because of its unsightly paint job. As a paint stripper/restoration expert, I understand the importance of maintaining the original beauty and character of these structures. While using paint stripper is a commonly used method for removing paint from brick, there are alternative approaches that can be just as effective.
Pressure washing is an option for those who want to avoid harsh chemicals. By directing pressurized water onto the painted surface, it can break down and remove the layers of paint. However, this method can also cause damage to the bricks if not done properly. It’s important to use appropriate pressure settings and to not get too close to the surface.
Another method that requires expertise is sandblasting. This process involves blasting sand particles onto the painted surface at high speeds to strip away layers of paint. Sandblasting can be effective in removing tough coatings but also comes with risks if not done correctly such as damaging the bricks or inhaling harmful particles. Therefore, it’s essential to hire professionals who have experience with this technique.
Moving forward, preventing future paint accidents will save you time and money in restoration efforts. In our next section, we will explore preventative measures such as sealants and proper surface preparation before painting on brick surfaces again.
Preventing Future Paint Accidents
Preventing damage to brick surfaces during the paint removal process is crucial. One of the best ways to do this is by using a paint stripper that is specifically designed for use on masonry surfaces. These products are formulated with powerful chemicals that can break down and dissolve paint without damaging the underlying brick. It’s important to follow the manufacturer’s instructions carefully when using these products, as they can be hazardous if not used properly.
Long term maintenance of painted brick surfaces is also important. Once the paint has been removed, it’s important to ensure that the surface is properly cleaned and sealed. This will help to protect the brick from future damage caused by weathering, moisture, and other environmental factors. Regular cleaning and maintenance can also help to prevent the build-up of dirt, grime, and other debris that can cause discoloration or damage over time.
In addition to proper cleaning and maintenance, it may also be beneficial to consider alternative methods for protecting brick surfaces in the future. For example, there are a variety of sealants and coatings available that can be applied directly to brick surfaces to provide long-lasting protection against weathering, UV rays, and other elements. By taking proactive steps to protect your painted brick surfaces, you can help ensure their longevity and aesthetic appeal for years to come.
Conclusion
When it comes to restoring the beauty of brick walls, removing paint is a crucial step. By following the proper procedures and using the right tools, you can transform an unsightly painted surface into a stunning, natural-looking facade. As a restoration expert, I recommend assessing the painted brick surface before applying paint stripper to ensure that it is suitable for this process.
Once you have chosen the right paint stripper and gathered all necessary tools and materials, prepare the work area by covering nearby surfaces with drop cloths and ventilating the space properly. Protect yourself during this process by wearing gloves and eye protection. Finally, dispose of any chemicals safely and consider taking preventative measures to avoid future paint accidents. With dedication and attention to detail, anyone can remove paint from brick and reveal its natural beauty once again.
Image Credits
- “Paint Stripper” by brighterorange (featured)

