The clothes dryer is an essential appliance in many households, especially in regions with colder climates. It provides a convenient and quick way to dry clothes, reducing the need for hanging them outside or on a drying rack. But have you ever wondered how a clothes dryer works? Understanding the working principles of this appliance can help you troubleshoot problems and take better care of your dryer.
A clothes dryer uses heat, airflow, and tumbling action to remove moisture from wet clothes. The process involves several components that work together to achieve efficient drying results. In this article, we will explore the main parts of a clothes dryer and how they function, from the drum that holds the clothes to the heating element that generates hot air. Whether you are a homeowner looking to maintain your appliance or simply curious about how things work, this guide will provide valuable insights into the inner workings of a clothes dryer.
The Drum
Did you know that the average household in the United States does about 400 loads of laundry per year? That’s a lot of clothes to dry! Thankfully, with the help of a clothes dryer, laundry day doesn’t have to be such a daunting task.
The drum is an essential component of a clothes dryer. It is where your wet clothes are placed for drying. The size and capacity of the drum vary depending on the model and brand of the dryer. Typically, residential dryers range from 3.5 cubic feet to 7 cubic feet in size. The larger the drum, the more clothes it can hold at one time, which ultimately saves you time and energy.
Drum maintenance is crucial to ensure optimal performance and longevity of your dryer. Over time, lint can accumulate inside the drum and around its edges, causing problems with airflow and heating elements. To prevent this from happening, clean out your dryer’s drum regularly using a soft cloth or vacuum cleaner attachment to remove any debris. Additionally, avoid overloading your dryer as this can cause unnecessary wear and tear on the drum’s bearings and belt system. Now let’s move onto another important aspect of your dryer – the lint filter.
The Lint Filter
The lint filter is a crucial component of any clothes dryer. Its primary function is to capture the lint and debris that accumulates during the drying process. Lint filters are generally situated just inside the dryer door or at the front of the drum and are easily accessible for cleaning purposes.
Cleaning frequency for your lint filter will depend on how often you use your dryer and what type of clothing you dry. As a rule, it’s best to clean your lint filter after each use. Not only does this ensure that your dryer performs optimally, but it also reduces the risk of fire caused by built-up lint in the machine.
To keep your lint filter working efficiently, there are some maintenance tips to follow. Firstly, remove any accumulated lint with a soft brush or by wiping it down with a damp cloth. Secondly, inspect the filter regularly for signs of wear and tear, such as cracks or holes, which could impact its effectiveness. Finally, consider replacing your filter every six months to keep it functioning correctly.
Proper maintenance of your dryer’s lint filter is essential to ensure that it works effectively and safely. By following these simple steps, you can help prevent potential hazards while prolonging the life of your appliance. The next step in maintaining a safe and efficient dryer is understanding how moisture sensors work.
The Moisture Sensor
- Moisture sensors are a key component in clothes dryers, as they provide the feedback needed to ensure the correct amount of time is spent on each cycle.
- In terms of functionality, these sensors detect the moisture in the air inside the dryer and send a signal to the control board to adjust the drying time accordingly.
- Calibration of the moisture sensors is an important step in keeping the dryer operating at its peak efficiency.
- This process involves adjusting the sensor sensitivity to ensure it can accurately detect the moisture in the air, as well as any changes in the environment.
- To ensure accuracy, the sensors should be checked regularly and adjusted accordingly, as any deviation from the calibration setting can lead to inaccurate readings.
- Properly calibrated moisture sensors are essential to preventing over-drying of clothes, which can damage fabric and reduce the life of the appliance.
Moisture Sensors
As an appliance technician, I can confidently say that the use of moisture sensors in clothes dryers is a game-changer. These sensors detect the level of moisture in the clothing and adjust the drying time accordingly, resulting in energy savings and reduced wear and tear on clothes. The benefits of using clothes dryers with moisture sensors are numerous, including increased efficiency, reduced electricity bills, and longer-lasting clothes.
Maintaining moisture sensors is crucial to ensure their proper functioning. Regular cleaning is necessary to avoid any buildup or blockage that may interfere with their accuracy. A soft cloth or brush should be used to wipe away any lint or debris that may accumulate on the sensor. Additionally, troubleshooting should be done when necessary to identify any issues before they escalate.
Troubleshooting moisture sensors in clothes dryers requires some basic knowledge of how they work. If the sensor fails to detect moisture properly and stops the dryer prematurely, it may need cleaning or calibration. On the other hand, if it fails to stop at all due to excessive moisture, it may require replacement. Homeowners can usually troubleshoot these issues themselves by referring to their dryer’s manual or seeking professional assistance from a qualified technician if needed.
In conclusion, using clothes dryers with moisture sensors has many benefits for both homeowners and their garments. Proper maintenance and troubleshooting can extend the life of these sensors while ensuring that they function optimally for years to come. As an appliance expert, I highly recommend investing in a dryer with moisture sensors for efficient and effective clothing drying needs.
Functionality
Efficiency tips and maintenance techniques are essential for maximizing the functionality of moisture sensors in clothes dryers. These sensors work by detecting the level of moisture in clothes, and adjusting the drying time accordingly. The benefits of using these dryers are numerous, including reduced energy consumption, decreased electricity bills, and longer-lasting clothes.
To ensure optimal functionality, it is important to regularly clean the sensors to avoid any buildup or blockage that may interfere with their accuracy. A soft cloth or brush should be used to wipe away any lint or debris that may accumulate on the sensor. Additionally, troubleshooting should be done when necessary to identify any issues before they escalate.
When troubleshooting moisture sensors in clothes dryers, homeowners can refer to their dryer’s manual or seek professional assistance from a qualified technician if needed. If the sensor fails to detect moisture properly and stops the dryer prematurely, it may need cleaning or calibration. On the other hand, if it fails to stop at all due to excessive moisture, it may require replacement. By staying proactive with maintenance and troubleshooting techniques, homeowners can maximize their dryer’s efficiency while ensuring its longevity.
Calibration
Calibration is a crucial aspect of maintaining the accuracy and efficiency of moisture sensors in clothes dryers. It involves adjusting the sensor to ensure that it accurately detects the level of moisture in clothes, which in turn determines the appropriate drying time. Calibration is important because an improperly calibrated sensor can result in either premature or excessive drying, leading to wasted energy and increased wear and tear on clothes.
The frequency of calibration depends on several factors, including how often the dryer is used, the type of fabrics typically dried, and whether any troubleshooting has been done recently. As a general guideline, it is recommended that calibration be done at least once a year for optimal performance. However, if there are any noticeable changes in drying times or inconsistencies in results, calibration should be done immediately.
Calibration importance cannot be overemphasized as it ensures that homeowners get the most out of their dryer’s moisture sensor technology. By maintaining accurate readings and reducing energy waste through proper calibration techniques, homeowners can save money on electricity bills and extend the lifespan of their dryer. Regular maintenance practices such as cleaning and calibration are essential for ensuring maximum efficiency while minimizing repairs and replacements down the line.
The Heating Element
One interesting statistic about the heating element in a clothes dryer is that it accounts for approximately 80% of the energy used by the appliance. This means that it is crucial to understand how the heating element works and how to maintain it properly to ensure optimal performance and energy efficiency.
There are different types of heating elements used in clothes dryers, including electric and gas-powered options. Electric heating elements use electrical resistance to generate heat, while gas-powered ones rely on burning natural gas or propane. Both types require regular maintenance, such as cleaning the lint filter and removing any debris from the venting system, to prevent overheating and potential safety hazards.
To maintain the heating element in your clothes dryer, it is important to follow some simple tips. Firstly, always clean the lint filter before or after each use to prevent lint build-up which can cause blockages in the venting system. Additionally, avoid overloading your dryer with too many clothes as this can put excessive strain on the heating element and reduce its lifespan. Lastly, make sure that your venting system is regularly cleaned and checked for any debris or obstructions that may affect airflow.
Moving forward into discussing ‘the thermostat’, an important component of a clothes dryer’s heating system, it plays a crucial role in regulating temperature and ensuring safe operation of the appliance.
The Thermostat
The thermostat is an integral component of any clothes dryer, and it plays a vital role in regulating the temperature inside the machine. There are two main types of thermostats used in clothes dryers: cycling thermostats and safety thermostats. Cycling thermostats work by turning on and off as needed to maintain a consistent temperature, whereas safety thermostats are designed to shut off the dryer if the temperature gets too high.
To ensure that your clothes dryer is functioning properly, it’s essential to perform regular maintenance on the thermostat. This includes checking for any signs of wear or damage, cleaning the thermostat with a soft brush or cloth, and testing it periodically to make sure it’s working correctly. If you notice any issues with your dryer’s thermostat, such as inconsistent temperatures or failure to turn on or off at the appropriate times, it may be time to replace it.
In summary, understanding the different types of thermostats used in clothes dryers and performing proper maintenance on them is crucial for ensuring that your appliance functions efficiently and safely. In the next section, we will discuss another important component of clothes dryers: the timer.
The Timer
The Timer:
As the clothes dryer operates, it requires a timer to regulate the duration of each cycle. The timer is an essential component of the appliance that determines how long the drying process will last. It is responsible for controlling various functions, such as temperature and airflow, to ensure that clothes are dried efficiently and adequately.
The timer is susceptible to wear and tear over time, leading to malfunctions or failure. Regular timer maintenance is crucial in ensuring it operates optimally. One way to maintain the timer is by cleaning it regularly with a soft cloth. This helps remove dirt and debris that may interfere with its performance. Additionally, you can lubricate the motor’s gears with oil or grease to prevent friction and prolong its lifespan.
If your dryer’s timer fails, replacement options are available depending on your budget and preference. You can choose between purchasing a new or refurbished timer from an authorized dealer or online retailer. Alternatively, you can opt for professional repair services if you’re not comfortable performing DIY repairs on your appliance.
The Timer maintenance and replacement options are critical aspects of keeping your dryer functioning correctly. Neglecting these components can lead to significant problems down the line, requiring costly repairs or replacements. Therefore, it’s essential to perform regular maintenance checks on your dryer’s timer to avoid any inconveniences that may arise due to malfunctioning parts.
Moving ahead into our next topic section – The Blower Wheel – let’s explore how this part contributes to the drying process in a clothes dryer.
The Blower Wheel
Previously, we discussed the timer of a clothes dryer. Now, let’s move on to another crucial component: the blower wheel. The blower wheel is responsible for circulating hot air throughout the dryer drum and expelling moisture out through the exhaust vent. It is typically located at the front or back of the dryer behind the lint screen.
Design features of a blower wheel vary depending on the make and model of your dryer. However, it is important to note that over time, the blower wheel can become clogged with lint and debris, which can cause it to malfunction. Regular maintenance is necessary in order to keep your dryer running smoothly. One maintenance tip is to clean out the lint trap after every use. Additionally, it’s recommended that you clean out the entire exhaust vent once a year to prevent buildup.
When maintaining your dryer’s blower wheel, make sure to turn off power or unplug your appliance before beginning any work. Use a soft brush or cloth to carefully remove any debris from around and inside of the blower wheel area. If you notice any damage or wear and tear on the blower wheel itself, it may be time for a replacement part. By keeping up with regular maintenance tasks like these, you can ensure that your clothes dryer runs efficiently for years to come.
Now that we’ve covered maintenance tips for your dryer’s blower wheel, let’s move on to discussing another important component: the belt. The belt plays a crucial role in rotating the drum of your clothes dryer during each cycle. Without it, your clothes would not tumble dry properly – if at all! So how does this small but mighty part work?
The Belt
The belt is a crucial component of a clothes dryer as it is responsible for rotating the drum. It functions by wrapping around both the drum and the motor pulley, which then rotates the drum. Over time, wear and tear may cause the belt to break or loosen, which can lead to inefficient drying or complete malfunctioning of the dryer.
Replacing or repairing the belt in a dryer is an important task that requires technical expertise. A professional technician should be contacted to handle such issues. However, with regular maintenance, you can prolong the lifespan of your dryer belt. Maintenance tips include keeping it clean and free from debris, checking for proper tension regularly, and avoiding overloading the dryer.
In summary, maintaining your dryer’s belt is essential for its smooth operation and longevity. Regular maintenance can help prevent problems such as poor drying performance or complete breakdowns due to wear and tear. However, if you experience any issues with your belt, it is best to contact a professional for repairs or replacement. In the next section, we will discuss another critical component of a clothes dryer – the motor – which plays a significant role in powering the machine’s various functions.
The Motor
The belt is an essential part of a clothes dryer that connects the motor to the drum. However, it’s not the only critical component that keeps the dryer running smoothly. The motor is equally important since it drives both the blower fan and the drum.
The motor is located behind the drum, usually at the back of the machine. It works alongside other parts such as pulleys, belts, and rollers to ensure that your clothes are dried evenly. Like any other mechanical device, it requires regular maintenance to function optimally. Therefore, you should keep an eye out for any unusual noises such as grinding or squeaking sounds coming from your dryer’s motor.
If you notice any problems with your dryer’s motor, you should consider replacing it immediately. While this may seem like an expensive undertaking, it’s often cheaper than repairing an old or worn-out motor in the long run. Additionally, replacing your dryer’s motor can help improve its efficiency and ultimately extend its lifespan. When comparing costs between repairing and replacing a faulty motor, remember to factor in additional expenses such as labor costs and warranties offered by different manufacturers.
As we move on to discussing ‘the control panel’ section of a clothes dryer, it’s important to note how all these components work together seamlessly to ensure effective drying cycles for your laundry loads. The control panel plays a vital role in regulating temperature settings and cycle times for each load type while also providing useful features such as delay start options and steam cycles. Let’s delve deeper into this aspect of a clothes dryer in our subsequent section below.
The Control Panel
- The control panel of a clothes dryer consists of a cycle selector, timer controls, and other options.
- Setting the cycle on the control panel will determine the type of drying cycle chosen and the temperature and speed settings.
- Cycle options on the control panel can include options such as permanent press, delicates, or air dry.
- Timer controls on the control panel are used to set the amount of time for the clothes to dry, as well as the cycle end signal.
- Some control panels may also include additional buttons for adjusting the temperature, activating the wrinkle guard setting, or activating the freshen cycle.
- Understanding the various settings and options of the control panel is essential to properly operate a clothes dryer.
Setting The Cycle
As an appliance technician, I often get asked about the settings on clothes dryers. Choosing the right setting is crucial for energy efficiency and getting your clothes dry in a timely manner. Most modern dryers come equipped with several options, including high heat, low heat, timed dry, and sensor drying.
When choosing settings, it’s important to consider the type of clothing you’re drying. Delicate fabrics should be dried on a low heat setting to prevent damage, while heavier items like towels and jeans can handle higher temperatures. Timed dry is useful when you have a specific amount of time to dedicate to drying your clothes, while sensor drying uses moisture sensors to automatically shut off the dryer once your clothes are dry.
Energy efficiency is also an important consideration when setting your dryer cycle. To save energy and money on your electricity bill, choose the shortest cycle possible that will still effectively dry your clothes. Avoid overloading the dryer as this can cause longer drying times and higher energy usage.
Overall, choosing the right settings for your clothes dryer is essential for efficient and effective drying. As a home appliance expert, I recommend taking some time to familiarize yourself with your dryer’s settings and experimenting with different cycles to find what works best for you.
Cycle Options
Now that we have discussed the importance of choosing the right settings for your clothes dryer, let’s move on to another crucial aspect of the control panel: cycle options. The cycle options on a dryer can vary depending on the brand and model, but most modern dryers come equipped with several common cycles.
One important cycle option to consider is the cool down feature. This setting allows your clothes to continue tumbling in the dryer with no heat at the end of the cycle, which helps prevent wrinkles and makes it easier to remove your clothes from the dryer. Another important consideration is energy efficient settings. These settings can help you save money on your electricity bill by using less energy during each drying cycle.
When selecting a cycle option, it’s important to consider the type of clothing you are drying as well as how much time you have available. For example, a quick dry cycle may be useful if you need your clothes dried quickly, while a heavy-duty cycle may be necessary for thicker fabrics like blankets or comforters. Always check your clothing labels for specific care instructions before selecting a cycle option.
Overall, understanding and utilizing your dryer’s various cycle options can make all the difference when it comes to effectively and efficiently drying your clothes. As an appliance technician, I recommend taking some time to familiarize yourself with these settings and experiment with different cycles until you find what works best for you and your household needs.
Timer Controls
Another important aspect of the control panel of a dryer is the programming timer. This feature allows you to set the amount of time you want your clothes to dry, giving you more control over the drying process. It’s important to note that some dryers may have a pre-set time for certain cycles, but most modern dryers come equipped with customizable timer controls.
When using the programming timer, it’s crucial to pay attention to the electrical connections and ensure that your dryer is properly grounded. Failure to do so can result in damage to your dryer or even electrical shock. As an appliance technician, I always recommend reading the manufacturer’s instructions carefully before attempting any settings on your dryer’s control panel.
Overall, utilizing the programming timer on your dryer can help you save time and energy by allowing you to customize each drying cycle. However, it’s essential to follow proper safety precautions and consult with a professional if you have any concerns about electrical connections or other technical aspects of your appliance. By taking these steps and familiarizing yourself with all aspects of your dryer’s control panel, you can ensure that your laundry is dried effectively and efficiently every time.
The Gas Valve
The gas valve is an essential component of a gas dryer. It controls the flow of natural gas or propane from the supply line to the burner assembly. The gas valve is responsible for igniting the flame that heats up the air inside the dryer drum. Without this part, a gas dryer cannot function effectively.
The gas valve requires regular maintenance to keep it working correctly. Gas valve maintenance includes checking for leaks, cleaning debris from the burner assembly, and replacing worn-out parts. A malfunctioning gas valve can result in issues like poor drying performance, loud noises, and even dangerous situations like fires or explosions.
Gas dryers are known for their efficiency when compared to electric dryers. They use less energy and cost less to run in the long term. However, they require more maintenance due to their complicated components such as the gas valve. Therefore, it’s essential to consider these factors when deciding between a gas or electric dryer.
Moving forward, we will now take a closer look at another crucial part of a clothes dryer- the igniter. The igniter plays a vital role in starting up the heating process by lighting up the flame that heats up the air inside the dryer drum. Let’s explore this essential component further and understand its importance in detail.
The Igniter
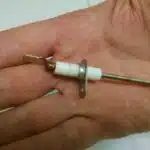
Clothes dryers are powered by electricity, and use a heating element to generate heat. The heating element is activated by an igniter, which is an electrical component that draws current and creates heat. The two main types of igniters used in clothes dryers are the flat and the cylindrical, which have different functions. The flat igniter is used to open the gas valve while the cylindrical igniter is used to light the gas burner, heating the air that is passed into the dryer.
Igniter Types
As an appliance technician, understanding the different types of igniters in a clothes dryer is essential. The most common type of igniter used in dryers is the silicon carbide igniter. This type of igniter is durable and can withstand high temperatures without breaking down. Another popular option is the spiral igniter, which heats up quickly and works well even with low voltage. However, it may not last as long as a silicon carbide igniter.
Regardless of the type of igniter used in your dryer, regular maintenance is crucial to keeping it working efficiently. One simple maintenance tip is to keep the area around the igniter clean and free of debris. This will ensure that air can flow freely around the igniter and that it can heat up properly. Additionally, checking the wiring for any signs of wear or damage can help prevent malfunctioning.
In summary, knowing about different types of igniters and how to maintain them can help ensure that your clothes dryer functions properly for years to come. By taking simple steps such as cleaning debris and inspecting wiring, you can save money on costly repairs or replacements later on. As an appliance expert, I highly recommend regular maintenance to keep your dryer functioning efficiently and effectively.
Igniter Function
Understanding the function of the igniter in a clothes dryer is crucial to maintaining its efficiency. The igniter is responsible for producing the necessary heat to ignite the gas that heats up the air in the dryer drum. When functioning properly, it should heat up quickly and stay hot until it reaches the required temperature. However, if there are any issues with the igniter, such as wear and tear or damage, it may not be able to produce enough heat or may fail altogether.
To ensure that your clothes dryer’s igniter functions correctly, regular maintenance is key. Igniter maintenance involves checking for any signs of wear or damage and cleaning off any debris that may have accumulated around it. Troubleshooting igniter issues can also be done by inspecting the wiring and connections to ensure that everything is connected properly. By doing these simple steps regularly, you can prevent costly repairs and replacements down the line.
If you notice any issues with your clothes dryer’s performance, such as reduced heating efficiency or longer drying times, it may be an indication that there is a problem with your igniter. In this case, it is best to seek professional help from a licensed appliance technician who can diagnose and fix the issue effectively. Remember that keeping your clothes dryer’s igniter functioning properly through regular maintenance can save you money and prolong its lifespan.
The Flame Sensor
The flame sensor is an essential component of a clothes dryer. It is responsible for detecting the presence of a flame in the burner assembly and signaling the control board to keep supplying gas to the burner. Without it, the dryer would not be able to generate heat, and your clothes would remain damp.
Over time, the flame sensor can accumulate dirt and debris, which can cause it to malfunction. When this happens, the dryer may not heat up at all or may shut off prematurely. To prevent this from happening, it is important to clean the flame sensor regularly. To do this, turn off power to your dryer and remove the front panel. Locate the flame sensor near the burner assembly and gently clean it with a soft brush or cloth.
Common problems with the flame sensor include corrosion of its surface or damage to its wiring. In some cases, you may need to replace the flame sensor altogether if it is beyond repair. If you are experiencing issues with your dryer’s heating function, it may be worth checking if there are any problems with your flame sensor before calling for professional help.
In addition to cleaning and maintenance of individual components like the flame sensor, it’s crucial that homeowners also inspect their exhaust ducts for blockages or obstructions that could hinder performance. A clogged exhaust duct can lead to overheating of your dryer or decreased efficiency in drying times. By regularly checking these parts, you can ensure that your clothes dryer operates smoothly and effectively for years to come.
The Exhaust Duct
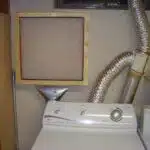
Cleaning the exhaust duct is an important step in ensuring optimal performance from a clothes dryer. Proper installation of the duct is key to preventing lint build-up, ensuring maximum air flow and avoiding fire hazards. Connections between the duct and the dryer should be sealed tightly with metal tape to ensure air is not escaping. The duct should be cleaned regularly to remove lint and debris that can accumulate over time and affect the dryer’s performance. Regular cleaning also helps to reduce fire hazards that are associated with lint build-up. For best performance, the duct should be inspected and cleaned at least twice a year. Connections should also be checked for any loose connections and be tightened as necessary.
Cleaning The Duct
As an appliance technician, I have seen countless clothes dryers that malfunction due to clogged exhaust ducts. Regular maintenance is crucial in ensuring the efficiency and safety of your dryer. One of the most important aspects of maintenance is cleaning the exhaust duct.
Cleaning the duct involves removing any lint or debris that has accumulated inside. This can be done by using a specialized brush or vacuum cleaner attachment designed for dryer vents. It is recommended to clean the duct at least once a year, depending on how frequently you use your dryer. If you notice any signs of blockage such as longer drying times or excessive heat, it may be necessary to clean the duct more frequently. In some cases, it may be best to enlist professional cleaning services to ensure all blockages are completely removed.
Neglecting to clean your dryer’s exhaust duct can result in serious consequences including fire hazards and increased energy consumption. As an expert in home appliances, I highly recommend regular maintenance and thorough cleaning of your dryer’s exhaust system for optimal performance and safety. By taking these simple steps, you can ensure that your clothes dryer will operate efficiently while maintaining its longevity.
Installing The Duct
Proper installation of the exhaust duct is just as important as regular cleaning when it comes to maintaining optimal performance and safety in your clothes dryer. As an appliance technician, I have seen many cases where improper duct installation has caused serious issues such as inefficient drying, fire hazards, and even carbon monoxide leaks. To ensure that your dryer’s exhaust system is installed correctly, there are some key tips to keep in mind.
Firstly, it is crucial to use the best materials for duct installation. The most commonly used materials include flexible aluminum, rigid metal, or vinyl tubing. However, it is recommended to use rigid metal or flexible aluminum for a safer and more durable option. Additionally, make sure that the duct is the appropriate size and length for your dryer model and that all joints are properly sealed with duct tape or clamps.
Another tip for proper duct installation includes ensuring that the duct is vented outside of your home rather than into an attic or crawl space. This will prevent moisture buildup which can lead to mold growth and other issues. It’s also important to avoid using screws or other fasteners that could catch lint inside the duct.
By following these tips for proper duct installation, you can help prevent potential hazards associated with clogged or improperly installed exhaust systems in your clothes dryer. Regular maintenance combined with proper installation can help extend the lifespan of your appliance while ensuring its safe and efficient operation.
Duct Connections
The exhaust duct is an essential part of your clothes dryer that needs proper installation, cleaning, and maintenance to ensure its optimal performance and safety. In addition to using the best materials for duct installation and venting outside of your home, it’s crucial to pay attention to the duct connections. There are different types of ducts that you can use for your dryer, such as flexible aluminum or rigid metal tubing. However, regardless of which type you choose, it’s crucial to follow proper installation techniques.
To ensure a safe and efficient connection between your dryer and the exhaust vent, you should avoid using screws or other fasteners that could catch lint inside the duct. Instead, use clamps or tape to secure the connections tightly. Properly sealing all joints in your duct system is also critical for preventing leaks that could lead to fire hazards or carbon monoxide poisoning.
Cleaning and maintenance tips for duct connections include checking them regularly for any signs of damage or clogs caused by lint buildup. You can use a vacuum cleaner with a long nozzle attachment to remove any debris from inside the ducts. Additionally, if you notice any unusual noises coming from your dryer during operation or if it takes longer than usual to dry clothes, it might be time to inspect and clean the exhaust duct connections.
By following these guidelines for proper installation techniques and cleaning and maintenance tips for duct connections in your clothes dryer’s exhaust system, you can ensure optimal performance and safety while extending its lifespan. Don’t wait until there’s a problem; take proactive steps today to keep your appliance running smoothly!
Troubleshooting Common Issues
Continuing from the previous topic of Exhaust Ducts, it is important to note that a clothes dryer’s functionality depends on multiple components working together. One such crucial component is the heating element. Did you know that according to a survey conducted by Consumer Reports, 31% of dryer repairs are due to issues with the heating element? This emphasizes the importance of knowing how this part works and how to troubleshoot possible issues.
To understand the heating element in a clothes dryer, it is essential first to comprehend its function. In essence, the heating element is responsible for generating heat that dries your clothes by blowing hot air through them. However, when this component malfunctions, it can lead to several problems like long drying times or no heat at all. To resolve such issues, appliance technicians suggest checking if there’s adequate power supply and if the circuit breaker needs resetting.
Apart from troubleshooting common problems, maintenance tips also play a critical role in ensuring your dryer’s longevity and efficiency. Regular cleaning of ducts prevents build-up of lint and other debris that can cause blockages and reduce airflow. Additionally, replacing worn out parts like drum rollers or belts can prevent excessive wear and tear on other components like bearings or motors. Proper care not only saves you money but also ensures your machine operates efficiently for years to come.
Maintenance and troubleshooting measures are critical in ensuring your clothes dryer’s optimal performance. By following these simple steps such as resetting circuit breakers or cleaning ducts regularly, you can avoid costly repairs and save time on drying cycles while maintaining energy efficiency levels. Remember always to unplug before attempting any maintenance work on your appliance for safety reasons.
Conclusion
A clothes dryer is a crucial appliance in any household, making laundry day less time-consuming and more efficient. The drum inside the dryer rotates the clothes, while the lint filter traps any lint or debris that may have come off during the drying process. The moisture sensor ensures that the clothes are not over-dried or under-dried by detecting when they are dry enough to be removed from the machine.
The heating element is responsible for producing hot air that dries the clothes, and the thermostat controls the temperature of this air. The igniter starts up the gas burner if your dryer runs on gas, and the flame sensor ensures that it stays lit throughout the drying cycle. Finally, the exhaust duct carries away any remaining moisture and lint from inside your dryer to prevent damage or malfunction.
While these components work together seamlessly most of the time, issues can arise with some regularity. Whether it’s a clogged exhaust duct or a faulty thermostat, knowing how to troubleshoot common problems can save you both time and money in repair costs. As an appliance technician or home appliance expert, it’s important to understand how each part works individually as well as how they function together to keep your clothes dry and fresh. After all, knowledge is power – especially when it comes to household appliances!
Image Credits
- “My clothes dryer is a cheap floozie” by kerryj.com (featured)














![How To Wash And Care For White Clothes 24 The only genuine borax soap cleanses hygienically saves the clothes and hands. 20 Mule-Team brand Boraxo white laundry soap [front]](https://green-life.blog/wp-content/uploads/2023/05/YDXLLCovnOjq-150x150.jpg.webp)

