Installing a phone jack may seem like a daunting task for those who are unfamiliar with telecommunications technology. However, with the right tools and knowledge, it can be a simple and straightforward process. A phone jack is an essential component that allows a phone to be connected to a network or landline, enabling communication between individuals both locally and internationally.
As a telecommunications technician, it is important to have the skills necessary to install and troubleshoot phone jacks. Whether you are setting up a new office or upgrading an existing system, knowing how to properly install a phone jack is crucial for providing reliable communication services for your clients. In this article, we will explore the steps required to successfully install a phone jack, from gathering the necessary tools to testing the connection. By following these guidelines, you will be equipped with the knowledge needed to provide quality service to your clients in need of telephone communication.
Understanding The Different Types Of Phone Jacks
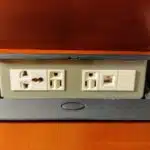
In the world of telecommunications, phone jacks are essential components that connect your telephone line to the network. There are several types of phone jacks available in the market, and it’s crucial to understand their differences before purchasing one. The most common types of phone jacks include modular jack, wall plate jack, flush mount jack, and surface mount jack.
A modular jack is a small rectangular unit that connects directly to the telephone line through a cable. This type of jack is compatible with various devices like phones, modems, fax machines, and routers. A wall plate jack is installed directly onto the wall surface and has a protruding socket where you can plug in your phone cord. These jacks come in different colors and styles to match your interior decor.
Flush mount jacks are similar to wall plate jacks but flush against the wall surface for a sleeker look. They’re commonly used when renovating or constructing new buildings. On the other hand, surface mount jacks have an exposed socket and are mounted on top of the wall surface. They’re ideal for use in areas where drilling into walls isn’t possible.
Compatibility issues may arise when choosing a phone jack based on its design and functionality. Therefore, it’s essential to ensure that you select a type of phone jack that aligns with your specific needs and equipment requirements. In summary, understanding the different types of phone jacks available will make it easier for you to choose a suitable option for your telecommunication needs.
Moving forward with installing your phone jack requires certain tools necessary for its successful completion.
Tools Required For Installation
- A screwdriver may be necessary to remove existing hardware when installing a telephone jack.
- A drill is typically used to create holes in the wall in order to run the required wiring for the telephone jack installation.
- Wire strippers, a telephone jack, a wall plate, and a hammer are all necessary materials for the installation.
- Additionally, a level, wire cutter, tape measure, utility knife, pliers, electrical tape, pencil, and a drywall saw may be required to complete the installation.
Screwdriver
When installing a phone jack, one of the essential tools you will need is a screwdriver. A screwdriver is a tool used to loosen or tighten screws, and there are several types available. The most commonly used screwdrivers are flathead and Phillips head screwdrivers. However, there are other types of screwdrivers, such as Torx and Robertson, which are less common but still useful.
Choosing the right size and type of screwdriver is crucial when installing a phone jack. Using the wrong size or type can damage both the screwdriver and the screws, making it difficult to install the phone jack correctly. Flathead screwdrivers come in various sizes ranging from 1/8 inch to 1 inch, while Phillips head screwdrivers range from #0 to #4 in size. It’s important to select a screwdriver that matches the size of your screws.
As a telecommunications technician, it’s essential to have a variety of screwdrivers on hand when installing a phone jack. Depending on the type of phone jack you’re installing, you may need different sizes or types of screwdrivers. Therefore, it’s important to choose quality tools that will last for several installations without wearing out quickly. By selecting the right size and type of screwdriver for your installation needs, you’ll be able to complete your job efficiently and effectively.
Drill
As a telecommunications technician, having the appropriate tools is crucial to ensure that installations are done efficiently and correctly. One of the tools required for installation is a drill. A drill is used to create holes in walls or other surfaces where phone jacks can be mounted. It’s important to choose an appropriate drill size and type for the job at hand.
When choosing an appropriate drill, consider the size and depth of the hole required for the phone jack installation. The drill bit should match the size of the mounting hardware used for the phone jack. Safety precautions should also be taken when drilling, such as wearing protective eyewear and gloves. Additionally, it’s essential to use caution when drilling near electrical wires or plumbing to avoid potential hazards.
In conclusion, drills are an essential tool for installing phone jacks in various locations. Choosing an appropriate drill size and type is crucial for ensuring that installations are done safely and effectively. By taking safety precautions and being cautious when drilling near potential hazards, telecommunications technicians can complete their job efficiently and ensure that phone jacks are securely mounted.
Preparing The Work Area
Before installing a phone jack, it is essential to prepare the work area. First, measure the distance from the existing phone jack to the location where you want to install the new one. This step will help ensure that you have enough cable to connect both jacks. Use a measuring tape or ruler for accuracy.
Once you have measured the distance, mark the drill spots on the wall where you want to install the new jack. Use a pencil or marker to make small marks at the top and bottom of where you plan to drill. This step will help ensure that your holes are in the correct location and prevent any unnecessary damage to your walls.
It is important to take your time during this stage of preparation as mistakes can cause frustration and increase installation time. By measuring distance accurately and marking drill spots precisely, you can save yourself trouble down the road. In addition, following these steps will help ensure that your installation is completed correctly and efficiently.
- Nested bullet point list:
- Have all necessary tools ready before starting.
- Screwdriver
- Drill
- Measuring tape or ruler
- Make sure there are no obstructions in your work area.
- Move furniture if necessary
- Cover floors with a drop cloth
- Double-check that power is turned off before beginning any drilling.
- Turn off circuit breaker for added safety
With careful preparation, installing a new phone jack can be an easy task for anyone who has some experience with basic tools and home repairs. However, before installing a new phone jack, it is essential first to prepare your work area accurately by measuring distances and marking drill spots precisely. By following these simple steps, you can avoid making costly mistakes that could impact your installation process negatively.
Transitioning into removing existing phone jacks, it is essential first to assess whether removal is necessary or not. If there are no issues with an existing phone jack, there may be no need to remove it. However, if there is a problem with the jack, such as poor connection or damage, then it may be necessary to replace it entirely. In the subsequent section, we will discuss how to remove existing phone jacks effectively without causing any unnecessary damage.
Removing Existing Phone Jacks
In the previous section, we have discussed how to install a phone jack. However, before installing a new one, it is necessary to remove any existing phone jacks that are no longer functional or damaged. In this subsequent section, we will learn how to remove existing phone jacks safely and effectively.
To begin with, it is essential to turn off the power supply of the telephone network in your house or office. This step ensures that there is no electrical current running through the wires when you start working on them. Once you have turned off the power supply, use a screwdriver to unscrew any visible screws holding the phone jack plate in place. After removing the plate, check for any damages on the wires or connections.
If you find any damages or broken wires while removing an old phone jack, repairing them is crucial before installing a new one. Ensure that all connections are adequately rewired and secured with electrical tape. Once all repairs are made, you can proceed with installing a new phone jack or leave it as it is if there is no requirement for one. The next section will focus on identifying wires and connections required for installation purposes without damaging any existing wiring system in your home or office.
Transitioning into the subsequent section about ‘identifying wires and connections,’ let us now move towards understanding how to identify different types of wires used for phone jacks and their respective functions accurately.
Identifying Wires And Connections
After removing the existing phone jacks, the next step is to identify wires and connections. This includes color coding and testing methods. In order to properly install a phone jack, it is important to understand how each wire connects to the jack.
Color coding is an essential aspect of wiring a phone jack. Each wire has a specific color that corresponds with its function. For example, red and green wires are typically used for voice communications, while yellow wires are used for data transmission. Understanding this color coding system is crucial when identifying wires and connections.
Testing methods should also be utilized when identifying wires and connections. A multimeter can be used to test continuity between the wires and the phone jack terminals. This ensures that each wire is connected properly and that there are no faulty connections.
Moving forward, stripping and connecting wires will be the next step in installing a phone jack. By following proper procedures for stripping and connecting wires, you can ensure that your phone line will function correctly once the installation process is complete.
Stripping And Connecting Wires
- It is important to properly strip the wire to ensure successful installation of a phone jack.
- Connecting the wires correctly is essential for a successful installation of a phone jack.
- The use of wire strippers is recommended to ensure that the wire is stripped correctly.
- A technician should ensure that the wires are securely connected to the phone jack.
Stripping Wire
Wire stripping is an essential skill for any telecommunications technician who needs to install a phone jack. It involves removing the insulation from the wire to expose the conductor, which is necessary for making connections. There are several wire stripping techniques that technicians use, but it’s important to choose the right one for each situation. Choosing the wrong technique could damage the wire or create a poor connection.
Safety precautions during wire stripping are crucial to protect both yourself and your equipment. Before you begin, make sure you have all of the necessary tools and equipment on hand, including safety glasses and gloves. You should also inspect your wires carefully to ensure that they are not damaged or frayed, which can cause injury if they come into contact with your skin. Always work in a well-lit area and avoid using sharp tools that could cut through the insulation.
One of the most common wire stripping techniques is using a wire stripper tool, which allows you to remove insulation from multiple wires at once. To use this tool, insert the wire into the appropriate hole on the stripper and twist it around until the insulation comes off. Another technique is using a utility knife or scissors to cut away small sections of insulation at a time. This method requires more precision and may take longer than using a wire stripper tool, but it can be useful when working with delicate wires.
In conclusion, mastering proper wire stripping techniques and following safety precautions are critical skills for telecommunications technicians who want to install phone jacks successfully. By choosing the right technique for each job and taking care to protect yourself and your equipment, you can ensure that your connections are secure and reliable every time.
Connecting Wires
After successfully stripping the wire, the next step is to connect them. It’s important to know that different wires have different functions, and they are identified by their color codes. A technician should be familiar with these color codes to avoid any confusion during the installation process. For instance, red and green wires are typically used for phone lines, while yellow and black wires are used for Ethernet connections.
When connecting wires, there are several crimping techniques that technicians can use. Crimping involves compressing a metal sleeve around the wire to create a secure connection. The most common crimping technique is using a crimping tool, which has different-sized dies for various wire sizes. Another technique is using a punch-down tool, which is commonly used in phone jack installations. Punch-down tools make it easier to insert wires into terminals without damaging them.
In conclusion, connecting wires after stripping them is an essential skill for telecommunications technicians who want to install phone jacks or other network cables successfully. Understanding wire color coding and using proper crimping techniques will ensure that your connections are strong and reliable every time. By mastering these skills, technicians can provide quality service to their clients and make lasting connections in the industry.
Attaching The Phone Jack To The Wall
Once the location for the phone jack is determined, attach it to the wall using drywall anchors. These anchors are designed to hold the weight of the phone jack and ensure that it stays securely in place. It is important to ensure that the anchors are spaced correctly and installed straight to prevent any issues with cable routing.
Before attaching the phone jack, consider how the cable will be routed. It is best to route cables through walls or ceilings whenever possible to keep them out of sight and prevent tripping hazards. If routing cables through a wall, use a stud finder to avoid drilling into electrical or plumbing lines. Once the cable is routed, attach the phone jack cover plate over the hole in the wall.
Installing a phone jack can be a simple process as long as proper precautions are taken. By using drywall anchors and carefully routing cables, you can ensure that your installation will stay secure and safe for years to come.
Four Common Mistakes When Attaching Phone Jacks:
- Ignoring local building codes – make sure your installation meets all necessary codes and regulations.
- Forgetting to shut off power – before attaching any wiring, turn off power at the circuit breaker.
- Improper placement – choose a location that is easily accessible and away from moisture or heat sources.
- Over-tightening connections – be careful not to strip screws or connectors when securing wiring.
Securing The Connections
After successfully wiring the phone jack, the next step is to secure the connections. This involves using crimping tools to ensure that each wire is tightly connected to its respective terminal. Crimping is a process of compressing a metal sleeve around a wire, thereby creating a strong and reliable connection. It is important to note that each wire must be crimped separately to prevent any short circuits and ensure optimal functionality.
Cable management techniques are also crucial during this stage of installation. It is essential to organize and secure all cables properly to prevent damage or disconnection in the future. One effective method is using cable ties or clamps to bundle wires together and keep them away from any sharp edges or moving parts. Additionally, it is advisable to label each wire according to its function for easier identification during future maintenance.
Properly securing the connections ensures optimal phone line performance and reduces the risk of any accidental disconnections. It also makes it easier for technicians to locate and fix any issues that may arise in the future. With crimping tools and cable management techniques, you can rest assured that your phone jack installation will be both functional and reliable for years to come.
Transition: Once all connections have been secured, it’s time to test if the phone jack is working correctly.
Testing The Connection
Once all the connections are secure, it’s time to test the phone jack. Testing the connection is an essential step in ensuring a smooth and functional phone line. A telecommunications technician must ensure that the signal strength is adequate and free of noise interference.
To test the connection, use a telephone tester or a working phone. Connect one end of the tester to the phone jack and plug in the other end to your phone. If you are using a working phone, simply plug it into the jack. Pick up the receiver and listen for any noise interference or static on the line. Check whether there is any dial tone present.
If you encounter noise interference or weak signal strength, try these solutions before calling a professional:
- Ensure that all connections are properly secured.
- Check for any damage to cables or wires.
- Check for any electrical devices near the phone line that may be causing interference.
- If all else fails, call your service provider for assistance.
Troubleshooting common issues is an important part of installing a phone jack. As a technician, it is our responsibility to provide quality service and ensure customer satisfaction. With proper installation and testing procedures, we can guarantee that our customers have reliable access to communication services through their newly installed phone jacks.
Troubleshooting Common Issues
Checking signal strength is an important first step in troubleshooting common issues with phone jacks. This can be done by plugging a working phone into the jack and checking for a dial tone. If there is no dial tone, it may indicate a problem with the wiring or connection. In this case, it is important to check all connections and ensure that they are secure.
Another common issue when installing phone jacks is noise interference. This can be caused by a number of factors, including external sources such as power lines or internal sources such as faulty wiring. To troubleshoot this issue, it is important to unplug all devices from the jack and test for noise interference. If the interference persists, it may be necessary to test other jacks in the home to determine if the problem is isolated to one particular location.
If these troubleshooting steps do not resolve the issue, it may be necessary to consider replacing or upgrading phone jacks. This can involve rewiring or installing new jacks altogether. It is important to consult with a telecommunications technician for this process, as improper installation could lead to further issues down the line. By following proper procedures and seeking professional help when needed, homeowners can ensure that their phone jacks are functioning optimally and without issue.
Replacing Or Upgrading Phone Jacks
In the world of telecommunications, phone jacks are a crucial component for connecting to the internet and making phone calls. In fact, according to a recent survey conducted by Pew Research Center, 96% of Americans own a cellphone, and 81% own a smartphone. Given the high demand for connectivity today, it’s important to ensure that your phone jacks are functioning properly.
If you’re experiencing issues with your phone jacks such as static or poor connection quality, upgrading techniques may be necessary. One option is to replace your current jack with a newer model that has enhanced features such as noise-cancellation technology or improved insulation. Another technique is to install additional wiring or filters to reduce interference from other electronics in your home.
To troubleshoot common problems with your phone jack, there are several tips you can try before considering an upgrade. First, check all connections to make sure they’re secure and free of damage. If the issue persists, try testing different phones or devices on the jack to determine if it’s a problem with the device itself rather than the jack. Additionally, if you notice any frayed wires or exposed insulation around the jack, it’s important to address these issues promptly as they could cause safety hazards.
In order to ensure optimal functionality and connectivity throughout your home or office, installing multiple phone jacks may be necessary. In the next section, we will discuss step-by-step instructions on how to install multiple phone jacks using commonly available tools and materials.
Installing Multiple Phone Jacks
To install multiple phone jacks, the first step is to determine the positioning of each jack. It is important to make sure that they are all in convenient locations and are not too far apart from each other. Once you have identified the positions, mark them with a pencil so that you can refer to them later when installing the jacks.
After marking the positions, proceed with installing the jacks using the same process as for a single jack installation. Once you have installed all of the jacks, it is important to test their connectivity by plugging a phone into each one and checking for a dial tone. This will ensure that all of your phone lines are working properly.
When testing connectivity, it is essential to test every jack thoroughly before proceeding. If there are any issues with connectivity or signal strength, you may need to adjust the positioning of some of the jacks or use additional wiring to improve signal quality. With proper installation and testing, multiple phone jacks can provide convenient access throughout your home or office for all your communication needs.
Working With Different Types Of Phone Lines
In order to properly install a phone jack, it is important to understand the different types of phone lines that may be present in a home or office. These can include analog lines, digital lines, and Voice over Internet Protocol (VoIP) lines. Each type of line comes with its own set of installation challenges and requirements for the phone jack.
Analog lines are the traditional copper-wire telephone lines that have been used for decades. They are relatively simple to install as they only require connecting two wires from the phone jack to the corresponding wires in the wall. Digital lines, on the other hand, may require more advanced knowledge and equipment as they use digital signals rather than analog signals. VoIP lines require an internet connection and specialized equipment to ensure proper installation.
Regardless of the type of phone line being used, it is important to ensure compliance with regulations such as those set by the National Electrical Code (NEC). Failure to comply with these regulations could result in safety hazards or damage to equipment. By understanding these different types of phone lines and ensuring compliance with regulations during installation, telecommunications technicians can provide high-quality service for their customers.
Ensuring Compliance With Regulations
While installing a phone jack may seem like a straightforward task, it is important to ensure compliance with regulations and take appropriate safety precautions. Failure to do so can result in potential hazards such as electrical shocks or fires. To ensure regulatory compliance, telecommunications technicians must be knowledgeable about applicable codes and standards.
One important regulation to consider is the National Electrical Code (NEC), which provides guidelines for safe electrical installation practices. This code sets requirements for wiring methods, grounding, and installation of equipment. Adhering to these guidelines helps prevent hazards such as electrocution and fire caused by faulty wiring or improper installation.
To further ensure safety, technicians should also take necessary precautions such as wearing protective gear and using insulated tools during installation. It is important to always turn off power before working on any electrical components, and to test the connection after installation to ensure proper functioning.
- Sub-lists:
- Familiarize oneself with applicable codes and standards
- Follow NEC guidelines for safe electrical installation practices
- Take necessary safety precautions during installation
In order to provide ongoing maintenance and support for phone jacks, it is essential that regulations are followed during the initial installation process. By ensuring compliance with safety regulations, technicians can help prevent hazards and ensure reliable performance of the phone jack over time.
Providing Ongoing Maintenance And Support
Ensuring compliance with regulations is just the first step towards providing a reliable telecommunications service. As a technician, it is important to continuously maintain and support the infrastructure to ensure its longevity and uninterrupted operation. Regular maintenance plays an essential role in delivering quality service to customers.
One of the key benefits of regular maintenance is that it helps identify potential issues before they escalate into major problems. By performing routine checks on phone jacks, technicians can detect loose connections, damaged wires, or faulty components that may impede the quality of service. This proactive approach minimizes downtime, reduces repair costs, and ultimately enhances customer satisfaction.
Troubleshooting common issues is another critical aspect of ongoing maintenance and support. Phone jacks are prone to various problems such as static noise, dead lines, or poor sound quality which can be frustrating for customers. Technicians must possess troubleshooting skills to diagnose and resolve these issues promptly. Failure to address common issues in a timely manner may lead to customer dissatisfaction or even loss of business.
Regular maintenance and troubleshooting are crucial elements in ensuring that telecommunications services remain efficient and effective. As a technician, it is essential to provide ongoing support by identifying potential issues early on and resolving them promptly. With this approach, customers can enjoy seamless communication services without interruptions or disruptions.
Conclusion
As a telecommunications technician, it is important to understand the process of installing a phone jack. By following the proper steps and utilizing the necessary tools, one can successfully install and maintain phone lines in both residential and commercial settings.
It is crucial to first identify the different types of phone jacks and understand their specific requirements. Proper preparation of the work area, removal of existing phone jacks, identification of wires and connections, installation of multiple phone jacks, compliance with regulations, and ongoing maintenance are all essential components to ensuring a successful installation.
As we know, “a stitch in time saves nine.” Taking the time to properly install a phone jack will not only prevent future issues but also provide reliable communication for those using it. Maintaining compliance with regulations ensures safety and avoids potential legal issues. As telecommunications technicians, it is our duty to provide quality service that meets industry standards.
Image Credits


