Shower pans are an important element of any bathroom, as they provide a waterproof barrier between the shower area and the subfloor. However, a common problem with shower pans is that they can flex or move over time due to wear and tear, leading to leaks and other issues. As a plumbing expert, it is essential to understand how to fix a shower pan that flexes or moves to ensure that your clients have a safe and functional bathroom.
When the shower pan flexes or moves, it can cause water damage to the subfloor and adjacent walls. This can lead to mold growth, rotting wood, and even structural damage if left untreated for an extended period. Therefore, it is crucial to address this issue as soon as possible. In this article, we will discuss some common causes of shower pan movement and provide practical solutions on how to fix them effectively. Whether you are a professional plumber or a homeowner looking to tackle a DIY project, our guide will equip you with the necessary knowledge and tools to repair your shower pan efficiently.
Understanding The Anatomy Of A Shower Pan
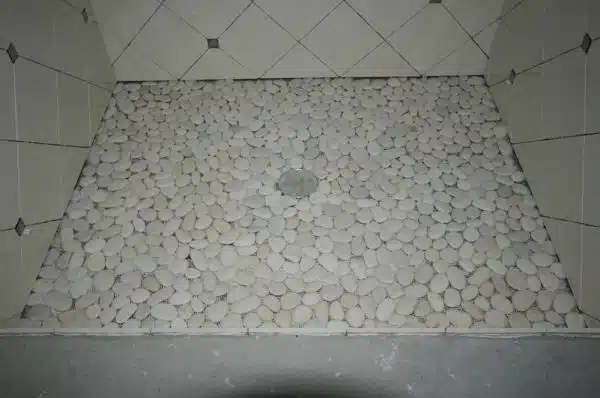
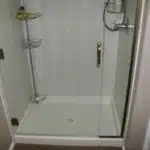
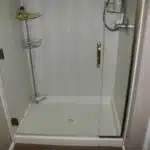
Shower pans are an essential component of bathrooms, as they prevent water from seeping into the floor and causing damage. Shower pans come in a wide range of materials, including fiberglass, acrylic, ceramic tile, and concrete. The type of material used for the shower pan will determine its durability and longevity.
Proper installation techniques are crucial for ensuring that a shower pan stays in place and does not flex or move. During installation, it is important to ensure that the subfloor is level and free from any debris or bumps. The shower pan should be installed using a suitable adhesive or mortar mix to ensure stability. It is also important to check if the drain is properly installed as this can cause leaks and lead to movement of the shower pan.
Overall, understanding the anatomy of a shower pan is key to preventing issues with flexing or movement. Proper installation techniques can help ensure that the shower pan remains stable over time. In the next section, we will discuss how to identify signs of a flexing or moving shower pan so that you can take action before any further damage occurs.
Identifying The Signs Of A Flexing Or Moving Shower Pan
According to a recent study, up to 90% of shower pan issues are caused by poor installation. Signs of a flexing or moving shower pan can include cracks in the tile surrounding the shower, water pooling in certain areas, and a creaking or squeaking noise when pressure is applied to the floor. It’s important to identify these signs early on to prevent further damage and avoid costly repairs.
Fortunately, there are solutions available for fixing a flexing or moving shower pan. One option is to reinforce the existing structure with additional support beams or braces. Another option is to replace the entire shower pan with a more stable material, such as fiberglass or acrylic. It’s important to consult with a professional plumber before attempting any repairs yourself, as improper installation can worsen the problem and lead to more extensive damage.
In the next section, we will explore common causes of shower pan movement and how they can be prevented. By understanding the root causes of this issue and taking preventative measures, homeowners can ensure their showers remain safe and functional for years to come.
Common Causes Of Shower Pan Movement
Shower pan movement is a common problem that homeowners encounter. There are many reasons why shower pans move or flex. One of the most common causes is a lack of proper support. When installing a shower pan, it is essential to ensure that it has adequate support to prevent any future movements.
Shower pan support can come in different forms, such as mortar beds, foam supports, and adjustable feet. Using these products during installation can help provide stability to the shower pan and prevent any unwanted movements. If you notice any signs of movement or flexing in your shower pan, it’s crucial to address the issue immediately before it leads to more significant problems.
Another factor that can cause shower pans to move is poor waterproofing solutions. When water seeps into the subfloor beneath the shower pan, it can cause damage over time and lead to movement or flexing. To prevent this from happening, proper waterproofing measures must be taken during installation. This includes using waterproof membranes and sealing around all edges and joints thoroughly.
In summary, there are several reasons why shower pans may move or flex over time. These include inadequate support during installation and poor waterproofing solutions. To avoid such problems, make sure to install your shower pan with adequate support and use quality waterproofing materials during installation. In the next section, we will discuss how to check for subfloor damage caused by a moving or flexing shower pan without causing any further damage.
Checking For Subfloor Damage
To ensure that your shower pan is stable and secure, you need to check for subfloor damage. This is particularly important if you have noticed that your shower pan flexes or moves. Checking for water damage is the first step in this process. Look for any signs of discoloration or warping on the subfloor around the shower area. If there are any soft or spongy spots, this could indicate water damage.
Another thing to check for is signs of mold growth. Moisture can cause mold to grow, and a damaged subfloor can create an environment that is perfect for mold growth. Mold can be harmful to your health, so it’s essential to address any issues as soon as possible. If you notice any visible mold growth or a musty smell, you may need to replace the affected subflooring.
If you do find subfloor damage during your inspection, it’s important to address it before continuing with any repairs. Ignoring the issue will only lead to further problems down the line and could result in more extensive repair work being needed later on. Once you have identified any issues with the subflooring, you can move on to preparing the work area.
Transition: Now that we’ve checked for subfloor damage and addressed any issues we found, it’s time to prepare the work area for repairing and securing your shower pan.
Preparing The Work Area
The first step in preparing the work area for fixing a shower pan that flexes or moves is to shut off the water supply. This can be done by turning off the main water valve or closing the shower valve. Once the water is shut off, the shower fixtures must be removed in order to access the shower pan. This includes the shower head, arm, and plate, as well as any other fittings that may be present. Care must be taken when removing the shower fixtures to ensure that no damage is done to the pipes or connections.
Shutting Off Water Supply
Before starting any plumbing work on a shower pan, one of the first steps is to turn off the water supply. This is crucial for ensuring safety during the repair process. When fixing a shower pan that flexes or moves, it is important to take certain precautions to avoid any potential accidents.
To turn off the water supply, locate the main valve and shut it off completely. This will prevent any water from flowing into the shower area while you work on repairing the pan. It is also recommended to turn off the power source to any nearby electrical outlets to avoid electric shock hazards.
When working with plumbing fixtures, always prioritize safety precautions. Make sure to wear appropriate protective gear such as gloves, goggles, and overalls when handling tools or materials. Additionally, keep a first aid kit close by in case of an emergency.
In summary, before attempting to fix a shower pan that flexes or moves, ensure that you turn off the water supply and take all necessary safety precautions. By doing so, you can minimize the risk of accidents and successfully carry out repairs without any issues.
Removing Shower Fixtures
To prepare the work area for fixing a shower pan, it may be necessary to remove shower fixtures. This is often required when replacing or repairing damaged tiles, walls, or plumbing components. Before removing any fixtures, ensure that you have the necessary tools on hand. These may include wrenches, pliers, screwdrivers, and other specialized equipment.
When removing shower fixtures, it is important to take safety precautions to avoid accidents or injuries. Prioritize your personal safety by wearing appropriate protective gear such as gloves and goggles. Additionally, turn off the water supply and power source to any nearby electrical outlets before starting work.
To avoid damaging surrounding tiles or surfaces during fixture removal, use caution and a gentle touch when using tools such as wrenches or pliers. Take care not to exert too much force which could cause tiles or walls to crack or break. By taking these steps to prepare the work area and remove shower fixtures safely, you can ensure a successful repair process with minimal risk of accidents or damage.
Removing The Shower Pan
Picture a shower pan as the foundation of your shower. Now imagine that the foundation is unsteady, causing everything else to shake and rattle. That’s what happens when you have a shower pan that flexes or moves. It can cause leaks, mold growth, and even structural damage to your home. To avoid these issues, it’s crucial to remove the problematic shower pan as soon as possible.
Shower pan removal may seem like a daunting task, but with the right tools and knowledge, it can be done efficiently. Here are some steps to follow:
Turn off the water supply: Before you begin removing the shower pan, make sure to turn off the water supply to the bathroom. This will prevent any accidental leaks from occurring.
Remove the Shower Drain: The first step in removing a shower pan is removing the drain cover. Use a screwdriver or pliers to loosen any screws holding down the cover.
Cut around the edges: Using a reciprocating saw or utility knife, carefully cut around the edges of the shower pan where it meets with tile or wall surface. Once completed, gently lift up on one side of the pan until it comes loose from its adhesive.
The next step after removing your shower pan is repairing your subfloor before installing new materials. Stay tuned for our subsequent section on repairing subfloors!
Repairing The Subfloor
To repair a shower pan that flexes or moves, it is important to start with subfloor preparation. The subfloor must be level, stable and strong enough to support the weight of the shower pan. If there are any weak spots or damage, they must be fixed before proceeding. This involves removing any damaged material and replacing it with new materials that are adequate for the job.
Once the subfloor is properly prepared, waterproofing techniques can be applied. This involves using a waterproof membrane that will prevent water from seeping through the subfloor and damaging other areas of the bathroom. There are different types of membranes available on the market, ranging from liquid-applied membranes to sheet membranes. Each type has its own unique properties and installation requirements, so it is important to choose carefully.
Proper subfloor preparation and waterproofing techniques are essential in repairing a shower pan that flexes or moves. By taking these steps, you can ensure that your shower pan will remain stable and secure for years to come. In the next section, we will discuss how to install a new shower pan, which will complete the process of repairing your shower area.
Installing A New Shower Pan
Shower pan materials play a critical role in determining the durability and stability of your shower. You can either choose a fiberglass or acrylic shower pan, which is relatively easy to install, or a tile shower pan that requires professional installation. A fiberglass or acrylic shower pan is the most common option for DIY installation because it’s lightweight and straightforward to handle.
However, if you prefer a tile shower pan, it’s advisable to engage a professional plumber to do the installation. Unlike other materials, tiles require more expertise and specialized equipment to ensure they fit securely in place. Furthermore, installing a tile shower pan requires multiple steps and can be complicated even for experienced DIY enthusiasts.
DIY vs professional installation is a critical factor when installing a new shower pan. While DIY might seem like an attractive option because of its cost-effectiveness, it may end up being costly in the long run if not done correctly. Engaging the services of a certified plumber guarantees that your new shower pan will be installed professionally, saving you from future repairs or replacements.
Securing The Shower Pan In Place
The key to preventing a shower pan from flexing or moving is to secure it in place. This can be achieved by using securing hardware such as screws and nails. These fasteners should be driven into the subfloor or framing below the shower base, ensuring that they are secured tightly.
It’s important to note that this process should only be done after waterproofing techniques have been applied. Otherwise, moisture may seep through the holes created by the securing hardware, leading to water damage and mold growth. To avoid this issue, ensure that all waterproofing measures are in place before attempting to secure the shower pan.
By following these steps and utilizing proper securing hardware and waterproofing techniques, you can ensure that your shower pan remains stable and secure for years to come. In the next section, we will discuss how to properly seal the edges of the shower pan to further prevent any leaks or water damage.
Sealing The Edges Of The Shower Pan
To ensure a stable and secure shower pan, it is important to secure it in place. However, even with proper securing techniques, some shower pans may still flex or move. If you are experiencing this issue, there are a few steps you can take to fix it.
Firstly, check the edging of your shower pan. If the edging is not properly sealed or damaged, it can cause the pan to move or flex. To fix this issue, apply a waterproof sealant around the edges of the shower pan. This will not only prevent movement but also prevent water from seeping through and causing damage.
Secondly, consider using waterproofing techniques to further stabilize your shower pan. There are various products available that can be applied to the underside of the pan to increase its stability. These products are typically easy to use and will provide an extra layer of protection against movement.
Lastly, if your shower pan is still moving or flexing after taking these steps, it may be necessary to consult with a professional plumber who specializes in shower installation. They can assess the situation and offer additional solutions to help stabilize your shower pan.
Overall, fixing a shower pan that moves or flexes requires attention to detail and proper techniques. By checking for proper edging seals and using waterproofing measures, you can ensure that your shower pan remains stable and secure for years to come.
Testing For Leaks
To ensure the success of your shower pan repair, it is crucial to test for leaks once you have installed a new one. Leak detection is essential because even small leaks can cause significant damage over time. If left unnoticed, these leaks can lead to mold growth and water damage to the surrounding areas.
To detect leaks in your newly installed shower pan, there are various waterproofing techniques you can use. One effective method is filling the shower base with water and observing for any signs of leaking or seeping through the floor or walls. Another approach is using a moisture meter to check for any water buildup in the surrounding areas, such as the subfloor or adjacent walls.
In conclusion, testing for leaks after installing a new shower pan is crucial to ensure its effectiveness. By using waterproofing techniques such as filling with water and monitoring for seepage or using a moisture meter, you can identify any potential leaks that may cause damage over time. With this step complete, you can move on to the final touches and clean-up of your repaired shower pan.
Finishing Touches And Clean-Up
Once you have fixed your shower pan’s movement or flexing issue, it is essential to finish the job with a few key steps. First, it is important to clean up any excess debris or materials left over from the repair. This can be done with cleaning supplies such as a broom, dustpan, and wet mop. Be sure to dispose of any waste materials properly according to local regulations.
Next, you will need to apply finishing materials to complete the job. Depending on the type of shower pan you have and the extent of the repairs needed, this could include caulk, sealant, or other waterproofing agents. It’s important to choose high-quality finishing materials that are designed for use in bathrooms and will provide long-lasting protection against water damage.
Finally, take some time to inspect your work and ensure that everything looks and functions as it should. Test your shower pan for stability by standing on it and shifting your weight back and forth. If it feels solid and secure, then you have successfully fixed the movement issue! With proper care and maintenance, your newly repaired shower pan should serve you well for years to come.
- Use protective gear such as gloves when handling finishing materials.
- Choose waterproofing agents that are appropriate for your specific type of shower pan.
- Consider hiring a professional plumber if you’re unsure about how to complete any aspect of the repair or finishing process.
Moving forward, there are several tips you can follow to prevent future issues with your shower pan. By keeping an eye out for signs of wear and tear such as cracks or leaks, performing regular maintenance tasks like re-caulking as needed, and hiring a professional plumber for more complex repairs or installations, you can help ensure that your bathroom remains safe and functional for years to come.
Tips For Preventing Future Shower Pan Issues
After finishing the installation of a shower pan, it is crucial to take preventive measures to avoid future issues. The first thing you should do is to ensure that the shower pan does not flex or move. If it does, you need to fix it immediately.
Preventive measures include using high-quality materials and following the manufacturer’s instructions when installing the shower pan. You should also make sure that the subfloor is level and sturdy enough to support the weight of the shower pan. Another tip is to seal all joints and seams with a silicone caulk to prevent water from seeping into the subfloor.
Maintenance tips for a shower pan include regular cleaning and inspection. Clean your shower pan with a mild cleaner and a soft brush, making sure to remove any debris or soap scum buildup. Inspect your shower pan regularly for any signs of damage or wear and tear, such as cracks or leaks. If you notice any issues, address them immediately before they become more significant problems.
When it comes to fixing a shower pan that flexes or moves, some DIY enthusiasts may be tempted to tackle the job themselves. However, if you are unsure about what needs to be done, it is best to call in a professional plumber who can assess the situation and offer expert advice on how best to proceed. A professional plumber has experience dealing with these types of issues and will know how to fix them quickly and efficiently while ensuring that your bathroom remains safe and functional.
When To Call A Professional Plumber
It is not always necessary to call a professional plumber for every plumbing issue, but there are times when it is best to leave it to the experts. When dealing with a shower pan that flexes or moves, it may be tempting to attempt a DIY fix, but this can often lead to more problems in the long run. Here are some reasons why you should consider calling a professional plumber:
Expertise: Professional plumbers have years of experience and training in fixing various plumbing issues. They know how to accurately diagnose and repair problems without causing further damage.
Safety: Plumbing work can be dangerous if not done properly. Professional plumbers have the necessary safety equipment and knowledge to work safely and avoid accidents.
Time-saving: Attempting a DIY fix on your shower pan can take up valuable time and effort. By calling a professional plumber, you can save yourself time and stress by having the job done right the first time.
Cost-saving tips: While calling a professional plumber may seem expensive at first, they can actually save you money in the long run by providing cost-saving tips and advice on preventative maintenance.
Common mistakes when attempting a DIY fix on your shower pan include using incorrect tools or materials, causing further damage during repair, or improperly installing components which can lead to leaks or other issues down the line. To avoid these mistakes and ensure that your shower pan is fixed correctly, it is recommended that you call a professional plumber.
By considering these factors and seeking out expert help when needed, you can rest assured that your shower pan will be properly fixed without causing any additional damage or safety hazards. In the next section, we will address some frequently asked questions about fixing a shower pan that flexes or moves.
Frequently Asked Questions (Faqs) About Fixing A Shower Pan That Flexes Or Moves
One of the most common issues with shower pans is their tendency to flex or move. This can be a frustrating problem for homeowners, as it can lead to leaks and water damage if not addressed promptly. While some may be tempted to attempt DIY repairs, it’s important to note that fixing a shower pan that flexes or moves can be a complex process. Hiring a professional plumber may ultimately save time and money in the long run.
When considering whether to tackle this issue on your own or call in a professional, it’s important to weigh the pros and cons of each option. DIY repairs may seem attractive due to their lower cost, but they come with several potential risks. Without proper knowledge and experience, you could end up causing further damage to your shower pan or even injuring yourself in the process. On the other hand, hiring a professional plumber ensures that the repair will be done correctly and safely.
Of course, cost is also an important factor when deciding whether to hire a professional or take on the repair yourself. In general, DIY repairs will be less expensive than hiring a plumber. However, this cost difference should be weighed against the potential risks involved in attempting the repair without proper knowledge or experience. Ultimately, it’s up to each homeowner to weigh these factors and decide which option makes sense for their specific situation.
| Pros of DIY Repairs | Cons of DIY Repairs | Pros of Professional Repairs | Cons of Professional Repairs |
|---|---|---|---|
| Lower Cost | Potential for Further Damage | Quality Workmanship Guaranteed | Higher Cost |
| Sense of Accomplishment | Risk of Injury | Safe Repair Process | Need to Schedule Appointment |
| Control Over Materials Used | Lack of Experience/Knowledge | Time Savings for Homeowner |
In summary, fixing a shower pan that flexes or moves can be a challenging task that requires careful consideration before proceeding. While DIY repairs may seem like a cost-effective solution, they come with significant risks. Hiring a professional plumber may ultimately be the safer and more cost-effective option for many homeowners. By weighing the pros and cons of each approach, you can make an informed decision that will ensure your shower pan is fixed correctly and efficiently.
Conclusion
In conclusion, a shower pan that flexes or moves can be a frustrating and potentially hazardous issue to deal with. However, by understanding the anatomy of your shower pan, identifying signs of movement, and checking for common causes such as subfloor damage, you can take steps to fix the problem yourself.
It’s important to prepare the work area properly and take precautions such as wearing safety gear before beginning any repairs. Additionally, regular maintenance and prevention measures can help prevent future issues with your shower pan.
Remember that if you’re unsure about fixing your shower pan yourself or if you encounter more serious issues during the repair process, it’s always best to call in a professional plumber. As the saying goes, “An ounce of prevention is worth a pound of cure.” By taking proactive steps to maintain your plumbing system, you can avoid costly repairs down the line and ensure that your home remains safe and comfortable for years to come.
Image Credits
- “Week 6 – Shower Pan” by mrjerz (featured)

