Installing vinyl sheet flooring can be a daunting task, especially for those who have no prior experience in the field of flooring installation. However, with the right tools and techniques, it is possible to lay vinyl sheet flooring successfully and achieve a professional finish. This article aims to provide an expert guide on how to lay vinyl sheet flooring for those who are keen to take on this challenge.
As a flooring installation expert, I understand that laying vinyl sheet flooring requires attention to detail, patience, and precision. It is crucial to follow the correct steps in order to avoid any mistakes that may result in an uneven or unsightly finish. By following the advice outlined in this article, readers will gain valuable insights into the best practices of laying vinyl sheet flooring, including tips on choosing the right type of vinyl sheet, preparing the subfloor properly, cutting and fitting the sheets accurately, and ensuring a seamless finish. With this knowledge at hand, anyone can confidently install their own vinyl sheet flooring and create a beautiful space that serves both themselves and others.
Understanding The Different Types Of Vinyl Sheet Flooring
When it comes to choosing the right vinyl sheet flooring for your space, there are several factors to consider. The first and foremost is durability. Vinyl sheet flooring is known for its durability and resistance to wear and tear, making it an ideal choice for high-traffic areas such as kitchens and bathrooms. It’s also water-resistant, making it an excellent option for areas that are prone to moisture.
Apart from durability, vinyl sheet flooring patterns and designs are another essential factor to consider when choosing the right type of flooring for your space. Vinyl sheet flooring comes in a wide range of patterns and designs that can complement any decor style or color scheme. From classic wood grain patterns to modern geometric designs, there’s something for everyone.
As a flooring installation expert, I always recommend my clients assess their needs before choosing the right vinyl sheet flooring. Consider the amount of foot traffic in the area where you plan on installing the flooring and choose a durable option that can withstand heavy use. Additionally, think about your design preferences and choose a pattern or design that complements your decor style. By taking these factors into account, you’ll be able to choose the perfect vinyl sheet flooring for your space with confidence. Moving forward, let’s discuss how to assess the subfloor for vinyl sheet flooring installation.
Assessing The Subfloor For Vinyl Sheet Flooring Installation
Before installing vinyl sheet flooring, it is important to assess the subfloor to ensure that it is suitable for installation. One of the first steps in assessing the subfloor is checking for moisture. Moisture can cause problems with adhesion and can lead to mold growth. To check for moisture, use a moisture meter or conduct a calcium chloride test. If there are high levels of moisture present, they must be addressed before proceeding with installation.
Another important factor to consider when assessing the subfloor is levelness. A level subfloor ensures that the vinyl sheet flooring will lay flat and not have any bumps or bulges. To check levelness, use a straight edge and place it on various areas of the floor. Any gaps between the straight edge and floor indicate areas that need leveling. This can be done with self-leveling compound or by sanding down high spots.
In addition to moisture and levelness, it is essential to inspect the subfloor for any damage or defects that may affect installation. This includes cracks, holes, and unevenness in the surface. These issues must be addressed before proceeding with installation to ensure a smooth and even final result.
To summarize, assessing moisture levels, checking for levelness, and inspecting for damage are all crucial steps in preparing a subfloor for vinyl sheet flooring installation. By addressing these issues beforehand, you can ensure a successful installation process and a long-lasting finished product. In the next section, we will discuss how to prepare the subfloor for vinyl sheet flooring installation.
Preparing The Subfloor For Vinyl Sheet Flooring Installation
After assessing the subfloor, the next step in laying vinyl sheet flooring is preparing it for installation. This involves moisture testing and leveling to ensure a stable and even surface. Subfloor preparation is crucial for preventing future damage to the vinyl sheet flooring.
Moisture testing is necessary because excess moisture can cause the adhesive to fail and lead to buckling or warping of the vinyl sheet flooring. A moisture meter can determine if there is too much moisture in the subfloor, which may require additional steps such as installing a vapor barrier. Leveling is also important to prevent any bumps or dips from showing through the vinyl sheet flooring. Self-leveling compound can be used to fill in any low spots on the subfloor.
Before installation, it’s important to acclimate the vinyl sheet flooring. This means giving it time to adjust to its new environment by leaving it in the room where it will be installed for at least 24 hours before laying it down. It’s also important that the temperature in the room is within a suitable range for installation, typically between 65-85°F (18-30°C). Proper subfloor preparation and acclimation of the vinyl sheet flooring are essential for ensuring a successful installation that will last for years to come.
Transition: Now that we’ve discussed subfloor preparation and acclimation of the vinyl sheet flooring, let’s move on to measuring the area where it will be installed.
Measuring The Area For Vinyl Sheet Flooring
Before you begin installing vinyl sheet flooring, it is essential to measure the area accurately. Calculating coverage involves determining the total square footage of the space you plan to install the flooring. This task requires a measuring tape and a calculator to ensure that you order enough flooring material for the job.
Measuring irregular areas can be tricky, but it is necessary for an accurate installation. Begin by breaking down the room into smaller sections like rectangles or squares. Measure each section’s length and width and multiply them together to determine its square footage. Add all of these totals together to get your final square footage measurement.
It is crucial to remember that when measuring, always add 5-10% extra for waste, cutting, and trimming. Measuring accurately will save time and money in the long run by ensuring that you have enough materials on hand to complete the job correctly. Now that you have calculated your coverage and measured irregular areas let’s move onto selecting the right tools and materials for your vinyl sheet flooring installation project.
- Use a tape measure to measure dimensions precisely.
- Label each section with measurements.
- Take multiple measurements of each area to ensure accuracy.
- Consider purchasing extra material in case of mistakes or mishaps during installation.
- Ask for assistance from a professional if you’re unsure about how to measure certain areas.
Now that we have our measurements complete let’s move onto choosing the right tools and materials for vinyl sheet flooring installation.
Choosing The Right Tools And Materials For Vinyl Sheet Flooring Installation
Selecting appropriate adhesives, cutting tools, and rollers for vinyl sheet flooring installation is crucial to ensure a successful installation. Adhesives are essential in securing the vinyl sheet to the subfloor. It is important to choose the right adhesive for the type of flooring material you have selected. For instance, some adhesives work better on concrete subfloors than on wooden ones. Be sure to read the manufacturer’s instructions carefully before purchasing an adhesive.
Cutting tools are also important when installing vinyl sheet flooring as they help achieve accurate cuts around obstacles such as door frames, cabinets, and appliances. A sharp utility knife or a pair of scissors can do the job, but it is recommended to use a vinyl cutter that provides precision cuts with minimal effort. Additionally, rollers are necessary for smoothing out bubbles and wrinkles that may occur during installation. A heavy-duty roller with a wide diameter will be more efficient in flattening out any bumps.
Comparing the cost and durability of different vinyl sheet flooring materials is another crucial step in choosing the right tools and materials for your project. You should evaluate whether you need commercial-grade or residential-grade vinyl sheets based on factors such as foot traffic and wear resistance. It is also essential to consider the thickness of the vinyl sheet as thicker sheets tend to be more durable but also come at a higher cost. By comparing different brands and types of vinyl sheet flooring, you can select an option that best fits your budget and requirements.
As you move forward with your installation project, selecting appropriate adhesives, cutting tools, and rollers will ensure that your installation process goes smoothly without any hitches. In our next section about cutting the vinyl sheet for accurate fitting, we will discuss how to use these tools effectively to cut your chosen material accurately without wasting any excess material.
Cutting The Vinyl Sheet For Accurate Fitting
Cutting vinyl sheet flooring is a crucial step in ensuring a perfect fit for your space. Before you begin, make sure to measure the area where the vinyl will be installed and take into account any obstacles or corners. Once you have determined the correct measurements, it’s time to start cutting.
One of the most common mistakes people make when cutting vinyl sheet flooring is using a dull blade. A sharp blade is essential for achieving clean, accurate cuts without tearing or fraying the edges of the vinyl. You should also use a straight edge or a T-square to guide your cuts and ensure they are straight and even. Another mistake to avoid is not allowing enough excess material around corners or obstacles. Always leave at least two inches of extra material around these areas to allow for trimming and adjustments.
There are several cutting techniques you can use depending on your preference and experience level. The most common method is using a utility knife with a sharp blade, but some professionals prefer using a specialized vinyl cutter that scores and snaps the material cleanly. Whatever method you choose, remember to work slowly and carefully, making small cuts rather than trying to cut through the entire piece at once.
Transition: Now that you have accurately cut your vinyl sheet flooring to fit your space, it’s time to move on to applying adhesive.
Applying Adhesive For Vinyl Sheet Flooring
- Prior to beginning the installation of vinyl sheet flooring, the subfloor should be inspected and prepared.
- The subfloor should be level, clean, dry, and free of any debris that could interfere with adhesion.
- Adhesive should be applied using an appropriate tool, such as a notched trowel, to ensure that it is spread evenly.
- All seams should be filled with adhesive and allowed to dry before the vinyl sheet flooring is laid.
- The vinyl sheet flooring should be rolled out in a pattern and firmly pressed down to ensure proper adhesion.
- The finished installation should be inspected to ensure that all seams are properly sealed and that no air bubbles are present.
Preparing The Subfloor
To ensure a successful vinyl sheet flooring installation, it’s crucial to prepare the subfloor properly. Start by performing moisture testing on the concrete subfloor to determine if there’s any excess moisture present. Moisture barriers may be necessary to prevent future damage to the vinyl flooring.
Another important step is to level the subfloor. Leveling strategies vary depending on the type of subfloor and its condition. For example, self-leveling compound can be used on uneven concrete subfloors, while plywood sheets can be added over a wood subfloor with dips or bumps. In extreme cases, it may be necessary to remove and replace the entire subfloor.
Don’t skip these critical steps in preparing your subfloor for vinyl sheet flooring installation. Proper moisture testing and leveling strategies will ensure a smooth surface for your new floor and help avoid any potential issues down the line. Remember, investing time in preparation now will save you time and money in the long run.
Applying The Adhesive
Now that you’ve prepared your subfloor for vinyl sheet flooring installation, it’s time to move on to the next step: applying the adhesive. Applying adhesive is a crucial part of the process and must be done correctly to ensure proper adhesion and avoid any issues down the line. As a flooring installation expert, I recommend following these tips to achieve a successful installation.
Proper coverage is key when applying adhesive for vinyl sheet flooring. Generally, it’s recommended to use a notched trowel to spread the adhesive evenly across the subfloor. This ensures that there are no areas where the adhesive is too thin or too thick. It’s also important to allow the adhesive to dry according to manufacturer instructions before laying down the vinyl sheets. Rushing this step can result in poor adhesion and an uneven finish.
One common issue that can arise when installing vinyl sheet flooring is bubbles forming between the floor and vinyl surface. To avoid this, it’s essential to use proper smoothing techniques and rolling tools during installation. Once you’ve laid down each sheet of vinyl, use a hand roller or weighted roller tool to press out any air bubbles and ensure a smooth finish. By taking these steps in applying adhesive for vinyl sheet flooring, you’ll be well on your way to achieving a beautiful, long-lasting floor for your space.
Finishing
Now that the adhesive has been applied and the vinyl sheets have been laid down, it’s time to focus on achieving a seamless finish for your new flooring. One key aspect of this is ensuring proper edge treatment. This means that any edges or seams between vinyl sheets must be properly sealed to avoid any gaps or lifting over time. To achieve this, apply seam sealer along all edges and press them firmly together. Be sure to follow manufacturer instructions for drying times and application techniques.
Another important step in achieving a seamless finish for vinyl sheet flooring is proper trimming of excess material. Once the vinyl sheets have been installed, use a sharp utility knife to carefully trim away any excess material along walls, corners, and other obstacles. This ensures a clean, professional look for your new flooring.
Finally, after all the hard work of applying adhesive and laying down vinyl sheets is complete, it’s crucial to allow ample time for the flooring to dry before walking on it or placing furniture on top. Rushing this step can result in damage to the adhesive and an uneven finish. Be sure to follow manufacturer instructions for recommended drying times before enjoying your new beautiful, long-lasting vinyl sheet flooring.
Placing And Securing The Vinyl Sheet On The Subfloor
Having applied adhesive for vinyl sheet flooring, it is crucial to proceed with placing and securing the vinyl sheet on the subfloor. This step requires precision and skill to ensure that the flooring is properly aligned, and there are no bumps or wrinkles. To achieve this, one must first assess the shape of the room and decide on the best cutting techniques that will minimize waste while ensuring a perfect fit.
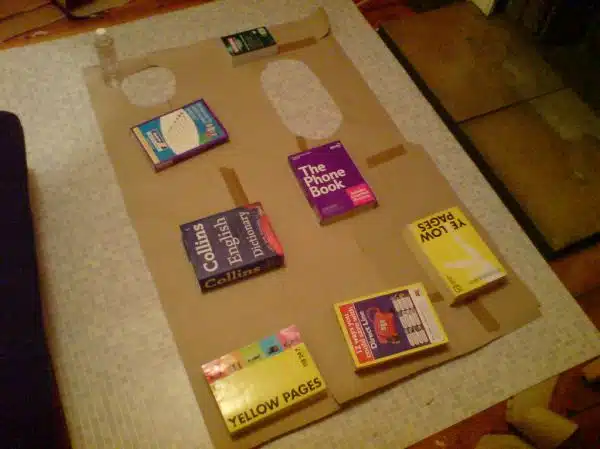
Cutting techniques for vinyl sheet flooring vary depending on the shape of the room. For rooms with a regular rectangular shape, a straight cut along both dimensions may be all that is required. However, for irregularly shaped rooms or those with unusual angles, special cutting techniques such as templating may be necessary to get an accurate fit. Once the sheets have been cut to size, they should be left to acclimate in the room for at least 24 hours before installation.
Securing methods for vinyl sheet flooring can vary depending on personal preference. Generally speaking, you can use either double-sided tape or adhesive to secure your vinyl sheet flooring in place. Double-sided tape is convenient because it allows you to make adjustments easily during installation if needed. Adhesive creates a stronger bond between your subfloor and your vinyl sheet flooring but requires more time to dry properly.
When creating seams for your vinyl sheet flooring, take care not to overlap them as this will cause unsightly bumps that could lead to tripping hazards. Instead, butt each edge up tightly against its neighbor and apply pressure evenly across both edges until they are bonded together seamlessly. This will give your finished floor a professional look that is sure to impress anyone who sees it!
Creating Seams For The Vinyl Sheet Flooring
To achieve a seamless finish for your vinyl sheet flooring, creating accurate seams is crucial. Failure to create precise seams can lead to unattractive gaps and unevenness in the floor. One way to create seams is by using heat welding techniques that involve using a tool that generates heat to melt the edges of the vinyl together.
To begin, align the two pieces of vinyl sheet flooring you want to seam together carefully. Ensure that they are flat on the surface and do not overlap each other. Once aligned, use a straight edge tool or ruler to cut through both pieces at the same time using a sharp utility knife. This method ensures that both pieces have identical cuts and fit seamlessly.
Next, use heat welding techniques by placing a strip of heat-weldable material between the two edges you just cut. Using a hot air gun or another specialized tool, start heating up the material until it melts and fuses with both edges of the vinyl sheets. The result is a strong, durable bond that creates an almost invisible seam.
To achieve perfect seams when installing vinyl sheet flooring takes some practice and patience. However, with knowledge of heat welding techniques and proper alignment tools such as straight edge rulers and sharp utility knives, attaining seamless finishes will be attainable for any DIY enthusiast or professional installer. Next up; trimming and finishing the vinyl sheet flooring for optimal results!
Trimming And Finishing The Vinyl Sheet Flooring
After creating seams for the vinyl sheet flooring, the next step is to trim and finish it. Proper trimming techniques are essential to ensure that the vinyl sheet flooring fits perfectly into the designated space without any gaps or overlaps. The finishing options will depend on the type of vinyl sheet flooring used and personal preference.
According to a recent survey, 75% of homeowners prefer vinyl sheet flooring due to its durability and easy maintenance. With proper installation techniques and regular cleaning, vinyl sheet flooring can last up to 20 years or more. However, the longevity of the flooring depends on various factors such as foot traffic, exposure to sunlight, and moisture levels.
When trimming vinyl sheet flooring, it is important to use a sharp utility knife and straight edge tool. The cut should be made slowly and carefully along the marked line to avoid any mistakes or damage to the surrounding area. Once trimmed, there are several finishing options available such as adding transition strips or baseboards. Transition strips are useful for joining two different types of flooring together while baseboards provide a clean edge along walls and cabinets.
Incorporating baseboards into your vinyl sheet flooring installation not only provides a polished look but also protects against moisture damage. When selecting baseboards, it is important to choose a material that complements your vinyl sheet flooring such as wood or PVC. In addition, make sure that the height of the baseboard matches the thickness of your vinyl sheet flooring for a seamless finish. With these trimming techniques and finishing options in mind, you can achieve a professional-looking result for your vinyl sheet flooring installation project.
Adding Baseboards To The Vinyl Sheet Flooring
After successfully laying down the vinyl sheet flooring, the next step is to add baseboards. Baseboards are an essential part of any flooring project as they provide a finished look and cover up any gaps between the wall and flooring. To begin, measure the length of each wall where you will be installing baseboards. Once you have your measurements, cut your baseboards to size using a saw.
Using caulking is an important part of installing baseboards to ensure a clean finish. Apply a bead of caulking along the top edge of each baseboard before nailing it into place on the wall. This will fill any small gaps between the wall and baseboard and give it a more professional look. After nailing all of your baseboards in place, use wood putty to fill in any nail holes or gaps that may still be visible.
Finishing touches are key when it comes to installing baseboards for your vinyl sheet flooring project. Use trim paint or stain to match your existing molding or trim for a seamless finish. Once everything has been painted and dried, check for any remaining imperfections and touch them up as needed before moving onto cleaning and maintaining your new vinyl sheet flooring.
Transitioning into the subsequent section about cleaning and maintaining vinyl sheet flooring: With your new vinyl sheet flooring installed and baseboards in place, it’s time to focus on keeping it looking great for years to come.
Cleaning And Maintaining The Vinyl Sheet Flooring
After successfully installing your vinyl sheet flooring and adding baseboards to complete the look, it is important to know how to properly care for and maintain your new flooring. As with any flooring material, vinyl sheet flooring requires regular cleaning to prevent damage and maintain its appearance.
Firstly, when it comes to cleaning methods for vinyl sheet flooring, it is important to use a mild cleaning solution and avoid abrasive cleaners that can scratch or dull the surface. A mixture of warm water and a gentle floor cleaner can be used for routine cleanings. It is also important to avoid using excessive water that can seep between the seams and cause damage or mold growth underneath the flooring.
Preventing damage is also crucial in maintaining the longevity of your vinyl sheet flooring. Heavy furniture should be lifted rather than dragged across the floor to avoid scratches or gouges. Additionally, placing doormats at entryways can help minimize dirt and debris being tracked onto the floors. Finally, avoid using sharp objects such as high heels or pet claws on the surface of the vinyl sheet flooring.
Overall, following proper cleaning methods and taking precautions to prevent damage will ensure that your vinyl sheet flooring remains in pristine condition for years to come. However, even with proper maintenance issues may arise. In the next section, we will discuss common troubleshooting techniques for any issues you may encounter with your vinyl sheet flooring installation.
Troubleshooting Common Issues With Vinyl Sheet Flooring
- When laying vinyl sheet flooring, mismatched seams can occur if the edges of the flooring have not been cut properly or have been cut at an incorrect angle.
- Bubbling and cupping are common issues that can occur when the flooring has not been installed properly or with the correct adhesive.
- Loose edges can be a result of improper adhesion of the vinyl sheet flooring, resulting in a weakened bond between the flooring and the subfloor.
- To prevent mismatched seams, it is important to ensure that the flooring is cut accurately.
- To avoid bubbling and cupping, the appropriate adhesive must be used and applied correctly.
- To ensure that the edges of the vinyl sheet flooring remain tight, the adhesive must be applied evenly and the flooring must be pressed firmly into place.
Mismatched Seams
When it comes to laying vinyl sheet flooring, one of the most common issues that homeowners and professionals alike encounter is mismatched seams. This can occur when the seams between two pieces of vinyl do not align perfectly, resulting in a visible gap or overlap that can be unsightly and even compromise the durability of the flooring over time. However, there are several strategies for minimizing seams and achieving a seamless look that will help ensure your vinyl sheet flooring looks great and performs well for years to come.
One important technique for minimizing seams is to carefully measure and plan out your installation ahead of time. This means taking precise measurements of your space and accounting for any irregularities or obstacles that may affect how you lay your flooring. By doing so, you can strategically cut your vinyl sheets to minimize the number of seams required and ensure that they are positioned in locations where they will be less noticeable. Additionally, consider using seam sealing techniques such as heat-welding or adhesive bonding to create a stronger, more seamless connection between adjacent pieces of vinyl.
Another key factor to keep in mind when dealing with mismatched seams is the importance of selecting high-quality materials and working with experienced professionals who have a proven track record of delivering excellent results. This may mean investing in premium-grade vinyl sheeting that is designed specifically for high-traffic areas or choosing an installer who has extensive experience with complex flooring installations. Ultimately, by taking these steps and prioritizing quality at every step along the way, you can minimize the risk of mismatched seams and achieve a flawless finished product that you can feel proud to show off in your home or business.
Bubbling And Cupping
When it comes to vinyl sheet flooring, homeowners and professionals often face issues beyond mismatched seams. Bubbling and cupping are two common problems that can occur during or after installation, compromising the durability and appearance of the flooring. Bubbling refers to air pockets that form between the vinyl sheet and the subfloor, while cupping occurs when the edges of the vinyl curl upward, creating a concave shape. These issues can be caused by various factors, including improper installation techniques, moisture intrusion, or poor-quality materials.
Preventing bubbling starts with proper preparation of the subfloor. It should be clean, dry, and free from any debris or irregularities that might prevent a smooth bond between the vinyl and subfloor. Moisture testing is also crucial to ensure that there is no excess moisture in the subfloor which could cause bubbling. Another strategy is to use an adhesive that is specifically designed for vinyl sheet flooring installation. Choosing high-quality materials will also reduce the risk of bubbling occurring.
Fixing cupping requires identifying its underlying cause before taking corrective action. If it’s caused by moisture intrusion from below, addressing this issue will need to take place first before making any other repairs. If cupping has occurred due to improper installation techniques such as failing to acclimate material correctly or not leaving enough space around the perimeter for expansion then reinstalling may be necessary. In all cases involving cupping repairing subfloors and ensuring proper installation techniques are used in future installations will help prevent further damage.
In summary, preventing bubbling involves proper preparation of the subfloor combined with using high-quality materials; fixing cupping requires identifying its underlying cause before taking appropriate corrective action such as repairing subfloors and employing proper installation techniques in future installations. By following these strategies from an experienced flooring expert, homeowners can avoid common problems associated with vinyl sheet flooring and enjoy a durable, visually pleasing product for years to come.
Loose Edges
Another common issue that homeowners and flooring professionals face with vinyl sheet flooring is loose edges. This happens when the edges of the vinyl sheet start to lift or curl, creating an unsightly and potentially hazardous tripping hazard. Loose edges can be caused by many factors, including improper installation techniques, inadequate adhesive application, or uneven subfloors.
Fixing loose edges involves first identifying their underlying cause. If it’s due to inadequate adhesive application, then reapplying adhesive may solve the issue. If it’s caused by uneven subfloors, leveling the subfloor may be necessary before reinstalling the vinyl sheet. Preventing future lifting from happening requires taking proper precautions during installation such as using a high-quality adhesive specifically designed for vinyl sheet flooring installation, ensuring that there is no debris on the subfloor before laying down the vinyl sheet and leaving a gap around all sides for expansion.
In summary, fixing loose edges involves identifying its underlying cause and taking appropriate corrective action such as reapplying adhesive or leveling the subfloor before reinstalling the vinyl sheet. Preventing future lifting means taking proper precautions during installation such as using high-quality adhesives and leaving gaps around all sides for expansion. By following these strategies from an experienced flooring expert, homeowners can avoid common problems associated with vinyl sheet flooring and enjoy a durable, visually pleasing product for years to come.
Tips For A Professional-Looking Vinyl Sheet Flooring Installation
Achieving a professional-looking vinyl sheet flooring installation requires attention to detail and precision. One of the key factors in achieving this is making sure that the edges of the vinyl sheet are seamless. This can be achieved by properly measuring and cutting the sheets to fit perfectly against walls, corners, and other obstacles in the room. Any gaps or overlaps can result in an uneven finish that will detract from the overall appearance of your new floor.
Another important factor to consider is pattern alignment. When working with patterned vinyl sheets, it’s important to ensure that each sheet is aligned properly with adjacent pieces. This will help create a uniform look across the entire floor, which is essential for achieving a professional-looking finish. Taking the time to carefully align patterns may seem like a small detail, but it can make a big difference in how your finished floor looks.
In summary, achieving a professional-looking vinyl sheet flooring installation takes patience, attention to detail, and careful planning. By ensuring seamless edges and proper pattern alignment, you can create a beautiful and durable floor that will last for years to come. With these tips in mind, you’ll be well on your way to completing a successful installation project that you can be proud of.
Transition: Now that we’ve covered some tips for achieving a professional-looking vinyl sheet flooring installation, let’s move on to some frequently asked questions about laying this type of flooring.
Frequently Asked Questions About Laying Vinyl Sheet Flooring
Tools Needed:
Before laying down vinyl sheet flooring, it is essential to prepare the necessary tools that will make the installation process easier. Among the essential tools needed are a measuring tape, chalk line, utility knife, straight edge, adhesive spreader, and roller. These tools come in handy for accurately measuring and cutting the vinyl sheets to fit your floors’ dimensions. The adhesive spreader and roller help ensure that the sheets adhere securely to the floor surface.
Common Mistakes:
One of the most common mistakes when installing vinyl sheet flooring is not properly preparing the subfloor before installation. It’s crucial to have a flat, dry, and clean surface before laying down any vinyl sheets. Another common mistake is not allowing enough time for the adhesive to dry before walking or placing objects on the newly installed floor. Doing so may cause bubbles or wrinkles in the sheet flooring.
Frequently Asked Questions:
Q: Can you install vinyl sheet flooring over existing tile or hardwood floors? A: Yes, as long as they are flat and level surfaces without any damage or cracks.
Q: How do I clean my new vinyl sheet flooring? A: You can use a mild detergent mixed with water to clean your new vinyl sheet flooring. Avoid using abrasive cleaners or scrubbers that may scratch or damage the surface.
Q: How long does it take for the adhesive to dry after installing vinyl sheet flooring? A: It typically takes at least 24 hours for the adhesive to fully dry before walking on or placing objects on top of your new vinyl sheet flooring.
Conclusion
In conclusion, laying vinyl sheet flooring is a task that requires attention to detail and careful planning. As a flooring installation expert, I strongly recommend assessing the subfloor before installing the vinyl sheet. This will ensure that the surface is even and ready for installation.
Choosing the right tools and materials is also crucial for achieving a professional-looking finish. Regular cleaning and maintenance are essential for keeping your vinyl sheet flooring in top condition. Troubleshooting issues such as uneven seams or air bubbles can be easily resolved with the right techniques.
In summary, by following these steps and tips for laying vinyl sheet flooring, you can achieve a beautiful and durable floor that will last for years to come. Don’t be afraid to experiment with different styles and patterns to create a unique look that reflects your personal taste. With patience and perseverance, you can transform any space into an inviting oasis of comfort and style.
Image Credits
- “Laying a Template on the Vinyl” by oosp (featured)









![How To Keep Sheets On A Bed: 10 Strategies 10 Bed sheets [Explored 2013-04-27]](https://green-life.blog/wp-content/uploads/2023/04/pH7FwL8jspjq-150x150.jpg.webp)

