As a professional fence installation expert, I have installed countless vinyl fences for residential and commercial clients. One of the most common questions I receive from homeowners is how to install a vinyl fence. Vinyl fencing is an excellent option for property owners who seek privacy, durability, and low maintenance. In this article, I will provide step-by-step instructions on how to install a vinyl fence, including tips and tricks that will save you time and money.
Before we dive into the installation process, it’s important to understand the benefits of vinyl fencing. Unlike traditional wood or metal fences that require frequent upkeep, vinyl fences are designed to withstand harsh weather conditions without fading, cracking or warping. Vinyl fences are also available in various colors and styles, making them an attractive option for enhancing your property’s curb appeal. With proper installation techniques and regular maintenance, your vinyl fence can last for decades while providing privacy and security for your family. Let’s get started!
Benefits Of Vinyl Fencing
Vinyl fencing has become increasingly popular over the years due to its many advantages. One of the most significant benefits of vinyl fencing is its durability. Unlike traditional wood fences, vinyl fences are resistant to rotting, warping, and insect damage, making them an excellent long-term investment for homeowners. Additionally, vinyl fences require little maintenance and can withstand harsh weather conditions such as heavy rain and extreme temperatures.
Another advantage of vinyl fencing is its versatility. Vinyl fences come in a variety of styles and colors, allowing homeowners to choose a fence that complements their home’s architectural style and landscape design. Furthermore, vinyl fences can be customized to fit any yard size or shape, providing both privacy and curb appeal.
Overall, choosing a vinyl fence over other materials such as wood or metal provides homeowners with many benefits that make it a worthwhile investment. In the next section, we’ll discuss how to choose the right vinyl fence for your needs based on factors such as style preferences, budget considerations, and property requirements.
Choosing The Right Vinyl Fence For Your Needs
When it comes to choosing a vinyl fence for your property, there are several factors to consider. One of the most important things to think about is the style of fence that will best suit your needs. Vinyl fence styles vary widely, from traditional picket fences to more modern designs, so it’s important to find one that aligns with your aesthetic preferences and functional requirements.
Another key consideration when selecting a vinyl fence is budget. While vinyl fences are generally less expensive than wood or metal alternatives, prices can vary depending on several factors such as height, width, and design complexity. It may be tempting to go with the cheapest option available, but keep in mind that investing in a high-quality fence will save you money in the long run by reducing maintenance costs and increasing overall durability.
To help you envision what type of vinyl fence might work best for your property and budget, here are some popular styles and their features:
- Picket Fence: A classic style that adds charm and curb appeal to any home. Picket fences come in various heights and widths and can be customized with embellishments like scalloped edges or decorative post caps.
- Privacy Fence: Ideal for homeowners who value privacy and security. These fences feature tightly spaced panels that block visibility from neighbors or passersby.
- Ranch Rail Fence: Perfect for ranch-style or country homes, this fence consists of horizontal rails supported by sturdy posts.
Ultimately, choosing the right vinyl fence depends on your individual needs and preferences. Take some time to research different options before making a decision – your fence installation expert can provide additional guidance if needed.
As you move forward with selecting the right vinyl fence for your property, it’s essential to have accurate measurements of your yard before making any purchases. In the next section, we’ll discuss how to properly measure your property for fence installation so that you can ensure a successful outcome.
Measuring Your Property For Fence Installation
Accurate measuring is crucial when installing a vinyl fence. Measuring your property accurately will ensure that you purchase the correct amount of materials and avoid any costly mistakes. To achieve this, you will need to use specific tools for measurement.
One useful tool for measuring is a laser level. This tool emits a beam of light that creates an accurate line across the ground or wall, allowing you to measure the distance between two points with precision. Another measuring tool that can be used is a tape measure. Tape measures come in different lengths and are ideal for measuring smaller distances, such as the width of panels or posts.
To take accurate measurements, start by mapping out your property lines using stakes and string. Once you have identified your boundaries, measure the length of each side of your property, taking into account any corners or obstacles that may affect the fence’s layout. When measuring, it’s essential to consider any changes in elevation as they can impact how much fencing material you’ll need.
In summary, accurate measurements are essential when installing a vinyl fence. Using tools such as laser levels and tape measures will help ensure precise measurements that will save time and money. By mapping out your property lines and taking into account any elevation changes or obstacles, you can guarantee that you purchase the correct amount of materials needed for installation. In the next section, we will discuss purchasing materials and tools required for installing a vinyl fence.
Purchasing Materials And Tools
After measuring your property for fence installation, you might be wondering about the cost estimation of installing a vinyl fence. According to HomeAdvisor, homeowners spend an average of $2,800 on vinyl fence installation. However, this cost can vary depending on factors such as the size of your property and whether you choose to install it yourself or hire professionals.
DIY installation is a popular option for those who want to save money. However, keep in mind that it requires some level of skill and experience with tools. If you’re not confident in your abilities or don’t have the necessary tools, professional installation may be a better choice. While it may cost more upfront, hiring professionals can save you time and ensure that your fence is installed correctly.
Before purchasing materials and tools for your vinyl fence installation project, consider whether DIY or professional installation is right for you. If you do decide to go the DIY route, make sure you have all the necessary tools and equipment before starting. In the next section, we’ll discuss how to prepare your property for fence installation to ensure a successful project.
Preparing Your Property For Fence Installation
Before installing a vinyl fence, it is important to properly prepare your property. This involves clearing any vegetation and marking property boundaries to ensure that the fence is installed in the correct location. Vegetation can hinder the installation process and may even damage the fence if left unaddressed. Clearing vegetation includes removing any shrubs, bushes, trees, or other plants that may be in the way of the fence line.
Once vegetation has been cleared, it is important to mark your property boundaries. This will help ensure that you are installing your fence on your own property and not encroaching on your neighbor’s land. Marking property boundaries can be done using stakes and string or with spray paint. It is important to make sure that all corners are marked accurately and that lines are straight.
Preparing your property for a vinyl fence installation may take some time and effort, but it will pay off in the long run by ensuring a smooth installation process. By clearing vegetation and marking property boundaries, you can avoid potential issues down the road such as damage to your fence or disputes with neighbors over property lines. With these preparations complete, you can move on to setting up the fence posts for a sturdy and secure installation.
Setting Up The Fence Posts
Just as a painter must prepare their canvas before painting, so too must you prepare your property before installing a vinyl fence. This entails ensuring that there are no underground utilities or plumbing lines where you plan to dig holes for the fence posts. Once the area has been marked, it’s time to begin digging holes for the fence posts.
Digging holes can be a challenging task, especially if you have rocky or clay soil. It’s important to make sure that each hole is deep enough and wide enough to accommodate the specific post size and style of your vinyl fence. After digging each hole, it’s recommended that you set concrete in the hole before inserting the fence post to provide stability and prevent shifting.
Setting concrete involves mixing it according to package instructions and pouring it into each hole around the post until it reaches ground level. The concrete should then be left undisturbed for at least 24 hours to allow it to cure properly before continuing with fence installation. Properly set concrete will ensure your fence stays upright even during windy conditions and provides long-lasting support for years to come.
With your fence posts securely in place, it’s time to move on to installing fence panels. But first, be sure to take a step back and admire your handiwork – knowing that your preparations have laid a solid foundation for a strong, beautiful vinyl fence that will serve its purpose well for many years.
Installing Fence Panels
Once you have measured and marked the fence line, the next step is to level the ground. It’s essential to make sure that your fence panels are installed on even ground, or else they won’t fit correctly. You can use a shovel or a rake to remove any rocks, debris, or plants from the area where you’ll install the fence. Then, use a level tool to check if the ground is level. If it isn’t, you may need to adjust it by adding soil or removing some until it’s even.
After leveling the ground, it’s time to dig holes for your fence posts. The depth and width of each hole will depend on your vinyl fence design and local building codes. Generally speaking, most vinyl fences require post holes that are at least 2 feet deep and 6 inches wide. You can use a post hole digger or an auger to do this job efficiently. When digging holes, be sure to keep them straight and evenly spaced apart.
Before setting your posts in concrete, double-check their alignment using a string line and a level tool. If everything looks good, mix some concrete according to the package instructions and pour it into each hole around the posts. Make sure that the posts are plumb (i.e., vertical) by checking them with a level tool before allowing them to set completely in concrete. Once all of your posts are securely set in place, you’re ready to move on to installing your vinyl fence panels.
- Discover three pro tips for ensuring optimal vinyl fence panel installation.
- Learn how proper leveling techniques can prevent future problems with your fence.
- Dig deeper into post hole digging techniques for vinyl fencing projects.
With all of your posts firmly planted in quality concrete depths below grade level and checked for alignment with string lines and levels across all sides of each post’s top edge before allowing setting times for firm anchoring starts preparing securing process of attaching prebuilt panels while keeping each panel’s bottom edges level and square to the ground.
Securing The Fence Panels
Like a painter’s brushstrokes on canvas, the fence panels are the foundation of a vinyl fence. But without proper securing, they may fail to provide long-term protection and privacy. To prevent such an outcome, it is crucial to use the right types of fasteners and spacing for your fence panels.
Types of fasteners vary depending on the type of panel you are using. For instance, if you are using tongue-and-groove boards, stainless steel screws with a small head will work best. On the other hand, if you are using pickets or rails, galvanized nails will suffice. Regardless of the option you choose, ensure that they can withstand harsh weather conditions over time.
Proper spacing is also vital when installing vinyl fence panels. A general rule is to leave at least one inch between each panel to allow for expansion and contraction due to temperature changes. To ensure precise spacing, use spacers or mark lines on your posts before installing the panels. Doing so will guarantee that your fence panels align correctly while providing ample room for movement as needed.
As you secure your fence panels into place, take time to inspect each one thoroughly to ensure that they are plumb and level with each other. Once all your panels have been secured with the appropriate fasteners and spacing, you can proceed with adding finishing touches to your vinyl fence by incorporating additional features like gates or post caps – but more on those later in this guide!
Adding Finishing Touches To Your Vinyl Fence
- When installing a vinyl fence, it is important to add the necessary accessories to make the fence complete.
- Accessories such as post caps and decorative finials can be easily attached to the top of the fence posts.
- After installation of the vinyl fence is complete, applying a sealant to all the seams can help protect the fence from the elements and extend its lifespan.
- It is also recommended to periodically check the fence for damage and apply sealant if necessary to help maintain the integrity of your vinyl fence.
Adding Accessories
Vinyl fence accessories are an excellent way to add a personal touch to your fence and make it stand out from the rest. There is a wide range of accessories available on the market, including post caps, gate hardware, and decorative accents. These items not only enhance the look of your fence but also improve its functionality.
One of the best things about vinyl fence accessories is that they can be customized according to your preference. For instance, you can choose post caps that match the style and color of your fence or opt for contrasting colors to create a unique look. You can also add solar lights to your posts for added visibility at night or install a locking mechanism for increased security.
When installing vinyl fence accessories, it’s crucial to follow proper installation procedures to ensure their longevity. Some accessories may require additional hardware or tools for installation, while others simply snap onto the posts. It’s essential to read the manufacturer’s instructions carefully before attempting any installation customization.
In conclusion, adding vinyl fence accessories is an excellent way to personalize your fence and make it truly yours. With a wide array of options available on the market, you’ll surely find something that suits your taste and budget. Just remember to follow proper installation procedures for each accessory and enjoy your new-look fence!
Applying Sealant
As a fence installation expert, I know that applying sealant is an essential step in adding finishing touches to your vinyl fence. Sealants protect the fence from weather and UV damage, preventing it from fading and cracking over time. There are various types of sealants available on the market, such as acrylic, silicone, and polyurethane. Each type has its own set of strengths and weaknesses, so it’s important to choose the right one for your fence.
When applying sealant to your vinyl fence, there are several techniques you can use depending on the type of sealant you’re using. For instance, if you’re using an acrylic-based sealant, you can apply it with a brush or roller. On the other hand, silicone-based sealants require a caulking gun for precise application. It’s crucial to follow the manufacturer’s instructions carefully when applying sealant to ensure its effectiveness.
While applying sealant is a popular choice for protecting vinyl fences, some homeowners may prefer alternatives due to personal preference or environmental concerns. For instance, some may opt for wax-based products instead of traditional sealants because they are eco-friendly and non-toxic. However, these alternatives may not provide the same level of protection against weather damage as traditional sealants do. It’s important to weigh the pros and cons of each option before making a decision.
In conclusion, adding finishing touches to your vinyl fence includes applying sealant to protect it from weather damage and UV rays over time. There are several types of sealants available on the market that require different techniques when applied. While some may prefer alternative options like wax-based products due to environmental concerns or personal preference, traditional sealants remain a popular choice among homeowners who prioritize durability and longevity for their fences.
Maintenance Tips For Your Vinyl Fence
Maintaining your vinyl fence is essential to keep it looking new and ensure its longevity. Regular cleaning is a must, especially if the fence is located in an area with high traffic or prone to dirt and debris accumulation. Fortunately, cleaning techniques for vinyl fences are relatively easy and require only a few tools.
To clean your vinyl fence, start by hosing down the surface with water to remove loose dirt. Then, use a soft-bristled brush or sponge and mild soap to scrub away any remaining grime. Avoid using abrasive materials or harsh chemicals as they can damage the fence’s surface and compromise its weather-resistant materials.
Vinyl fences are known for their durability and resistance to harsh weather conditions; however, it’s still essential to take some preventive measures during extreme weather events such as hurricanes or heavy snowfall. Check your fence regularly for any signs of damage and make sure it’s securely anchored in the ground. If you live in an area where saltwater exposure is common, rinse off your fence frequently with fresh water to prevent any corrosion from occurring.
As important as maintaining your vinyl fence is, some damages may still occur over time due to various factors such as impact or natural wear and tear. In the next section, we’ll discuss how to repair your vinyl fence without having to replace it entirely.
Repairing Your Vinyl Fence
Vinyl fence repair techniques can help you save money and extend the life of your fence. The most common issues with vinyl fences are cracks, holes, and discoloration. Fortunately, these problems can be fixed easily with some basic tools and materials.
If you have a small crack or hole in your vinyl fence, you can use a patch kit to fix it. These kits typically include a patching compound and adhesive that can be applied directly to the damaged area. Make sure to clean the area thoroughly before applying the patch to ensure a strong bond.
For larger holes or cracks, you may need to replace the damaged section of your fence. This will require more extensive repairs, but it is still a cost-effective solution compared to replacing the entire fence. You can purchase replacement sections of vinyl fencing at most hardware stores or online retailers.
Cost-effective repair solutions for vinyl fences are readily available if one knows where to look. With proper maintenance and care over time, your vinyl fence will remain sturdy and functional for many years to come. If you still experience damage beyond repair or simply want to remove your vinyl fence altogether, continue reading our next section on removing your vinyl fence.
Removing Your Vinyl Fence
Removing a vinyl fence can be a daunting task that requires careful planning and execution. It is not uncommon for homeowners to underestimate the amount of work involved in removing their vinyl fence, especially if they have never done it before. However, with the right tools and safety measures in place, you can remove your vinyl fence without much hassle.
To begin with, you will need some essential tools to make the process easier. These include a power drill, hammer, gloves, sawzall or reciprocating saw, pry bar or crowbar, shovel, and a wheelbarrow or bucket. These tools will help you break down the fence panels and posts efficiently without damaging your property.
As with any DIY project involving heavy machinery and sharp tools, safety should always come first. When removing your vinyl fence, make sure you wear appropriate protective gear such as safety glasses, earplugs or earmuffs to protect against loud noises from power equipment. Additionally, keep bystanders away from the work area to prevent accidents and injury. Finally, take breaks as needed to avoid exhaustion and dehydration during the project.
Next up: Safety Precautions During Fence Installation
Safety Precautions During Fence Installation
During the installation of a vinyl fence, it is important to prioritize safety precautions. Using safety gear and protective clothing can help prevent injuries and accidents during the installation process. Safety gear such as goggles, gloves, and hard hats should be worn by all individuals involved in the installation process. Additionally, protective clothing such as long pants and sturdy boots can provide added protection from potential hazards.
When installing a vinyl fence, it is important to be aware of the surroundings. Before beginning any work, ensure that the working area is clear of any debris or obstacles that could cause trips or falls. It is also important to be cautious when using any power tools or equipment during the installation process. Always read and follow the manufacturer’s instructions for proper use of equipment.
Lastly, it is crucial to communicate effectively during the fence installation process. All individuals involved in the project should have a clear understanding of their roles and responsibilities to ensure a safe and efficient installation process. By prioritizing safety precautions, being aware of surroundings, and effective communication throughout the installation process, you can create a safe environment for yourself and others.
Moving forward into frequently asked questions about vinyl fencing: What are some common mistakes to avoid during fence installation? How do you properly clean a vinyl fence? These questions will be addressed in detail in the following section.
Frequently Asked Questions About Vinyl Fencing
Vinyl fencing is becoming a popular choice for many homeowners due to its durability, low maintenance and attractive appearance. One of the most frequently asked questions about vinyl fencing is how to maintain it. Vinyl fences are relatively easy to maintain compared to other fence materials such as wood or metal. Regular cleaning with soap and water is enough to keep your vinyl fence looking great.
When it comes to cost comparison with other fence materials, vinyl fencing may be more expensive initially, but it can pay off in the long run. Unlike wood fences that require regular staining or painting, vinyl fences do not need any upkeep other than occasional cleaning. This means you can save money on maintenance costs over time.
Overall, vinyl fencing is a great investment for any homeowner who wants a durable and low-maintenance fence that looks great. With proper care, your vinyl fence can last for years without any significant wear and tear. If you’re considering installing a new fence or replacing an existing one, we highly recommend choosing vinyl as your material of choice.
When it comes to installing your new vinyl fence, hiring a professional fence installer is always recommended. While some homeowners may choose to install their own fences, this can be a complicated process that requires specialized equipment and knowledge. A professional installer will ensure that your fence is installed correctly and efficiently, saving you time and hassle in the long run.
Hiring A Professional Fence Installer
Vinyl fencing is a popular option for homeowners as it offers a low-maintenance and durable solution for enclosing yards and properties. Installing a vinyl fence can be done either by the homeowner or with the help of a professional fence installer. One important consideration when deciding between DIY and professional installation is cost comparison.
DIY installation of a vinyl fence may seem like a cost-effective option, but it requires specific tools and skills that not every homeowner possesses. Additionally, mistakes made during installation can result in costly repairs or replacement down the line. On the other hand, hiring a professional fence installer ensures that the job is done correctly from start to finish, reducing the risk of future issues.
When comparing costs between DIY and professional installation, it’s important to factor in not only the initial cost but also any potential future repairs or replacements. While DIY may seem cheaper upfront, it could end up costing more in the long run if mistakes are made during installation. Hiring a professional fence installer may have higher upfront costs but can ultimately save money over time by ensuring proper installation and reducing the risk of future problems.
- Properly installed vinyl fences can last up to 30 years
- Professional installers often offer warranties on their work
- DIY installation may void any manufacturer warranties on materials – Improperly installed vinyl fences can lead to costly repairs or replacements in the future.
Conclusion
Vinyl fencing has become a popular choice for homeowners due to its durability, low maintenance, and long-lasting qualities. When it comes to installing a vinyl fence, it is important to choose the right type of fence based on your needs and measure your property accurately. Purchasing the necessary materials and tools and preparing your property are also essential steps in the installation process.
Removing an old fence and taking safety precautions during installation are crucial for a successful project. Frequently asked questions about vinyl fencing can provide clarity and insight into the installation process. However, if you feel overwhelmed or unsure about installing a vinyl fence yourself, hiring a professional installer can save time, money, and ensure proper installation.
As a fence installation expert, I highly recommend investing in a high-quality vinyl fence that will withstand harsh weather conditions and last for years to come. Installing a vinyl fence may seem daunting at first, but with proper preparation and safety measures in place, it can be a rewarding project that enhances the look of your property while providing security and privacy. Remember to take your time during each step of the process, ask for help if needed, and enjoy the satisfaction of completing this DIY project with ease. So go ahead – take that first step towards having the perfect backyard oasis!
Image Credits
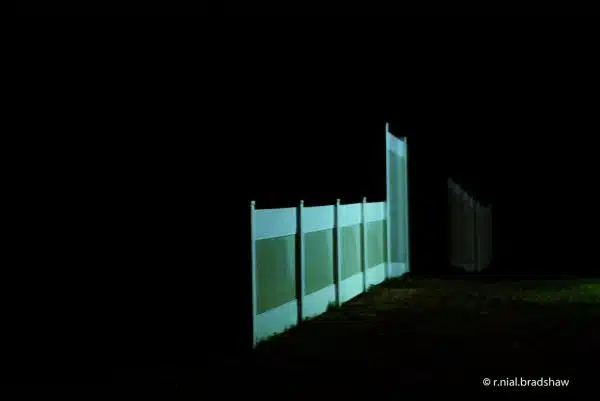
- “fence-vinyl-night.jpg” by r.nial.bradshaw (featured)

