Installing fence posts is a critical step in building a sturdy and long-lasting fence. Whether you are using wood, metal, or vinyl posts, proper installation is essential to ensure the structural integrity of your fence. As an expert in fence post installation, I have seen countless fences that have failed due to improper post installation.
The process of installing fence posts may seem simple at first glance, but it requires careful planning and attention to detail. In this article, I will guide you through the steps necessary to properly install fence posts for your next fencing project. By following these guidelines and taking the time to do it right, you can ensure that your fence will stand strong for years to come.
Choosing The Right Fence Post Material
Fence posts are an essential component of any fence installation. The type of fence post material you choose can have a significant impact on the overall durability and longevity of your fence. Two common types of fence post materials are wooden and metal posts.
Wooden fence posts offer several benefits. They are relatively inexpensive, readily available, and easy to work with. Additionally, they blend well with natural surroundings and add aesthetic value to your property. However, they do require regular maintenance to prevent rotting or insect infestations.
On the other hand, metal fence posts come with their own set of pros and cons. They are incredibly durable and can withstand harsh weather conditions without much maintenance. They also offer excellent structural support for heavy-duty fences. However, they tend to be more expensive than wooden posts and may require specialized equipment for installation. Moreover, some people might not like the industrial look that metal posts give to their fences.
Identifying property lines and obtaining permits is crucial before starting any fence installation project. It is essential to know where your property ends and your neighbors’ begins to avoid any legal disputes in the future. Additionally, some municipalities require permits for installing fences that exceed a certain height or length. Therefore, it is imperative to research local regulations before beginning any fencing project to avoid unnecessary expenses or legal issues down the line.
Identifying Property Lines And Obtaining Permits
As a fence post installation expert, it is important to understand regulations related to property lines and permits. Before starting any construction work, it is necessary to identify the exact location of your property lines. This will help you avoid any legal issues and ensure that you are building within your own property boundaries.
One way to identify property lines is by hiring a surveyor. A professional surveyor can accurately measure and map out your property lines for you. They use specialized equipment and techniques to mark the precise boundaries of your property. Additionally, they can provide you with a written report that outlines all the details of their survey.
Obtaining permits is another crucial step in fence post installation. Depending on where you live, there may be specific requirements regarding fence height, materials used, and distance from neighboring properties. Contacting your local zoning or building department can provide insight into what permits and approvals are needed before beginning any construction work on your fence.
With an understanding of regulations related to property lines and obtaining permits, you are more likely to have a smooth and successful fence post installation process. The next step in this process is measuring and marking post locations, which we will discuss in the following section.
Measuring And Marking Post Locations
- The first step of installing a fence is to determine the boundaries of the area and mark the corners with stakes or paint.
- It is important to establish post locations in accordance with the specific type of fence that is being installed.
- Measuring post depths correctly is critical in order for the fence posts to be securely anchored in the ground.
- The depth of the post holes should be determined by the height of the fence and the type of soil that is present in the installation area.
- For areas with especially hard soil, it may be necessary to use a post hole digger or other specialized tools to dig the holes.
- It is important to take the time to measure and mark post locations accurately in order to ensure a successful fence installation.
Marking Boundaries
Are you planning to install a fence on your property? One of the most important steps in this process is marking boundaries. Using boundary markers, such as stakes and strings, will help ensure that your fence is installed in the correct location and that it complies with local codes and regulations.
When marking boundaries, it’s essential to determine the correct spacing between fence posts. This distance can vary depending on the type of fence you’re installing and the terrain of your property. As a general rule, most fences require posts to be spaced no more than 8 feet apart. However, if you’re installing a heavier or taller fence, such as a privacy fence or a chain-link fence, you may need to space posts closer together.
To ensure accuracy when marking boundaries and determining post spacing, consider enlisting the help of a professional installer. They can provide guidance on local codes and regulations and help you avoid costly mistakes that could lead to problems down the line. By taking these steps, you can ensure that your new fence is installed correctly and serves its intended purpose for years to come.
Establishing Post Locations
When installing a fence, establishing post locations is a crucial step in the process. The importance of soil type cannot be overstated when deciding where to place your posts. Soil conditions can affect the stability and durability of your fence, so it’s essential to choose the right location before you begin digging. Soft or wet soil can cause posts to shift or sink over time, while rocky or hard-packed soil may require more effort and equipment to install posts correctly.
Using string lines for accuracy is another crucial factor in establishing post locations. String lines are used to mark out the exact placement of each post, ensuring that they are spaced at consistent intervals and aligned correctly. This helps ensure that your fence is level and straight, which not only looks better but also provides better security and privacy.
Working with an experienced fence installer can help you navigate these challenges and ensure that your fence is installed correctly. They have the expertise to assess soil conditions and determine the best location for your posts, as well as the tools necessary to dig holes accurately and set posts securely. By taking these steps, you can ensure that your fence will stand up to years of use and provide the function and beauty you need for your property.
Measuring Post Depths
Measuring and marking post locations are essential steps in fence installation. However, measuring post depths is equally crucial as it plays a vital role in ensuring the stability and durability of your fence. The depth of each post will depend on various factors such as soil type, fence height, and local building codes.
To measure post depths accurately, several tools are required, including a tape measure, level, and auger or post hole digger. It’s important to note that one common mistake when measuring post depths is not considering the frost line. The frost line refers to the depth at which water freezes in the ground during winter months. If posts are not set below this line, they can be lifted out of the ground by frost heave.
Another common mistake is not accounting for variations in soil conditions. For instance, if there are rocks or hard-packed soil at a certain depth, it may be necessary to dig deeper to ensure that the post is secure. By taking these factors into account when measuring post depths, you can ensure that your fence will stand up to years of use and weather conditions.
Digging Post Holes
To begin the process of installing fence posts, one of the first steps is to dig post holes. This may seem like a simple task, but it requires careful attention to detail and proper technique. To start with, you will need a few tools to get the job done efficiently. These include a shovel or post hole digger, measuring tape, level, and stakes.
One common mistake people make when digging post holes is not measuring properly. It’s important to measure the distance between each hole accurately and ensure that they are evenly spaced. Another common mistake is not digging deep enough or wide enough holes for the posts. The depth and width of each hole will depend on the type of fence being installed and local building codes.
Proper technique is also essential when digging post holes. Start by marking out where each post will be placed using stakes and string. Then use a shovel or post hole digger to remove soil from the marked area in an even manner. Be sure to check the depth regularly using your measuring tape and level. Once all holes are dug, move onto determining proper depth for post holes.
Transition: Now that we have gone through the tools needed and common mistakes to avoid when digging post holes for fence installation, let’s move on to determining the proper depth for each hole.
Determining Proper Depth For Post Holes
Post hole depth is an important factor in the successful installation of a fence. It is necessary to determine the desired post hole depth prior to digging. To measure for proper depth, the post should be placed in the hole and the top of the post should be marked. A level should then be placed on the post to ensure the post is at the desired angle, and the depth of the hole should be measured from the top of the post to the bottom of the hole.
Determining Post Hole Depth
Determining the proper depth for fence post holes is crucial to ensure that your fence stays upright and secure for years to come. Several factors affect the depth of post holes, including the type of soil in your area, the height of your fence, and the climate conditions. Soil with a high clay content can make it more challenging to dig deep holes that securely hold posts, while areas with strong winds require deeper post holes to keep your fence from leaning or falling.
To determine the appropriate depth for your post hole, you should consider several factors affecting depth. For example, if you live in an area with significant frost heave during winter months, you will need to dig deeper than if you live in a warmer climate. Additionally, taller fences require deeper post holes as they have more surface area exposed to wind and other weather elements. To avoid any potential issues after installing your fence posts, take time to research these factors affecting depth before starting to dig.
When it comes to digging post holes, there are several tips that can help make the process more manageable. First and foremost, use a sturdy digging tool such as a shovel or auger that can handle tough soil conditions. You may also want to consider renting a power auger if you have many fence posts to install or if you don’t have much experience digging post holes. Remember always to check with local utility companies before breaking ground as there may be underground gas lines or electrical cables that could cause serious damage if hit during excavation.
In conclusion, determining the proper depth for fence posts is essential for ensuring that your fence stays upright and secure for years to come. Factors affecting depth include soil type, climate conditions and height of your fence among others. Tips for digging include using sturdy tools like shovels or augers and checking with local utility companies before breaking ground. By following these guidelines when installing your fence posts, you’ll save yourself time and money down the road by avoiding any potential issues that could arise from poorly dug post holes.
Measuring For Proper Depth
Properly measuring the depth for fence post holes is crucial to ensure that your fence stays secure and upright. Measuring techniques can vary depending on different factors such as the type of soil, the height of your fence, and local climate conditions. Before starting your installation project, it’s important to research these factors and determine the appropriate depth for your post holes.
One common mistake to avoid when measuring for proper depth is assuming that all posts should be dug at an equal depth. This can lead to uneven placement and a wobbly fence. Instead, consider using a string line or laser level to create a straight line and mark where each post should be placed. Additionally, make sure to take into account any slopes or changes in terrain that may affect the depth needed for each individual post.
When measuring for proper depth, it’s also important to consider leaving room at the top of each hole for gravel or concrete fill. This added support will help prevent rotting and leaning over time. Finally, double-check your measurements before digging any holes and make sure you are following local codes and regulations regarding fence height and placement. By utilizing proper measuring techniques and avoiding common mistakes, you can ensure a successful fence installation project with long-lasting results.
Preparing Post Holes For Installation
How deep should you dig your post holes? The minimum depth for fence posts is typically one-third to one-half their overall length. However, in locations with strong winds or heavy soil, deeper holes may be necessary. To determine the ideal depth for your fence, consider the height of the fence, the type of soil you’re working with, and your local climate conditions.
Tools needed:
- Post hole digger
- Shovel
- Measuring tape
- Level
- Stakes
One common mistake to avoid when preparing post holes is failing to measure and mark the placement accurately. This can result in unevenly spaced posts or an unstable fence. Another mistake is not digging wide enough holes. The diameter of each hole should be at least three times wider than the width of the fence post. This increases stability and helps prevent the post from tilting over time.
By taking care to properly prepare your post holes before installation, you’ll save yourself a lot of headaches down the road. Avoiding common mistakes and using essential tools like a post hole digger and level will help ensure that your fence stands strong for years to come. In the next section, we’ll discuss how to add gravel or concrete to further secure your posts in place.
Adding Gravel Or Concrete To Post Holes
Ensuring that your fence posts are properly secured is crucial to the longevity of your fence. One way to achieve this is by adding gravel or concrete to the post holes. This step helps to provide a stable base for the fence posts, preventing them from shifting over time due to environmental factors such as wind and rain.
The importance of drainage cannot be overstated when adding gravel or concrete to post holes. Without proper drainage, water can accumulate around the base of the posts, leading to rot and decay. To prevent this from happening, it is recommended that you add a layer of gravel at the bottom of the hole before pouring in concrete. This allows water to drain away from the base of the post, reducing the risk of damage.
While concrete is often used for added stability, using alternative materials such as crushed rock or dry-packed sand can also be effective. These materials allow for better drainage and are less prone to cracking than traditional concrete. Additionally, they can be more cost-effective and easier to work with than poured concrete.
With a solid foundation in place, you can now move on to setting your fence posts in place. But before doing so, it’s important to ensure that they are level and plumb. In our next section, we’ll discuss how to properly set fence posts in place for a sturdy and long-lasting fence.
Setting Fence Posts In Place
Like a sturdy foundation for a house, setting fence posts correctly is crucial to the overall stability and longevity of the fence. One of the first steps in setting fence posts in place is to determine how deep they should be dug. A general rule of thumb is that one-third of the post’s length should be buried underground. For example, if you have a 6-foot fence post, then it should be buried 2 feet deep.
Tools needed for setting fence posts include a post hole digger, shovel, level, measuring tape, gravel or crushed stone, and concrete mix. Make sure that the diameter of the hole is wider than the post itself to allow enough space for backfill material. Common mistakes to avoid include not digging deep enough or using too little cement mix as these can compromise the structural integrity of your fence.
Once you’ve set your posts in place and allowed the cement to cure properly, you can move onto ensuring that they are level and plumb. This involves using a level tool to ensure that each post is straight up and down vertically and horizontally leveled with one another. Ensuring that your posts are level and plumb will help guarantee that your fence stays upright and secure for years to come without any warping or leaning.
Ensuring Posts Are Level And Plumb
After setting the fence posts in place, it is crucial to ensure that they are level and plumb. This step is essential to maintain the structural integrity of the fence and ensure its longevity. The importance of post levelers cannot be overstated when it comes to achieving this goal.
Post levelers are tools that help in confirming if the posts are vertical or not. They come in different shapes and sizes, but the most common ones resemble a carpenter’s level with two vials placed perpendicular to each other. These tools make it easier to check if the posts are leaning too much in any direction. In case there is an unevenness, there are tips for correcting uneven posts.
One way to correct uneven posts is by digging out some soil from underneath one side of the post and packing it on the other side until it becomes plumb. It’s also possible to add braces between two adjacent posts to force them both upright while concrete sets around their bases. Whichever method you choose, remember that a little extra effort during installation will save you headaches down the road. Once you have corrected any unevenness, securing posts with braces should be your next step towards building a strong and durable fence.
Securing Posts With Braces
Types of Braces When it comes to installing fence posts, braces are an essential component in making sure that your fence stays upright and stable. There are several types of braces that you can use, including diagonal braces, knee braces, and cross braces. Diagonal braces are the most commonly used type of brace, as they provide support in both directions and prevent the post from leaning to one side or the other. Knee braces are also effective at providing support but are typically used for shorter fences. Finally, cross braces add extra stability by connecting two or more posts together.
Importance of Braces The importance of using braces when installing fence posts cannot be overstated. Without proper bracing, your fence is likely to lean or topple over completely. This not only looks unattractive but can also pose a safety hazard for anyone who comes near it. By using the right type of brace and installing it correctly, you can ensure that your fence remains sturdy and secure for years to come.
Allowing Posts to Settle and Cure Once you have secured your posts with braces, it’s important to allow them time to settle and cure before attaching any fencing material. This process typically takes several days and involves keeping the soil around the post moist while allowing the concrete to harden fully. During this time, it’s important not to disturb the area around the post or apply any weight or pressure until the concrete has fully cured. By following these steps, you can ensure that your fence will remain strong and stable for many years to come without any issues caused by improper installation techniques.
Allowing Posts To Settle And Cure
- When locating posts, it is important to make sure that the posts are positioned properly and securely to ensure a safe and efficient installation.
- Posts should be prepared with appropriate post hole diggers and a shovel to ensure they are installed in suitable soil.
- Once posts have been set in place, they should be backfilled with soil and compacted to ensure they are stable and secure.
- To cure posts, they should be left in their position for a period of time to allow the posts to settle in the soil.
- After curing, the posts should be checked to make sure they are straight and secure before continuing with the installation.
- Finally, the posts should be treated with a preservative to protect them from weather and other elements.
Locating Posts
When it comes to installing fence posts, locating the proper placement is crucial. As an installation expert, using tools for locating posts can make this process much smoother. One such tool is a post hole digger which can help accurately measure the depth and width of the hole needed for your fence post. Another useful tool is a line level which ensures that your fence stays level throughout its entire length.
It’s important to take precautions when choosing the location of your fence posts to avoid any potential property line disputes with neighbors. One tip for avoiding these disputes is to thoroughly research property lines before starting any work on your fence. Additionally, it’s a good idea to communicate with neighbors about your plans and ensure that they are comfortable with the proposed placement of your fence.
Properly locating your fence posts will not only avoid property line disputes, but it will also allow them to settle and cure correctly. By following these tips and using the right tools, you can ensure that your fence will be installed in the correct location and remain sturdy for years to come.
Preparing Posts
When it comes to installing a fence, it’s essential to ensure that the posts are properly prepared and allowed to settle and cure before proceeding with the rest of the installation. This is a critical step in creating a sturdy and long-lasting fence. As an installation expert, I recommend using the right tools for preparing your fence posts. Some of these tools include a post level, measuring tape, stakes, and string.
One common mistake to avoid when preparing fence posts is not digging deep enough holes or packing the soil too loosely around the post. This can cause instability in the fence, leading to leaning or falling over time. Additionally, it’s essential to make sure that each post is set at the correct distance from each other for optimal stability. Proper preparation will allow your fence posts to settle and cure effectively.
After setting your fence posts in place, it’s crucial to allow them sufficient time to settle and cure before proceeding with further installation steps. The amount of time needed for this process depends on various factors such as climate conditions, soil type, and humidity levels. Generally, allowing your posts to settle for at least two days before attaching rails or pickets is recommended. This will help ensure that they are firmly set in place and ready for use as part of your new fence structure.
Curing Posts
Once the fence posts are set in place, it’s crucial to allow them to settle and cure properly before continuing with further installation steps. One essential factor in this process is the moisture content of the soil around the posts. If the soil is too dry, it can cause cracking and shrinking around the posts, leading to instability in your fence structure. On the other hand, if the soil is too wet, it can take longer for the posts to cure effectively.
The timeframe required for curing fence posts depends on various factors such as climate conditions and soil type. Typically, allowing your fence posts to cure for at least one week after setting them in place is recommended. During this time, it’s crucial to avoid any disturbances that could compromise their stability or disrupt their curing process.
In conclusion, allowing your fence posts sufficient time to settle and cure before proceeding with further installation steps is critical in ensuring a sturdy and long-lasting fence structure. By paying attention to factors such as moisture content and timeframe, you can ensure that your fence posts are firmly set in place and ready for use. Remember that taking shortcuts during this process can lead to significant problems down the road, so it’s always best to follow proper installation procedures from start to finish.
Trimming Posts To Proper Height
After allowing the fence posts to settle and cure, it’s time to move on to trimming them to the proper height. This is an important step in ensuring that your fence is level and aesthetically pleasing. Before you begin, make sure you have all the necessary tools needed for this task.
Tools needed:
- Saw
- Measuring tape
- Level
- Safety glasses
One common mistake people make when trimming fence posts is not measuring properly. It’s important to measure each post individually as they may have settled differently during the curing process. Another mistake is not wearing safety glasses while sawing, which can result in debris getting into your eyes.
In order to trim the posts to the proper height, begin by measuring each post from the ground up to where you want it trimmed. Mark this spot with a pencil or marker. Next, use a saw to carefully cut each post at the marked spot. Use a level to ensure that each post is trimmed evenly and that your fence will be level once installed.
Now that your fence posts are trimmed to the proper height, it’s time to move on to attaching fence panels to posts. This step requires careful attention to detail and precision in order for your fence installation project to be successful.
Attaching Fence Panels To Posts
After successfully installing fence posts, the next step is to attach fence panels. Before that, however, it’s crucial to determine the type of panel you want to use for your fence. There are various types of panels available in the market, including vinyl, wood, chain link, and aluminum. Each has its own unique features and benefits that cater to different needs.
Once you’ve selected the right type of panel for your fence, it’s time to install them properly onto the posts. The first step is to ensure that each panel is level and plumb before attaching them to the posts with screws or nails. Proper installation techniques also involve spacing the panels evenly apart from one another and ensuring that all edges align correctly. This process may require the help of another person or a level tool.
In conclusion, attaching fence panels can be a daunting task but following proper installation techniques can make it easier. By selecting the right type of panel and ensuring they are installed correctly onto your newly set fence posts, you can create an aesthetically pleasing and functional barrier for your property. The next step is adding finishing touches to your fence such as gates or post caps which we will discuss in our subsequent section.
Adding Finishing Touches To Fence
Once the fence posts are installed, there are several finishing touches that can be added to complete the look and functionality of your fence. One creative design option is to add decorative caps or finials to the top of each post. These can come in a variety of materials including wood, metal, or plastic and can be shaped into various designs such as spheres or pyramids. Not only do they enhance the overall appearance of your fence, but they also provide additional protection against weather damage.
Another cost-effective option for finishing your fence is to add a stain or sealant to protect the wood from moisture and UV rays. These products come in a range of colors that can complement the natural tones of your wood or add a pop of color to match your home’s exterior. Applying a stain or sealant can also extend the lifespan of your fence by preventing rot and decay.
In addition to adding decorative elements and protective coatings, it is important to properly maintain your fence for longevity. This includes regularly cleaning it with soap and water to remove dirt and debris, trimming any vines or plants growing near it that could cause damage, and inspecting it for any signs of wear or damage such as loose boards or broken hinges. By taking these steps, you can ensure that your fence remains secure and attractive for years to come. Transitioning into maintaining your fence for longevity, let’s discuss some key tips for keeping your fence looking its best year after year.
Maintaining Your Fence For Longevity
As we have discussed previously, adding finishing touches to your fence is important in completing a beautiful and functional fence. But the work does not end there. Maintaining your fence is crucial to ensure its longevity. How can you keep your fence post integrity intact? What are the best practices for repairing damaged fence posts?
One tip for maintaining fence post integrity is to choose the right type of wood for your posts. Cedar and redwood are popular choices as they are naturally resistant to rot and decay. Another tip is to avoid burying the entire post in concrete as it can trap water, causing the post to rot faster. Instead, use a gravel base for drainage or leave at least 6 inches of space between the concrete and soil.
If you do encounter damaged fence posts, it’s best to repair them as soon as possible before they cause more damage or become a safety hazard. One best practice is to remove any rotted wood and replace it with fresh lumber treated with preservatives or sealants. Alternatively, you can reinforce the post with braces or sister posts on either side for added support.
In summary, regular maintenance is key in ensuring that your fence lasts for years to come. Remember these tips for maintaining fence post integrity and best practices for repairing damaged fence posts so that you can enjoy your beautiful and functional fence for many years without worry.
Conclusion
Installing fence posts requires careful planning, precise measurements, and proper execution. Choosing the right material is crucial to ensure durability and longevity of your fence. Whether you opt for wood, metal or vinyl posts, make sure they are treated to withstand weather conditions and resist rotting.
Identifying property lines and obtaining necessary permits are important steps to avoid any legal issues in the future. Measuring and marking post locations with accuracy is also essential to achieve a straight and level fence line. Digging post holes at the correct depth and trimming them to the appropriate height are critical in providing stability and support for your fence.
One anticipated objection may be that installing fence posts is a difficult task that requires professional help. However, with proper guidance, anyone can tackle this project successfully. It may take some time and effort, but the end result will be worth it – a beautiful and sturdy fence that enhances the aesthetics of your property while providing security and privacy.
Adding finishing touches such as caps or paint can further enhance the appearance of your fence while maintaining it regularly will ensure its longevity. By following these steps, you can install your own fence posts like a pro!
Image Credits
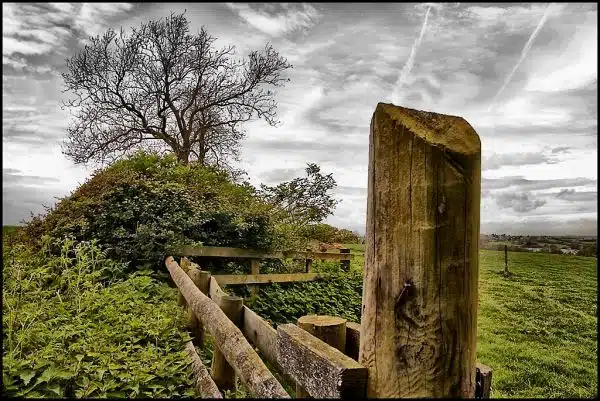
- “The Fence Post.” by Pat Dalton… (featured)

