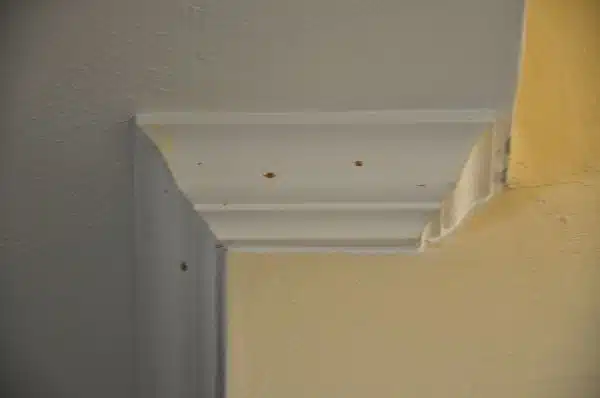
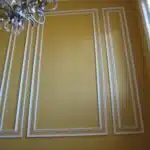
Crown molding is an elegant and timeless addition to any room in a home. It not only adds a decorative touch but also creates the illusion of higher ceilings, making rooms appear more spacious. Installing crown molding may seem like a daunting task at first, but with proper guidance and tools, it can be easily achieved by anyone with basic carpentry skills.
In this article, we will discuss the step-by-step process of installing crown molding to enhance the aesthetic appeal of your home. From selecting the appropriate materials to cutting and installing the pieces, we will provide you with all the necessary information to complete this project successfully. By following our comprehensive guide, you will be able to add value and beauty to your home while impressing others with your newfound carpentry skills.
Measuring Your Space For Crown Molding
Precision is paramount when it comes to installing crown molding. Measuring techniques are crucial in determining the correct amount of material required for the job. The first step in measuring your space is to get accurate measurements of the length and width of the walls where you plan to install crown molding.
It is essential to use professional measuring tools, such as a tape measure or laser level, to ensure accuracy. Precision is particularly important when installing crown molding because even small discrepancies can affect the final look of the project. A laser level can be especially helpful in confirming that your walls are straight and level.
Once you have your measurements, add them together to determine how many linear feet of crown molding you need. It is always best to round up and purchase slightly more than you think you will need since it is better to have extra material rather than running out mid-project. With precise measurements and professional tools, you can confidently move onto choosing the right type of crown molding for your space.
Choosing The Right Type Of Crown Molding
After measuring your space for crown molding, the next step is to choose the right type of crown molding that fits your home’s interior design. There are various types and styles of crown molding available in the market today. The most popular types include plaster, wood, and MDF (medium-density fiberboard). Each type has its unique features, advantages, and disadvantages. For instance, plaster is a traditional material that adds elegance to any room but requires professional installation due to its weight. Wood is versatile and can be stained or painted to match your home’s décor but can be expensive. MDF is affordable, easy to install, and has a smooth finish but may not last as long as other materials.
Apart from the types of crown molding available in the market, you also need to consider different finishes and materials. Crown moldings come in various finishes such as natural wood grain finish, painted finish or even metallic finishes such as bronze or gold. Choosing a particular finish depends on your preference and existing décor in your home.
Lastly, before installing crown molding in your room, it is essential to gather all the necessary tools and materials required for the job. Some of the tools you may need include a saw (preferably miter saw), hammer/nail gun, tape measure, adhesive/caulk gun and sandpaper among others. You will also need materials such as wood glue/adhesive depending on the type of crown molding you choose.
In conclusion, choosing the right type of crown molding depends on different factors such as budget, style preference and durability. Once you have decided on these factors, it’s essential to gather all necessary tools and materials before embarking on installing crown molding in your room. Proper preparation ensures that you complete this project successfully without any hiccups along the way.
Gathering The Necessary Tools And Materials
Before diving into the installation process, it is crucial to gather all the necessary tools and materials. This step is essential to ensure a smooth and efficient installation process. To start, you will need measuring tape, a saw, a nail gun, nails or screws, wood filler, sandpaper, and a level. These tools are essential for accurate measurements and precise cuts.
Types of materials needed for crown molding projects vary depending on the design preference and budget. Wood is the most popular choice due to its durability and versatility. It comes in different types such as oak or maple with varying grades of quality that affect cost considerations. For those who want an affordable option without compromising quality, medium-density fiberboard (MDF) is also an excellent choice.
Cost considerations play a significant role in choosing materials for your crown molding project. The price range depends on the type of material used and the complexity of the design. Choosing MDF over hardwood can save up to 60% on material costs but may require more labor to finish properly. It is also important to consider hiring professionals if you lack experience in carpentry work.
Now that you have gathered all the necessary tools and materials for your crown molding project let’s move on to preparing your workspace for installation.
Preparing Your Workspace
Creating a level workspace is crucial when installing crown molding. This will ensure that the molding sits evenly against the wall and ceiling, resulting in a professional-looking finish. To do this, use a level to check each section of the wall where you plan to install the molding. If there are any bumps or dips, sand them down or fill them in with wood filler before proceeding.
Ensuring safety during installation is another key aspect of preparing your workspace. Use a sturdy ladder that can support both you and your tools, and make sure it is placed on a stable surface. Additionally, wear appropriate safety gear such as gloves and eye protection when using power tools or handling sharp objects like nails or saw blades.
By taking the time to properly prepare your workspace, you will set yourself up for success when it comes time to start cutting and installing the crown molding. Now that your workspace is level and safe, it’s time to move on to the next step: cutting the crown molding.
Cutting The Crown Molding
Preparing your workspace is essential when it comes to installing crown molding. However, it’s equally important to know how to cut the crown molding properly. Did you know that 80% of failed crown molding installations are due to poor cutting techniques? This statistic may seem daunting, but with the right angle calculations and cutting techniques, you can avoid common mistakes and ensure a successful installation.
Angle calculations are critical when cutting crown molding. Remember that crown molding sits at an angle on your wall, which means that you’ll need to make angled cuts on both ends of each piece of molding. To find the correct angle, measure the corner where two pieces of molding will meet and divide that number by two. This will give you the angle for each end cut. Additionally, be sure to adjust your saw blade accordingly for each type of cut.
Cutting techniques are just as crucial as accurate angle calculations. One technique is called coping, which involves cutting along the profiled edge of one piece of molding so that it fits snugly against another piece without any gaps or overlaps. Another technique is known as mitering, which involves cutting both ends at a 45-degree angle so that they fit together perfectly in a corner. With these techniques in mind and proper practice, you’ll be able to create seamless joints for a professional finish.
Now that you have mastered the art of cutting crown molding accurately and efficiently, it’s time to move onto installing the first piece. By following these steps carefully and methodically, you can achieve a beautiful result that will last for years to come.
Installing The First Piece Of Crown Molding
To start installing crown molding, the first piece is crucial as it sets the foundation for the rest of the project. Before nailing anything to the wall, make sure to measure and mark where the molding will sit on both the ceiling and wall. This will ensure that when it’s time to install, everything lines up perfectly.
Once you have your measurements in place, cut your molding at a 45-degree angle using a miter saw. It’s important to note that crown molding should always be cut upside down with its back against the saw fence. Once you’ve made your cuts, it’s time to nail your first piece into place. Start by nailing one end of your molding at an angle towards the ceiling while holding it flush against the wall. Then, nail every 16 inches along its length until fully secured.
To make sure that your crown molding looks professional and polished once installed, there are a few painting techniques to keep in mind. First off, use a primer before painting to ensure that the final coat adheres evenly throughout. When applying paint, use long even strokes in one direction rather than going back and forth which can leave brush marks or uneven coverage.
Troubleshooting tips for installing crown molding include making sure all pieces are tightly fit together without any gaps or overlaps between them. If you find yourself with gaps or overlaps, adjust accordingly before nailing them into place. Additionally, if nails don’t seem to be holding properly or slipping out of place when hammered in, consider using adhesive or a brad nailer instead for added stability.
When making coping cuts for inside corners, there are a few things to keep in mind for a seamless finish. Stay tuned for our next section where we will dive into this step-by-step process!
Making Coping Cuts For Inside Corners
Accurately measuring the corner angle and the length of the crown molding is essential for making proper coping cuts. Coping cuts should be made with a coping saw and should be made with the molding upside down and on its side. The coping saw should be held at a 45-degree angle and should be kept steady while the blade is pulled back. Once the cuts are complete, the corners should be sanded to create a smooth finish.
Measuring The Cuts
Achieving a successful crown molding installation requires attention to detail and precise measurements. Measuring the cuts accurately is crucial in ensuring that the inside corners are seamless and professional-looking. As a home improvement/carpentry expert, I cannot overemphasize the importance of measuring accuracy when making coping cuts for inside corners.
To achieve accurate measurements, it is essential to use the right tools for measuring. A quality tape measure should be your go-to tool for measuring lengths, while an angle finder or protractor can be used to determine angles between two walls. These tools help ensure that you get precise measurements that will enable you to make accurate cuts that fit perfectly at the inside corners.
When making coping cuts for inside corners, it’s also important to take into account any irregularities in the wall’s shape or angle. Use shims or other leveling devices to ensure that any gaps between the molding and the wall are minimal or none at all. This attention to detail will result in a beautiful finish that looks like it was installed by a professional.
By following these tips and using precision measuring tools, you’ll be on your way to creating perfect coping cuts for your crown molding installation project. Remember, practice makes perfect so don’t get discouraged if it doesn’t turn out perfectly on your first try – keep at it until you get the results you want!
Making The Cuts
As we continue discussing coping cuts for inside corners, it is essential to emphasize the importance of mastering the cutting techniques. Making precise cuts is critical in achieving a seamless and professional-looking crown molding installation. One common mistake that DIYers make when making coping cuts is cutting too much or too little from the molding’s profile, resulting in gaps or overlaps at the joint.
To avoid such mistakes, it is crucial to use appropriate cutting techniques when making coping cuts. A coping saw or a jigsaw is ideal for making these cuts, as they allow for more flexibility in maneuvering around tight corners. It’s also important to hold the saw at a slight angle when cutting to ensure that the cut follows the molding’s profile precisely.
Another essential tip when making coping cuts is to cut just outside of the line you’ve drawn on the molding. This technique allows you to sand down any excess material until you achieve a perfect fit. Using this technique will help eliminate overcuts, which can compromise your installation project’s overall look.
In summary, mastering proper cutting techniques and avoiding common mistakes are key factors in achieving successful coping cuts for inside corners during your crown molding installation project. By using a coping saw or jigsaw and holding them at an angle while cutting just outside of your marked line, you’ll be on your way to creating beautiful seams that will add value and beauty to your home.
Making Miter Cuts For Outside Corners
After making coping cuts for the inside corners of your crown molding, it is time to move on to making miter cuts for outside corners. It is crucial to measure and cut accurately to ensure a seamless fit. Angles and measurements are essential in this step as any slight deviation can cause gaps or overlaps between the two pieces of molding.
To begin, measure the length of the wall where the crown molding will be installed. The most accurate way to do this is by using a laser level or measuring tape. Once you have determined the length, cut a piece of molding at a 45-degree angle on one end. Repeat this process for the other side of the corner but make sure to cut the molding in the opposite direction from before.
Finishing touches and details are essential when installing crown molding. To ensure that there are no gaps or seams visible, sand down any rough edges and fill any nail holes with wood filler. Painting or staining can also add an extra layer of sophistication to your installation project. Now that you have made both coping cuts and miter cuts for your crown molding, it’s time to attach it to the wall securely.
Transition: Now that we have successfully made both coping cuts and miter cuts for our crown molding, let’s move on to attaching it securely onto our wall without any complications or setbacks.
Attaching The Crown Molding To The Wall
Now that you have measured and cut your crown molding, it is time to attach it to the wall. One of the most effective ways to do this is by using adhesive. Start by applying a small amount of construction adhesive onto the back of your crown molding. Be sure to apply enough glue so that it covers the entire surface area of the molding.
Once you have applied the adhesive, hold up the crown molding against the wall and press firmly into place. To ensure a secure bond, use painters tape or clamps to hold in place while drying. Allow ample time for the adhesive to dry and cure before removing any tapes or clamps.
With your crown molding securely in place, it’s now time for finishing touches. Inspect your work for any gaps or uneven edges along your installation line. Use a sander or hand plane to smooth out any rough spots or uneven edges. Once you are satisfied with your installation, you can proceed with filling in gaps and nail holes using wood filler in preparation for painting or staining.
As you move forward with filling in gaps and nail holes, it is important to remember that this step will require patience and attention to detail. Take care when applying filler and sanding down any excess material before proceeding with painting or staining. With these steps complete, you will have successfully installed crown molding like a pro!
Filling In Gaps And Nail Holes
Once you have installed the crown molding, it is important to fill in any gaps or nail holes. This step is crucial to achieve a seamless and polished look. There are various spackle techniques that can be used to fill in these imperfections.
One option is to use a lightweight spackle, which dries quickly and can be sanded down easily. Another option is to use a paintable caulk, which can be applied with a caulking gun and smoothed out with a putty knife. Regardless of the technique used, it is important to let the spackle dry completely before moving on to the next step.
Once the spackle has dried, it’s time to paint over it to match the color of your crown molding. It’s best to take a sample of your crown molding or even bring a small piece of it with you when selecting paint colors at the store. This will ensure that the color matches perfectly and blends seamlessly with your existing crown molding. With careful attention paid during this step, no one will be able to tell where the gaps or nail holes were once located.
Next up, we will discuss sanding and finishing the crown molding for an extra smooth finish.
Sanding And Finishing The Crown Molding
Once the crown molding has been installed, it is essential to sand and finish it properly. Sanding helps to smooth out any rough or uneven spots, while finishing adds an extra layer of protection against wear and tear. Before sanding, make sure the molding is clean and free of dust and debris. Use a fine-grit sandpaper, starting with a coarser grit if necessary, and work in the direction of the grain.
When it comes to finishing, there are several options available. You can choose between paint or stain, both of which have their own advantages and disadvantages. If you opt for paint, make sure to use a high-quality product that is specifically formulated for trim or molding. Painting tips include using a brush or roller with long strokes and applying multiple thin coats rather than one thick coat.
If you prefer the natural look of wood, staining is another option. Staining allows the natural beauty of the wood grain to show through while still providing protection against moisture and other elements. To get the best results when staining, use a pre-stain conditioner to help even out any blotchy areas. Sanding techniques are also crucial here since any imperfections will be more visible after staining.
Next up: Dealing with tricky ceilings and angles without compromising on style or functionality.
Dealing With Tricky Ceilings And Angles
After sanding and finishing your crown molding, it’s time to tackle the more challenging part of the installation process. Dealing with tricky ceilings and angles can be daunting if you’re not familiar with the process. However, with a bit of patience and know-how, you can achieve a professional-looking finish.
Common challenges when installing crown molding include uneven ceiling heights, sloping walls, and oddly shaped rooms. These issues can make it difficult to achieve a seamless installation. Fortunately, there are several solutions for angles that will help you overcome these obstacles.
Firstly, take accurate measurements of your room before making any cuts. This will help you determine the correct angle and length for each piece of molding. Secondly, use a miter saw to make precise cuts at the appropriate angle. Finally, use a coping saw or jigsaw to shape any pieces that need to fit around corners or protrusions.
By following these tips for dealing with tricky ceilings and angles, you’ll be well on your way to achieving a professional-looking finish for your crown molding installation. In the next section, we’ll discuss some additional tips for ensuring that your crown molding looks its best once installed.
Tips For A Professional-Looking Finish
To achieve a professional-looking finish when installing crown molding, there are a few key tips to keep in mind. One important aspect is painting techniques. Before painting the crown molding, make sure it is clean and free of any dust or debris. Use painter’s tape to protect any areas that you don’t want to paint, such as walls or ceilings. Apply a coat of primer before painting to ensure that the paint adheres properly.
Another factor to consider is lighting options. Proper lighting can highlight the beauty of your crown molding and draw attention to its intricate details. Consider installing recessed lighting or track lighting above the molding for a dramatic effect. Alternatively, you can use accent lighting placed below the molding to create a subtle glow.
By utilizing these tips for achieving a professional-looking finish, you can enhance the aesthetic appeal of your home and elevate its overall value. However, there are also some common mistakes to avoid when installing crown molding that can detract from its appearance and functionality. Let’s explore these potential pitfalls in more detail in our next section.
Common Mistakes To Avoid
Avoiding mistakes is key to any successful home improvement project, and installing crown molding is no exception. Here are some common mistakes that people make when installing crown molding and how to avoid them.
Firstly, one of the most common mistakes is measuring incorrectly. It’s essential to measure twice and cut once, as the saying goes. Make sure you take precise measurements and consider any corner angles before cutting your molding. Also, ensure that all your pieces are cut at the correct angle to match the corners in your room.
Another mistake people often make when installing crown molding is not properly preparing their walls. Before installation, make sure that your walls are smooth and flat so that the molding can adhere correctly. Any bumps or imperfections will cause gaps between the wall and the crown molding, creating an unprofessional look.
Troubleshooting common issues during installation will save you a lot of time and frustration. If you find that there are gaps between the wall and the crown molding after installation, use caulk to fill them in. Additionally, if you accidentally cut a piece too short or long, don’t panic; instead, try using wood filler on any visible gaps.
In conclusion, by avoiding common mistakes like measuring incorrectly or not preparing your walls adequately before installation, you can ensure a successful crown molding project. Troubleshooting common issues with caulk or wood filler will also save you time and frustration during installation.
Next up is answering frequently asked questions to help those who may have additional concerns before embarking on their crown molding project!
Frequently Asked Questions
After learning about the common mistakes to avoid when installing crown molding, it’s time to delve into some frequently asked questions. It’s important to understand that crown molding can be a challenging task, but with the proper installation tips and techniques, you can achieve professional-looking results on your own.
Pros and Cons of Crown Molding Before diving into the frequently asked questions, let’s take a moment to discuss the pros and cons of crown molding. On one hand, crown molding adds elegance and style to any room while increasing home value. On the other hand, it requires skillful installation and patience as incorrect cuts can result in wasted materials and an uneven finish. Additionally, it can be expensive if you choose high-end materials.
Installation Tips Now that we’ve weighed the pros and cons of crown molding let’s discuss some essential installation tips:
- Always measure twice before cutting once.
- Use a coping saw for inside corners instead of mitering.
- Sand all edges before painting or staining.
- Use adhesive in addition to nails for extra stability.
- Paint or stain before installing for easier touch-ups.
By following these installation tips, you’ll increase your chances of achieving a polished finish while minimizing the risk of errors during installation. Remember to take your time and work carefully as haste often leads to mistakes.
Asking questions is key when attempting any home improvement project like installing crown molding. Don’t hesitate to ask for advice from professionals or knowledgeable friends if you’re unsure about something. With these frequently asked questions answered along with some useful tips, you’re now equipped with the knowledge required to tackle this DIY project on your own without fear of making common mistakes.
Conclusion
Installing crown molding can be a great way to add a touch of elegance and sophistication to your home. By following the steps outlined in this article, you’ll be able to complete the project with confidence and achieve professional-looking results.
First, it’s important to measure your space and choose the right type of crown molding for your needs. You’ll also need to gather the necessary tools and materials, including a saw, nail gun, and adhesive. Preparing your workspace is crucial before cutting the crown molding to fit perfectly along your walls. Dealing with tricky ceilings and angles can be challenging but with patience and careful measurement, it is possible.
To ensure a professional-looking finish, take care when nailing or gluing the crown molding in place. Common mistakes to avoid include not checking for levelness before installation or using too much adhesive that can cause unsightly gaps. With practice and attention to detail, you’ll be able to install crown molding like a pro.
In conclusion, installing crown molding may seem daunting at first but with proper planning and execution, it can be an easy DIY project that enhances your home’s overall aesthetic appeal. Follow these tips carefully as you embark on this carpentry journey and enjoy the results for years to come.
Image Credits
- “crown molding ideas” by The Finishing Company Richmond Va (featured)

