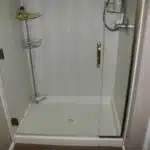
Installing tub or shower surround panels with adhesive is a popular and cost-effective way to update your bathroom’s look. This method of installation involves using panel adhesive to attach the panels directly to the wall, eliminating the need for nails or screws that can damage the surrounding area. By following these simple steps, you can easily install tub or shower surround panels with adhesive and enjoy a new and improved bathroom in no time.
Before beginning the installation process, it’s important to gather all the necessary tools and materials. These may include a tape measure, level, panel adhesive, caulk gun, utility knife, silicone sealant, and any necessary hardware. It’s also important to properly prep the area by cleaning any existing surfaces and ensuring they are dry before applying the adhesive. With these preparations in mind, let’s dive into the step-by-step process of installing tub or shower surround panels with adhesive for a beautiful new bathroom renovation.
Preparing Your Bathroom For Installation
One of the most important things to remember when installing tub or shower surround panels with adhesive is to ensure that your bathroom is properly prepared. This step is essential for ensuring that the panels adhere properly and that your installation is successful. Without proper preparation, you run the risk of having your panels come loose or not stick at all.
The first thing you need to do when preparing your bathroom for installation is to clean all surfaces thoroughly. This includes removing any old adhesive, grime, or dirt from the walls and surrounding areas. You can use a variety of cleaning products for this task, but be sure to read the instructions carefully and follow them closely.
Once you have cleaned all surfaces, it’s time to gather the tools you’ll need for surface preparation. These may include sandpaper, a putty knife, a silicone caulk gun, and other items depending on your specific installation needs. Make sure you have everything you need before beginning the process so that you don’t have to stop midway through and go get more supplies.
With proper surface preparation and the right tools in hand, you’ll be well on your way to completing a successful installation of tub or shower surround panels with adhesive. Now that your surfaces are clean and ready, it’s time to move on to measuring and cutting your panels for an exact fit in your bathroom space.
Measuring And Cutting Your Panels
Accurate measurements of walls are essential when installing tub or shower surround panels with adhesive. It is important to measure the width and height of the walls, and to consider any irregularities in the walls. Once measurements are taken, the panels can be cut according to the measurements. Cutting panels should be done with a carbide-tipped saw blade, and the appropriate type of blade should be chosen for the material being cut. Measurements should be marked on the panels prior to cutting to ensure accuracy. Additionally, any notches or holes for fixtures should be marked out as well.
Measuring Walls
As homeowners, we all want to maximize the space in our bathrooms while maintaining a stylish design. Installing tub or shower surround panels is one way to achieve this goal. However, before you start the installation process, it is crucial to measure your walls accurately to ensure that the panels fit perfectly.
Common mistakes when measuring walls include not taking into account any inconsistencies in the wall’s shape and size or not measuring from multiple points on the wall. These mistakes can lead to poorly fitting panels and may require additional cutting and adjustments. To avoid these issues, use helpful tools like a laser level or a straightedge ruler to ensure precise measurements.
Maximizing space and design options are key considerations when measuring your walls for tub or shower surround panels. Adding extra height or width can create a more spacious feel in your bathroom, while choosing different panel designs can add personality and style to your space. Remember that accurate measurements are crucial for achieving the best possible results in terms of both aesthetics and functionality.
Cutting Panels
Now that you have accurately measured your bathroom walls for tub or shower surround panels, it’s time to move on to the next step: cutting the panels. Cutting panels is a crucial part of the installation process, and it requires precision and skill. One common mistake when cutting panels is not taking into account the measuring accuracy from the previous step. Inaccurate measurements can lead to poorly fitting panels, causing gaps or overlaps in the installation.
To ensure proper cutting techniques, use a straightedge ruler or a cutting guide to create straight lines. It’s essential to use sharp blades when cutting through panel materials such as fiberglass, acrylic, or PVC. Dull blades can result in jagged edges that make fitting and joining panels difficult. When using power tools for cutting, make sure you follow manufacturer’s instructions and wear protective gear.
Lastly, remember that proper measuring accuracy and cutting techniques are crucial for achieving a professional-looking installation. If you’re not confident in your skills, consider hiring a professional installer to do the job instead. With careful planning and execution, installing tub or shower surround panels can turn an outdated bathroom into a stylish oasis that maximizes space without sacrificing design options.
Marking Measurements
Accurate measurements and precise cutting are the keys to a successful tub or shower surround panel installation. After measuring your bathroom walls, it’s time to move on to marking these measurements onto the panels. Using a level is crucial in this step, ensuring that the lines are straight and level. Inaccurate marking can lead to poorly fitting panels, causing gaps or overlaps in the installation.
When marking the panels, ensure that you account for sealing edges. These edges will be used to seal the panels together during installation. Marking these edges accurately will ensure that they line up correctly when sealed together, resulting in a seamless finish. Remember to use a straightedge ruler or a cutting guide when marking the panels and use sharp blades when cutting through materials such as fiberglass, acrylic, or PVC.
Proper marking techniques are an essential part of achieving a professional-looking installation of tub or shower surround panels. While it may seem like an easy task, taking the time to mark accurately can save you from costly mistakes down the road. Remember that attention to detail is key in any home improvement project and if you’re not confident in your skills, consider hiring a professional installer to do the job instead.
Choosing The Right Adhesive For Your Panels
After measuring and cutting your panels, the next step is to choose the right adhesive for your installation. There are different types of adhesives available in the market, each with its own unique properties. It is important to select an adhesive that is specifically designed for use with tub or shower surround panels.
One of the most common types of adhesives used for this type of installation is construction adhesive. This type of adhesive provides a strong bond between the panel and the wall surface. However, it is important to follow best practices when applying construction adhesive to ensure a secure installation. This includes using a notched trowel to spread the adhesive evenly on the back of the panel and pressing firmly against the wall surface to remove any air pockets.
Another option for installing tub or shower surround panels is using silicone adhesive. Silicone provides a waterproof seal between the panel and wall surface, making it ideal for use in wet areas. However, it requires more time to cure than construction adhesive and may not provide as strong of a bond. As with construction adhesive, it is important to follow best practices when applying silicone adhesive for a secure installation.
Determining the best placement for your panels is crucial for a successful installation. In order to achieve an even look and avoid any gaps between panels, it is recommended to start from one corner and work your way outwards. Take into consideration any fixtures or obstacles that may require special cuts or adjustments before beginning installation. Proper planning will ensure that your tub or shower surround looks great and functions properly for years to come.
Determining The Best Placement For Your Panels
Before proceeding with the installation of your tub or shower surround panels, it is essential to determine the optimal panel positioning. This step is crucial as it ensures that you have enough panels to cover the entire surface area of your bathroom walls. You can use a measuring tape to get an accurate measurement of the height and width of your bathroom walls. Once you have measured your bathroom walls’ dimensions, you can create a diagram showing where each panel will be placed.
Professional installation has several benefits, including ensuring that your panels are correctly positioned for optimal performance. A professional installer will also ensure that any necessary adjustments are made before installing the panels. This includes cutting the panels to fit around existing fixtures such as faucets and pipes. If you are not confident in your ability to install the panels yourself, it is recommended that you seek professional installation services.
Determining the best placement for your tub or shower surround panels is essential for a successful installation process. By taking accurate measurements and creating a diagram showing where each panel will be placed, you can ensure that your bathroom walls are adequately covered. In the next section, we will discuss how to apply adhesive to the wall for panel installation without causing damage to your bathroom tiles or fixtures.
Applying The Adhesive To The Wall
Prior to applying the adhesive, it is important to ensure the wall surface is clean and dry. Any debris should be removed to ensure a secure bond and a successful installation.
Before applying the adhesive, check for any loose or damaged drywall and repair it if necessary.
For adhesive application, spread the adhesive evenly over the wall using a putty knife or trowel. Take care to ensure it is applied according to the manufacturer’s instructions.
Allow the adhesive to dry for the recommended amount of time before proceeding with the installation of the tub or shower surround panels.
Preparing The Wall
Before applying the adhesive to the wall, it is crucial to prepare the surface properly. The first step in wall preparation is to ensure that the wall is clean and free of debris or dust. Use a stiff-bristled brush or a vacuum cleaner to remove any dirt from the surface. Any grease or oil on the wall should be removed by wiping with a cloth dipped in rubbing alcohol.
Next, it’s essential to repair any damage to the wall before installing tub or shower surround panels. Check for holes or cracks and use spackling compound to fill them up. Allow time for the compound to dry and then sand it smooth using sandpaper. If there are any protrusions on the wall such as nails, screws, or pins, remove them.
Finally, check that the wall is level before proceeding with adhesive application. Use a level tool and place it against various areas of the wall to ensure that there are no bumps or dips. If you find any uneven spots, mark them with a pencil and sand them down until they’re level with the rest of the surface. By following these steps correctly, you will have prepared your wall adequately for adhesive application without encountering any problems during installation.
Applying The Adhesive
After preparing the surface of the wall, it’s time to apply the adhesive. The adhesive is a crucial element in ensuring that the tub or shower surround panels stay in place for an extended period. There are different types of adhesives available in the market, but it’s important to choose one that is specifically designed for this purpose.
When applying adhesive, it’s essential to follow specific tips and techniques to ensure proper installation. First, apply a small amount of adhesive on the back of the panel and spread it evenly using a notched trowel. Make sure that you cover all edges and corners thoroughly. Avoid using too much adhesive as it can cause the panel to slide down before it dries.
Once you have applied the adhesive on the panel, press it against the wall firmly. You may use a rubber mallet or a similar tool to ensure even pressure on all sides. Repeat this process for each panel until you have installed them all correctly. By following these tips and techniques, you will have successfully applied the adhesive to your wall and completed an essential part of your tub or shower surround installation process.
Pressing Your Panels Into Place
Applying pressure is a critical step in ensuring that your tub or shower surround panels are installed properly. Once you’ve applied adhesive to the back of your panels and positioned them, use a roller or another tool to press them into place. Press firmly, but be careful not to damage the panels. Applying pressure will help ensure that the adhesive bonds properly and prevents any air pockets from forming, which could cause the panels to come loose over time.
When selecting an adhesive for your tub or shower surround panel installation, it’s important to choose one that is specifically designed for this purpose. Look for an adhesive that is waterproof and provides strong bonding capabilities. Some adhesives may require you to wait a certain amount of time before applying pressure, so be sure to read the instructions carefully before beginning installation.
Remember that applying pressure is just one part of installing your tub or shower surround panels with adhesive. In the next section, we’ll discuss how to secure your panels with temporary support before allowing the adhesive to fully dry and cure. This step will help ensure that your installation is sturdy and long-lasting, providing you with years of enjoyment in your newly renovated bathroom.
Securing Your Panels With Temporary Support
Imagine you’ve just installed your tub or shower surround panels with adhesive, but the thought of them falling off is daunting. You don’t want to wait for the adhesive to dry before leaving the area, so what do you do? The answer is temporary support. This section will provide tips on how to secure your panels with temporary support and common mistakes to avoid.
Firstly, when securing your panels with temporary support, make sure it’s sturdy enough to hold the weight of the panel. You can use wooden boards or even metal brackets to prop up the panels temporarily while the adhesive dries. However, be careful not to apply too much pressure as this could cause damage or create gaps between the walls and panels.
Secondly, check that your panels are level before applying temporary support. If they’re not level, this could cause issues down the line such as water pooling in certain areas or uneven gaps between fixtures. Use a level tool to ensure that all four corners of your panel are equal in height.
Common mistakes to avoid when using temporary support include placing too much pressure on one area of the panel causing damage or gaps between walls and panels, not checking if your panel is level before applying temporary support which could lead to uneven gaps between fixtures and water pooling in certain areas. By following these tips and avoiding common mistakes, you’ll be able to secure your panels with ease.
Now that you’ve secured your panels with temporary support, it’s time to move onto cutting out openings for fixtures without damaging your newly installed tub or shower surround.
Cutting Out Openings For Fixtures
When it comes to installing tub or shower surround panels, one important step is cutting out openings for fixtures. Fixture placement is crucial in ensuring that your bathroom functions properly and looks aesthetically pleasing. You will need to measure and mark the locations for the showerhead, faucet handles, and any other fixtures before cutting into the panels.
Before you start cutting, it’s important to consider waterproofing techniques. Cutting holes into the panels can leave them vulnerable to water damage if not properly sealed. One effective technique is to apply a layer of silicone sealant around each fixture opening before inserting the fixture itself. This will create a watertight seal that prevents moisture from seeping behind the panel.
To cut out openings for your fixtures, you can use a jigsaw with a fine-tooth blade or a hole saw drill bit. Be sure to follow your markings carefully to ensure accurate placement of each fixture. Once all of the openings have been cut, you can insert each fixture into its respective hole and secure it in place according to manufacturer instructions.
- Measure and mark locations for all fixtures before cutting.
- Use waterproofing techniques such as silicone sealant around each opening.
- Cut carefully using a jigsaw or hole saw drill bit.
Now that you’ve successfully cut out openings for your fixtures, it’s time to move on to applying silicone sealant to the edges of your tub or shower surround panels.
Applying Silicone Sealant To The Edges
Silicone sealant is an essential part of the installation process when it comes to tub or shower surround panels. It provides a water-resistant barrier that prevents moisture from seeping through the edges and causing damage to the walls behind. There are two primary types of silicone sealant: 100% silicone and silicone latex blend. The former is more durable and lasts longer, while the latter is easier to work with and less expensive.
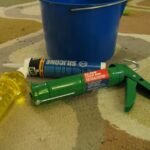
Before applying silicone sealant, make sure that the area is completely dry and free of debris. You can use a caulk gun to apply a thin bead of silicone along the edges where the panel meets the wall or adjacent panel. Start from one end and work your way towards the other, smoothing out any bumps or air pockets as you go. For corners, use a caulking tool or your finger to ensure that the silicone fills in evenly.
Applying silicone sealant to corners requires a bit more finesse than other areas. You’ll want to start by applying a small bead of silicone along each side of the corner, then run your finger along both edges simultaneously to smooth it out. This will create a neat and even joint that won’t crack or leak over time. Remember to wipe away any excess before it dries, as this will be much harder to remove later on.
As you finish applying silicone sealant around your tub or shower surround panels, take care not to leave any gaps or bubbles in the sealing material. Once you’ve completed this step, move on promptly removing any excess adhesive or sealant from your project space for an optimal final result.
Removing Any Excess Adhesive Or Sealant
As you complete the installation of your tub or shower surround panels with adhesive, it’s essential to remove any excess adhesive or sealant. This will ensure a neat and professional finish that is also safe for use. Start by examining the edges of the surround panels for any smudges or bumps caused by excess adhesive.
To remove excess adhesive, you can use a putty knife or scraper tool. Hold the tool at an angle and gently scrape off the excess adhesive without damaging the panel surface. Be sure to dispose of any removed adhesive appropriately, as it may be hazardous waste.
After removing any excess adhesive, smooth out any rough edges on the sealant using a finger or caulk smoothing tool. This step ensures that there are no gaps between the panels where water can seep through. Once you’ve done this, allow sufficient drying time before using your newly installed tub or shower surround.
As you prepare to allow sufficient drying time for your new tub or shower surround, it’s important to remember not to rush this process. Rushing could compromise the integrity of the installation and lead to future issues such as leaks or cracks. Instead, follow manufacturer instructions regarding drying times and ventilation requirements for optimal results.
Allowing Sufficient Drying Time
After applying adhesive to your tub or shower surround panels, it is crucial to allow sufficient drying time before continuing with the installation process. This step is often overlooked by individuals who are eager to complete the project quickly. However, failing to wait for the adhesive to dry properly can lead to issues such as panels shifting or falling off entirely.
Tips for ensuring proper drying time include waiting at least 24 hours before touching the panels or applying any additional pressure. It is also recommended that you avoid using the shower or bathtub during this time as excess moisture can interfere with the drying process. Additionally, keeping the room well-ventilated and maintaining a consistent temperature can help speed up the drying process.
One of the most common mistakes made during this step is failing to wait long enough for the adhesive to dry. It can be tempting to rush through this part of the installation, but doing so will only lead to problems down the line. Taking your time and allowing ample drying time is essential for ensuring that your tub or shower surround panels stay securely in place.
When you have allowed sufficient drying time for your adhesive, you can move on to installing any necessary hardware such as handles or faucets. At this point, it is important to follow manufacturer instructions carefully and ensure that all components are properly secured in place. With careful attention paid to each step of the installation process, you can achieve a professional-looking finish that will last for years to come.
Installing Any Necessary Hardware
Once you have allowed sufficient drying time for your tub or shower surround panels, it is time to move on to installing any necessary hardware. Before you begin this step, make sure that you have chosen the appropriate hardware for your specific installation needs. This may include things like brackets, screws, and anchors.
When choosing hardware, it is important to consider factors such as the weight of your panels and the type of wall material you are working with. You want to ensure that the hardware you choose can support the weight of your panels without damaging your walls. Additionally, make sure that you have all of the proper tools on hand before beginning this step. This may include items like a drill, level, measuring tape, and screwdriver.
Proper installation of your hardware will help ensure a secure and long-lasting installation for your tub or shower surround panels. Take care to follow manufacturer instructions carefully and double-check measurements before drilling any holes into your walls. With the right tools and careful attention to detail, you can enjoy a beautiful new bathtub or shower surround in no time.
Cleaning And Maintaining Your New Tub Or Shower Surround
- Cleaning your new tub or shower surround is essential to ensure it looks its best and lasts for many years.
- Regularly scrubbing the surface with a damp cloth and mild soap is sufficient for most cleaning jobs.
- To maintain your surround, you should use a sealant to protect the surface from water damage.
- Additionally, periodically inspect the surrounding area for signs of water damage and make any necessary repairs to keep your tub or shower surround looking its best.
Cleaning Surround
When it comes to cleaning and maintaining your new tub or shower surround, it’s important to start with a clean slate. Before applying any cleaning products, make sure the surround is free of any dirt, grime, or soap scum. Use a non-abrasive cleaner such as vinegar and water or a mild detergent to wipe down the surface. Avoid using harsh chemicals or abrasive scrubbers that can damage the material.
Once you’ve cleaned the surround, it’s time to focus on removing tough stains. For mild stains, try using baking soda mixed with water to create a paste that can be applied directly to the stain. Let the paste sit for 10-15 minutes before wiping away with a damp cloth. For more stubborn stains like rust or hard water buildup, consider using a specialized cleaner designed for your specific type of surround.
To keep your tub or shower surround looking its best, make sure to clean it regularly and avoid leaving standing water on the surface. Consider investing in a squeegee or towel to dry off the surface after each use. With proper care and maintenance, your new tub or shower surround will continue to look great for years to come.
Maintaining Surround
After cleaning your new tub or shower surround, it’s important to focus on maintaining its appearance and functionality. Proper maintenance can prolong the life of your surround and prevent costly repairs or replacements in the future. This subtopic will discuss the importance of maintaining your surround and provide some tips on how to achieve it.
Firstly, preventative maintenance is key to keeping your tub or shower surround in good condition. This includes wiping down the surface after each use to prevent water buildup and using a squeegee or towel to remove excess moisture. Regularly inspecting the caulking around the edges of your surround can also help prevent leaks and water damage.
Secondly, using appropriate cleaning techniques can help maintain the appearance of your surround. Avoid using harsh chemicals or abrasive scrubbers that can damage the material. Instead, use non-abrasive cleaners such as vinegar and water or a mild detergent to wipe down the surface. For tougher stains, consider using specialized cleaners designed for your specific type of surround.
In conclusion, proper maintenance is crucial for preserving the look and functionality of your new tub or shower surround. By incorporating preventative measures such as wiping down surfaces and regularly inspecting caulking, you can avoid costly repairs down the line. Additionally, using appropriate cleaning techniques can keep tough stains at bay while preserving the integrity of your surround.
Troubleshooting Common Installation Issues
Common adhesive problems may occur during the installation of tub or shower surround panels. One common issue is using too little adhesive, which can cause the panels to become loose and unstable over time. Another problem is using the wrong type of adhesive for the specific material of the panel or surface. This can lead to a weak bond and possible detachment of the panels.
To ensure a secure installation, it is important to follow the manufacturer’s instructions for adhesive application and drying times. It is also recommended to apply enough adhesive to create a strong bond between the panel and surface. Additionally, it is crucial to use an adhesive that is specifically designed for your particular type of panel and surface material.
By following these tips for ensuring a secure installation, you can prevent common adhesive problems from occurring and enjoy your beautiful new bathroom with confidence. Always remember to double-check your work before moving on to the next step, as small mistakes during installation can lead to bigger problems in the future.
Enjoying Your Beautiful New Bathroom!
Once you have successfully installed your tub or shower surround panels, it’s time to enjoy your beautiful new bathroom! Your hard work has paid off and you can now relax in a space that is both functional and aesthetically pleasing. As the saying goes, “home is where the heart is,” and the bathroom is no exception. It’s a space where we start and end our day, so it’s important to make it feel like a sanctuary.
To further enhance your bathroom experience, consider adding some accessories that fit your personal style. Bathroom accessories are an easy way to add character and functionality to your space. When choosing accessories, keep these tips in mind:
- Consider the size of your bathroom when selecting items
- Choose items that are practical for your daily routine
- Mix and match textures and colors for added interest
- Don’t be afraid to add unique or unexpected pieces for a touch of personality
Another way to elevate your bathroom design is by incorporating plants into the space. Not only do plants add a natural element, but they also provide health benefits such as air purification. When incorporating plants into your bathroom design, try these ideas:
- Choose plants that thrive in humid environments
- Opt for hanging plants if counter space is limited
- Group smaller plants together for impact
- Use decorative pots or baskets to add visual interest
With these tips and ideas in mind, you can create a beautiful and functional bathroom that meets all of your needs. Enjoy your new oasis!
Conclusion
In conclusion, installing a tub or shower surround panel with adhesive requires careful preparation and attention to detail. Start by measuring and cutting your panels to fit your bathroom space, and choose an appropriate adhesive for a secure installation. Determine the best placement for your panels, and apply the adhesive evenly to the wall before installing any necessary hardware.
As you install your new tub or shower surround, be sure to clean up any excess adhesive and maintain your new fixture regularly for long-lasting beauty and functionality. If you encounter any issues during installation, troubleshoot them carefully to ensure a successful outcome.
With these expert tips in mind, you can enjoy a beautiful new bathroom that is both practical and stylish. Whether you are upgrading an existing space or starting from scratch, taking the time to install your tub or shower surround properly will pay off in the long run.
Image Credits
- “Baby tub” by MyAngelG (featured)


