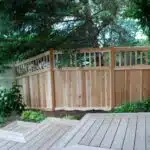
Welcome to this comprehensive guide on how to install a wood fence. As a fencing installation expert, I have seen many homeowners struggle with the process of installing a fence, which is why I have put together this step-by-step guide to help you achieve a successful installation. Whether you are looking to enhance your privacy or add curb appeal, installing a wood fence can be an excellent investment for your home.
Before you begin the installation process, it is important to understand the different types of wood fences available and their benefits. A cedar fence is an excellent choice for its durability and natural resistance to rot and insects. Pine fences are also popular due to their affordability and easy customization options, while redwood fences offer a high-end look that can last for decades with proper maintenance. With this guide, you will learn everything you need to know about how to install a wood fence, from selecting the right materials and tools to preparing your site and setting posts. So let’s get started on this exciting journey towards improving your property’s value and functionality!
Benefits Of Installing A Wood Fence
Wood fences are a popular choice for homeowners seeking to enhance the privacy and security of their property. There are many benefits that come with installing a wood fence, including its cost effectiveness. Compared to other fencing materials like vinyl or aluminum, wood is relatively inexpensive, making it a practical choice for those on a budget.
In addition to being cost effective, wood fences offer several advantages over other types of fencing. For one, they are extremely durable and can last for many years if properly maintained. The natural properties of wood also make it an excellent insulator, providing added protection against the elements.
Another benefit of installing a wood fence is its versatility in terms of design options. Wood fences can be customized to fit any style or preference, from traditional picket fences to more modern designs featuring horizontal slats or decorative lattice work. With so many choices available, homeowners can easily find a wood fence that complements their home’s architecture and landscaping.
When considering the installation of a wood fence, it is important to weigh the benefits against the cost and effort involved. However, with its affordability and durability, along with its ability to be customized to match any style preference, it is easy to see why wood fencing remains such a popular choice among homeowners today. In the following section, we will explore some different types of wood fences that you may want to consider for your property.
Types Of Wood Fences To Consider
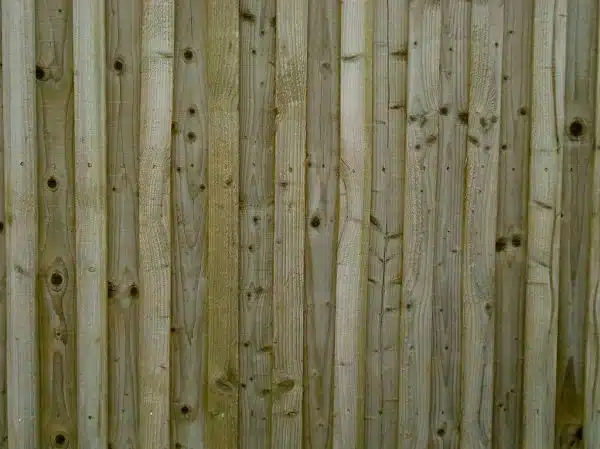
When it comes to wood fences, there are a variety of options available to homeowners. Different wood species offer unique benefits and drawbacks that should be carefully considered before making a final decision. Some popular choices include cedar, redwood, and pressure-treated pine.
Cedar is a popular choice due to its natural insect and decay resistance. It also has a distinctive aroma that can add to the overall ambiance of your yard. However, cedar tends to be one of the more expensive options for wood fences.
Redwood is another durable option that is also resistant to insects and rot. Its rich, warm color can add an attractive touch to any property. However, like cedar, it is on the pricier side.
Pressure-treated pine is a common choice due to its affordability and durability. This type of wood has been chemically treated to resist rot and insects, making it a low-maintenance option for homeowners on a budget. However, some people may not prefer the greenish tint that pressure-treated pine tends to have.
When considering different wood species for fences, it’s important to keep in mind cost comparisons between options. While some choices may offer more benefits than others, they may not necessarily fit within your budget or timeline for fence installation. By weighing the pros and cons of each option, you can make an informed decision about which type of wood fence will best suit your needs and preferences. In the next section, we’ll delve into the process of choosing the right materials for your fence based on factors such as privacy needs and aesthetic preferences.
Choosing The Right Materials For Your Fence
When it comes to installing a wood fence, choosing the right materials is crucial. Fence material comparisons should be done to ensure that the chosen material is durable and long-lasting. Wood is a popular choice for fences due to its natural look and affordability, but not all wood types are created equal.
Sustainable wood options are becoming more popular as people become more aware of the impact their choices have on the environment. Cedar and redwood are two sustainable options that are naturally resistant to decay and insects, making them ideal for outdoor use. However, they can be more expensive than other wood types. Pressure-treated pine is another option that can be affordable while still being durable, but it does require maintenance such as staining or sealing to prolong its lifespan.
When deciding on which material to use for your fence, consider factors such as budget, durability, and environmental impact. It’s important to make an informed decision based on your specific needs and preferences. By taking into account fence material comparisons and sustainable wood options, you can choose a material that will provide both functionality and aesthetic appeal for years to come.
Moving forward with your fence installation project requires thoughtful consideration of not only materials but also tools needed for the job. In order to make sure your project runs smoothly from start to finish, it’s important to have the right tools at hand.
Tools You Will Need For The Installation Process
Before starting with the installation process, it is important to ensure that you have all the essential equipment. Properly equipping yourself will help in making the installation process smoother and prevent any mishaps from happening. Some of the must-have tools include a post hole digger to create holes for fence posts, a level tool to ensure that your fence is straight, a measuring tape to take accurate measurements, and a circular saw or handsaw to cut wood or metal.
It is crucial to follow proper safety measures when installing a wood fence. The installation process involves several hazardous tasks that require cautionary steps. Always wear gloves and protective eyewear when handling wood or metal materials. Additionally, wear appropriate footwear with non-slip soles as you may have to walk on uneven ground while carrying heavy materials. Lastly, make sure you have a first aid kit nearby in case of any accidents.
To make your installation process easier and more efficient, here are four essential items you should bring with you: water bottle, snacks, sunscreen, and insect repellent. Installing a fence can be time-consuming and tiring work; staying hydrated and fueled up will keep your energy levels up throughout the day. Applying sunscreen will protect you from harmful UV rays while insect repellent will keep pesky bugs at bay.
Proper equipment and safety measures are vital for a successful fence installation project. In the next section, we will discuss how to prepare your site for fence installation by examining factors such as property lines and soil conditions.
Preparing Your Site For Fence Installation
As an expert in fencing installation, site preparation is crucial to ensure the long-term durability and stability of your wood fence. Before beginning any construction, it is essential to remove any debris or vegetation from the area where the fence will be installed. This includes rocks, roots, and other obstacles that could pose problems during installation.
Another important step in site preparation is soil testing. Soil tests will help determine the type of soil you have and its drainage capabilities. This information can be used to select appropriate materials for your fence posts and footings. It’s essential to choose materials that will withstand weather conditions and hold up over time.
To ensure accuracy during installation, it’s recommended that you measure and mark your fence line before beginning construction. This involves using stakes and string to outline the perimeter of your fence. A 3-column by 5-row table can be utilized to keep track of measurements and markings during this process. By taking these steps in site preparation, you’ll set yourself up for success when it comes time to install your wood fence.
Transitioning into measuring and marking your fence line section: With a solid understanding of site preparation under our belts, we can move on to the next important step: measuring and marking your fence line.
Measuring And Marking Your Fence Line
Accurate measurements are essential for a successful fence installation. A measuring tape and markers should be used to measure and mark the desired layout of the fence. After the location of the fence is determined, the fence line should be marked with wooden stakes or spray paint. Once the fence line is marked, the fence posts should be placed at the desired intervals along the line and leveled. Posts should then be secured with concrete, and post caps should be installed. Finally, rails and pickets should be installed according to the manufacturer’s instructions.
Measuring The Layout
Accurate measuring is the foundation of a successful wood fence installation. Measuring accuracy ensures that you have enough materials to complete the project, and that the fence line is straight and level. Before starting your fence installation, it’s important to calculate the material requirements, which include posts, rails, pickets, and any necessary hardware.
To begin measuring the layout of your fence line, start by identifying the boundaries of your property. Use a measuring tape or laser level to measure the length of each side of your property and mark these points with stakes or spray paint. Next, use a string line or chalk line to connect these markers and create a straight line for your fence.
Once you have established a straight fence line, use a plumb bob or level to ensure that your posts are installed vertically. This will help prevent sagging in your fence over time. Taking accurate measurements at every step of the installation process will ensure that your wood fence is sturdy and long-lasting.
Marking The Fence Line
Accurately measuring and marking your fence line is crucial to ensure a successful wood fence installation. In addition to measuring the length of each side of your property, choosing post spacing is also a critical aspect of marking the fence line. The distance between posts will determine the overall sturdiness of your fence, so it’s important to choose an appropriate distance based on the height of your fence and local building codes.
Once you have determined the appropriate post spacing, using a string line is a helpful tool in marking the fence line. A string line allows you to create a straight line for your fence, which will help prevent any sagging or unevenness over time. Be sure to use a level or plumb bob during this process to ensure that your posts are installed vertically.
After marking the fence line with stakes or spray paint, double-check all measurements before beginning installation. Taking these extra steps at the beginning of the project will save time and money in the long run by preventing mistakes or having to redo work later on. By accurately measuring and marking your fence line, you’ll be setting yourself up for a sturdy and long-lasting wood fence installation.
Setting Fence Posts
After accurately measuring and marking your fence line, the next crucial step in a wood fence installation is setting the posts. Proper methods for post setting are necessary to ensure that your fence will stand strong against wind, weather, and time. There are several ways to set posts, including using concrete or gravel. Concrete is a popular choice due to its strength and durability, but it can also be more difficult to work with than gravel. Using gravel involves digging holes for the posts and filling them with compacted gravel before installing the posts.
One of the most common post setting mistakes is not digging deep enough or wide enough holes for the posts. This can result in unstable posts that lean over time or even fall down altogether. It’s important to dig holes that are at least one-third as deep as the length of the post and twice as wide as the diameter of the post. Another common mistake is not allowing enough time for concrete to set before continuing with installation. Concrete needs at least 24 hours to fully cure before any weight or pressure is applied.
To set your fence posts correctly, start by positioning them in their respective holes and ensuring they are level using a level tool. After making sure they are straight up and down, add either concrete or gravel around the post until it fills up about 2/3 of the hole. Be sure to double-check that each post remains level while filling in around it with soil or other material until it reaches ground level. Taking these extra steps during post setting will ensure strong support for your wood fence installation and prevent costly mistakes down the road.
Digging Fence Post Holes
To properly install a wood fence, it is crucial to dig fence post holes with precision. The first step in digging fence post holes is to determine the correct post hole depth and spacing based on the height and weight of the fence panels. A general rule of thumb is to dig a hole one-third the height of the fence panel and space them eight feet apart.
Digging fence post holes can be labor-intensive work, so it’s important to have the proper tools on hand. A post-hole digger or an auger can be used for this task. A manual post-hole digger may work for small fences, but for larger projects, a gas-powered auger will get the job done more efficiently.
To ensure stability and longevity of your wood fence, make sure that each hole is dug at least 2-3 feet deep. This will give you enough depth to stabilize your posts with concrete or other materials if needed. Furthermore, properly spaced holes will allow for even distribution of weight along your fence line which reduces sagging over time.
- Determine appropriate depth and spacing based on height and weight of panels
- Use proper tools such as an auger or manual post-hole digger
- Dig each hole at least 2-3 feet deep
Next up in installing a wood fence is setting your posts in concrete. It’s important to take all precautions during installation to ensure that your fence lasts for many years to come.
Setting Fence Posts In Concrete
As a fencing installation expert, the process of setting fence posts in concrete is essential to ensure that your wood fence stands strong and lasts long. The first step in this process is to dig post holes, which should be at least one-third the length of the fence post and wider than the post diameter. Once you’ve dug the holes, it’s time to mix your concrete.
Mixing concrete can be a laborious task, but it’s crucial to ensure that it sets correctly around your fence posts. You can either mix your own concrete or use pre-mixed bags that are readily available at hardware stores. When mixing your own concrete, make sure you’re using a mixing ratio of 1:2:3 (one part cement, two parts sand, and three parts gravel). If you’re looking for concrete alternatives, there are options such as foam backfill and gravel that can provide adequate support for smaller fences.
In terms of best practices for setting fence posts in concrete, it’s important to ensure that each post is level and plumb before pouring the concrete. Use a spirit level to adjust the post accordingly and brace it until the concrete has set. Once you’ve poured the concrete into the hole, make sure to slope it away from the post to prevent water from pooling around it. With these tips and techniques, you’ll be able to set your fence posts securely in no time.
Moving on from setting fence posts in concrete, the next step is attaching rails and pickets to your fence posts. This stage requires precision and accuracy so that your wood fence looks neat and tidy.
Attaching Rails And Pickets To Fence Posts
After setting up the fence posts, it is time to attach rails and pickets. Rails are horizontal components that run between fence posts, while pickets are vertical components that are attached to the rails. The first step in this process is to measure and cut the rails according to the required length. Ensure that you space them evenly along the length of the fence and attach them securely with screws or nails.
Next, you need to attach pickets to the rails. Spacing pickets properly is crucial for a good-looking fence. A general rule of thumb is to leave a gap of about 2 inches between each picket. This will allow air circulation and prevent moisture buildup, which can warp or rot wooden fences over time. Once you’ve decided on your spacing, mark it out on each rail and then attach each picket using screws or nails.
Attaching rails securely is essential for a sturdy fence that can withstand harsh weather conditions. One way to do this is by using brackets specifically designed for wood fences. These brackets allow you to fasten rails securely without drilling into the posts themselves, preventing damage caused by water seeping into holes drilled into posts.
- Use galvanized screws or nails for attaching rails and pickets as they are more resistant to rust than regular ones.
- Consider using pressure-treated lumber for your wood fence as it is more durable and less susceptible to rotting.
- Apply a coat of sealant or stain after installing your fence to protect it from weathering.
- If your ground is uneven, use gravel or concrete at the base of each post when setting them up.
- Before starting any installation process, double-check local zoning regulations regarding fencing height and placement.
Incorporating these tips will help ensure that your wood fence not only looks great but also lasts long without requiring frequent repairs or maintenance. In the next section, we’ll discuss how you can create a gate for your wood fence that complements its style and functionality seamlessly.
Creating A Gate For Your Wood Fence
A gate is like the front door of your home, it’s the only section that opens and closes, allowing you access to your yard. A well-built gate will offer safety, privacy, and security while still adding an aesthetic appeal to your fence. If you’ve decided on installing a wood fence by yourself, why not take it a step further and try building the gate as well? With some DIY skills and creativity, constructing a gate can be an easy task.
DIY gate construction involves several steps which include measuring the opening where the gate will be installed, designing the layout of the gate, cutting the wood to size, attaching hinges and latches, and finally hanging it onto your wooden fence. It is essential to choose quality hardware for your gate that matches its design and weight. Common hardware options include self-closing hinges, latch sets with handles or knobs, and gravity latches that lock automatically.
Incorporating a sturdy and functional wood gate into your fencing project can complete the overall look of your yard. There are various styles to choose from depending on your preference; however, it’s crucial to ensure that it complements or enhances your fence’s design. Once you’ve successfully constructed and installed your new wood fence gate, you can now move on to adding finishing touches such as staining or painting.
Adding Finishing Touches To Your Fence
Having constructed a sturdy and secure fence gate, the next crucial step is to add the finishing touches to your wood fence project. One of the most important decisions you will have to make at this stage is selecting a staining option. While leaving your fence untreated may seem like an attractive option, it leaves it susceptible to weathering and degradation. Staining your fence not only gives it a polished look but also provides protection from the elements, ensuring that it lasts longer.
When choosing a stain for your wood fence, consider both functional and aesthetic factors. You should opt for a stain that contains water repellents and mildewcides to avoid mold growth and moisture damage. Additionally, you can choose from several decorative elements such as colors that complement your home’s exterior or textures that give your fence a unique look. Other options include semi-transparent stains which allow some of the natural grain of the wood to show through or opaque stains which provide complete coverage.
Adding decorative elements doesn’t just stop at staining; there are numerous other options available. Whether you want to add finials or post caps, arbors or trellises, there are plenty of ways to customize your fence according to your tastes. These additional features don’t just beautify your fencing project but can also increase its functionality by providing support for climbing plants or shade on sunny days.
As much as adding finishing touches is crucial in creating an attractive wood fence project, maintenance is equally important in achieving longevity. In our next section, we’ll cover the key aspects of maintaining your wood fence so that it retains its beauty and functionality for years to come.
Maintaining Your Wood Fence For Longevity
Cleaning your wood fence regularly is important to maintain its longevity. Sealing and staining the wood can protect it from water damage and rot. Repairs may be necessary to fix any damage, and waterproofing will further protect the wood from the elements. Rustproofing hardware and painting the fence can also help to extend its life, along with using insect repellent and fungicide treatments.
Cleaning
Keeping your wood fence clean is essential to its longevity. A dirty fence will not only affect the overall appearance of your property but can also cause damage to the wood. Pressure washing is a highly effective method for cleaning your fence as it removes dirt, grime, and other unwanted substances from the surface of the wood. It’s important to use proper pressure washing techniques to avoid damaging the wood. If you’re not confident in doing this yourself, it’s best to hire a professional fencing contractor.
Staining your fence is another crucial step towards maintaining its longevity. Staining provides an extra layer of protection against moisture and UV rays that can damage the wood over time. Before staining, ensure that your fence is completely clean and dry. There are various staining techniques available such as brushing or spraying on the stain. The key is to ensure that every part of the fence is coated evenly with a sufficient amount of stain.
In conclusion, regular cleaning and staining are vital for keeping your wood fence looking its best and ensuring its longevity. Pressure washing gets rid of dirt and grime while staining provides an additional layer of protection against weathering elements that could harm your fence over time. By following these steps, you’ll be able to enjoy a beautiful and long-lasting fence for years to come.
Sealing
Maintaining your wood fence is crucial if you want it to last for many years. In addition to cleaning and staining, sealing your fence is another important step in preserving its longevity. Sealing provides an additional layer of protection against moisture, pests, and other elements that can damage the wood. It also helps to prevent warping, cracking, and splitting.
There are different types of sealants available for wood fences such as oil-based sealers, water-based sealers, and clear sealers. Each type has its own advantages and disadvantages. Oil-based sealers are known for their durability and resistance to UV rays but may require more time to dry. Water-based sealers are eco-friendly and quicker to dry but may not be as durable as oil-based ones. Clear sealers offer a natural look while still providing protection but may not be suitable for those who want a colored finish.
The benefits of sealing your wood fence cannot be overstated. It not only enhances the appearance of the fence but also extends its lifespan by protecting it from moisture, insects, and other factors that can cause damage over time. By choosing the right type of sealer for your fence and applying it correctly, you can enjoy a beautiful and long-lasting fence for many years to come.
Troubleshooting Common Fence Installation Issues
Installing a wood fence can be a rewarding DIY project, but it is not without its challenges. Like any construction project, there is always the possibility of making mistakes that could compromise the stability and longevity of the fence. Common fence installation mistakes include using the wrong type of wood, not digging post holes deep enough, or failing to properly align posts.
One of the most critical steps in installing a wood fence is ensuring that your fence posts are properly aligned. Poorly aligned posts can cause your fence to lean or fall over entirely. If you notice that your posts are crooked or out of position during installation, stop immediately and reposition them before continuing. Be sure to use a level to ensure that each post is perfectly vertical before securing it into place.
Here are four tips for troubleshooting fence post alignment:
- Use string lines: String lines can help you keep your posts in line and ensure that they are evenly spaced.
- Double-check your measurements: Before digging any holes, double-check your measurements to ensure that all post placements are accurate.
- Use a level: A level will help you determine if each post is vertical and plumb.
- Check regularly: Be sure to check post alignment regularly throughout the installation process to catch any issues early on.
Next up, we will discuss some safety precautions you should take when installing a wood fence to help ensure a successful and injury-free project.
Safety Precautions To Take When Installing A Wood Fence
When installing a wood fence, certain safety precautions must be taken to ensure that the project is completed without any accidents or injuries. Before starting the installation process, it is important to gather all the necessary equipment and tools required for the project. This includes gloves, safety glasses, ear protection, hard hats, and steel-toed boots.
Potential hazards associated with installing a wood fence include sharp edges on the lumber, power tool usage, and heavy lifting. To avoid injury during installation, it is recommended to wear protective clothing and gear while handling these materials. Additionally, it is important to keep power tools out of reach of children and pets to prevent accidental injuries.
To further prevent injury during installation of a wood fence, there are some safety tips that should be followed. Always read the manufacturer’s instructions before beginning the installation process. When using power tools or heavy machinery, make sure they are in good working condition before use. Lastly, never attempt to install a wood fence on your own if you are not experienced or knowledgeable about fencing installation.
| Important Equipment | Potential Hazards | Safety Tips |
|---|---|---|
| Gloves | Sharp edges on lumber | Read manufacturer’s instructions before installation |
| Safety Glasses | Power tool usage | Check equipment before use |
| Ear Protection | Heavy lifting | Hire an experienced fencing installer if needed |
| Hard Hats | Keep tools out of reach of children and pets |
As an expert in fencing installation, I strongly advise individuals to take extra care when installing a wood fence. By following proper safety precautions and taking steps towards injury prevention during installation, this project can be completed smoothly and efficiently without harm to oneself or others.
Transitioning into our next section about tips for hiring a professional fence installer- it is important to understand that sometimes we may not have the knowledge or experience necessary to complete such projects ourselves. In these cases, hiring a professional fence installer may be the best option.
Tips For Hiring A Professional Fence Installer
While it’s possible to install a wood fence on your own, hiring a professional can be the smartest choice. A licensed and experienced fencing contractor will get the job done right the first time, ensuring that your fence is sturdy, secure and attractive. However, not all fence installers are created equal. It’s important to ask the right questions and watch out for red flags when selecting a professional to handle this project.
Questions to ask:
- Are you licensed and insured?
- How long have you been in business?
- Can you provide references or examples of previous work?
Red flags to watch out for:
- The installer doesn’t seem knowledgeable about local zoning laws or permits.
- The installer requests payment upfront before any work has been completed.
- The installer doesn’t offer a written contract or warranty for their services.
By taking the time to find a reputable fencing contractor, you’ll save yourself headaches down the road. A qualified professional will help ensure that your wood fence lasts for years and looks great from day one. Remember to ask questions, read reviews and check references before making your final decision.
Conclusion
In conclusion, installing a wood fence can be a great investment for your property. There are many benefits to having a wood fence, including privacy, security, and aesthetic appeal. Before beginning the installation process, it is important to consider the different types of wood fences available and choose the right materials for your specific needs.
When preparing for the installation process, it is crucial to have all necessary tools and take safety precautions to prevent injury. Maintaining your wood fence regularly will ensure longevity and prevent common issues such as rotting or warping. If you are uncertain about installing a wood fence yourself, it may be beneficial to hire a professional fence installer who has experience with this type of project.
As the saying goes, “good fences make good neighbors.” A well-installed and maintained wood fence not only adds value to your property but also provides privacy and security for you and your neighbors. By following these tips and taking the necessary steps in the installation process, you can enjoy the benefits of a beautiful and functional wood fence for years to come.
Image Credits
- “Wood fence panels” by allispossible.org.uk (featured)

