Installing a chain link fence can be a daunting task, but with the right tools and knowledge, it can be a manageable project for homeowners. A well-installed chain link fence provides security and adds aesthetic value to any property. In this article, we will discuss the steps involved in installing a chain link fence from start to finish.
Before embarking on this project, it is essential to understand that installing a chain link fence requires planning and preparation. Adequate preparation involves selecting the appropriate materials, measuring the area to be fenced, obtaining necessary permits, and ensuring that the ground is suitable for installation. As an experienced fence installation expert, I believe that following these steps will make your installation process less stressful and ensure that your new fence meets your needs and expectations.
Assessing Your Property For Fence Installation
Evaluating terrain is the first step in assessing your property for chain link fence installation. Understanding the type of land you have will help determine the best approach to installing a fence that suits your needs. Is your property flat or sloped? Are there any trees, rocks, or other obstacles that may affect the installation process? These are some of the factors to consider when evaluating terrain.
Checking for underground utilities is just as important as evaluating terrain. Before digging any holes, it’s crucial to know what lies beneath the surface. Contact your local utility company to mark any underground lines such as gas, electric, and water. This will prevent damage to these lines during the installation process and ensure safety for all involved.
Once you have assessed your terrain and checked for underground utilities, you can move on to choosing the right type of chain link fence that fits your needs. A fence installation expert can assist you in selecting a fence that meets your specific requirements, whether it be privacy or security concerns. With proper assessment and planning, installing a chain link fence can be a smooth process that provides peace of mind for years to come.
Choosing The Right Type Of Chain Link Fence
- Chain link fencing is an economical choice for property owners since it is relatively affordable and easy to install.
- Chain link fencing comes in a variety of materials, such as galvanized steel, aluminum, and vinyl-coated steel, each with its own benefits and drawbacks.
- The cost of a chain link fence will depend on the type of material used, the size of the fence, and the complexity of the installation.
- Professional fence installers can provide guidance on the most appropriate type of chain link fence for a particular situation and recommend the most cost-effective solution.
Types Of Chain Link Fence
When it comes to installing a chain link fence, choosing the right type is crucial. There are two main types of chain link fences available: galvanized and vinyl coated. Galvanized chain link fences are made from steel wire that has been coated in zinc to prevent rust and corrosion. This type of fence is durable and long-lasting, making it an ideal choice for those who want a fence that can withstand harsh weather conditions. On the other hand, vinyl-coated chain link fences are covered in a plastic coating that provides an additional layer of protection against rust and corrosion. These fences come in a variety of colors, making them an attractive option for homeowners who want to add some curb appeal to their property.
When deciding which type of chain link fence to install, cost is also an important factor to consider. Traditional chain link fences tend to be more affordable than privacy chain link fences, which are designed with slats or mesh material that provide added privacy for your property. However, it’s worth noting that privacy chain link fences can offer significant benefits in terms of both security and aesthetics, making them a worthwhile investment for many homeowners.
Ultimately, the decision between galvanized vs vinyl coated and traditional vs privacy chain link fence will depend on your specific needs and preferences as a homeowner. It’s important to weigh the pros and cons of each option carefully before making your final decision. By doing so, you can ensure that you choose a fence that not only meets your practical needs but also enhances the overall look and feel of your property.
Cost Of Chain Link Fence
When it comes to choosing the right type of chain link fence, cost is a significant factor to consider. The total price of the fence will depend on several factors that affect its installation and materials. These factors include the size of the area to be fenced, the height of the fence, and whether you opt for traditional or privacy chain link fencing. Comparing chain link fences to other types of fencing can also help you determine if this type of fence is within your budget.
Compared to other types of fencing, chain link fences tend to be more affordable. However, the cost can still vary depending on the aforementioned factors. For example, a larger area would require more materials and labor, leading to a higher cost. Additionally, privacy chain link fences may come at a higher price point due to their added functionality and material requirements. It’s crucial to get accurate estimates from reliable installers before making any final decisions.
Ultimately, when it comes to choosing a chain link fence for your property, it’s essential to consider both practicality and budget. While there are many factors affecting cost, comparing various options can help ensure that you make an informed decision that meets your needs and preferences as a homeowner.
Deciding On Fence Height And Length
Factors to consider when deciding on the height and length of your chain link fence include the purpose of the fence, local regulations, and budget. If you are installing a fence for privacy or security reasons, a higher fence may be necessary. However, if you want to maintain visibility or comply with local regulations, a shorter fence might be required. Additionally, longer fences require more materials and labor, which can increase costs.
The benefits of different fence heights and lengths vary depending on the purpose of the fence. A taller fence provides increased privacy and security while also deterring intruders from entering your property. A shorter fence allows for better visibility and can be less imposing in residential areas. Longer fences can keep larger animals out of your yard but may not be necessary for smaller properties.
Ultimately, choosing the right height and length for your chain link fence comes down to weighing the factors mentioned above and finding a balance between functionality and cost-effectiveness. By carefully considering these factors, you can ensure that your fence meets your needs while also staying within budget constraints.
As you move forward with planning your chain link fence installation project, the next step is to measure your fence line accurately. This is an essential part of ensuring that you purchase enough materials and have an accurate estimate of labor costs. The following section will provide step-by-step instructions on how to measure your fence line correctly.
Measuring Your Fence Line
Measuring accuracy is crucial when it comes to installing a chain link fence. One of the most common mistakes people make is not measuring their fence line accurately, which can lead to a lot of problems down the line. To ensure that you get your measurements right, start by locating your property lines and determining where you want your fence to go.
Once you have established where your fence will go, it’s time to adjust for property slope. Most properties are not completely flat, and if yours isn’t either, you’ll need to take this into account when measuring for your fence. You can do this by using a level and measuring the height difference between different points along your fence line. This will help you determine how much of a slope there is and how much you’ll need to adjust your measurements accordingly.
After taking these factors into account, it’s time to start marking your fence line. Use stakes and string to mark out where your posts will go, making sure that they’re evenly spaced and in the correct positions according to your measurements. This process may take some time but taking care at this stage will save you a lot of headaches later on in the installation process.
With accurate measurements and adjustments for property slope accounted for, marking out your fence line should be straightforward. In the next section, we’ll move on to preparing for post installation.
Marking Your Fence Line
Before you start marking your fence line, make sure you have all the necessary measuring tools. These include a measuring tape, stakes, and string. You can also use spray paint to mark your fence line if you prefer.
It’s important to take safety precautions when marking your fence line. Make sure there are no underground utilities in the area where you will be digging. You can call 811 to have utility lines marked before you begin. Additionally, wear gloves and safety glasses when handling the measuring tools.
Once you have all of your measuring tools and safety precautions in place, it’s time to mark your fence line. Start by placing a stake at each corner of where your fence will be installed. Then tie a string between the stakes to create a straight line for your fence. Use spray paint or additional stakes along the string line to mark where each post will go.
Now that you’ve successfully marked your fence line, it’s important to obtain any necessary permits before beginning installation. Check with your local zoning board or city hall to see if a permit is required for installing a chain link fence in your area. This step is crucial in ensuring that your fence meets all local regulations and codes.
Obtaining Necessary Permits
Before you begin installing your chain link fence, it is important to obtain any necessary permits. This process can vary depending on your location and the specific regulations in place. Failure to obtain the proper permits can result in fines or even legal consequences.
To begin, research the requirements in your area for fence installation permits. This may involve contacting your local government office or reviewing online resources. It is important to factor in the cost of these permits when estimating the overall cost of your fence installation project.
Additionally, timeline management is crucial when obtaining permits for your fence installation. The permit application process can take several weeks or even months to complete, so it is important to plan accordingly and allow ample time before beginning any construction. By properly managing your timeline, you can ensure that all necessary permits are obtained before beginning the installation process and avoid any delays or complications down the line.
As you prepare to install your chain link fence, it is essential to have all necessary materials and tools on hand before beginning any construction. This includes items such as fencing materials, posts, concrete, and tools such as a post hole digger and level. Proper preparation beforehand can save time and prevent complications during installation. In the next section, we will discuss how to gather these materials and tools in more detail.
Preparing Your Materials And Tools
After obtaining the necessary permits, it is important to start preparing your materials and tools for chain link fence installation. Choosing tools that are appropriate for the job will greatly affect the efficiency and quality of the project. Some essential tools include wire cutters, pliers, a level, a hammer, a post hole digger, and a measuring tape. These tools will help you secure the fence posts in place and ensure that the chain link fence is installed straight and sturdy.
Gathering materials should also be done with careful consideration. Chain link fences come in various heights and mesh sizes, so it is important to choose one that fits your needs. Additionally, you will need fence posts, rails, tension bands, tie wires, gate hardware, and concrete mix. The quantity of these materials will depend on the length of your fence perimeter and height.
Before proceeding to digging fence post holes section which is an essential step in chain link fence installation process, it is crucial that all necessary tools are gathered and all required materials are readily available. This will save time and prevent unnecessary delays during installation. In the next section we will discuss how to dig fence post holes properly to ensure a strong foundation for your chain link fence.
Digging Fence Post Holes
- Before beginning the process of installing a chain link fence, it is important to gather all the necessary materials, such as posts, concrete, post caps, and a post hole digger.
- Next, it is necessary to measure the distance between each post to ensure the fence is installed properly.
- After measuring the distance, the post holes must be dug, typically 2 to 3 feet deep and 8 inches in diameter.
- The post hole digger is used to create the hole and the soil should be removed from the hole in manageable amounts.
- The post should then be placed in the hole and leveled before adding the concrete mix.
- The concrete should be mixed according to the manufacturer’s instructions and poured into the hole, ensuring that the post stays in an upright position.
Gathering Materials
To begin the process of installing a chain link fence, gathering materials is the first step. This includes getting all necessary tools and equipment such as a post hole digger, tape measure, level, pliers, and wire cutters. Cost estimation is also important to consider when purchasing materials. A typical chain link fence requires posts, top rails, terminal posts, gate hardware, tension bands, and ties. However, material alternatives such as vinyl-coated or powder-coated chain link can be used for a more durable and aesthetically pleasing option.
When considering cost estimation for materials, it is important to factor in the length and height of the fence desired. It’s recommended to purchase at least one extra post per 10 feet of fencing in case of any issues during installation. Additionally, measuring the area where the fence will be installed is crucial for determining how much fencing material will be needed. Material alternatives such as vinyl-coated chain link can also provide added durability against rust and weathering.
In summary, gathering materials for installing a chain link fence involves obtaining necessary tools and equipment while considering cost estimation and material alternatives. Proper measurement of the area where the fence will be installed is essential before purchasing any materials. Investing in material alternatives such as vinyl-coated or powder-coated chain link can provide added durability against wear and tear over time.
Measuring Distance
Measuring distance is a crucial step in digging fence post holes for a chain link fence installation. One of the most essential tools needed for measuring distance is a measuring tape. It is important to measure the length and width of the area where the fence will be installed accurately. This will ensure that you purchase the right amount of materials and that your posts are spaced correctly.
To calculate distance, begin by marking out the perimeter of the fence using stakes or spray paint. Next, use a measuring tape to measure the distance between each stake or marker. Record these distances carefully, as they will be used to determine how many posts are needed and how far apart they should be placed. Additionally, it’s important to consider any corners or angles in the fencing area when calculating distance to ensure accuracy in placement.
When measuring distance for digging fence post holes, it is crucial to take into account any obstacles such as trees, rocks or uneven terrain that may affect placement. Failure to consider these obstacles can result in incorrectly placed posts which can cause problems with overall fence stability and durability over time. By taking accurate measurements and considering any obstacles in advance, you can ensure that your chain link fence installation is properly anchored and stable for years to come.
Digging Holes
After accurately measuring the distance for the fence post holes, the next crucial step is to dig the holes. Before beginning, it’s important to ensure that all necessary tools are on hand. The tools needed for digging fence post holes include a shovel or post hole digger, a wheelbarrow or bucket for removing dirt, and a level for ensuring that each post is installed straight.
One of the best digging techniques when installing a chain link fence is to use a manual post hole digger. This tool allows you to dig precise, deep holes with minimal disruption to the surrounding area. Begin by positioning the digger over where the pole will be placed and push down into the ground until you reach your desired depth. Then, turn the digger and remove any excess dirt from inside the hole.
When digging holes for your chain link fence posts, it’s important to make them deep enough to provide adequate stability. A general rule of thumb is that each hole should be at least one-third as deep as the overall height of the fence (for example, if your fence will be six feet tall, your holes should be at least two feet deep). By following these guidelines and utilizing proper digging techniques, you can ensure that your chain link fence installation is secure and durable for years to come.
Setting Fence Posts In Concrete
According to the US Consumer Product Safety Commission, more than 6,000 people are treated each year for injuries related to chain link fences. This alarming statistic serves as a reminder of just how important it is to ensure that fence posts are installed correctly and securely. Setting fence posts in concrete is the most common method used, but there are alternative post setting methods that may be suitable depending on the specific needs of your project.
When setting fence posts in concrete, proper spacing and depth are crucial for ensuring stability and durability. The general rule of thumb is to space posts approximately 8-10 feet apart, with corner or gate posts set slightly deeper and wider for added support. The depth of the hole should be at least one-third the height of the post above ground level, with an additional 2-3 inches of gravel at the bottom for drainage. Before pouring concrete, make sure the post is level and plumb using a spirit level.
While setting fence posts in concrete may be the most common method used, it’s important to note that there are alternative post setting methods available. These include using anchors or braces to secure posts directly onto existing concrete surfaces or driving metal T-posts into the ground instead of digging holes. However, these methods may not be suitable for all projects and should be evaluated carefully before use. Regardless of which method you choose, proper spacing and depth are key factors in ensuring a sturdy fence that will last for years to come.
When it comes to installing a chain link fence, properly setting fence posts in concrete is essential for ensuring stability and durability. With proper spacing and depth, your fence will withstand harsh weather conditions and heavy usage over time. In our next section, we’ll discuss how to install top rails and bottom tension wire – two additional components that will help keep your chain link fence secure and stable.
Installing Top Rails And Bottom Tension Wire
After installing the posts and laying out the fence fabric, the next step is to install the top rails and bottom tension wire. These components provide structure and stability to the chain link fence. Start by attaching hardware onto one end of a top rail, then slide it into place on top of the terminal post. Repeat this process for all remaining sections of the fence.
Once all top rails are installed, it’s time to secure the bottom tension wire. This wire runs along the bottom of the fence fabric, keeping it taut and preventing sagging over time. Begin by threading tension wire through a section of chain link fabric near a corner or end post. Secure one end with an appropriate tension band, then stretch it tightly along the length of that side, securing it with additional tension bands every few feet.
With both top rails and bottom tension wire securely in place, you can now move on to stretching and attaching the chain link fabric itself. This is a crucial step in completing your chain link fence installation as it provides privacy and security to your property. Follow these steps carefully for optimal results: [subsequent section about ‘stretching and attaching the chain link fabric’] … and enjoy the peace of mind that comes with a well-secured fence.
Stretching And Attaching The Chain Link Fabric
- Unrolling the chain link fabric involves unrolling it in the direction of the fence line, and ensuring that the fabric is being held taut as it is unrolled.
- Securing the posts requires fastening all posts into the ground with concrete and setting the posts at a distance that is determined by the height of the fence.
- Attaching the fabric to the posts is done with the help of tension bars, tension bands, tension bands with eye tops, and fence ties.
- To attach the fabric to the posts with tension bars, the fabric is placed in the groove of the tension bar and the tension bar is fastened with bolts at the top of the post.
- To attach the fabric with tension bands, the first band is placed at the bottom of the post and the fabric is pulled taut and fastened with screws.
- To attach the fabric with fence ties, the fabric is pulled taut and the tie is wrapped around the fabric and post and then fastened with a crimping tool.
Unroll The Fabric
To properly install a chain link fence, it is crucial to know how to unroll the chain link fabric. Before starting, ensure that you have enough space to lay out the fabric completely. Begin by unrolling the fabric along the fence line while keeping it taut. This will help prevent any wrinkles or kinks from forming in the fabric.
As you unroll the fabric, keep an eye out for any twists or knots that may be present. These can cause unnecessary tension and make it difficult to attach the fabric properly to the fence posts. If you encounter any such issues, use techniques like smoothing out wrinkles and kinks in the fabric with your hands or by using pliers.
Once you have successfully unrolled and smoothed out any wrinkles or kinks in the chain link fabric, it is time to attach it to the fence posts. This process involves weaving the wire through each post and securing it tightly with clamps. With these steps completed, your chain link fence will be well on its way to providing security and privacy for your property for years to come.
Secure The Posts
Now that you have unrolled and attached the chain link fabric to the fence posts, it is time to secure the posts firmly into place. Proper post placement is crucial for a sturdy and long-lasting fence. The distance between each post should be measured precisely to ensure they are evenly spaced apart. A good rule of thumb is to place posts every 8-10 feet, depending on the height of your fence.
Once you have determined the correct spacing, dig holes for each post using a post-hole digger. The depth of the holes should be at least one-third of the total length of each post. After placing each post in its designated hole, use anchoring methods such as concrete or gravel to secure them firmly into place. It is important to let the concrete dry completely before continuing with installation.
After securing all posts into place, it’s time to install any additional hardware needed for your fence, such as gates or latch mechanisms. Ensure that everything is aligned and properly installed before finishing up by tightening any loose bolts or screws. By following these steps, you can confidently say that you have successfully installed a durable and secure chain link fence for your property.
Attach The Fabric
Now that the posts are securely in place, it’s time to focus on attaching the chain link fabric to the fence. Stretching techniques are crucial for ensuring that the fabric is taut and free from any wrinkles or sagging. One effective method is to use a come-along, which is a tool that allows you to pull the fabric tight and adjust it as needed. Another option is to use a fabric tensioning tool, which can make the process easier and more precise.
Before attaching the fabric, it’s important to ensure that it fits properly between each post. Measure the distance between each post carefully and trim any excess fabric before beginning. Start at one end of the fence and unroll the fabric along its length, making sure that it lines up with each post as you go. Use clamps or other fasteners to hold it in place while you work on stretching and securing it.
Once you have stretched the fabric tightly across all posts, use hog rings or tie wires to attach it securely. Work your way down each post, pulling the fabric tightly as you go and making sure that there are no gaps or sagging areas. By following these steps for attaching the chain link fabric, you can be confident in your ability to install a durable and attractive fence for your property.
Adding Gates And Hardware
Once you have installed the primary chain link fence structure, it is time to add gates and hardware. Choosing appropriate hardware is crucial for the safe and secure operation of your gate. Make sure to select high-quality materials that will not rust or deteriorate over time. The type of hardware you choose will depend on the size and weight of your gate, as well as the level of security required.
When installing gate hinges, it is important to ensure they are adjusted correctly for smooth operation. In order to prevent sagging or dragging, make sure that the hinges are level and plumb with the post. Use a spirit level to check if necessary. Once you have secured the hinge brackets to both the gate frame and post, test swing the gate several times to ensure it opens and closes smoothly.
Properly installing gates and hardware requires attention to detail and patience. Take your time during this process to ensure that everything is installed correctly. Once everything has been installed, move on to the next step: finishing touches and clean up.
Finishing Touches And Clean Up
- Once the chain link fence has been installed, it is important to trim the posts to the required height with a saw or shears.
- Any leftover materials or debris should be carefully cleared away to ensure a neat and tidy finish to the installation.
- It is also important to check that the posts are firmly secured and that the tension of the wire is correct for the size of the fence.
- Finally, an inspection should be carried out to ensure that all components are in good condition and that the fence is securely installed.
Trim Posts
When it comes to installing a chain link fence, trimming the posts is a crucial finishing touch. Proper post trimming ensures that your fence looks neat and professional while also making sure that the fence structure is sound. Before you begin trimming, make sure that you have set your posts at the correct spacing and depth.
When trimming your posts, use a handsaw or reciprocating saw to cut off any excess height. Make sure to leave at least two inches of post above the top rail to accommodate for any settling that may occur in the future. If you are using terminal posts, be sure to cap them with post caps for added protection against water damage.
Post spacing and depth are key factors in ensuring that your fence is stable and secure. The spacing between each post should be consistent throughout the length of your fence, typically ranging from six to ten feet apart depending on the height of your fence. Additionally, make sure that each post is set at a depth of at least one-third of its overall length in order to provide adequate support for the weight of the fence.
In conclusion, taking the time to trim your chain link fence posts is an important step in creating a polished finished product. By following proper post spacing and depth guidelines, as well as utilizing appropriate tools and materials, you can ensure that your fence will not only look great but also stand strong for years to come.
Clear Debris
After trimming the posts, it’s time to move on to clearing debris. This is an essential step in finishing your chain link fence installation. Not only does it improve the overall appearance of your fence, but it also ensures a safe environment for you and your family.
Before you begin clearing debris, make sure to take all necessary safety precautions. Wear appropriate clothing, gloves, and eye protection. Use caution around sharp objects such as nails or wire ends that may be sticking out from the fence.
Efficient methods for clearing debris include using a rake or broom to sweep up loose dirt and grass clippings that may have accumulated during the installation process. You can also use a leaf blower to quickly clear away any remaining debris.
In summary, clearing debris is an important step in completing your chain link fence installation. By taking necessary safety precautions and utilizing efficient methods, you can ensure a clean and safe environment for years to come.
Maintaining Your Chain Link Fence
Maintaining Your Chain Link Fence is an important aspect of having a long-lasting fence. Repairing Rust should be done as soon as it is noticed. Rust can spread quickly and weaken the structure of the fence. To repair rust, start by removing any loose or flaky rust with a wire brush. Then, sand the area until it is smooth and apply a rust converter to prevent further corrosion.
Cleaning Techniques are also crucial to keeping your chain link fence in good condition. Regular cleaning will prevent dirt buildup and keep your fence looking new for years to come. To clean your fence, use a mixture of water and mild detergent. Scrub the fence with a soft-bristle brush and rinse thoroughly with water.
Regular Inspections are another key component of maintaining your chain link fence. Check for any loose or damaged parts that may need to be replaced or repaired. Look for signs of wear and tear such as bent posts or sagging sections. Addressing these issues early on will save you time, money, and hassle in the long run.
- Three important tools for maintaining your chain link fence: wire brush, rust converter, soft-bristle brush.
- Three things to inspect regularly on your chain link fence: loose/damaged parts, wear and tear, signs of rust.
- Three benefits of regular maintenance: prolongs life of fence, saves money in repairs/replacements, keeps property looking well-maintained.
Moving on from maintaining your chain link fence, it’s important to know how to troubleshoot common installation problems that may arise. By being aware of these issues beforehand, you can take proactive steps to avoid them altogether or address them quickly if they do occur.
Troubleshooting Common Fence Installation Problems
Common mistakes during fence installation can lead to a variety of issues that can affect the stability and longevity of your chain link fence. One of the most common mistakes is not properly anchoring the posts into the ground. This results in a weak foundation, causing your fence to lean or even collapse over time. To avoid this problem, ensure that the post holes are dug deep enough and filled with concrete.
Another issue that can arise during fence installation is uneven spacing between posts. If posts are not installed at consistent intervals, it can lead to sagging or bulging sections of the fence. To address this problem, use a measuring tape to ensure that each post is spaced evenly before installing them into the ground.
Furthermore, failing to properly stretch and tension the chain link fabric between posts can also cause problems down the line. If your chain link fence is not stretched tightly enough, it can bow or sag under pressure from wind or other external factors. To prevent this issue from occurring, make sure you use a come-along tool to properly tension and stretch the chain link fabric during installation.
In summary, there are several common mistakes that can occur during chain link fence installation that may impact its durability and stability over time. Ensuring proper anchoring of posts into the ground, maintaining consistent spacing between posts and stretching chain link fabric tightly will help avoid these issues. By following these troubleshooting tips, you’ll be able to install a sturdy and reliable chain link fence for your property.
Conclusion
Assessing your property for fence installation is the first and most important step in building a chain link fence. Choosing the right type of chain link fence is also critical, as it will determine the durability and longevity of your fence. Deciding on fence height and length is equally important, as it will affect privacy, security, and aesthetic appeal. Measuring your fence line accurately and marking it precisely will ensure that your chain link fence is straight and level.
Adding gates and hardware is essential to make your chain link fence functional and accessible. Finishing touches such as adding post caps and cleaning up debris can enhance the overall appearance of your chain link fence. Maintaining your chain link fence properly by checking for rust, damage or wear can prevent costly repairs down the road.
In conclusion, installing a chain link fence requires careful planning, accurate measurements, attention to detail, and proper maintenance. A well-built chain link fence provides security, privacy, beauty, and value to any property. Like a sturdy picket in a strong wooden panel, a good quality chain link fence stands firm against external forces while keeping everything safe inside its boundaries.
Image Credits
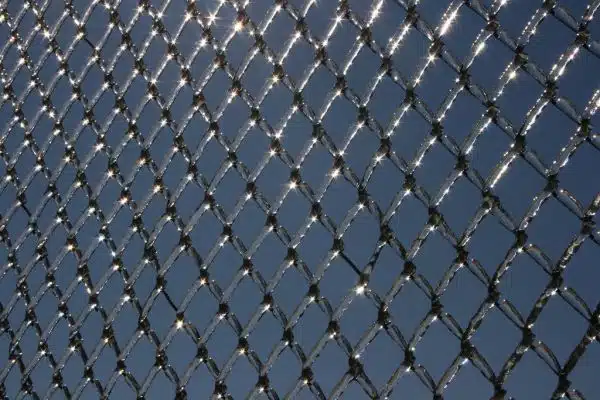
- “Icy Chain-link Fence” by existentist (featured)

