Indoor-outdoor carpet has become increasingly popular due to its versatility and durability. It is perfect for high-traffic areas such as patios, decks, and basements where moisture and dirt can be a concern. Installing indoor-outdoor carpet may seem like a daunting task for some homeowners, but with the right tools and techniques, it is a straightforward process.
As a professional in the carpet installation industry, I have seen the benefits of indoor-outdoor carpet firsthand. Not only does it enhance the aesthetic appeal of any space, but it also provides practical advantages that make it an excellent investment for homeowners. In this article, I will provide step-by-step instructions on how to install indoor-outdoor carpet that will ensure your project is completed successfully. Whether you are a seasoned DIYer or new to home improvement projects, my guide will equip you with the knowledge and skills necessary to complete your installation with ease.
Choosing The Right Type Of Indoor-Outdoor Carpet
Indoor-outdoor carpet can be a great addition to any home, especially those with high traffic areas or outdoor spaces. One of the main benefits of indoor-outdoor carpet is that it’s durable enough to withstand harsh weather conditions and heavy foot traffic. It’s also easy to clean and maintain, making it a practical choice for families with pets or children.
When choosing indoor-outdoor carpet, there are several factors to consider. First, you’ll want to think about where you plan to install the carpet. If it’s an outdoor space, you’ll need a material that can withstand rain, sun exposure, and other weather conditions. If it’s an indoor area with high foot traffic like a hallway or entryway, you may want a denser pile to prevent wear and tear.
Another important factor to consider is the style of your home. Indoor-outdoor carpet comes in a variety of colors and patterns that can complement any décor style. You’ll want to choose a color and pattern that complements your existing furniture and design scheme while also providing the durability you need for your space. Overall, taking these factors into consideration will help you make the best choice when selecting indoor-outdoor carpet for your home or business space.
When considering how to install indoor-outdoor carpet, one important step is measuring your space accurately.
Measuring Your Space For Carpet
As the old adage goes, “measure twice, cut once.” This phrase is especially applicable when it comes to installing indoor-outdoor carpet. Maximizing efficiency begins with taking proper measurements of your space. By doing so, you can avoid common mistakes such as underestimating the amount of carpet needed or cutting too much off of a roll.
To begin measuring your space for carpet, first determine the area that needs to be covered. Measure the length and width of each room and multiply those numbers together to get the total square footage required. It’s always a good idea to add an extra 5-10% to this number for waste or mistakes.
Next, consider the layout of your space and any obstacles that may need to be accounted for such as doorways, closets, or built-in furniture. Make note of these measurements and subtract them from the total square footage needed. This will give you a more accurate estimate of how much carpet you’ll need to purchase. By taking these steps and avoiding common measurement errors, you’ll save time and money in the long run.
Moving forward with your indoor-outdoor carpet installation project requires gathering all necessary tools and supplies. But before getting started on this step, make sure you have taken thorough measurements of your space. By doing so, you can avoid mistakes that could lead to costly miscalculations later on in the process.
Gathering The Necessary Tools And Supplies
Now that you have accurately measured your space for indoor-outdoor carpet, it is time to gather the necessary tools and supplies for installation. Before anything else, it is important to choose the appropriate adhesive for your carpet. Types of adhesives vary depending on the type of subfloor you have, so it is important to consult with a professional or refer to manufacturer instructions before making a decision.
Once you have chosen your adhesive, be sure to take all safety precautions when handling chemicals. Wear gloves and protective eyewear as needed, and ensure proper ventilation in the installation area. It may also be helpful to wear knee pads or use a kneeling board during installation to protect your knees.
In addition to adhesive and safety gear, there are a few other tools and supplies that will come in handy during installation:
- Carpet knife or scissors
- Trowel or notched spreader
- Measuring tape
- Straight edge
With these tools at the ready, you can move forward with confidence knowing that you have everything you need for a successful indoor-outdoor carpet installation. In the next section, we will discuss how to prepare your subfloor for carpet installation.
As you prepare for installing indoor-outdoor carpet in your space, it is important to take all necessary steps in ensuring a smooth process. One of these steps involves properly preparing your subfloor before laying down any carpeting.
Preparing Your Subfloor
To ensure a successful installation of indoor-outdoor carpet, it is crucial to prepare your subfloor adequately. A subfloor is the underlying surface that supports your finished flooring. Before installing your new carpet, it is essential to check that your subfloor is in good condition and free from any damage or defects.
One critical aspect of preparing your subfloor is moisture prevention. Moisture from the ground can seep into the subfloors, causing them to become damp and eventually rot over time. To prevent this from happening, you must inspect the area where you intend to install the carpet for signs of water damage or moisture buildup. If there are any visible signs of moisture, you must take action immediately before proceeding with the installation process.
Another essential aspect of preparing your subfloor is conducting necessary repairs. Before installing new carpeting, you should inspect your existing subfloor for any cracks or damages that require repair. Fixing these issues will help ensure that your new carpet lays evenly and does not develop wrinkles or bulges over time due to an uneven foundation. By performing these essential repairs on your subfloors beforehand, you can save yourself both time and money in the long run.
Now that we have covered how to prevent moisture buildup and conduct necessary repairs on your subfloors let us move on to removing existing flooring. Proper removal of old flooring material is also crucial in ensuring a smooth installation process for indoor-outdoor carpeting.
Removing Existing Flooring
As the old saying goes, “Measure twice, cut once.” This is especially true when it comes to installing indoor-outdoor carpet. Before you start laying out your carpet, make sure you have all the tools you need for the job. You will need a utility knife, a straightedge, a measuring tape, a chalk line, adhesive glue or double-sided carpet tape, and a notched trowel.
When it comes to safety precautions, always wear protective gear such as gloves and safety goggles. Make sure your work area is well-ventilated since adhesives can emit fumes. If you are using glue, be careful not to apply too much pressure when spreading it since this can cause air pockets to form under the carpet. It’s also important to keep children and pets away from the work area until the installation is complete.
Now that you have prepared your subfloor and taken necessary safety measures, it’s time to remove any existing flooring. This step ensures that your new carpet lays evenly on the subfloor. Use your utility knife to cut any existing flooring into manageable pieces for removal. Be sure to dispose of any debris in accordance with local regulations before moving on to laying out your carpet.
Laying Out Your Carpet
To lay out your indoor-outdoor carpet, first, you need to clear the area of any debris or obstacles that may hinder the installation process. Make sure that the surface is clean and dry before proceeding with the installation. It is recommended to install a moisture barrier if you are installing the carpet over concrete or an area prone to moisture.
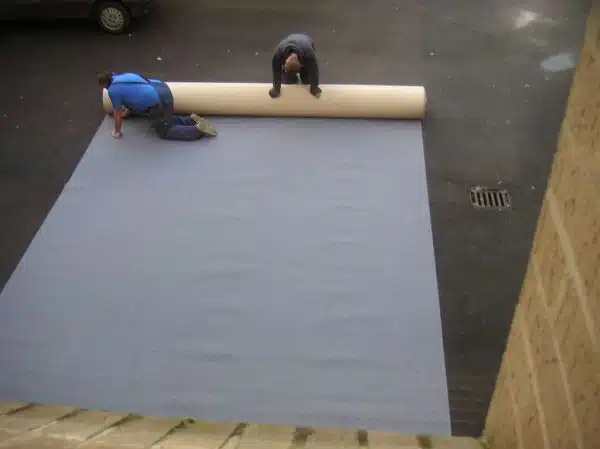
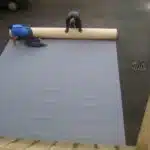
Once you have prepared the surface, it’s time to lay out your carpet. Start by rolling out your carpet onto one corner of the room and aligning it with the wall. Use a sharp utility knife or scissors to trim any excess material on the sides and ends of your carpet. To ensure proper alignment, use chalk lines or tape measures as guides.
Tips for alignment include starting in a corner and working outward, using a straightedge tool to keep lines straight, and checking frequently for any bumps or gaps. If you encounter obstacles such as vents or corners, cut small slits in the carpet to fit around them. Remember to make precise cuts and avoid cutting too much material at once.
Transitioning into the subsequent section about ‘cutting your carpet to fit,’ after laying out your indoor-outdoor carpet, it’s time to cut it to fit perfectly in your space. This step requires precision and attention to detail; therefore, we recommend taking extra care when making cuts.
Cutting Your Carpet To Fit
After laying out your carpet, the next step is to cut it to fit the desired area. Cutting techniques vary depending on the size and shape of the space, as well as the type of carpet being used. It’s important to use the proper tools and techniques to ensure a clean and precise cut.
One common mistake when cutting carpet is not measuring accurately. Before making any cuts, be sure to measure the space multiple times from different angles to ensure accuracy. Another mistake is using dull or incorrect cutting tools, which can result in jagged or uneven edges. Be sure to use sharp scissors or a utility knife specifically designed for cutting carpet.
To help with cutting your carpet, here are some tips:
- Use a straight edge tool such as a T-square or chalk line for straight cuts
- Cut slightly larger than necessary and trim down if needed
- Make small cuts rather than large ones
- Cut in one direction only
- Use caution when working around corners or curves
Once your carpet has been properly cut, it’s time to secure it with adhesive.
Securing Your Carpet With Adhesive
Once you have cut your indoor-outdoor carpet to size, it’s time to secure it in place. The most common method of securing carpet is using adhesive. However, before you begin, it’s important to weigh the pros and cons of this method.
One of the main advantages of using adhesive is that it provides a strong bond between the carpet and the surface underneath. This ensures that your carpet will stay in place and not shift or buckle over time. Additionally, adhesive can help reduce noise and improve insulation.
On the other hand, there are also some downsides to using adhesive. For one, it can be quite messy and difficult to work with if you’re not experienced with this type of installation. In addition, if you ever need to remove the carpet in the future, it can be challenging to do so without damaging the underlying surface.
Tips and tricks for using adhesive include making sure that both the surface underneath and the backside of the carpet are clean and free from debris before applying any glue. It’s also important to use a high-quality adhesive specifically designed for indoor-outdoor carpets.
Transition: Now that you’ve secured your carpet in place with adhesive, it’s time to move on to seaming your carpet together.
Seaming Your Carpet Together
After securing your carpet with adhesive, it’s time to seam the pieces together. Seaming is a crucial step in any carpet installation process. It involves joining two or more pieces of carpet to create a seamless finish. This technique is essential for indoor-outdoor carpets because they come in rolls that are typically not wide enough to cover large areas.
To achieve a seamless look, you need to use proper seaming techniques. Common mistakes include not aligning the pattern correctly, using the wrong adhesive, and not allowing enough time for the adhesive to dry. You can avoid these issues by following these three steps:
Use a seaming tape: Seaming tapes provide extra support between the two pieces of carpet and ensure that they stay together over time.
Apply adhesive: Using a recommended adhesive helps provide better adhesion and prevents any gaps between the seams.
Use a seaming iron: A seaming iron will activate the adhesive on the tape and melt it into both pieces of carpet, creating an even stronger bond.
By following these simple steps, you can ensure that your indoor-outdoor carpet is installed seamlessly and securely without any visible seams or gaps. In our next section, we will discuss trimming excess carpet from your installation project for a perfect finish.
Trimming Excess Carpet
After laying down the indoor-outdoor carpet, the next step is to trim any excess material. This process involves cutting off any parts of the carpet that extend beyond the edges of the room. Trimming techniques vary depending on the type of carpet and tools used. However, there are some general tips that can help achieve a professional-looking finish.
Before trimming, ensure that you have all necessary tools, including a sharp utility knife and a straight edge. You may also need a carpet seam roller to press down on the edges and prevent fraying. Start by folding back the edges of the carpet to expose the excess material. Using your straight edge as a guide, cut along the line where you want to trim. Be careful not to cut too deep into the carpet backing or flooring underneath. Once done, use your seam roller to press down firmly on the newly trimmed edge.
After trimming, it’s essential to finish off your carpet’s edges correctly. One option is using a binding tape or adhesive to create a clean look and prevent unraveling. Alternatively, you can use special finishing techniques like serging or whip-stitching for a more decorative touch. Whatever method you choose, ensure that the finished edge matches your indoor-outdoor carpet’s color and texture seamlessly.
Transition strips are often required when installing indoor-outdoor carpets in areas where different flooring materials meet. In such cases, transition strips serve as an aesthetic and functional bridge between two floors’ junctions while preventing tripping hazards. The next section covers how to install transition strips effectively without damaging your newly laid indoor-outdoor carpets’ surface or ruining their overall appearance.
Installing Transition Strips
After trimming the excess carpet, it is time to install transition strips. These strips serve as a bridge between different types of flooring, and they also help cover any gaps that may appear during installation. Using transition strips is an essential step in creating a seamless and professional-looking carpet installation.
When selecting transition strips, it is important to consider the color coordination with the surrounding flooring. Matching the color of the strip to the floor will ensure a cohesive look throughout the room. It is also important to choose a strip that fits snugly against both types of flooring for a secure hold.
Once the appropriate transition strips have been selected, they can be installed using adhesive or screws depending on their type. Adhesive strips are easy to install and provide a strong hold, while screw-in strips offer added durability. Regardless of which method is chosen, following the manufacturer’s instructions for installation is crucial for success. With proper installation of transition strips, your indoor-outdoor carpet will have a polished finish that will impress all who enter your space.
To ensure an overall successful installation process, it’s important to pay attention to every detail including cleaning up after installation. Neglecting this step can lead to debris being left behind which can cause damage to your newly installed carpet over time. In our next section we will discuss how you can properly clean up after installing indoor-outdoor carpet.
Cleaning Up After Installation
After installing your indoor-outdoor carpet, it is important to clean up any debris or excess materials left behind. A quick and efficient clean-up will ensure that your carpet is ready for use as soon as possible. Here are some tips on how to clean up after your installation:
Firstly, gather all the materials used during installation such as scissors, knives, and glue remnants. Dispose of these materials properly in a safe and secure place. Next, vacuum the entire area thoroughly to remove any dust or dirt that may have accumulated during the installation process. If there are any spills or stains caused by the installation process, be sure to address them immediately with a cleaning solution.
When choosing a cleaning solution for your indoor-outdoor carpet, consider using mild detergent mixed with warm water. Avoid using harsh chemicals as they can damage the fibers of your carpet. Alternatively, you may want to use a specialized carpet cleaner specifically designed for indoor-outdoor carpets. Always test any cleaning solution on an inconspicuous area of the carpet before applying it to the entire surface.
Cleaning up after installing your indoor-outdoor carpet should not be neglected as it ensures that your new flooring is ready for use while maintaining its quality and appearance. By following these tips for quick clean up and using suitable cleaning solutions, you can prolong the life of your indoor-outdoor carpet while keeping it looking fresh and new. In the next section, we will discuss how to maintain your indoor-outdoor carpet so that it lasts for years to come.
Maintaining Your Indoor-Outdoor Carpet
Cleaning is essential to maintain indoor-outdoor carpet and should be done regularly to prevent dirt and debris build-up. Sun protection is also important as it can prevent fading, discoloration, and damage. Stains can be removed with the proper cleaning solutions and tools. Mildew prevention can be achieved through proper moisture management. Repairing tears and damage can be done with a patching compound or glue. Vacuuming is essential to maintain the carpet and should be done regularly to remove dust and dirt.
Cleaning
Keeping your indoor-outdoor carpet clean is essential to extend its lifespan and maintain its beauty. Regular cleaning helps prevent dirt, dust, and other particles from getting embedded in the fibers, which can cause damage over time. Proper cleaning techniques are necessary to ensure that your carpet remains fresh and clean for years to come.
Vacuuming regularly is the first step in maintaining your indoor-outdoor carpet. Use a high-quality vacuum cleaner with a powerful suction system to remove dirt and debris effectively. Avoid using a beater bar or brush attachment as it can damage the fibers of the carpet. Instead, use a vacuum cleaner with a rotating brush head that gently agitates the fibers without causing any harm.
Stain removal is another crucial aspect of maintaining your indoor-outdoor carpet. Spills happen, so it’s essential to act quickly when they occur. Blot up as much of the spill as possible with a clean cloth or paper towel, then use a mild detergent solution to remove any remaining stains gently. Be sure not to scrub too hard or use harsh chemicals that could damage the fibers of your carpet. With these tips in mind, you can keep your indoor-outdoor carpet looking fresh and new for many years to come!
Sun Protection
When it comes to maintaining your indoor-outdoor carpet, there are various factors to consider. One of these is sun protection, which can significantly impact the lifespan and appearance of your carpet. To ensure that your outdoor carpet remains in excellent condition for many years, it’s crucial to protect it from the damaging effects of the sun’s rays.
Using pergolas for sun protection is an effective way to safeguard your indoor-outdoor carpet from excessive exposure to sunlight. Pergolas are an attractive and practical solution that provides shade while adding a stylish element to your outdoor living space. They come in different sizes and designs, making it easy to find one that complements your home’s architectural style and overall aesthetic.
Choosing the right color for your indoor-outdoor carpet is another essential aspect of sun protection. Lighter colors tend to reflect sunlight, reducing heat absorption and minimizing fading over time. On the other hand, darker colors absorb more heat and are more prone to fading when exposed to direct sunlight for extended periods. Therefore, it’s vital to choose a color that not only complements your outdoor space but also provides adequate sun protection for your carpet.
In conclusion, protecting your indoor-outdoor carpet from the damaging effects of the sun is critical in maintaining its beauty and extending its lifespan. Using pergolas for shade and choosing the right color for your carpet are simple yet effective ways of achieving this goal. By following these tips and adopting other maintenance practices like regular cleaning, you can enjoy a beautiful and long-lasting outdoor living space that serves both functionally and aesthetically.
Stains Removal
Maintaining your indoor-outdoor carpet is crucial in ensuring its longevity and keeping it looking beautiful for years to come. One of the challenges that homeowners face is removing stubborn stains from their carpets. While regular cleaning can help prevent stains, accidents happen, and it’s essential to know how to remove them effectively.
There are different home remedies for stain removal that you can use to tackle common carpet stains like red wine, pet urine, grease, and oil. For example, baking soda mixed with vinegar can work wonders on tough stains like pet urine. Simply apply the mixture to the affected area and let it sit for a few hours before vacuuming up the residue. Another effective solution is using a mixture of warm water and dish soap to remove grease and oil stains.
When it comes to removing stains from your indoor-outdoor carpet, it’s essential to act quickly and avoid harsh chemicals that may damage or discolor your carpet. Additionally, regular cleaning can help prevent stains from setting in by removing dirt and debris before they have a chance to penetrate the fibers of your carpet. By following these tips and incorporating simple yet effective stain removal techniques into your maintenance routine, you can keep your indoor-outdoor carpet looking beautiful all year round.
Troubleshooting Common Installation Issues
Coincidentally, even the most experienced DIYers can encounter installation issues while installing indoor-outdoor carpet. Common mistakes include not properly preparing the surface or not allowing enough time for the adhesive to dry. Troubleshooting tips can help alleviate these issues and ensure a successful installation.
One common issue is wrinkles or bubbles in the carpet. This can be caused by insufficient troweling of the adhesive or not rolling the carpet flat enough during installation. To fix this issue, use a knee kicker to stretch out any wrinkles and use a carpet roller to smooth out any remaining bubbles.
Another issue that may arise is seam separation. This occurs when two pieces of carpet are not properly joined together with seam tape and heat seaming iron. If this happens, carefully lift up the edges of both pieces of carpet and reapply seam tape before heating it with an iron to seal it together.
Overall, troubleshooting common installation issues requires attention to detail and patience. Proper preparation before installation can prevent many issues from occurring in the first place, but if problems do arise, they can often be fixed with simple solutions like stretching out wrinkles or reapplying seam tape. However, if these troubleshooting tips do not work for you, consider enlisting professional help to ensure your indoor-outdoor carpet is installed correctly.
Enlisting Professional Help If Necessary
When it comes to installing indoor-outdoor carpet, some homeowners may opt to enlist the help of a professional. This decision can be influenced by various factors, such as lack of experience, time constraints, or physical limitations. Hiring professionals can provide peace of mind and ensure that the job is done right the first time.
Before deciding on hiring professionals, cost considerations should also be taken into account. The cost of installation may vary depending on factors such as the size of the area to be covered, the quality of carpet being used, and additional services required such as removal of old carpet or preparation of subflooring. It is important to obtain quotes from multiple providers before making a final decision.
In summary, while installing indoor-outdoor carpet can be a DIY project for some homeowners, others may benefit from seeking professional help. Cost considerations should also be factored in when making this decision. Ultimately, enlisting the help of professionals can save time and effort while ensuring that the installation is done correctly.
Conclusion
Installing indoor-outdoor carpet can be a great way to add comfort and style to your home or outdoor living space. However, it is important to follow the proper installation procedures to ensure a successful outcome. Choosing the right type of carpet, measuring your space accurately, preparing your subfloor, and gathering necessary tools are just some of the crucial steps to take before starting your project.
One common issue that many homeowners face during installation is wrinkling or buckling of the carpet. This can occur if the carpet is not properly stretched during installation, causing unsightly bumps and unevenness in the flooring. To prevent this problem, make sure to use a power stretcher tool when laying your carpet. This will ensure that the carpet is stretched tightly and evenly across your space, creating a smooth and seamless finish.
In conclusion, installing indoor-outdoor carpet can be a rewarding DIY project for homeowners who enjoy working with their hands. By following the proper installation procedures and taking care to address any issues that arise along the way, you can create a beautiful and functional addition to your home or outdoor living space. Whether you choose to tackle this project yourself or enlist professional help, remember that success is always within reach with careful planning and attention to detail. As one famous quote goes: “A well-laid plan is like a perfectly installed carpet – both require precision, patience, and persistence.”
Image Credits
- “Outdoor carpeting” by ☺ Lee J Haywood (featured)

