As a flooring installation expert, I understand the importance of having a sturdy and level subfloor. The subfloor is the foundation of your flooring, and it must be in good condition to ensure that your new floor will last for years to come. However, replacing a subfloor under a wall can be a challenging task that requires careful planning and execution.
In this article, we will discuss how to replace a subfloor under a wall, including the tools you’ll need, the steps involved in removing and replacing the old subfloor, and tips for ensuring that your new subfloor is level and secure. Whether you’re renovating an old home or repairing damage caused by water or pests, learning how to replace a subfloor under a wall is an essential skill for any homeowner or flooring professional. By following these guidelines, you can ensure that your new floor will not only look great but also provide a safe and durable surface for years to come.
Assessing The Damage
Have you ever experienced the frustration of a damaged subfloor under a wall? It can be a daunting task to repair or replace, but fear not, as an expert in flooring installation, I am here to guide you through the process. The first step is assessing the damage and determining whether repair or replacement is necessary.
To assess the damage, start by removing any flooring material covering the subfloor. Inspect for any signs of water damage, rotting wood, or termite infestation. If there are noticeable dips or soft spots when walking on the subfloor, it may be an indication of severe damage that requires replacement. Identifying the root cause of subfloor damage is crucial in preventing future issues.
Common causes of subfloor damage include water leaks from plumbing fixtures or appliances, poor ventilation causing moisture buildup, and natural wear and tear over time. Once you have determined the extent of the damage and identified the root cause, you can proceed with your plan for repair or replacement. In our next section, we will discuss gathering the necessary tools for this process.
Gathering The Necessary Tools
Choosing appropriate materials for subfloor replacement is crucial to ensure the longevity of the floor. It is important to select materials that are durable, moisture-resistant, and have a thickness that can handle the weight of furniture and foot traffic. Plywood and oriented strand board (OSB) are common choices for subflooring due to their strength and resistance to warping. However, it is essential to choose materials that match the existing subfloor dimensions.
Safety precautions during subfloor replacement must be taken seriously. Before starting the project, it is necessary to switch off electricity in the room where the work will take place. This ensures safety against accidental electrocution while using power tools such as saws or drills. Wearing protective clothing such as gloves, goggles, and masks is also critical when handling any construction material. Additionally, use caution when removing old subflooring as there may be hidden nails or screws that could cause injury.
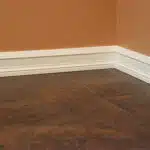
Once you have chosen appropriate materials and taken safety precautions, it’s time to start replacing the subfloor under a wall by removing baseboards. Removing baseboards requires careful attention so as not to damage adjoining walls or molding strips. A flat pry bar can be used to gently remove baseboards without applying too much pressure on surrounding surfaces. After successfully removing baseboards in sections, proceed with removing damaged flooring sections from under the wall using a circular saw or jigsaw.
Removing The Baseboard
- To gain access to the subfloor, the baseboard must be removed. This can be done by using a pry bar to carefully lift the baseboard away from the wall.
- When removing the baseboard, it is important to be careful not to damage the wall or the baseboard itself.
- Once the baseboard has been removed, the nails that held it in place will need to be removed.
- The use of pliers or a hammer can be used to remove the nails, and care should be taken to ensure that the wall is not damaged in the process.
Gaining Access To Subfloor
Assessing the accessibility of a subfloor beneath a wall is crucial before replacing it. It requires careful examination to determine the repair options needed to address the issues with the subfloor. For instance, if the subfloor is rotted or damaged, it must be immediately replaced to prevent further damage and ensure that the floor can support weight.
Gaining access to a subfloor under a wall is not an easy task. However, there are several techniques that can be used to remove baseboards without causing damage to surrounding areas. One effective method is using a pry bar by inserting it behind the baseboard and gently prying until it pops off from its position. After removing the baseboard, cut out any rotten or damaged sections of the subfloor using a circular saw.
When assessing accessibility and determining repair options for replacing a subfloor under a wall, it is important to work diligently and efficiently while ensuring safety measures are in place. This will help prevent injuries as well as damages to surrounding areas. With proper planning and execution, accessing and repairing a subfloor under a wall becomes easier, restoring your flooring’s stability and ensuring longevity.
Removing Baseboard Nails
After gaining access to the subfloor under a wall, the next step is removing the baseboard. This task requires patience and attention to detail as it can be challenging not to damage surrounding areas. One of the vital techniques in removing baseboards is by removing the nails that secure them in place. To do this, several tools can be used, such as a pry bar or a nail puller.
Using a pry bar is an effective method for removing baseboard nails. First, locate the nails by looking for small holes or cracks on the surface of the baseboard. Then, insert the pry bar behind the board and apply gentle pressure until you feel it loosen from its position. Slowly move along the length of the board while applying pressure until it comes off completely. Another technique that can be used is using a nail puller tool, which can grab onto and remove individual nails.
When removing baseboard nails, it is essential to use caution not to cause any damage to surrounding areas such as walls or floors. Therefore, before starting this task, one should ensure that they have all necessary tools and protective gear in place. With proper execution and attention to detail, successfully removing baseboard nails becomes easier while minimizing any potential damages or injuries that may occur during this process.
Cutting The Old Subfloor
What is the first step in replacing a subfloor under a wall? You need to cut the old subfloor precisely. This can be quite challenging, especially when you have to work around obstacles like walls and joists. But with proper planning, tools, and techniques, it’s possible to do it right.
Before you start cutting the old subfloor, make sure to take safety precautions. Wear gloves, goggles, and a dust mask to protect your eyes and lungs from debris and dust. Also, keep the saw blade sharp and well-lubricated to prevent accidents.
Choosing the right saw is crucial for a successful subfloor replacement project. A circular saw or reciprocating saw works best for this job. However, avoid using a jigsaw or handsaw as they can cause inaccurate cuts that will require additional sanding or trimming. Common mistakes that people make when cutting the old subfloor include making uneven cuts or cutting too deep into the joists. If you are unsure about how much depth to cut out of your subfloor or where exactly to cut it out from under the wall, consult an expert before proceeding.
Proper disposal of your old subfloor is essential after removing it from under the wall. Disposing of waste responsibly protects both human health and natural resources. You can either rent a dumpster or hire a waste removal company for this task. Alternatively, you may consider recycling materials such as wood chips or scraps by repurposing them for other projects like mulch or composting material.
Next up is removing the old subfloor – but how do you do it without damaging anything else? Here’s what you need to know:
Removing The Old Subfloor
- Before replacing a subfloor under a wall, the area must be adequately prepared to ensure the job is done properly.
- All furniture and other items should be removed from the area to be worked on, as well as any baseboards or trim.
- The old subfloor should then be removed, taking care to ensure that all nails and other materials are safely discarded or recycled.
- Once the old subfloor has been removed, the area should be vacuumed and inspected for any other potential issues that may need to be addressed before installing the new subfloor.
Preparing The Area
Preparing the Area is an essential step in any flooring installation project, especially when replacing a subfloor under a wall. This is because it requires a methodical approach to ensure the safety of both you and your property. Before you start, make sure that you have all the necessary tools needed to complete this task successfully. These include a circular saw, hammer, pry bar, chisel, gloves, eye protection gear and a dust mask.
Safety precautions must also be taken into account when preparing the area. Make sure that you turn off all electrical circuits in the room where you will be working. If possible, remove furniture and other items from the room to create more space for maneuvering. You should also secure plastic sheets on adjoining walls and floors to prevent debris from spreading around your work area.
After setting up your tools and ensuring your safety measures are in place, it’s time to proceed with Preparing the Area for removing the old subfloor under a wall. Start by examining the existing subfloor carefully and mark out any areas that need special attention. You can then use your circular saw to cut away any protruding nails or screws that may interfere with your work later on. Once done, use your pry bar to remove any baseboards or molding around the perimeter of the room before proceeding with removing the old subfloor itself.
Removing The Old Subfloor
Having prepared the area for subfloor replacement, the next crucial step is removing the old subfloor. This requires specific tools and safety precautions to ensure a successful outcome. Before proceeding, assess your tools and make sure you have all the necessary equipment, including a pry bar, circular saw, chisel, hammer, gloves, eye protection gear, and respirator mask.
Safety should always come first when dealing with any flooring installation project. Ensure that all electrical circuits in the room are turned off to avoid accidents. Remove any furniture or other items that may pose a danger or obstruct movement around your work area. Additionally, secure plastic sheets on adjoining walls and floors to prevent debris from spreading around your workspace.
Once you have everything in place and taken all safety measures into account, it’s time to start removing the old subfloor. Assess the condition of the existing subfloor carefully and mark out any areas that require special attention. Using your circular saw, cut away any protruding screws or nails that could interfere with your work later on. Then use a pry bar to remove baseboards or molding around the perimeter of the room before proceeding with removing the old subfloor itself.
Checking For Structural Damage
Signs of damage to a subfloor can be subtle, but it is important to identify them early on to avoid further structural issues. One of the most common signs of damage is a sagging or uneven floor. This could be caused by moisture or water damage, termite infestation, or simply wear and tear over time. Another sign of damage could be squeaking or creaking sounds when walking on the floor. This could indicate that the subfloor has weakened due to age or other factors.
If you suspect that your subfloor may be damaged, it is important to get a professional inspection. A trained flooring specialist can assess the extent of the damage and provide recommendations for repair or replacement. They may use specialized tools such as moisture meters and thermal imaging cameras to detect any hidden issues that may not be visible to the naked eye. It is always best to address any structural issues as soon as possible to prevent further damage and ensure the safety of your home.
In summary, checking for structural damage in your subfloor is an essential step before replacing it under a wall. Signs of damage such as sagging floors or creaking sounds should not be ignored, and a professional inspection should be sought out if there are any concerns. By taking this proactive approach, you can ensure that your new subfloor will be installed properly and securely, providing a stable foundation for your home’s flooring system.
Installing The New Subfloor
After checking for structural damage, the next step is to install a new subfloor. This process involves removing the old subfloor and replacing it with a new one. However, when dealing with a wall situated on top of the subfloor, special care must be taken to ensure that the integrity of the wall remains intact.
Subfloor construction is an essential aspect to consider when replacing a subfloor under a wall. The thickness of the plywood used should be consistent with that of the existing subfloor to avoid any unevenness once installed. It is also essential to check for any damage or rot on the joists or beams supporting the subfloor. In case of any damage, replace them before installing the new subfloor.
Subfloor insulation is another critical factor to consider during installation. Insulating your subfloors helps control heat loss through floors and helps reduce noise transmission between floors. When installing insulation, ensure it fits snugly between joists without leaving any gaps.
- Use protective gear such as gloves and goggles during installation.
- Measure and cut your plywood accurately before installation.
- Follow manufacturer’s instructions when using adhesives.
- Ensure that you have all necessary tools before starting installation.
Cutting the new subfloor can be challenging, especially when dealing with difficult angles or curves around walls. However, with proper tools and techniques, this task can be accomplished with ease.
Cutting The New Subfloor
Before cutting the new subfloor, ensure that you have measured the area where it will be installed correctly. This is crucial to avoid cutting the boards incorrectly and causing further damage to your flooring. Once you have done this, use a cutting technique that is appropriate for the type of subflooring material you are using. This can include saws, knives or jigsaws.
When using any cutting tool, it is essential to take safety precautions seriously. Always wear protective gear such as gloves and goggles to prevent injury from flying debris or sharp edges. Additionally, make sure that your tools are in good condition before use and that they are appropriately adjusted for the job at hand.
In conclusion, cutting the new subfloor requires precision and attention to detail. By following proper measurement techniques and utilizing safe cutting practices, you can ensure a successful installation. Next up, we’ll discuss fitting the new subfloor into place.
Fitting The New Subfloor
Once you have removed the old subfloor, it is time to measure and cut the new one to fit. Measuring accuracy is crucial at this stage to ensure that the new subfloor will fit perfectly under the wall. It is important to measure both the length and width of the area where you will be placing the new subfloor, taking into account any irregularities in shape or size.
When choosing subfloor materials, it is important to select ones that are strong and durable enough to withstand heavy foot traffic and potential exposure to moisture. Plywood is a popular choice for subfloors due to its strength, stability, and affordability. However, it may not be suitable for areas with high moisture levels. In such cases, cement board or oriented strand board (OSB) may be better options.
Now that you have measured and selected your materials, it’s time to cut the new subfloor to fit snugly under the wall. Keep in mind that precision is key when cutting your subfloor material as even small errors can cause issues with installation later on. Once your new subfloor has been cut to size, you can move on to securing it in place using appropriate adhesives or fasteners.
Securing The New Subfloor
- Preparing the area for subfloor installation is crucial in ensuring long-term stability and structural integrity.
- The existing flooring should be removed to provide a clean, level, and dry surface for the new subfloor.
- The new subfloor should then be cut to fit and checked for squareness, as well as being checked for any damage before being installed.
- Once in place, the subfloor should be secured to the existing subfloor or joists using appropriate screws or nails.
- It is important to ensure that the subfloor is secured to the joists with enough screws or nails so that it is adequately supported.
- Additionally, the new subfloor should be secured to the wall using screws or nails to ensure that it is properly secured.
Preparing The Area
As flooring installation experts, we understand the importance of a well-prepared area when replacing a subfloor under a wall. Before securing the new subfloor, it is crucial to measure the space accurately to ensure that your new subfloor fits perfectly. A poorly measured subfloor will lead to uneven floors, which can be dangerous and unsightly.
To prepare the area, start by clearing debris from underneath the wall. This includes any old insulation or damaged materials that may have accumulated over time. Clearing debris ensures that there is enough space for you to work comfortably and safely. It also prevents any unwanted surprises during installation, such as protruding nails or screws.
After clearing debris, thoroughly inspect the area for any damages or signs of moisture. Water damage can compromise the strength of your new subfloor and cause mold growth over time. If you notice any signs of moisture or damage, address them before installing your new subfloor to prevent future problems. By preparing the area properly, you set yourself up for a successful and long-lasting installation process without compromising safety or quality.
Installing The Subfloor
After clearing and inspecting the area, it’s time to install the new subfloor. Before securing it in place, ensure that the subfloor is level. Tips for leveling a subfloor include using a self-leveling compound or shims. A level subfloor ensures that your new flooring will lay flat and prevents any future damage.
Choosing the right subfloor material is also crucial for a successful installation process. Common materials used for subfloors include plywood, OSB, and particleboard. Each material has its advantages and disadvantages, depending on the location and intended use of the room. For example, plywood is commonly used in areas with high moisture levels, while OSB is more cost-effective.
Once you’ve chosen the right material and ensured that your subfloor is level, it’s time to secure it in place. Use screws or nails to attach the subfloor to the joists underneath. Be sure to space them out evenly to prevent any warping or buckling over time. With these steps in mind, you can install a new subfloor confidently and efficiently while ensuring quality results that last for years to come.
Securing The Subfloor
With the subfloor material chosen and leveled, it’s time to secure it in place. This step is crucial to prevent sagging and ensure that your new flooring will last for years. Proper anchoring of the subfloor requires the use of screws or nails, spaced out evenly to avoid any warping or buckling over time.
When securing the subfloor, it’s important to consider the spacing between each screw or nail. The recommended spacing is six inches on center along the edges and eight inches on center throughout the rest of the subfloor. This ensures that every section is anchored securely without creating too much stress on any one point. Additionally, using adhesive between the joists and subfloor can provide extra stability.
Proper anchoring techniques also depend on the type of subfloor material used. For example, when using plywood as a subfloor, it’s important to ensure that every edge is supported by a joist or blocking. This prevents any unsupported edges from sagging over time. By following these guidelines for securing your new subfloor, you can ensure a stable foundation for your new flooring installation project.
Replacing The Baseboard
As we have secured the new subfloor, it is time to move on to the next step of our project. Before we can begin sanding and leveling the new subfloor, we need to remove the baseboard first. This will allow us to finish the edges of the subfloor without any obstructions in our way.
Baseboard removal can be a tricky task, but with some patience and the right tools, it can be done easily. Start by using a putty knife to loosen any caulking or paint around the baseboard. Once it is loose, use a pry bar to gently lift it off the wall. Be careful not to damage any surrounding walls or flooring during this process.
After you have removed the baseboard, it’s time for finishing techniques. Use wood filler or putty to fill in any gaps or holes in your subfloor before sanding. This will ensure that your new floor has a smooth and even surface for installation. Remember that proper preparation is key when installing flooring, so take your time and make sure everything is level and even before moving forward.
Sanding And Leveling The New Subfloor
- To prepare the new subfloor for installation, sanding is a necessary first step to remove any imperfections and create a smooth surface.
- After sanding, the subfloor must be leveled to ensure a uniform base for the new flooring.
- Leveling the subfloor can be done by assessing for any high or low spots, then shimming or removing material to create a flat surface.
- It is important to assess the existing walls for cracks or other imperfections, as these may need to be addressed before the new subfloor can be installed.
Sanding The Subfloor
When it comes to sanding the subfloor, it is important to use proper sanding techniques to achieve a smooth and level surface. The first step is to choose the appropriate equipment for the job. A drum sander is ideal for large areas while an orbital sander is better suited for smaller spaces.
After selecting the right equipment, begin by sanding parallel to the direction of the wood grain. This will prevent any scratches or damage to the wood fibers. It is important to start with a coarse grit sandpaper and then gradually work your way up to a finer grit until you achieve a smooth surface.
When using a drum sander, be sure to keep it moving at all times and never stop in one spot as this could create divots in the subfloor. Additionally, when using an orbital sander, make sure you overlap each pass slightly to avoid leaving any visible marks on the floor.
In summary, utilizing proper sanding techniques and equipment selection can help ensure that your new subfloor is level and smooth. By following these steps carefully, you can achieve professional results that not only look great but also ensure long-lasting durability for your flooring installation project.
Leveling The Subfloor
To achieve a high-quality flooring installation, it is crucial to start with a level subfloor. This ensures that the final flooring product will be visually appealing and structurally sound. To level a new subfloor, there are different tools needed depending on the severity of the unevenness. For minor leveling issues, a self-leveling compound can be applied to smooth out any bumps or dips. However, for more significant leveling problems, shims or plywood may need to be used.
One of the most important aspects of leveling a subfloor is ensuring that it is done correctly. If not done properly, it can result in an uneven surface which can affect the final flooring product. Before starting any leveling work, it is important to identify any high and low spots in the subfloor using a straight edge or laser level. This will help determine where leveling compounds or shims need to be applied.
When applying self-leveling compound, it is important to follow manufacturer instructions carefully and mix the compound thoroughly before application. It should then be poured onto the subfloor and spread evenly using a trowel or other appropriate tool. When using shims or plywood, they should be placed underneath the low spots until they are flush with the rest of the subfloor. Ultimately, proper use of these leveling techniques will ensure that your new flooring installation project is successful and long-lasting.
Adding Floor Joists As Needed
After removing the damaged subfloor, it may be necessary to add support by installing new floor joists. This is especially true if the old subfloor was not properly supported or if there is significant damage to the existing joists. Before adding new joists, it’s important to inspect and reinforce any existing beams that will be used to support them.
One way to reinforce beams is to sister them with additional pieces of lumber. This involves attaching a new piece of wood to the side of an existing beam using construction adhesive and screws or bolts. The sistered beam provides additional strength and support for the new joists while distributing weight more evenly across the entire structure. Another option for reinforcing beams is to install steel brackets or hangers, which can be bolted directly into the existing beam and provide additional stability.
Once all necessary reinforcements have been made, it’s time to install the new floor joists. These should be cut to fit snugly between each supporting beam, with an extra inch on either end for added stability. Use construction adhesive and screws or nails to attach each joist securely in place, making sure they are level and spaced properly according to local building codes.
| Adding Support | Reinforcing Beams |
|---|---|
| Inspect Existing Beams | Sistering with Additional Lumber |
| Cut New Joists | Install Steel Brackets/Hangers |
| Attach Joists Securely | Distribute Weight More Evenly |
Sealing and finishing the subfloor can help protect it from future damage while also providing a smooth surface for installing flooring materials. However, before sealing or finishing, it’s important to make sure that all repairs have been completed and that any moisture issues have been addressed. In the next section, we’ll discuss how to properly seal and finish your newly reinforced subfloor for maximum durability and longevity.
Sealing And Finishing The Subfloor
After successfully replacing the subfloor under a wall, it is important to ensure that it is sealed and finished properly. Finishing techniques vary depending on the type of flooring being installed but generally involve sanding and smoothing out any rough patches or edges. This ensures that the surface is level and ready for installation.
Waterproofing methods are also important as they protect the subfloor from moisture damage. This step should not be overlooked, especially in areas prone to flooding or high humidity levels. Applying a waterproof sealant over the subfloor will prevent water from seeping through and causing damage to both the floor and subfloor.
To further protect the subfloor, consider using a moisture barrier between the subfloor and flooring material. This will provide an additional layer of protection against any potential water damage. Additionally, using a quality underlayment can help absorb sound and provide added cushioning underfoot.
By implementing these finishing techniques and waterproofing methods, you can ensure that your new subfloor will last for years to come. Testing the stability of your newly finished subfloor is crucial before proceeding with installing any new flooring material.
Testing The Subfloor For Stability
After sealing and finishing the subfloor, it is important to ensure that it is stable. Did you know that 90% of flooring failures are due to poor subfloor preparation? Testing the stability of your subfloor can prevent costly repairs down the line.
There are several testing methods available for analyzing the stability of a subfloor. One method is to use a straightedge or level tool to check for any dips or uneven spots. Another method is to measure the moisture content of the subfloor using a moisture meter. Excessive moisture can lead to warping or swelling in the subfloor, causing damage to your finished flooring.
It’s also important to assess any structural supports under your subfloor, such as joists or beams. You can do this by visually inspecting them for any signs of damage or decay, and by checking their spacing and size against local building codes. Ensuring that your subfloor is stable and structurally sound will provide a strong foundation for your finished flooring and help prevent future problems.
Conclusion
Replacing a subfloor under a wall can be a daunting task, but with the right tools and techniques, it can be done efficiently. The first step is to assess the damage and gather the necessary tools. Removing the baseboard and cutting out the old subfloor are next, followed by removing and replacing any damaged floor joists. Sanding and leveling the new subfloor is essential for proper installation, while sealing and finishing ensure long-lasting stability.
It’s interesting to note that according to a recent survey, more than half of homeowners who renovated their floors chose hardwood as their top choice. However, proper subfloor installation is critical for maintaining hardwood flooring integrity. Taking care to follow these steps when replacing subfloors under walls will not only provide a solid foundation for hardwood floors but also ensure safety in your home.
As flooring installation experts, we understand how important it is to have a stable subfloor before installing any type of flooring. By following these steps, you can replace your subfloor under a wall with confidence knowing that you have taken all the necessary precautions for safety and longevity. Remember always to use caution when working on projects like this and never hesitate to seek professional help if needed.
Image Credits
- “Horse Trailer with Living Quarters Video Walkthrough – 2015 Cimarron Norstar” by Trailers of the East Coast (featured)

