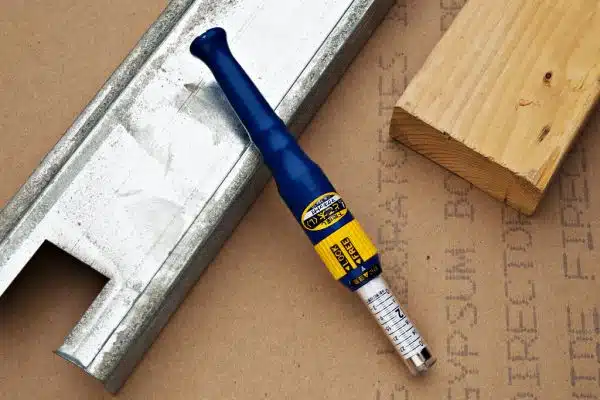
Stud finders are essential tools for anyone who wants to hang something on a wall. They detect studs behind drywall or other materials, making it easier to locate the right spot to drill into. However, using a stud finder can be tricky if you’re not familiar with how they work. In this article, we’ll discuss the basics of using a stud finder and offer some tips on how to get the most out of this tool.
Firstly, it’s important to understand that stud finders work by detecting changes in density behind walls. Most stud finders use either magnetic or electronic sensors to do this. Magnetic sensors work by detecting metal objects (like nails or screws) in the wall, while electronic sensors measure changes in density caused by the presence of wood or other materials. Both types of sensors have their advantages and disadvantages, so it’s worth considering which type will work best for your needs before you start using a stud finder. Once you’ve selected your tool and understand how it works, you’ll be ready to start finding studs like a pro!
Understanding The Purpose Of Stud Finders
Stud construction is an essential component of building any structure. Without it, walls would be flimsy and unable to support weight. Understanding stud construction is crucial when it comes to hanging heavy items on walls. You don’t want to risk damaging your drywall or worse, injuring yourself or others with a falling object.
That’s where stud finders come in. These devices are designed to locate the studs behind your walls so that you can safely and securely hang items such as shelves, mirrors, or even TVs without worrying about them falling down. The importance of finding a stud cannot be overstated as it ensures that your item will be properly supported and won’t cause any damage.
By using a stud finder, you can save time and effort by avoiding the trial-and-error method of locating studs by tapping on the wall or drilling holes until you hit one. Stud finders make the process more efficient and accurate, allowing you to complete your project quickly and confidently. In the next section, we’ll discuss the different types of stud finders available on the market today and how they differ in their functionality.
Types Of Stud Finders
Stud finders come in different types, and each type has its unique features. One of the primary considerations when choosing a stud finder is whether to go for an analog or digital device. Analog stud finders are the traditional models that use simple mechanisms to detect studs behind walls. They work by measuring changes in magnetic fields as they pass over a wall surface. Digital stud finders, on the other hand, use advanced sensors and algorithms to detect studs. They offer more precise readings compared to analog devices.
Another factor to consider when selecting a stud finder is whether you want an edge finding or center finding model. Edge finding stud finders locate the edges of the studs while center finding models detect the middle part of the stud. Edge finding models are ideal for tasks such as hanging shelves and cabinets since they allow you to locate the edges where you can attach screws or nails securely. On the other hand, center finding models are perfect for tasks such as electrical wiring installations since they help you avoid drilling into wires or pipes hidden behind walls.
When selecting a stud finder, it’s essential to choose one that suits your needs best. Factors such as cost, accuracy, and convenience should guide your choice between digital and analog devices as well as edge finding and center finding models. Regardless of which type you opt for, always ensure that you follow manufacturer instructions carefully to get accurate readings from your device.
Magnetic Sensors Vs. Electronic Sensors
After understanding the different types of stud finders available in the market, it is important to know which sensor type suits your needs. Magnetic sensors and electronic sensors are two popular choices among users. Each has its own set of advantages and disadvantages.
Magnetic sensors are simple to use and require no batteries or calibration. They detect metal objects within the wall, such as nails or screws, allowing users to locate a stud quickly. These sensors are also cheaper than electronic sensors, making them an affordable option for DIY enthusiasts. However, they may not be accurate when used on walls with thicker paint layers or metal studs.
On the other hand, electronic sensors use advanced technology like radar and ultrasound to locate studs with high accuracy. They can detect changes in density within the wall, making them more reliable than magnetic sensors. Moreover, some models come with additional features like live wire detection and deep scanning capabilities that make them more versatile. However, these benefits come at a higher cost than magnetic sensors, and they require regular calibration and battery replacement.
Understanding the pros and cons of magnetic sensors can help you decide if this type of sensor meets your requirements. While they are easy to use and have a lower price point than electronic ones, they may not be as accurate on certain walls. In the next section, we will take a closer look at the advantages and disadvantages of magnetic sensors compared to electronic ones so you can make an informed decision when choosing a stud finder for your project.
Advantages And Disadvantages Of Magnetic Sensors
Magnetic sensors are an essential tool for detecting hidden objects behind walls. They are designed to detect the magnetic field generated by metal objects, and they come in different types. The most common types of magnetic sensors include Hall effect sensors, magnetoresistive sensors, and fluxgate magnetometers.
Hall effect sensors are based on the principle that when a magnetic field is applied perpendicular to a current, it generates a voltage across the conductor. These sensors are highly sensitive and can detect small changes in the magnetic field. Magnetoresistive sensors, on the other hand, use changes in resistance to measure changes in the magnetic field. They are more accurate than Hall effect sensors but are also more expensive.
Fluxgate magnetometers work by generating an alternating magnetic field that induces a secondary magnetic field in any nearby metal object. This secondary magnetic field is detected by the sensor and used to locate hidden metal objects. Fluxgate magnetometers are highly accurate but can be affected by nearby sources of electromagnetic interference.
When comparing accuracy between different magnetic sensors, it is important to consider their sensitivity and range. Sensitivity refers to how well a sensor can detect small changes in the magnetic field, while range refers to how far away from the sensor an object can be detected. In general, Hall effect and fluxgate magnetometers have higher sensitivity and range compared to magnetoresistive sensors.
Overall, each type of magnetic sensor has its advantages and disadvantages depending on the specific application. Understanding these differences can help users choose the best type of sensor for their needs. In the next section, we will explore electronic sensors as an alternative option for detecting hidden objects behind walls.
Advantages And Disadvantages Of Electronic Sensors
- Electronic sensors provide a precise and accurate way of locating objects in walls, floors, and ceilings without any guesswork.
- The main advantage of using an electronic sensor is that it is much faster than traditional methods.
- However, the cost of electronic sensors can be quite high, making them prohibitively expensive for some users.
- Additionally, the accuracy of the sensors is limited by the material being scanned, as some materials can interfere with the signal.
Advantages Of Electronic Sensors
When it comes to finding studs in walls, electronic sensors are the go-to tool for many homeowners and professionals alike. The advantages of electronic sensors over traditional methods of locating studs, such as tapping on the wall or using a magnet, are numerous. First and foremost, electronic sensors can detect a wider range of materials beyond just wood, including metal and live electrical wires. This makes them an essential safety tool for anyone working on home renovation projects.
Another advantage of electronic sensors is their ability to accurately pinpoint the location of studs with greater precision than other methods. Studs are often spaced unevenly in walls, and an electronic sensor can help identify the exact location and spacing of each one. Additionally, many models come equipped with features like depth detection and marking tools that make it easy to mark the location of studs for future reference.
Tips for using electronic sensors effectively include calibrating the device before use, ensuring it is level while scanning the wall, and moving slowly to avoid missing any studs. It’s also important to note that different types of sensors may be required depending on factors like wall thickness or material composition. For example, some models may be better suited for drywall while others may be better suited for thicker materials like plaster.
In conclusion, when it comes to finding studs in walls, electronic sensors offer several advantages over traditional methods. Their ability to detect a wider range of materials and accurately pinpoint stud locations make them an invaluable tool for any home renovation project. With proper calibration and technique, using an electronic sensor can help ensure a safe and successful project outcome every time.
Disadvantages Of Electronic Sensors
While electronic sensors are a popular and effective tool for finding studs in walls, they do come with some disadvantages. One of the main drawbacks of relying solely on electronic sensors is that they can be expensive compared to alternative methods such as manual techniques like tapping or using a magnet. This can be particularly problematic for homeowners who only need to use a stud finder infrequently or for small projects.
Another disadvantage of electronic sensors is that they require batteries to operate, which can run out at inconvenient times. Additionally, some models may have difficulty detecting studs in certain wall types or materials, requiring users to purchase multiple sensors for different applications. It’s also important to note that while electronic sensors can detect live electrical wires, this feature can also make them more complex and potentially dangerous if not used correctly.
Despite these limitations, electronic sensors remain a popular choice for professionals and DIY enthusiasts alike due to their accuracy and versatility. However, it’s important to consider the potential drawbacks when choosing a stud finder and determine whether alternative methods may be more appropriate for the project at hand. By weighing the advantages and disadvantages of different options, users can make informed decisions about which tools are best suited for their needs.
Preparing Your Wall For Stud Finding
Moving on from discussing the advantages and disadvantages of electronic sensors, we will now delve into wall preparation before using a stud finder. As with any project, proper preparation is key to success. In this case, you need to ensure that your wall is free from obstructions and debris that may interfere with the accuracy of your stud finder.
Wall preparation involves removing any pictures, shelves or other items attached to the wall that could cause interference. Next, clean the surface of the wall using a damp cloth to remove any dust or debris. This will help improve the accuracy of your stud finder by ensuring there are no false readings.
Now that your wall is ready for stud finding, it’s important to have all necessary tools at hand. These include a stud finder, pencil, measuring tape or ruler, and level. With these tools in place and your wall prepared properly, you can move on to locating the first stud.
Transitioning smoothly into the next section without using ‘step’, take your time when using a stud finder as rushing through this process can lead to inaccurate results. The first step in locating a stud is identifying where you want to hang your item. Once you have determined where you want it placed on the wall, use your measuring tape or ruler and level to mark out its position accurately.
Locating The First Stud
Ironically, the first step in locating a stud with a stud finder is to turn on the device and hold it against the wall. While this may seem obvious, many people overlook this critical first step. Once the device is turned on, slowly slide it across the wall until you hear a beep or see a light indicating that you have found a stud.
Common challenges when locating the first stud include struggling to differentiate between studs and other objects in the wall, such as pipes or electrical wires. To avoid this issue, it’s essential to have a basic understanding of how walls are constructed and where studs are typically located. Additionally, alternative methods for finding studs include using a magnet or tapping on the wall to listen for differences in sound.
To ensure accuracy when locating studs, follow these four simple steps: 1) Begin at one end of the wall and work your way across systematically. 2) Use multiple methods to confirm that you have found a stud, such as checking for consistency in readings or using an additional tool like a level. 3) Mark the location of each stud with a pencil so that you can easily find them later when needed. 4) Finally, take your time and be patient – rushing through this process can lead to inaccurate results.
Transitioning into marking the stud location, once you have successfully located your first stud, it’s time to mark its location so that you can use it as a reference point for finding additional studs along the same wall. This step is crucial because if you make any mistakes during subsequent measurements, having marked locations will help reduce errors and save time in correcting them later on.
Marking The Stud Location
Once you have located the stud, the next step is to mark its location accurately. Using a pencil, mark the center of the stud on the wall. This will help you remember where it is when you start hanging items. Be sure to use a pencil and not a pen, as pen marks may bleed through paint or wallpaper.
It’s important to test the accuracy of your stud finder reading before marking the wall. To do this, move the stud finder over the same area several times in different directions. If it consistently gives you a reading in the same spot, then that is likely where the stud is located. However, if it gives you inconsistent readings or no readings at all, then there may be something interfering with its signal.
Once you have marked one stud location, you can use this as a reference point for finding additional studs. Simply measure 16 inches from the center of the first stud and scan that area with your stud finder. Repeat this process until you have located all of the studs in your desired area. Remember to always mark each stud accurately before moving on to hanging items.
Finding Additional Studs
After marking the location of the stud, you may find that there are additional studs in the same area. Finding hidden studs is important to ensure that your screws or nails will hold properly and prevent any damage to your wall. To do this, move your stud finder horizontally along the wall until it indicates another stud. Mark the location as before, making sure to measure and mark accurately.
If your stud finder is having trouble locating additional studs, don’t worry – there’s a backup method you can use. Take a small nail or drill bit and insert it into the wall where you suspect there may be a hidden stud. If you hit something solid, it may be a stud. Use a measuring tape to check if it lines up with the other marked locations.
Determining stud spacing is also crucial for successful installation of shelving or other wall-mounted items. The standard distance between studs in most homes is 16 inches apart from center to center. However, in older homes or those with non-standard construction, this measurement may vary. Measure from the center of one marked stud to the center of another to determine spacing and ensure proper installation of any wall-mounted items.
With these tips and tricks for using a stud finder, locating hidden studs and determining spacing should be no problem at all. Remember to always double-check your measurements before drilling or inserting screws to ensure a secure hold for whatever you’re mounting on your walls.
Determining Stud Spacing
To determine stud spacing, it is essential to understand the basics of measuring depth and using a laser level. Measuring depth is an important step in finding the studs as they are usually found behind drywall. To measure the depth, stud finders come with sensors that detect changes in density behind the wall. You should hold the stud finder flat against the wall where you plan to drill and slide it slowly until it indicates that it has detected a stud.
Once you have found one stud, use a laser level to mark its position horizontally across the wall. Move along the wall and repeat this process until you find another stud and mark its position. Using these two marked points, you can now measure their exact distance apart to determine their spacing. Repeat this process across your entire wall until all of your studs are marked and spaced out evenly.
Determining stud spacing may seem like a daunting task, but with proper technique and equipment, it can be done accurately and efficiently. Remember to take your time when using your stud finder and marking each point accurately with a laser level. In the next section, we will discuss some tips for accurate stud finding that will help you avoid common mistakes and ensure that your walls are sturdy and secure.
Tips For Accurate Stud Finding
Calibrating stud finders is crucial for accurate results. Before using your stud finder, it’s essential to ensure that it’s correctly calibrated. This means that you should place the device on a wall without any studs and press the calibration button. The device will beep, indicating that it’s ready for use. Failure to calibrate your stud finder can lead to inaccurate readings, which can result in frustration and wasted time.
Using visual clues is another useful technique when searching for studs. While different types of walls may have varying visual cues, some common ones include electrical outlets, baseboards, and light switches. These elements are usually mounted on studs and can be used as reference points when looking for other studs on the same wall. Additionally, you can look for nail pops or dimples on the wall surface, which indicate where nails or screws have been driven into the drywall.
In summary, calibrating your stud finder and using visual clues are essential tips for accurate stud finding. By following these techniques, you’ll increase your chances of locating a wall stud with ease and precision. In the next section, we’ll discuss common mistakes to avoid when using a stud finder so that you can achieve optimal results in all your DIY projects without unnecessary hitches or errors.
Common Mistakes To Avoid
Failing to properly calibrate the stud finder prior to use can result in inaccurate readings. Not accounting for wall angles can lead to inaccurate readings and may lead to the user drilling into an unintended spot. It is essential to find the joists in order to accurately locate the studs. The depth of the wall should be taken into account as this will affect where the studs are located. It is important to double check the accuracy of the stud finder before drilling. The scanning process should not be skipped as it is essential for locating the studs.
Failing To Calibrate
The Importance of Proper Calibration cannot be overstated when it comes to using a stud finder. It is the foundation from which all other functions depend on, and without it, the device will not perform as intended. Calibration ensures that the sensor accurately detects changes in density behind walls, allowing users to locate studs or other hidden objects with precision. Without calibration, it is highly likely that false readings will occur, resulting in frustration and wasted time.
Troubleshooting Calibration Issues can be a daunting task for those who are new to using a stud finder. One common mistake is failing to calibrate before each use. This may result in inaccurate readings which could cause damage to walls or other surfaces if drilled into incorrectly. Other issues that may arise include interference from nearby magnetic fields or electrical wiring which can also cause false readings. To avoid these problems, users must follow proper calibration procedures and ensure that their device is free from any potential sources of interference.
In conclusion, the key takeaway here is to always calibrate your stud finder properly before each use and troubleshoot any calibration issues that may arise immediately. By doing so, you can eliminate false readings and ensure accurate results when locating studs or other hidden objects behind walls. Remember that using a stud finder correctly is essential for successful DIY projects and repairs around the house.
Ignoring Wall Angles
When it comes to using a stud finder, there are several common mistakes that people make which can lead to inaccurate readings and frustration. One such mistake is ignoring wall angles when attempting to locate studs or other objects behind walls. Wall angles can be a challenge for even the most experienced DIY enthusiasts, but with the right techniques, they can be easily overcome.
Ignoring wall angles can result in false readings and misinterpretation of results. This is because the density of a wall may change at an angle, making it difficult for a stud finder to accurately detect hidden objects. Common issues with ignoring wall angles include drilling into electrical wiring or plumbing, damaging drywall, or not finding studs altogether. However, there are several techniques that can be used to avoid these problems and ensure accurate results.
To avoid issues related to wall angles, users must use specific techniques designed for detecting studs at various angles. These include using a level to ensure proper alignment of the device with the wall surface and adjusting the sensor’s depth settings accordingly. Additionally, users should try different scanning directions while moving the device slowly across the surface of the wall to locate hidden objects accurately. By following these tips and avoiding common mistakes like ignoring wall angles, users can achieve successful DIY projects without causing damage or frustration along the way.
Not Finding Joists
As a stud finder expert, one of the common mistakes that users make is not being able to locate joists accurately. This issue can be frustrating and can lead to incorrect readings or even damaging the wall structure. Possible causes for this problem include using low-quality stud finders or scanning too quickly across the surface of the wall.
To avoid not finding joists, it is essential to use high-quality stud finders with advanced sensing technology. These devices are designed to detect hidden objects like studs, wiring, and pipes accurately. Alternative methods include using a magnetic stud finder that uses powerful rare earth magnets to locate metal fasteners in the wall. This type of device doesn’t require batteries or calibration, making it an excellent option for DIY enthusiasts.
Another technique for locating joists is by using visual cues on the surface of the wall. This method involves looking for nail holes or marks left by previous installations such as electrical outlets or light switches. These marks indicate where joists are likely located behind drywall. By following these tips and avoiding common mistakes like not finding joists, users can achieve successful DIY projects without causing damage or frustration along the way.
Troubleshooting Your Stud Finder
Calibrating accuracy is key in ensuring your stud finder functions properly. If you’re experiencing difficulty with accurate readings, it may be time to calibrate your device. Start by holding the stud finder against a flat surface and pressing the calibration button. Wait for the device to beep and then move it over a known area with no studs or obstructions. If it beeps again, repeat the process until there are no more beeps. This will ensure that your stud finder is calibrated to detect only studs and not any other materials.
Dealing with false positives can be frustrating, but there are steps you can take to minimize them. One common reason for false positives is electrical wires behind walls. To avoid this issue, use a metal detector before using your stud finder to locate any possible wires in the area. Additionally, make sure you’re using the right setting on your device for the type of wall you’re working with. For example, if you have plaster walls, select the appropriate setting on your stud finder to ensure accurate readings.
In summary, calibrating accuracy and dealing with false positives are important steps in troubleshooting your stud finder. By taking proper care of your device and following these tips, you can ensure that it functions properly every time you use it. In the next section, we’ll discuss how to maintain and clean your stud finder to keep it in top condition for years to come.
Maintaining Your Stud Finder
As a stud finder expert, it is important to maintain your device’s accuracy and extend its lifespan. Regular cleaning is an essential aspect of maintaining the efficiency of your stud finder. Dust and debris can accumulate on the sensors, which may lead to inaccurate readings. To prevent this, you should clean your stud finder after every use with a dry cloth or brush.
Calibration is also necessary for ensuring accurate measurements. The calibration process involves adjusting the settings of your device to match the surface you are scanning. Before using your stud finder each time, make sure to calibrate it according to the surface type (e.g., drywall or plaster). Failure to do so may result in false positives or negatives.
To avoid damaging your stud finder, always store it in a safe place when not in use. Keep it away from moisture and extreme temperatures, as these can affect its performance and shorten its lifespan. By following these simple cleaning tips and calibration processes, you can ensure that your stud finder remains reliable and functional for years to come.
As we conclude this section on maintaining your stud finder, it is important to remember that regular maintenance is key to keeping your device functioning accurately. Neglecting routine cleaning and calibration may lead to false readings and ultimately damage the device itself. By taking care of your stud finder, you will be able to use it effectively for all of your home improvement projects.
Conclusion And Final Thoughts
After maintaining your stud finder, it’s time to learn how to use it effectively. A stud finder is a tool used to locate hidden framing studs behind walls. Studs are vertical framing members that provide support and structure to a building. It’s important to know where the studs are when hanging heavy objects on the wall, such as shelves or artwork.
To use a stud finder, first turn it on and place it flat against the wall. Move the device slowly across the wall horizontally until you hear a beep or see a light indicating that a stud has been detected. Mark this spot with a pencil or tape measure and continue scanning until you find another stud. Once you’ve located both sides of the stud, mark its center point.
The importance of practice cannot be emphasized enough when using a stud finder. It takes time and patience to become proficient at finding studs accurately every time. However, if you’re having difficulty locating studs or unsure about your findings, seeking professional help may be necessary. Don’t hesitate to hire an expert if you’re unsure about something or feel overwhelmed by the process.
Bullet Point List:
- Use caution when drilling into walls
- Always double check your measurements
- Avoid using cheap or unreliable stud finders
- Calibration is key for accurate readings
- Take your time and don’t rush through the process
Remember, practice makes perfect when it comes to using a stud finder effectively. Be patient with yourself and take the time to learn how to use this valuable tool correctly. If you’re still struggling after practicing for some time, seek out professional help from someone experienced in locating studs behind walls. Keep in mind these important tips: always double-check your measurements before drilling into walls, avoid using cheap or unreliable devices, calibration is key for accurate readings, and take your time during the process—rushing could result in costly mistakes!
Conclusion
Stud finders are essential tools for anyone who wants to hang pictures or mount shelves on the walls. With so many types of stud finders available, it can be difficult to know which one to choose and how to use it properly. Magnetic sensors and electronic sensors each have their strengths and weaknesses, so it’s important to understand the differences between the two.
When using a stud finder, it’s crucial to avoid common mistakes such as not calibrating the tool correctly or not holding it level against the wall. Troubleshooting your stud finder can also help you avoid frustration when you’re trying to locate studs in your walls.
As a stud finder expert, I recommend maintaining your tool regularly by cleaning it after each use and storing it in a safe place. Remember that a good stud finder is an investment that will save you time and money in the long run.
In conclusion, if you want to ensure that your pictures and shelves are mounted securely on your walls, investing in a stud finder is a smart choice. By understanding the differences between magnetic sensors and electronic sensors, avoiding common mistakes, troubleshooting issues when they arise, and taking care of your tool properly, you’ll be able to use your stud finder with confidence. So go ahead, take control of those walls!
Image Credits
- “Stud-Finder-25T2301_1” by Garrett Wade (featured)

