As a home repair specialist, one of the most common issues I come across in households is broken blinds. Whether it’s due to wear and tear, accidental damage or an improper installation, broken blinds can be frustrating for homeowners. Not only do they affect the aesthetic appeal of a room, but they also impact privacy and light control.
Thankfully, fixing broken blinds is not as complicated as many people think. With the right tools and techniques, you can restore your blinds to their former glory without having to replace them entirely. In this article, we will explore some tips and tricks on how to fix various types of broken blinds, from horizontal slat blinds to vertical blinds. By following these steps, you can save money on replacement costs and enjoy fully functioning window treatments once again.
Identifying The Type Of Blind
Blinds are commonly used in homes and offices to provide privacy, regulate light, and enhance the interior décor. Different types of blinds are available in the market, including Venetian, vertical, roller, Roman, and cellular shades. Each type has its own unique features and functionalities. It is important to identify the type of blind you have before attempting to fix it.
Venetian blinds are made of horizontal slats that can be rotated to control the amount of light entering a room. Vertical blinds, on the other hand, consist of vertical slats that can be tilted or drawn to one side. Roller blinds are made of a single piece of fabric that can be rolled up or down using a cord or chain system. Roman shades are made of fabric panels that fold up neatly when raised. Cellular shades consist of two or more layers of fabric that trap air between them for insulation purposes.
Most blinds are made from common materials such as wood, metal, plastic, or fabric. These materials may become damaged over time due to wear and tear, exposure to sunlight and moisture, or accidents such as pulling too hard on the cords. Assessing the damage is an important step in fixing broken blinds because it helps determine whether the blind can be repaired or needs to be replaced altogether. In the next section, we will discuss how to assess common types of damages seen in blinds.
Assessing The Damage
Identifying the type of blind may be easy, but fixing it is a different story. Broken blinds can be frustrating, especially when they are an essential part of your home’s privacy and light control system. Don’t fret just yet; we’re here to help you assess the damage and determine whether it’s a DIY job or if you need to call in a professional.
Common damages that occur in window blinds include broken slats, tangled cords, and malfunctioning mechanisms. The good news is that most damages can be fixed without needing to replace the entire unit. However, the extent of the damage will determine whether you need to call in a professional or if it’s a simple fix that you can do yourself.
DIY vs professional repair is an important consideration before you begin any repairs. If the damage seems minor, such as a broken slat or cord tangle, then attempting to fix it yourself may be a viable option. However, if the damage appears extensive, such as a motor malfunction or bent frame, then calling in a professional should be considered. Remember that attempting repairs beyond your skill level can cause more harm than good and lead to more costly repairs down the line. With this in mind, let’s move on to gathering the necessary tools for repairing your broken blinds.
Gathering The Necessary Tools
To fix broken blinds, you will need a few tools that can make the process easier and more efficient. Before you begin repairing your blinds, it is important to gather all the necessary tools needed for the job. Some common tools for fixing broken blinds include a screwdriver, pliers, scissors, and replacement parts.
Choosing replacement parts is an essential step in fixing broken blinds. It is crucial to match the replacement parts with the original ones to ensure proper functioning of the blinds. Commonly replaced parts include cords, slats, and brackets. Always buy high-quality replacement parts as cheaper ones may not last long and may cause more damage than good.
There are several common mistakes that people make when replacing or fixing their broken blinds. One of the most common mistakes is not taking accurate measurements before purchasing replacement parts. This can result in buying incorrect sizes that do not fit properly. Another mistake is not matching the color and style of replacement parts to the original ones which can lead to an unsightly look after repair. Avoid these mistakes by carefully measuring and choosing matching replacement parts for your blinds.
As you have gathered all necessary tools and chosen appropriate replacement parts for your broken blinds, it is now time to remove them from the window safely without causing any damage to your window frames or walls.
Removing The Blind From The Window
- Ensuring one has the necessary tools before attempting to repair broken blinds is essential; the necessary tools can include a ladder, screwdriver, dustpan and brush, and adjustable wrench.
- Once all tools have been gathered, the blind must be uninstalled, taking care to store all screws, brackets, and other fittings in an easily accessible location, ensuring none are lost.
- To begin reassembling a blind, the mounting brackets must be reattached to the wall, followed by the blind, and the chain and clutch system.
- When reattaching the blind, making sure it is level is important to ensure the blind will operate smoothly.
- Once the blind is reattached, the chain and clutch system should be reattached and tested for proper operation.
- Once all parts are reassembled, the blind should be tested for proper operation, and any necessary adjustments should be made as needed.
Gathering Tools
As a homeowner, there’s nothing more frustrating than having broken blinds on your windows. Not only does it ruin the aesthetic of your home, but it also impairs your privacy and light control. To fix this issue, you need to remove the blind from the window. However, before doing so, you must gather some essential DIY tool recommendations to make the process safe and efficient.
Firstly, ensure that you have a sturdy ladder or step stool that can support your weight while reaching high places. Next, prepare a screwdriver and pliers for removing screws and brackets. If you’re dealing with corded blinds, grab some scissors to cut them off safely. Additionally, don’t forget to wear protective gloves and goggles to avoid any potential injury during the process.
Lastly, always prioritize safety precautions when working on any home repair project. Before starting anything else, turn off the power supply in your room to prevent electrocution accidents. Remember that fixing broken blinds can be challenging at times, so don’t hesitate to seek professional help if needed. With these DIY tool recommendations and safety precautions in mind, you’re now ready to take on the task of removing your broken blinds from the window.
Uninstalling Blind
To safely remove blinds from your windows, it’s essential to follow specific steps that will ensure a successful and stress-free process. The first step is to make sure you have all the necessary tools for the job. A screwdriver, pliers, scissors (if dealing with corded blinds), protective gloves, and goggles are all crucial items to have on hand.
Once you’ve gathered your tools, it’s time to start uninstalling your blind. Begin by removing any screws or brackets that hold the blind in place using a screwdriver or pliers. If you’re dealing with corded blinds, be sure to cut them off safely with scissors before proceeding further.
After successfully taking down your blinds, it’s essential to store them properly if they’re not going back up immediately. Tips for storing blinds during renovation projects include labeling each blind with its corresponding window location and keeping them in a dry and dust-free area. By following these simple yet effective tips for uninstalling and storing your blinds correctly, you can ensure that they remain intact and functional for future use.
Reassembling Blind
After successfully removing your blinds from the window, it’s essential to reassemble them correctly to ensure proper functionality. Before starting the reassembly process, it’s crucial to clean the blinds thoroughly to remove any dust or debris that may have accumulated during storage. This step is critical as it can help prevent allergies and respiratory problems for those who suffer from dust-related allergies.
When reassembling the blind, make sure you follow the manufacturer’s instructions and diagrams carefully. Start by attaching any brackets or screws that were removed during the uninstallation process securely. Once this is done, you can begin threading the cords through each slat of the blind, ensuring they are evenly spaced.
Blind safety is also a crucial factor when reassembling your blinds. Make sure all cords are secured and out of reach of children or pets to prevent any potential accidents. By following these simple yet effective tips for blind cleaning and safety while reassembling your blinds after removal, you can ensure their long-term functionality and enjoy a safe home environment.
Replacing Broken Slats
To continue with your DIY repairs, the next step is to replace any broken slats. The first thing you will need to do is identify which slats are damaged and remove them. To do this, gently pull the bottom of the blind away from the window frame and carefully remove the affected slats.
Once you have removed the broken slats, measure their width and length so that you can order new ones. It’s important to get the right size, as ill-fitting slats may not function properly or look aesthetically pleasing. You can order replacement slats online or contact a professional for help.
If you’re confident in your DIY skills and would like to install the new slats yourself, simply slide each one into place by aligning it with the existing holes at both ends of the ladder tape. If you’re not comfortable doing this or encounter any issues during installation, it’s best to seek professional help.
With your new slats in place, the next step is to reattach them to the cord. This process requires careful attention to detail to ensure that each slat is properly aligned and spaced apart. Let’s take a closer look at how you can do this in our next section.
Reattaching Slats To The Cord
After replacing broken slats, the next step is to reattach them to the cord. However, before proceeding with this task, it’s important to identify the common causes of broken blinds. One of these is wear and tear due to frequent use. Another possible cause is exposure to extreme weather conditions such as strong winds or heavy rains.
Fortunately, there are DIY solutions available for reattaching slats to the cord. One option is to use a pair of pliers to fix the problem. Simply grip the cord and pull it through the hole in the slat until it’s tight enough. Then, tie a knot at the end of the cord and trim off any excess material. Another alternative repair method involves using a needle and thread to stitch the hole in the slat back together.
If you’re not confident with your DIY skills or if your blinds are severely damaged, there are professional options available. You can hire a handyman or a professional blind repair service to fix your blinds for you. They have specialized tools and equipment that can make this task easier and faster. Additionally, they can also provide advice on how to properly maintain your blinds in the future so that they don’t break again anytime soon.
Moving forward, if repairing slats or cords won’t solve your problem, then you may need to consider replacing damaged cord or string altogether. This task requires some technical know-how but with patience and attention to detail, it can be done successfully at home.
Replacing Damaged Cord Or String
If your blinds have a damaged cord or string, it is important to replace them immediately to avoid further damage. Before replacing the cord or string, you need to choose the right replacement. Measure the length of the old cord or string and purchase a new one that matches the measurement. It is recommended to buy an extra foot of cord or string in case of any errors during installation.
Once you have chosen the replacement, remove the old cord or string from the blinds carefully. Untie all knots and remove any excess frayed strings. Cut off any damaged parts of the old cord or string using scissors and attach one end of the new cord or string to the blind’s mechanism. Next, thread the new cord through each slat in order and tie a knot at each end once you reach the bottom of your blinds.
Tying knots for your blinds can be tricky as they need to be tied tightly enough but not too tight that they restrict movement. An easy way to ensure perfect knots is by using a pair of pliers along with your fingers while tying them. Using these tools will help keep your knots secure and prevent them from coming undone easily. Once you have finished tying all knots on both ends, test out how smoothly your blinds move up and down before moving onto fixing broken tilt mechanisms.
Fixing Broken Tilt Mechanisms
So, you broke your blinds. Congratulations! You have successfully joined the ranks of many others who have experienced this common problem. However, fear not, for I am here to guide you in fixing the broken tilt mechanism. Before we dive into troubleshooting tips, let’s take a look at some of the common causes that lead to this issue.
One of the most common reasons why tilt mechanisms break is due to excessive force or tension applied during operation. Another reason could be that the internal gears and parts of the tilt mechanism have worn out over time. Lastly, if your blinds are exposed to direct sunlight or moisture, it can cause them to warp and ultimately lead to a broken tilt mechanism.
Now that we know what could be causing the issue, let’s move on to some troubleshooting tips:
- If you notice that your tilt mechanism is loose or wobbly, try tightening any screws or bolts that may be holding it in place.
- Check if any of the internal gears are worn out and need replacement.
- If none of these steps work, it may be time to replace the entire tilt mechanism.
In summary, fixing a broken tilt mechanism requires patience and a keen eye for detail. By following these troubleshooting tips and identifying common causes, you can quickly fix this issue without having to replace your entire set of blinds. In our next section, we will discuss how to repair broken clips or brackets without breaking a sweat.
Repairing Broken Clips Or Brackets
One of the most common problems that homeowners face with their blinds is broken clips or brackets. These essential components can become damaged over time due to wear and tear, accidental damage, or improper installation. Fortunately, repairing broken clips or brackets is a relatively straightforward process that can be completed using a few simple tools and techniques.
To start, you will need to identify which clips or brackets are broken and remove them from the blind. In most cases, this involves using a screwdriver to unscrew the damaged component from the headrail. Once removed, you can inspect the clip or bracket for any signs of damage or wear and determine whether it needs to be replaced entirely or simply repaired.
Replacing broken clips is usually the easiest option, as these components are relatively inexpensive and widely available at home improvement stores. To replace a clip, simply slide the new clip into place on the headrail and secure it using screws. Repairing damaged brackets may require a bit more effort, as you may need to patch up any cracks or holes in the plastic before reattaching them to the headrail.
Overall, repairing broken clips or brackets on your blinds is an essential maintenance task that can help prolong their lifespan and ensure they continue to function correctly. By taking care of these small repairs promptly, you can avoid more extensive damage down the line and keep your blinds looking and working like new for years to come.
Transition: Now that you know how to repair broken clips and brackets on your blinds let’s move on to another common issue – fixing misaligned slats.
Fixing Misaligned Slats
Identifying the Problem: Inspect the slats to determine if any of them are broken or misaligned.
Adjusting the Slats: Utilize a flat head screwdriver to loosen the slat from the bracket, allowing for the slat to be adjusted.
Adjusting the Slats: Carefully adjust the tilt of the slat and then reattach the slat to the bracket.
Adjusting the Slats: Ensure that the slat is securely fastened and that it is in the desired position.
Identifying The Problem
The first step in fixing misaligned slats is to identify the root of the problem. Common blind damages include broken cords, bent slats, and improper installation. Troubleshooting tips can help you pinpoint the issue and determine whether it’s something you can fix on your own or if you need to call in a professional.
Start by examining the slats themselves. Are they bent or warped? If so, this could be causing them to overlap improperly and interfere with one another. Check for any obstructions that may be preventing the blinds from closing properly as well. If there are no visible issues with the slats themselves, move on to inspecting the cords and mechanisms controlling them.
If you’re still unable to identify the problem after inspecting both the slats and cords, it’s likely time to bring in an expert. Blind repair specialists have extensive experience troubleshooting a wide range of issues and can quickly diagnose any problems with your blinds. With their expertise, you can rest assured that your blinds will be functioning properly once again in no time at all.
Adjusting The Slats
To fix misaligned slats, there are different methods you can use depending on the root cause of the problem. One solution is to adjust the slat spacing. This is especially useful when the blinds are not closing properly due to overlapping slats. You can adjust the spacing by pulling on one of the cords while pushing on another cord. This will create more space between the slats and allow them to close properly.
Another way to fix misaligned slats is through cleaning methods. When dust and debris accumulate on your blinds, it can cause them to become warped or bent, making it difficult for them to align properly. To prevent this from happening, you should clean your blinds regularly using a soft cloth or duster. If you need a deeper clean, you can also use a mild detergent and water mixture.
If adjusting the slat spacing or cleaning your blinds does not solve the issue, it’s best to seek professional help. A blind repair specialist has the expertise necessary to diagnose and fix any problems with your blinds quickly and efficiently. They can also provide advice on how to maintain your blinds properly so that they continue functioning correctly for years to come.
Straightening Bent Blinds
Using pliers is a simple and effective way to straighten bent blinds. First, identify the location of the bend. Then, using the pliers, gently pull or push the slat in the opposite direction of the bend until it is straightened out. Be careful not to apply too much pressure, as this can cause further damage to the blinds.
Common causes of bends in blinds include accidental mishandling, exposure to extreme temperatures or humidity, and general wear and tear over time. To prevent future bends, it’s important to handle blinds with care and avoid placing heavy objects on top of them. Additionally, consider investing in blinds made from more durable materials that are less likely to bend or warp.
Best practices for prevention also include periodic cleaning of the blinds. Dust buildup can add weight to individual slats and increase the likelihood of bends. Regularly wiping down the blinds with a soft cloth or using a vacuum attachment will help keep them clean and free from dust buildup. By following these best practices for prevention, you can reduce the likelihood of having to straighten bent blinds in the future.
Transition: Now that you’ve straightened your bent blinds, it’s important to ensure they continue functioning properly by addressing any issues with movement. The next section will cover how to lubricate moving parts for smooth operation of your window treatments.
Lubricating Moving Parts
To ensure smooth and easy operation of your blinds, lubricating the moving parts is essential. A well-lubricated blind not only makes it easier to adjust but also extends the life of your blinds. Using the best lubricants and lubrication techniques can make a significant difference in how well your blinds function.
When it comes to selecting the best lubricants for your blinds, there are a few options to choose from. Silicone spray is an excellent choice as it doesn’t attract dust and dries quickly. White lithium grease is another option that works well for metal parts as it reduces friction and repels moisture. For wooden blinds, beeswax or paraffin wax can be used to prevent warping.
Before applying the lubricant, clean the parts thoroughly with a soft cloth to remove any dirt or debris buildup that could impede proper functioning. Once cleaned, apply a small amount of lubricant directly onto the moving parts, being careful not to overdo it. Use a cotton swab or toothbrush to distribute the lubricant evenly and wipe away any excess.
Incorporating regular maintenance into your routine will keep your blinds functioning smoothly for years to come. By using the best lubricants and following proper lubrication techniques, you can extend the life of your blinds and avoid costly repairs in the future.
To continue with reinstalling your blind, follow these steps…
Reinstalling The Blind
Before reinstalling your broken blind, it is important to choose the right hardware. Make sure you have all the necessary screws, brackets, and other components required for installation. These may vary depending on the type and model of your blind. Refer to the manufacturer’s instructions or seek advice from a home improvement store if you are unsure about what to use.
Once you have gathered all the hardware needed, it is time to measure for accuracy. Take precise measurements of the window opening where the blind will be installed. Measure both width and height, and make sure your measurements are accurate before proceeding with installation. This will ensure that your blind fits perfectly and functions correctly once reinstalled.
After choosing the right hardware and measuring accurately, it’s time to reinstall the blind. Follow the manufacturer’s instructions carefully, making sure that each component is securely fastened in place. Once everything is in place, test the functionality of your newly reinstalled blind by raising and lowering it a few times to make sure it operates smoothly. If any issues arise, troubleshoot them before considering installation complete.
Testing The Functionality Of The Blind
It is essential to test the functionality of the blind after repairing it to ensure its proper operation. Blind maintenance is an important aspect of home repair that should not be overlooked. Testing the functionality of the blind is a vital step in ensuring that it can be used without any issues.
To test the functionality of the blind, start by checking if it moves up and down smoothly. If it does not move correctly, check for any obstructions or loose parts that may be causing problems. Troubleshooting tips can include tightening screws, replacing broken parts or lubricating moving components.
If you encounter issues while testing the blind’s functionality, don’t hesitate to seek professional help. A home repair specialist can provide expert advice on how to fix broken blinds and ensure their proper operation. By following these tips and seeking professional assistance when needed, you can keep your blinds working smoothly for years to come.
As with any household item, preventative maintenance tips can help extend the life of your blinds. In the next section, we will discuss some simple steps you can take to maintain your blinds and prevent future problems from arising. So, let us delve into some preventative maintenance tips that you can implement in your daily routine to ensure smooth operation of your blinds.
Preventative Maintenance Tips
After testing the functionality of the blind, it’s important to consider preventative maintenance tips to avoid future breakages. One common mistake is using excessive force when opening or closing the blinds. This can cause the mechanism that operates the blinds to bend or break, resulting in difficulty with opening and closing or even complete failure.
To prevent this, make sure you handle your blinds with care and avoid tugging or pulling them too hard. Another common mistake is neglecting to clean your blinds regularly. Dust and debris can accumulate on the slats and affect their movement, leading to wear and tear over time.
To keep your blinds in good condition, regularly dust them with a soft cloth or vacuum attachment. You can also use a mild cleaning solution and wipe down each slat individually for a more thorough cleaning. With these preventative measures in place, you can extend the lifespan of your blinds significantly.
Tools needed for preventative maintenance include a soft cloth or vacuum attachment, mild cleaning solution (if desired), and careful handling techniques when operating the blind mechanism. By avoiding common mistakes like using excessive force when opening/closing and neglecting regular cleaning, you can keep your blinds functioning properly for years to come.
Conclusion
When it comes to fixing broken blinds, it is important to first identify the type of blind and assess the damage. Gathering the necessary tools such as replacement slats and lubricant is also crucial. Removing the blind from the window and replacing broken slats can then be done followed by lubricating moving parts. Reinstalling the blind and testing its functionality should be done before implementing preventative maintenance tips.
According to a study conducted by the Blind Manufacturers Association, over 50% of households in the United States have some form of window treatment, with blinds being one of the most popular choices. This statistic highlights how common it is for homeowners to encounter issues with their blinds, making it important to know how to fix them properly. With these steps in mind, you can save money on repairs and prolong the lifespan of your blinds while ensuring they continue to function properly.
As a home repair specialist, it is essential to have a thorough understanding of how to fix various household items including blinds. By following these steps, you can provide valuable assistance to homeowners who may otherwise have difficulty repairing their broken blinds on their own. Remember that with proper maintenance and care, blinds can last for many years without needing extensive repairs or replacements.
Image Credits
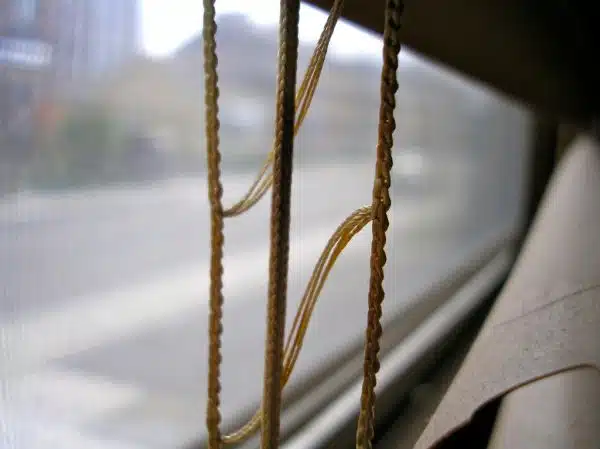
- “Broken blinds” by J.L. Trinh (featured)

