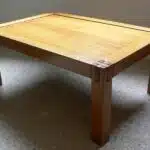
Picnics are one of the most popular outdoor activities enjoyed by families and friends. They offer a great way to bond, relax, and enjoy nature while sharing a meal together. However, finding the perfect picnic table can be a daunting task, especially if you are on a tight budget. Building your own picnic table is not only cost-effective but also allows you to customize it to your specific needs and preferences.
In this article, we will provide step-by-step instructions on how to build a simple picnic table that is both functional and aesthetically pleasing. We will cover everything from selecting the right materials to assembling the table, ensuring that even beginners can confidently create their own outdoor dining space. Whether you are planning a family gathering or a romantic picnic with your significant other, our guide will equip you with all the knowledge and skills necessary to build your dream picnic table.
Gathering The Necessary Tools
Ah, yes, the joys of building your own picnic table. There’s nothing quite like the satisfaction of completing a DIY project that will bring joy to others. However, before diving in headfirst, it’s important to gather all the necessary tools for the job. As with any project, proper tool organization is key to ensuring a smooth and efficient process.
Before beginning, make sure you have all the essential tools on hand: a circular saw, jigsaw, power drill with drill bits, measuring tape, carpenter’s square, clamps, and safety glasses. It may be tempting to rush out and buy everything at once but be mindful of your budget and prioritize what you need most. Once you have everything together, lay out your tools in an organized fashion so that they are easily accessible throughout the project.
It’s also crucial to take safety precautions when working with power tools. Always wear protective gear such as gloves and safety glasses to prevent injury. Make sure your work area is well-lit and free of clutter or debris that could cause accidents. And never forget to read through all instruction manuals thoroughly before using any equipment. With these precautions in place and tools organized properly, you’re ready to move on to selecting the right materials for your picnic table masterpiece.
Choosing The Right Materials
1.When picking the right wood to build a simple picnic table, the type of wood is important to consider as it affects the durability and longevity of the table. 2.Woods like cedar, pine, or redwood are ideal for outdoor furniture, as they are all resistant to rot, decay, and insect infestation. 3.When selecting durable hardware, stainless steel and galvanized steel are recommended as they are corrosion resistant and more durable than other materials. 4.For additional strength and stability, it is recommended to use connecting bolts, screws, and washers to secure the components of the picnic table.
Picking The Right Wood
Choosing the right materials is essential when building a picnic table. One of the most important decisions that you will make is selecting the right type of wood. This can significantly impact the durability and longevity of your project.
When selecting wood, it’s crucial to consider its strength and resistance to decay. Cedar, redwood, and pressure-treated pine are some popular options. These woods have natural oils that resist insects and rotting. Understanding wood grain direction is also vital as it affects the stability of your table. Make sure to choose boards with straight grains for maximum strength.
Once you’ve selected your wood, inspect each board carefully for any knots or cracks that may weaken the structure. Picking the right type of wood can be daunting, but with careful consideration, you can ensure that your picnic table lasts for years to come without needing frequent repairs or replacements.
Selecting Durable Hardware
Selecting durable hardware is just as important as choosing the right type of wood when building a picnic table. The hardware you choose will impact the overall strength and stability of your project. It’s essential to select hardware that can withstand outdoor weather conditions, such as rain or humidity.
To ensure your picnic table lasts for years, you need to invest in rust-resistant options. Hardware made from stainless steel, brass, or zinc-coated steel are excellent choices since they are less likely to rust over time. Additionally, consider types of finishes that can protect against corrosion, such as galvanizing or powder coating. These finishes provide an extra layer of protection against rust and other types of damage caused by exposure to outdoor elements.
When selecting hardware for your picnic table, it’s important to choose the right size and type of screws, bolts, and washers. It’s also crucial to ensure that each piece fits securely and snugly into place to prevent wobbling or instability. By carefully choosing durable hardware with rust-resistant options and proper sizing, you can significantly increase the longevity and durability of your picnic table project.
Measuring And Cutting Your Wood
Precise measurements and accurate cutting techniques are crucial when building a picnic table. Before starting, gather all the necessary tools: a measuring tape, circular saw, handsaw, and safety gear such as goggles and gloves. Keep in mind that the dimensions of your picnic table will depend on how many people you plan to seat comfortably.
Here are some tips to ensure measuring accuracy:
- Always measure twice before cutting once.
- Use a straight edge or square to create straight lines.
- Mark your measurements clearly with a pencil or marker.
When it comes to cutting your wood, there are various techniques you can use depending on the tool you have available. A circular saw is ideal for making long cuts while a handsaw is better suited for detail work. Here are some additional tips for precise cutting:
- Take your time and make slow, steady cuts.
- Use clamps to hold the wood secure while cutting.
- Cut slightly outside of your marked line and then sand down to the correct size.
Remember that practice makes perfect, so don’t be discouraged if your first few cuts aren’t perfect. With patience and attention to detail, you’ll soon get the hang of it.
As you move onto sanding and smoothing the wood, keep in mind that this step is essential for creating a professional-looking finished product.
Sanding And Smoothing The Wood
To ensure that your picnic table looks professional and polished, it’s important to sand and smooth the wood. This step may seem tedious, but it’s crucial for creating a finished product that will last for years. Sanding removes any rough patches or splinters from the wood, while smoothing evens out the surface.
Using a coarse grit sandpaper, begin by sanding down the entire surface of your table. This will remove any large bumps or knots from the wood. Then, switch to a finer grit sandpaper and repeat the process until you achieve a smooth finish. Be sure to sand in the direction of the wood grain to avoid damaging it.
Once your table is sanded and smoothed, you can begin staining it. Before applying any stain, however, it’s important to consider the wood grain pattern. Some staining techniques work better with certain patterns than others. For example, if you have a straight grain pattern, applying a light stain can enhance its natural beauty. On the other hand, if you have a more intricate pattern like birdseye or burlwood, choosing a darker stain can highlight its unique features.
| Coarse Grit Sandpaper | Finer Grit Sandpaper | Staining Techniques |
|---|---|---|
| Removes large bumps | Smooths out surface | Enhances natural |
| Removes knots | Evens out texture | Highlights features |
| Avoids damage | Maintains grain | Brings out detail |
Assembling your tabletop is next on your list of tasks to complete! Now that your wood is sanded and smoothed to perfection and you’ve chosen your ideal staining technique based on its unique grain pattern, you’re ready to move onto assembling your picnic table top. Keep reading for clear instructions on how best to approach this final step!
Assembling Your Tabletop
Now that you have cut all of your boards to the correct size, it is time to assemble them into a tabletop. Lay out all of your boards on a flat surface and arrange them in your desired pattern. You can choose to alternate the colors of the wood or create a checkerboard design. Get creative with your tabletop design!
Once you have arranged your boards, use wood glue to attach them to each other. Apply the glue liberally along the edges of each board and press them firmly together. Be sure to wipe away any excess glue before it dries. After the glue has dried, sand down any rough edges or uneven surfaces.
Staining options are a great way to add color and protect your tabletop from outdoor elements. You can choose from various stain colors such as natural, cedar, or mahogany. Be sure to apply a weather-resistant sealant over the stain for added protection against rain and sun damage.
As you move forward with building the frame for your picnic table, keep in mind that this will be the foundation for supporting everything else.
Building The Frame
To build a sturdy picnic table, you need to start with a strong frame that can support the weight of the tabletop and benches. When it comes to building the frame, there are different options for fasteners such as screws or nails. While both can work, screws are generally a better choice as they provide more holding power and are less likely to loosen over time.
When assembling the frame, make sure to use straight cuts and measure carefully to ensure everything lines up properly. It’s also important to reinforce any joints with corner braces or other hardware. This will help prevent wobbling or shifting of the table during use.
If you want to add some extra functionality to your picnic table, consider incorporating a built-in cooler into the design. This can be achieved by cutting out a section of the tabletop and installing a removable cooler insert underneath. Not only does this provide a convenient spot for drinks and snacks, but it also adds an element of fun and uniqueness to your outdoor gatherings.
As you finish up building the frame, keep in mind that attaching the legs is the next important step in creating a stable foundation for your picnic table. By using sturdy brackets or hardware, you can ensure that each leg is securely attached and able to bear weight evenly. With these tips in mind, your picnic table will be well on its way to becoming a functional and enjoyable addition to your outdoor space.
Attaching The Legs
Now that the frame of the picnic table is complete, it’s time to move on to attaching the legs. Leg attachment techniques can vary depending on the design of the table, but there are a few common ways to secure them. One method is to use metal brackets that attach to both the frame and leg, providing extra support. Another option is to drill screws directly through the legs into the frame. Whichever technique you choose, make sure it’s sturdy enough to withstand weight and movement.
Choosing leg materials is also an important consideration when building a picnic table. Common options include pressure-treated lumber or cedar for outdoor use, while pine or oak may be suitable for indoor tables. Some DIY enthusiasts opt for using metal pipes or even repurposed items like old bed frames as legs. Whatever material you choose, make sure it’s strong enough to support the weight of the tabletop and those who will sit at it.
Adding braces for stability is a crucial step in ensuring your picnic table stays sturdy over time. These can be added between the legs or underneath the tabletop, depending on the design and materials used. Braces can be made from scrap wood or purchased pre-made at a hardware store. By incorporating these braces into your construction process, you’ll prevent wobbling and ensure your guests feel safe and comfortable while enjoying their meal outdoors.
Adding Braces For Stability
Once you have constructed the basic structure of your picnic table, it’s time to think about adding braces. The benefits of braces are clear — they provide additional support and stability, ensuring that your table can withstand heavy use and even harsh weather conditions. Without them, your table may not be as durable or long-lasting as you would like.
There are a few different bracing techniques you can use when building your picnic table. One option is to add diagonal braces between the legs on each end of the table. These braces should be cut at a 45-degree angle and secured with screws or bolts. Another technique is to add horizontal braces along the length of the table, connecting the legs on either side. These can be placed at regular intervals or spaced further apart depending on your preference.
When deciding which bracing technique to use, consider both the aesthetic appeal and functionality of each option. Diagonal braces can add a decorative touch to your table while also providing extra strength, while horizontal braces may be more subtle but still highly effective at improving stability. Whichever method you choose, make sure that all joints are securely fastened with screws or bolts for maximum durability.
With your braces in place, it’s time to move on to installing the cross pieces that will form the tabletop itself. By taking care to add these crucial components step by step, piece by piece, you’ll ensure that your finished picnic table is stable and strong enough to last for years of outdoor gatherings and family meals.
Installing The Cross Pieces
Adding braces for stability is an essential step in building a simple picnic table. While it may seem like an extra step, this will ensure that the table will last for years to come. As with any DIY project, there are some common issues that you may face during this process, but don’t worry – we have troubleshooting tips to help you along the way.
Now that the braces are in place, your next step is to install the cross pieces. These pieces connect the two legs of the picnic table and provide additional support. To begin, cut four 2x4s to a length of 51 inches each. Then, attach them to the inside of each leg using wood screws. Make sure they are level before securing them in place.
Alternative designs can also be considered when building your own picnic table. From circular tables to ones with built-in coolers, there are many different options available that can suit your needs and preferences. However, keep in mind that these designs may require different materials or additional steps in construction.
Troubleshooting tips:
- If the cross pieces do not fit snugly against the legs, adjust them until they do.
- If you notice any cracks or splits in the wood, reinforce them with wood glue and clamps before proceeding.
- If you encounter any other issues during this step or throughout the project, don’t hesitate to consult online tutorials or reach out to a professional for assistance.
Next up: creating the benches!
Creating The Benches
Now that you have successfully built the table, it’s time to create the benches. Start by cutting four legs and four aprons for each bench from your lumber. Assemble the legs and aprons using carriage bolts, screws, or nails. Next, cut two seat boards and a back board for each bench.
Once you have assembled the basic structure of your benches, it’s time to add some comfort. One option is to paint the benches with outdoor-grade paint using various painting techniques such as stenciling or distressing for added visual appeal. Another option is to add cushions to the seats and backs of the benches for extra comfort during extended use. Cushion options range from simple foam inserts covered in outdoor fabric to more elaborate custom-made cushions.
After completing the assembly and adding any desired finishing touches like painting or cushioning, it’s important to sand down any rough edges or surfaces on your new benches before applying any type of finish. The sanding process will ensure that your benches are smooth and free of splinters, while also allowing any stain or sealant you apply to be absorbed evenly into the wood grain for a beautiful finish. In the next section, we will cover how to properly sand and finish your picnic table and benches for long-lasting enjoyment.
Sanding And Finishing
Although sanding and finishing may seem like a daunting task, it is important to remember that taking the time to do it right will ensure that your picnic table lasts for many years to come. Before you begin, it is important to choose the right materials for the job. DIY sanding tricks can be found online, but investing in a good quality sander will make the process much easier and more efficient.
Once you have finished sanding, it’s time to move onto choosing the right finishes. There are many different types of finishes available on the market today, including oil-based stains, water-based stains, and paints. When choosing a finish for your picnic table, consider both its functional and aesthetic qualities. A good finish should protect against moisture, as well as provide a beautiful appearance that compliments your outdoor space.
To get started with finishing your picnic table, follow these easy steps:
- Apply a coat of wood conditioner to prevent blotchiness.
- Sand lightly between coats.
- Use a foam brush or spray gun for an even application.
- Allow plenty of drying time between coats.
By following these simple steps and utilizing DIY sanding tricks when necessary, you can transform your humble picnic table into a beautiful focal point for your outdoor space. Once you have applied the protective coating needed to prolong the life of the table against environmental factors such as rain or UV rays from sunlight; you can then move on to adding personal touches such as decorations or seating arrangements that allow you and others to enjoy some much-needed relaxation in nature.
Adding Protective Coating
After sanding the picnic table, it’s time to add a protective coating to ensure it can withstand the elements when used outdoors. There are several types of coatings available in the market that you can choose from. Each of these coatings has its pros and cons, so it’s essential to understand them before selecting one.
One popular type of coating is varnish. It provides a glossy finish that enhances the wood grain’s natural beauty while protecting against moisture damage and fading caused by UV rays. However, varnish requires multiple coats and regular maintenance to retain its shine.
Another option is paint, which offers a wide variety of color choices and can be applied easily with a brush or sprayer. Paint also forms a durable barrier against moisture penetration and sun damage. However, it may peel or crack over time, requiring touch-ups or repainting.
In summary, choosing the right protective coating is crucial to keep your picnic table looking good for years to come. Consider your preferences and needs before selecting between varnish, paint, or other options available in the market. The next step is decorating and customizing your picnic table once the coating has dried completely.
Decorating And Customizing
Did you know that 85% of Americans believe that their outdoor living space is just as important as the inside of their home? This means that not only do we want our outdoor spaces to be functional, but we also want them to be aesthetically pleasing. Fortunately, when it comes to your picnic table, there are plenty of customizing options available to make it unique and reflect your personal style.
One DIY tip for customizing your picnic table is to add a pop of color. You can easily achieve this by painting the table in a bright hue or using colorful seat cushions. Another way to personalize your picnic table is by adding stenciled designs or decals. These can range from simple patterns such as stripes or polka dots, to more intricate designs like flowers or animals.
If you’re looking for a more natural look, consider adding woodcarvings or etchings to your picnic table. You could also opt for a rustic finish by sanding down the wood and applying a weathered stain. The key is to experiment with different customization options until you find what works best for you and your space.
Now that you’ve personalized your picnic table to match your style and taste, it’s important to think about storing and maintaining it properly. In the next section, we’ll discuss some tips on how to keep your table looking great year-round without breaking the bank.
Storing And Maintaining Your Table
After building your very own picnic table, the next step is to learn how to store and maintain it properly. The first thing you should consider is where you will store your table. It is best to keep it in a covered area such as a garage or shed when not in use. This will protect it from the elements, preventing any damage that may be caused by exposure to rain, sun, or wind.
When it comes to maintenance techniques, regular cleaning is key. Dirt and debris can accumulate on the surface of your picnic table over time and cause unsightly stains. To clean your table, simply use a mild detergent mixed with warm water and a soft-bristled brush or sponge. Avoid using harsh chemicals or abrasive materials as they may damage the surface of your table.
In addition to cleaning, you should also inspect your picnic table regularly for any signs of wear and tear. Check for loose screws or bolts and tighten them if necessary. If you notice any cracks or splits in the wood, sand them down and apply a fresh coat of sealant or paint to protect the wood from further damage. By following these storing tips and maintenance techniques, your picnic table will last for years to come.
As you’ve learned how to properly store and maintain your picnic table, now it’s time to invite friends and family over for a fun-filled picnic! With its sturdy construction and beautiful design, your new picnic table is sure to impress guests while providing a comfortable place for everyone to sit and enjoy delicious food together. So go ahead and plan that outdoor gathering – your perfectly maintained picnic table is ready for action!
Inviting Friends And Family Over For A Picnic!
Summer is a time for getting outside and enjoying the great outdoors, and what better way to do that than by inviting friends and family over for a picnic? Once you have built your simple picnic table, it’s time to start planning the perfect outdoor gathering. Whether you’re celebrating a special occasion or just looking for an excuse to spend time with loved ones, there are a few things you’ll want to keep in mind.
First, think about the picnic menu. You’ll want to choose foods that are easy to transport and serve outdoors. Finger foods like sandwiches, fruit skewers, and vegetable platters are always a hit, as are classic picnic dishes like potato salad and coleslaw. Don’t forget drinks – bring plenty of water, as well as some fun summer beverages like lemonade or iced tea.
Next, consider games and activities. While it’s always nice to simply relax and enjoy each other’s company, having some games on hand can help break the ice and get everyone involved. Classic lawn games like cornhole or horseshoes are always fun options, but don’t be afraid to get creative – set up an outdoor movie night or organize a scavenger hunt.
Finally, choosing the perfect picnic spot is essential. Look for a location that has plenty of shade (especially during the hottest part of the day), as well as access to restrooms or running water if possible. A nearby park or beach is always a classic choice, but don’t be afraid to explore off-the-beaten-path locations like local nature reserves or community gardens.
With these tips in mind, you’re well on your way to hosting an unforgettable summer picnic!
Conclusion
In conclusion, building a simple picnic table can be a fun and rewarding project for any DIY enthusiast. By gathering the necessary tools and choosing the right materials, you can create a sturdy and practical piece of furniture that will last for years to come. Measuring and cutting your wood with precision and sanding it down until smooth will ensure that your tabletop is level and comfortable to use.
Assembling your table requires patience and attention to detail, but the end result will be well worth the effort. Adding a protective coating will help extend the life of your table, while decorating and customizing it will allow you to express your personal style. Finally, storing and maintaining your table properly will ensure that it remains in good condition for future use. So go ahead, invite friends and family over for a picnic on your new creation – it’s sure to be a hit!
Image Credits
- “picnic table massabesic” by pelicanwind (featured)








![How To Repair Rotted Wood 12 Texture : Altario Buick Estate Wagon : Rotting Faux Wood Paneling [1 of 2]](https://green-life.blog/wp-content/uploads/2023/05/z1CersK-gCjq-150x150.jpg.webp)


