As a furniture craftsman/craftswoman, building a table is not just about creating a functional piece of furniture. It is also about creating an object that can serve as the centerpiece of a room, giving people a place to gather and connect with each other. Whether you are building a table for your own home or for someone else, the process requires careful planning and attention to detail.
To build a table that will stand the test of time, you need to start with high-quality materials and use the right tools and techniques. From selecting the right type of wood to joining pieces together seamlessly, every step in the process requires skill and precision. In this article, we will walk you through the steps necessary to build a beautiful and functional table that will be cherished by generations to come.
Choosing The Right Type Of Wood
When it comes to building a table, choosing the right type of wood is crucial. The wood selection criteria vary based on several factors such as durability, color, texture, and grain pattern. Some commonly used types of wood for tables are oak, maple, cherry, walnut, and pine.
Oak is a popular choice due to its strength and durability. It has a distinct grain pattern that adds character to the table’s surface. Maple is another durable option that has a lighter tone and a more uniform appearance. Cherry has a warm reddish-brown color that darkens with age and exposure to light. Walnut has a rich brown color with darker streaks and swirls in the grain pattern. Pine is a softer wood that is often used for rustic or farmhouse-style tables.
After selecting the type of wood, it’s important to consider wood finishes and stains. Finishing techniques like sanding, staining, and sealing can significantly impact the appearance and longevity of the table. Stain colors range from light to dark shades and can enhance or alter the natural color of the wood. A clear sealant can protect the surface from scratches and moisture damage while also adding shine.
Choosing the right type of wood and finishing technique is crucial in creating a high-quality table that will last for years to come. However, it’s also important to consider other factors such as the table’s purpose and design before starting on any construction. Whether you’re making a dining table or coffee table, understanding its intended use will help guide your decisions in choosing materials and construction methods.
Considering The Table’s Purpose And Design
After deciding on the type of wood to use for your table, it’s time to think about the style. Choosing the right style is crucial because it will determine the overall look and feel of your table. There are several styles you can choose from, including traditional, rustic, modern, or contemporary. Each style has its unique characteristics that can complement any room in your home. When selecting a style, consider the existing décor in your space and choose a design that complements it.
Once you’ve chosen the style for your table, it’s time to consider the size. The size of your table will depend on its purpose and how much space you have available in your home. For example, if you’re building a dining table, you’ll need to consider how many people you want to seat comfortably and ensure there is enough space around the table for everyone to move comfortably. Similarly, if you’re building a coffee table, you’ll want to ensure it’s the right height for your seating arrangement.
Before measuring and cutting wood for your table, take some time to plan out your design carefully. Make sure you have all of the necessary tools and materials before beginning any cutting or sanding. It’s crucial to measure twice and cut once when working with wood; otherwise, errors can be costly and time-consuming. Additionally, always wear safety gear such as goggles and ear protection when using power tools like saws or sanders. By taking these precautions, you’ll be able to build a beautiful table that will last for years to come while ensuring safety throughout the process.
Measuring And Cutting Wood
Before you start cutting your wood, it is essential to measure accurately. Measuring accuracy is a crucial step in ensuring that your table is well constructed and sturdy. To achieve this, use a tape measure and mark out the dimensions of each piece of wood. Make sure that all pieces are cut to the same length to ensure consistency.
Cutting techniques are an important aspect of building a table. A variety of saws can be used, including a circular saw or a hand saw. The type of saw used will depend on personal preference and the type of cut required. When cutting, it is important to keep the blade straight and follow the marked line for precision. It is also essential to wear protective gear such as goggles and gloves to avoid any accidents.
In summary, measuring accuracy and using proper cutting techniques are vital aspects of constructing a sturdy table. Take your time when measuring and make sure that all pieces are cut evenly for consistency. Use protective gear when cutting with any type of saw. In the next section, we will discuss sanding and smoothing the wood to prepare it for finishing touches.
Sanding And Smoothing The Wood
After cutting and assembling the pieces for the table, it’s time to sand and smooth the wood. This process is crucial as it removes any rough edges or imperfections and prepares the surface for staining. To begin, gather your tools for sanding, which include sandpaper, an orbital sander, a sanding block, and a dust mask.
Start with a coarse grit sandpaper and work your way up to a fine grit. Use the orbital sander to cover large areas and the sanding block for smaller or harder-to-reach spots. Be sure to wear a dust mask to avoid inhaling any particles. Once you have finished sanding, use a tack cloth to remove any remaining dust.
Now that your wood is smooth and ready for staining, it’s important to choose the right staining technique. There are several options available including wiping stains, gel stains, spray stains, and more. It’s important to do some research beforehand to determine which technique will work best for your project.
Transition: With our wood now perfectly smoothed and ready for staining, let’s move on to creating the tabletop itself.
Creating The Tabletop
Now that the table frame is done, it’s time to create the tabletop. The tabletop is the centerpiece of the table, and it’s important that it looks great, feels smooth, and is durable enough to withstand everyday use. To get started with creating the tabletop, it’s essential to choose a high-quality wood material that will provide a sturdy base.
Once you have selected your wood material for the tabletop, you can begin applying finish and staining techniques to enhance its overall look and feel. Applying finish involves sanding down the surface of the wood to remove any imperfections or rough spots. Afterward, a sealer coat is applied to protect against moisture and scratches. Finally, a topcoat is added for extra shine and durability.
Staining techniques are also an excellent way to add character and depth to your tabletop. Depending on your personal taste, you can choose from a variety of stain colors that will complement your dining room decor. Whether you prefer a light or dark finish, make sure to apply multiple coats evenly across the surface for optimal results. Once complete with staining techniques, now we move on to joining the tabletop and legs without further ado.
Joining The Tabletop And Legs
To join the tabletop and legs, begin by placing the tabletop upside down on a flat surface. Then, position the legs on each corner of the tabletop, ensuring they are flush against the edges.
Next, use assembly techniques such as clamps or screws to attach the legs to the tabletop securely. It is important to ensure that each leg is level and straight before attaching it to prevent wobbling or an uneven surface.
Finishing touches can be added at this point, such as sanding any rough edges or applying a coat of varnish for protection and aesthetics. Take care not to damage any of the surfaces during this process.
Adding supports for stability will further enhance the durability of your table. This can be achieved by attaching cross braces between each leg, either at the bottom or midway up each leg. These braces can be secured with screws or even decorative brackets for a unique touch. By following these steps and incorporating these finishing touches, your table will not only look beautiful but also withstand daily use for many years to come.
Adding Supports For Stability
As any furniture craftsman or craftswoman knows, a well-built table must be stable and supportive. In order to achieve this, bracing techniques are necessary to keep the structure secure and prevent wobbling or tipping. One option is to add diagonal braces between the legs of the table. These can be made using dowels or metal brackets, depending on the design and materials used.
Another stability option is to incorporate aprons into the design of the table. Aprons are horizontal supports that connect the legs together and help distribute weight evenly across all four corners of the table. This not only provides stability but also adds an aesthetically pleasing detail to the overall look of the piece. The size and placement of these aprons will vary depending on the size and style of the table being built.
It’s important to remember that while stability is crucial when building a table, it doesn’t have to compromise on style or beauty. By incorporating various bracing techniques and stability options, a craftsman or craftswoman can create a stunning piece that will stand the test of time. In the next section, we’ll explore how creating strong legs for your table can further enhance its stability and durability.
Creating The Table’s Legs
When creating the table’s legs, one must first make a decision on the best material to use. Factors such as strength, stability, and aesthetics should all be taken into consideration. Once a material has been chosen, one must then measure the desired lengths of the legs. Precise measurements are essential to ensure the table will stand properly. After the measurements have been taken, the legs can then be cut to the desired length. Using a saw or other cutting tools, the legs can be shaped and finished to the desired specifications. With the legs cut, the next step is to attach them to the table’s frame.
Choosing The Right Material
When it comes to creating the legs of a table, choosing the right material is crucial. Comparing materials is necessary to ensure durability and stability. Wood, metal, and plastic are common options for table legs.
Wood is a popular choice due to its natural aesthetic appeal. It provides warmth and character to any design. However, sustainability options should be considered when choosing wood as it may contribute to deforestation. Metal is a durable and sturdy option that can withstand heavy weight and constant use. It also offers a sleek and modern look to any design. Plastic may be a more affordable option but it is not as durable as wood or metal.
As furniture craftspeople, it is our duty to consider both the functionality and environmental impact of our creations. While wood may be visually appealing, using sustainable options such as reclaimed or recycled wood can lessen its impact on the environment. Similarly, choosing metal made from recycled materials can reduce waste in production. Ultimately, selecting the right material for table legs requires careful consideration of both aesthetics and sustainability options.
Measuring Leg Lengths
As furniture craftspeople, we understand the importance of precision and accuracy in our work. Measuring the leg lengths of a table is a crucial step in creating stable and balanced furniture. There are various measuring techniques that can be used to ensure proper leg length, such as using a tape measure or ruler. These techniques should be used consistently throughout the process to avoid common mistakes in measuring.
One common mistake is not accounting for uneven flooring, which can result in wobbly tables. To avoid this issue, it is important to measure each leg individually and adjust accordingly. Another mistake is not factoring in the thickness of any material added to the bottom of the legs for stability purposes. This can result in legs that are too long or too short for the desired height of the table.
To ensure accurate measurements, it is also important to have a level surface for measuring and marking leg heights. Taking extra care during this step will save time and effort later on in the construction process. As furniture craftspeople, we take pride in creating high-quality pieces that serve both form and function. Proper measurement techniques are essential to achieve this goal and create beautiful, functional tables with stable legs that will withstand years of use.
Cutting The Legs
After ensuring the accuracy of leg lengths, the next step in creating stable and balanced furniture is cutting the legs. The length of each leg should be marked clearly and accurately before cutting to avoid errors. It is important to consider the thickness of the legs as well, as this can affect the overall stability and balance of the table.
Joining techniques and reinforcement options are also crucial factors in creating sturdy table legs. Proper joinery techniques such as mortise and tenon or dowel joints can ensure a strong connection between the legs and tabletop. Reinforcement options such as metal brackets or corner braces can add extra support and stability to the legs.
Cutting the legs to precise measurements, selecting appropriate joining techniques, and reinforcing where necessary are all essential steps in creating high-quality furniture with stable legs. As furniture craftspeople, we understand that attention to detail during these crucial stages will result in beautiful, functional tables that serve both form and function for many years to come.
Making Sure The Table Is Level
Once you have successfully assembled the table, it is essential to ensure that the table is level. A wobbly table can be a source of frustration and may even cause damage to the table legs or surface. To achieve this, you will need to use shims.
Shims are small pieces of wood or plastic that can be inserted under the legs of the table to provide stability. They help to balance out any unevenness in the flooring and prevent the table from wobbling. Start by placing a level on top of the table and checking which leg(s) need adjustment. Then, slide a shim under each leg until the bubble in the level is centered.
Before using shims, it’s essential to check that the foundation of your table is stable. Look for any loose screws or joints that need tightening or reinforcing. If there are any major issues with your foundation, fix them before proceeding with leveling your table. Once you have made sure everything is secure, proceed with using shims to level your table for an enjoyable dining experience every time.
As you move forward with applying a protective finish onto your newly built table, it’s important not to neglect its foundation. A sturdy and balanced base ensures that your protective finish will last longer without getting chipped or damaged due to wobbling or movement. So let’s dive into how we can apply a suitable protective finish for our beautiful piece of furniture!
Applying A Protective Finish
After ensuring that the table is level, the next step is to apply a protective finish. There are many types of finishes available, such as oil-based finishes, water-based finishes, and lacquers. Each type has its own unique characteristics and advantages. Oil-based finishes provide a warm, natural look and are easy to apply. Water-based finishes have a low odor and dry quickly. Lacquers are durable and resist scratches and stains.
Applying finishes can be a time-consuming process but it is essential for protecting the table from damage caused by everyday use. To begin, clean the surface of the table thoroughly with a soft cloth to remove any dirt or debris. Next, use a brush or roller to apply the finish evenly across the entire surface of the table. Be sure to follow the manufacturer’s instructions for drying time between coats.
Once all of the coats have been applied and have dried completely, it’s time to polish the table. This step will help bring out the shine in your finish and protect it from future scratches or blemishes. To polish your table, use a soft cloth or polishing pad along with your chosen polishing compound. Work in small circular motions until you achieve the desired shine on your table’s surface. With these simple steps, you can create a beautiful and long-lasting protective finish on your handmade table that will withstand years of use.
Polishing The Table
Once you have assembled the table, it is time to polish it. Polishing is an essential step in building a table as it protects the wood from moisture and gives it a shine. Using wood filler is one way to prepare the table for polishing. Wood fillers are used to fill gaps and cracks in the wood, making it smooth before applying polish.
The next step after using wood filler is staining the table. Staining gives the table its color and enhances its natural beauty. There are different types of stains available in the market that can be used depending on the type of wood used for building the table. It is important to apply a thin layer of stain and let it dry completely before adding another coat.
In summary, using wood filler fills gaps and cracks in the wood before polishing while staining enhances the natural beauty of the table and adds color to it. Once these steps are completed, your table will look polished and ready for use. The next section will discuss how to add decorative touches to your newly built table without compromising on functionality or practicality.
Adding Decorative Touches
Despite the functional purpose of a table, many people desire a piece of furniture that reflects their personal style and adds decorative touches to their living space. While some may think that adding decorative elements to a table is difficult or time-consuming, it can actually be quite simple and fun. By using stencils and applying color wash, you can easily create a unique look for your table.
Using stencils is an excellent way to add intricate designs to your table without having to freehand them yourself. Stencils come in a variety of patterns and sizes, so you can choose one that best fits the aesthetic of your room. Simply place the stencil on the surface of your table and use a brush or sponge to apply paint or stain. You can use different colors for each stencil, creating an eye-catching design that is sure to impress.
Another way to add decorative touches is by applying color wash. This technique involves diluting regular paint with water and then brushing it onto the surface of the table in thin layers. The result is a subtle, washed-out effect that adds depth and texture to the wood grain. You can experiment with different colors and layering techniques until you achieve the desired effect.
With these simple techniques, you can take your basic table from functional to fabulous in no time. The best part? These decorative touches not only enhance the appearance of your furniture but also make it more personal and unique. In the next section, we will discuss how to test your newly decorated table’s durability so that it lasts for years to come.
Testing The Table’s Durability
As furniture craftspeople, we value a table’s durability. A sturdy and durable table can withstand years of use, making it a valuable investment for any household. Testing methods are crucial in ensuring that our tables meet the highest standards of durability.
One common testing method is the weight test. We place heavy objects on the table’s surface to see how much weight it can bear without breaking or cracking. Another testing method is the drop test, where we drop a heavy object onto the table from various heights to simulate accidental impacts that may occur during everyday use.
Our expected results from these tests are simple: we want our tables to be able to withstand any reasonable amount of weight and accidental impact without breaking or showing significant damage. A table that passes these tests will give our customers peace of mind knowing that their investment will last for years to come.
Moving forward, making adjustments as needed is crucial in ensuring that our tables continue to meet our high standards of durability. In the next section, we will discuss how we make these adjustments and what tools and techniques we utilize in doing so.
Making Adjustments As Needed
After testing the durability of your table, it’s time to make any necessary adjustments. As a furniture craftsman/craftswoman, you understand that adjustment challenges are common in the building process. One common mistake is not accounting for wood expansion and contraction due to humidity changes, causing warping or cracking. Another mistake is not taking enough time during the glue-up process, resulting in uneven surfaces.
To avoid these mistakes and other adjustment challenges, follow these three tips:
- Take your time during the glue-up process and use clamps to ensure even pressure distribution.
- Allow enough time for the wood to acclimate to its environment before starting construction.
- Use a moisture meter to check the wood’s moisture content before beginning construction and periodically throughout the building process.
By implementing these tips, you can avoid many common mistakes and be prepared for any necessary adjustments along the way.
Now that you have successfully navigated through potential adjustment challenges, it’s time to enjoy your finished table. Remember that each piece of furniture is unique and has its own story to tell. As a skilled craftsman/craftswoman, you have added value to someone’s life by creating a functional and beautiful piece of furniture for them to enjoy for years to come.
Enjoying Your Finished Table
Once you have built your table, it is time to enjoy the fruits of your labor. One of the best ways to do this is by hosting dinners with friends and family. Having a beautifully crafted table as the centerpiece of your dining room can make all the difference in creating an inviting atmosphere for guests.
When it comes to decorating options for your finished table, the possibilities are endless. Depending on your personal style and preference, you may choose a simple and minimalist approach or go all out with bold patterns and colors. Some popular options include adding a table runner, using decorative placemats, or incorporating seasonal centerpieces such as flowers or candles.
Ultimately, how you choose to enjoy your finished table is up to you. Whether it be hosting memorable dinner parties or simply admiring its beauty on a daily basis, having a well-built and stylish table can bring joy and satisfaction into your life for years to come. So take pride in your craftsmanship and continue to find new ways to make the most out of this functional piece of furniture.
Conclusion
Building a table requires patience, precision, and attention to detail. Choosing the right type of wood is crucial to ensure that your table lasts for years to come. Consider the table’s purpose and design before measuring and cutting the wood. Sanding and smoothing the wood is essential to create a smooth surface that will be comfortable to use.
Creating the tabletop is the most critical part of building a table. It should be level, sturdy, and able to withstand weight without cracking or breaking. Adding decorative touches such as staining or painting can enhance the look of your table.
According to recent statistics, an increasing number of people are choosing DIY furniture projects rather than buying pre-made pieces. Building your own table allows you to customize it to fit your specific needs and style preferences.
As a furniture craftsman/craftswoman, I can attest that building a table requires dedication, skill, and creativity. By following these steps and taking your time with each step, you can build a beautiful and functional piece of furniture that will last for generations. Remember always to test its durability before making any adjustments as needed and enjoy your finished masterpiece!
Image Credits
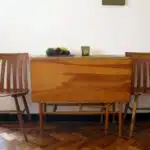
- “Mr. Shimoni’s table” by Dennis Wong (featured)












![How To Repair Rotted Wood 27 Texture : Altario Buick Estate Wagon : Rotting Faux Wood Paneling [1 of 2]](https://green-life.blog/wp-content/uploads/2023/05/z1CersK-gCjq-150x150.jpg.webp)

