Table legs are an essential component of any table, whether it be a dining table or a coffee table. They provide stability and support to the tabletop while also adding aesthetic appeal to the overall design. While many pre-made table legs are available on the market, they may not always fit the specific needs or style of an individual. This is where DIY table legs come into play, as they offer a customizable and cost-effective alternative to store-bought options.
In this article, we will explore various methods and materials for creating your own DIY table legs. From traditional wooden legs to industrial metal pipes, there are countless options to choose from that can fit any skill level or budget. Whether you’re looking for a rustic farmhouse look or a sleek modern design, making your own table legs allows you to fully customize the finished product and create a piece that perfectly suits your needs. So let’s dive in and learn how to make DIY table legs!
Choosing Your Materials: Wood, Metal, Or Other
In the world of DIY table legs, choosing the right material is crucial. The two most popular materials are wood and metal, but there are also unique options to consider. Each material has its pros and cons, which should be carefully weighed before making a decision.
Wooden table legs are a classic choice that offers warmth and natural beauty to any space. They come in various types of wood, such as oak or pine, each with their own unique grain pattern. Wood is relatively easy to work with for DIY projects since it can be cut and sanded to the desired shape. However, wooden table legs may not be as durable as other materials and can be prone to scratches or dents.
On the other hand, metal table legs offer sturdiness and durability that wooden legs cannot match. They come in a variety of finishes such as chrome or black powder-coated steel. Metal table legs are also incredibly versatile and can complement any style of decor. Yet, they may not provide the same warmth that wooden legs do and can be more challenging to work with due to their hardness.
For those looking for unique options beyond wood or metal, there are other materials available for creating DIY table legs. These could include recycled materials like pipes or repurposed furniture pieces like old dresser drawers or bedposts. While these may require more creativity in construction, they can add an interesting touch of character to your finished product.
Measuring And Cutting Your Materials
To start making your DIY table legs, you need to measure and cut your materials. There are several sizing options available depending on the height of your table and the design you want. Most tables are around 29 inches high, but you can adjust the height based on personal preference or the intended use of the table.
When cutting your materials, it’s essential to choose the right cutting techniques that will give you a precise and clean finish. You can use various tools like a circular saw, jigsaw, or handsaw to cut through different types of wood. The choice of tool will depend on the thickness of your material and how intricate your design is. Regardless of the tool you choose, always remember to take safety precautions, such as wearing protective gear like gloves and goggles.
To ensure that all your pieces are cut uniformly, make sure to mark them using a measuring tape, square ruler or angle finder before cutting them into shape. Once you have all pieces cut out according to size, lay them out in their final orientation to ensure everything fits together snugly before moving onto sanding and finishing.
Sizing Options:
Consider standard heights for tables versus counter heights.
Account for tabletop thickness when determining leg length.
Take into account any additional height adjustments if necessary.
Cutting Techniques:
Choose an appropriate saw for the type and thickness of wood being used.
Measure twice before making any cuts.
Use clamps or vice grips to hold materials in place while cutting.
In preparation for sanding and finishing your legs, make sure all surfaces are smooth by sanding down any rough edges or corners with a fine-grit sandpaper. This ensures that the paint or stain will adhere evenly without any bumps or unevenness on the surface. After sanding is complete, wipe them down with a damp cloth to remove any dust particles left behind from sanding. Once dry, you can then move on to applying your desired finish.
Sanding And Finishing Your Legs
Once you have cut and assembled your table legs, it’s time to sand and finish them for a polished look. Start by using a coarse grit sandpaper to remove any rough edges or bumps on the legs. Then, gradually move to finer grits of sandpaper to smooth out the surface of the legs.
Once you have sanded your legs, you can choose from various staining techniques to add color and depth to the wood. One popular option is a traditional stain that penetrates deeply into the wood grain. Another option is a gel stain that sits on top of the wood for a more consistent finish. No matter which technique you choose, be sure to apply the stain evenly and follow manufacturer instructions for drying times.
If you prefer an alternative finish, there are several options available as well. A clear coat of polyurethane will provide protection and shine without changing the color of the wood. You can also use wax or oil finishes for a more natural look. Experiment with different finishes until you find one that fits your desired aesthetic and level of durability.
Moving onto creating a traditional turned leg requires careful attention to detail and patience. With some basic woodworking skills and a lathe, it is possible to craft beautiful turned legs that will elevate any DIY table project.
Creating A Traditional Turned Leg
To create a traditional turned leg for your DIY table, you first need to choose the appropriate wood species. Hardwoods such as oak, maple, and cherry are ideal for this purpose due to their strength and durability. Softwoods like pine can also be used but may require additional support or reinforcement.
Once you have selected your wood species, the next step is to master turning techniques. Turning involves using a lathe to shape the wood into the desired form. To turn a traditional leg, begin by cutting the rough shape of the leg on a bandsaw. Then use a lathe to refine the shape and add decorative elements such as fluting or spiral grooves.
To make your traditional turned leg stand out, consider incorporating nested bullet point lists with sub-lists. For example:
Consider adding decorative elements such as fluting or spiral grooves
To achieve fluting, use a gouge or chisel to carve out shallow grooves along the length of the leg
For spiral grooves, use a skew chisel held at an angle and gradually rotate it along the length of the leg
Use sandpaper or other finishing tools to smooth out any rough spots and apply your desired finish
A matte finish will highlight natural wood grain while glossy finishes will provide more protection against wear and tear
Be sure to follow all safety precautions when working with power tools and always wear protective gear.
With these tips in mind, you can now move on to building a tapered leg for your DIY table without missing a beat.
Building A Tapered Leg
After learning how to create a traditional turned leg, it’s time to explore other leg tapering techniques. Designing tapered legs is a great way to add a modern touch to your DIY table project. Tapered legs are narrower at the bottom and wider at the top, creating an elegant look that complements various table designs.
To create tapered legs, start by cutting four legs of equal length from your choice of wood. Next, sketch out the shape of the leg on each side with a pencil. Use either a hand plane or sandpaper to shave off the excess wood from each side, starting from the top and working downwards. Repeat this process until you have achieved your desired width for the bottom of your leg.
When designing tapered legs, it’s important to remember that symmetry is key. The amount of taper on each side should be equal and smooth for each leg. Additionally, consider adding chamfered edges or rounding off corners for a more refined look. With these tips in mind, you can create custom tapered legs that will elevate any DIY table project.
As we move forward in our journey towards constructing DIY table legs, let’s take a closer look at building hairpin legs.
Constructing A Hairpin Leg
Imagine you’re walking through a garden, admiring the beauty of the flowers and plants around you. You come across a tulip that stands out from the rest. Its stem is slender yet sturdy, and it curves elegantly at the top. This is what inspired the design for our hairpin leg.
Design variations for hairpin legs can vary greatly depending on personal taste and functionality. The amount of curve in the bend can range from minimal to dramatic, while the length of each leg can be adjusted to fit any type of table or furniture piece. Some may prefer a rustic look with unfinished steel, while others might opt for a sleeker appearance with powder-coated colors.
When it comes to installation tips, there are a few things to keep in mind. First, make sure to measure accurately so that all legs are level and firmly attached to the tabletop or furniture piece. Pre-drilling holes for screws will also help prevent splitting or cracking of wood surfaces. Additionally, using rubber pads or felt at the bottom of each leg will protect floors from scratches and dents.
Transition: Now that we’ve covered how to construct a hairpin leg, let’s move on to making a pipe leg.
Making A Pipe Leg
Gathering materials for creating a diy pipe leg is an important first step. It is necessary to acquire the necessary pipes, fittings, and tools in order to ensure a successful outcome. Assembling the pipe leg requires several steps which must be followed in order and correctly executed in order to ensure the desired result. This includes cutting the pipes to the desired length, connecting the pipes and fittings, and securing the pipes in the desired position.
Gathering Materials
For any DIY enthusiast, sourcing materials is a crucial step in successfully completing any project. When making pipe legs for a DIY table, there are several cost-effective options available to ensure that the project stays within budget. One option is to visit local hardware stores and inquire about their selection of pipes and fittings. This allows for hands-on inspection of the materials and the opportunity to ask questions or receive advice from knowledgeable staff.
Another option for sourcing materials is to explore online retailers. This method provides access to a wider range of options and prices, as well as the ability to compare prices between different websites. Many online retailers also offer bulk discounts or free shipping on larger orders, making it an even more cost-effective choice.
Regardless of the method chosen, it’s important to keep in mind the specific measurements needed for the project and double-check that all necessary components have been sourced before beginning construction. With careful planning and consideration, sourcing materials for pipe legs can be an affordable and straightforward process that sets DIY enthusiasts on the path towards a successful project.
Assembling The Pipe Leg
Once all the materials have been sourced for making pipe legs, the next step is to assemble them. This process involves using different pipes and fittings to create a sturdy and stable base for the table. The first step is to determine the height of the table legs and cut the pipes accordingly. Then, using a combination of elbows, tees, and couplings, the pipes can be connected to form the desired shape.
It’s important to consider different finishes when assembling pipe legs for a DIY table. Depending on personal preference or the overall aesthetic of the room, pipes can be left in their natural state or painted with a variety of finishes such as matte black or metallic colors. It’s also possible to use sandpaper or wire brushes to achieve a distressed or rustic look if that’s what you’re going for.
Assembling pipe legs may seem intimidating at first, but with careful planning and attention to detail, it can be an achievable task. Taking measurements beforehand and double-checking connections during assembly can ensure that the final product is structurally sound and visually appealing. With these tips in mind, creating custom pipe legs can add a unique touch to any DIY project while staying within budget constraints.
Crafting A Wooden Block Leg
After learning how to make a pipe leg for your DIY table, it’s time to explore other woodworking techniques. One of the most popular options is crafting a wooden block leg. This type of leg provides a classic and sturdy foundation for your table.
When designing your wooden block leg, consider the overall style of your table. You can opt for a simple and minimalist design or add intricate details such as carving or woodburning. Design inspiration can be found online, in furniture stores, or even in nature.
To start creating your own wooden block legs, gather high-quality wood that fits the measurements you need. Then, use woodworking tools such as saws and chisels to shape the wood into the desired shape. Sand down any rough edges before attaching the legs to your table top.
Transition: If you’re looking for a more unique and modern look for your DIY table legs, consider creating a metal mesh leg.
Creating A Metal Mesh Leg
- The metal mesh for creating a diy table leg must be cut to the desired size and shape.
- Utilizing a metal saw is the best method for cutting metal mesh to the required size.
- Securing the metal mesh to the table can be achieved by using bolts and screws.
- The metal mesh should be firmly secured to the table and then reinforced with a metal bracket for added stability.
Cutting The Metal Mesh
When creating a metal mesh table leg, one of the most important steps is cutting the metal mesh to the appropriate size. It is important to consider the thickness of the metal mesh when choosing a cutting tool. For thinner mesh, wire cutters or tin snips may be sufficient. However, for thicker mesh, a rotary cutter or angle grinder may be necessary.
Before cutting the metal mesh, it is important to measure and mark it accurately. This will ensure that each leg is uniform in size and shape. Once measured and marked, use the chosen cutting tool to carefully cut along the lines.
If you do not have access to traditional cutting tools, there are alternative methods you can use. One option is to use a Dremel tool with a metal cutting disc attachment. Another option is to use a jigsaw with a metal blade. Regardless of which method you choose, always wear protective gear such as gloves and goggles to ensure your safety during this step of the DIY process.
Securing The Mesh To The Table
Now that the metal mesh has been cut to size, the next step is to secure it to the table. The type of mesh used will determine the installation technique required. For example, if using a welded wire mesh, it can be attached directly to the table frame using screws or bolts. However, if using an expanded metal mesh, it may require additional support such as brackets or angle iron.
Before securing the mesh to the table, it is important to ensure that it is properly aligned and level. This can be done by placing a level on top of the frame and adjusting as necessary. Once aligned, use clamps or vice grips to hold the mesh in place while drilling holes for screws or bolts. It is recommended to space screws/bolts evenly along the perimeter of the frame for maximum stability.
After securing the mesh to the table frame, inspect each leg carefully for any signs of weakness or instability. If any issues are detected, address them immediately before continuing with further steps. With proper installation techniques and attention to detail, creating a metal mesh table leg can be a rewarding DIY project that adds a unique touch to any home decor.
Adding Decorative Accents To Your Legs
Once you have completed building your table legs, the next step is to add embellishments to give them a unique look. Adding decorative accents not only adds aesthetic value but also makes the legs more functional. You can choose from a wide range of options depending on your personal preference and style.
Choosing colors is an excellent way to personalize your table legs. You can paint the legs with any color that complements the overall theme of your room. Alternatively, you can create unique patterns by using stencils or masking tape. Adding metallic finishes such as gold or silver leafing can give your table legs a luxurious look. However, keep in mind that if you are using reclaimed wood for your legs, it is best to use natural finishes such as oil or wax.
In summary, adding embellishments is an essential step in creating DIY table legs. It allows you to customize the look of your furniture and make it stand out from store-bought products. By choosing colors and finishes that complement your room’s décor, you can create a cohesive design that looks professionally done. In the next section, we will discuss another option for making sustainable DIY table legs by using reclaimed materials.
Using Reclaimed Materials For A Sustainable Option
The previous section showcased some creative ways to add decorative accents to your table legs. Now, let’s explore an option that not only adds character but also promotes sustainability. Upcycling materials is a growing trend in the DIY community and can be a great way to repurpose items that would otherwise end up in landfills. By using reclaimed wood or metal for your table legs, you can create an eco-friendly design that is both stylish and functional.
One of the benefits of upcycling materials is the unique textures and colors they bring to your project. Each piece has its own history and personality, adding depth and character to your final product. When searching for materials, consider using old furniture pieces, shipping pallets, or even salvaged building materials. With a little creativity and patience, you can turn these discarded items into one-of-a-kind table legs.
Building sustainable table legs is not only good for the environment but also for your wallet. Upcycling materials can be a cost-effective alternative to buying new materials while still achieving a high-quality finish. Additionally, it allows you to customize the size and shape of your table legs to fit your specific design needs.
Moving forward with our DIY project, let’s take inspiration from nature and incorporate eco-friendly designs into our work. Using reclaimed materials not only adds character but also promotes sustainability in our homes. Next, we will delve into building legs for a specific table design without compromising on functionality or style.
Building Legs For A Specific Table Design
Custom leg designs are essential to achieving the desired look of your table. Many design options can be used to create the perfect custom legs that match the style of your table. These include tapered legs, turned legs, and more intricate designs such as cabriole or Queen Anne legs. Whatever design you choose, ensure it complements your tabletop’s size and shape.
Matching leg styles is another important consideration when building custom legs for your table. If you plan to build a set of tables with different sizes and shapes, consider matching the leg styles across all tables to achieve a cohesive look. This will also provide consistency in style throughout your space. Matching leg styles can also be useful if you plan to move furniture around frequently, as having interchangeable pieces will make moving furniture less complicated.
In summary, designing custom legs for your table is an exciting project that allows you to showcase your creativity while enhancing the overall aesthetic value of your space. Whether you opt for simple or intricate designs, make sure they match the style of your tabletop and consider matching leg styles if you plan on building multiple tables. With these tips in mind, let’s move on to exploring how to craft sturdy and stable DIY table legs.
Tips For Sturdy And Stable Legs
- Accurate measurements are a critical factor in constructing sturdy and stable legs for a table.
- Joining the leg components securely is also essential to ensure stability in the structure.
- The use of appropriate and well-secured fasteners is important to secure the joints and prevent any wobbling.
- When constructing a table, the stability of the structure should be the number one goal.
- To further ensure the stability of the structure, extra support should be added to the legs.
- Cross bracing and additional support beams are recommended for added stability of the legs.
Measuring Accurately
Accurately measuring the table legs is crucial for achieving a sturdy and stable end product. Precision plays an essential role in ensuring that the legs fit perfectly in place, and the final product looks seamless. It is important to measure accurately as even a difference of 1/16th of an inch can have a significant impact on the stability of the table.
One of the most common measuring mistakes is not using the right tools for measurement. Many beginners make this mistake and end up with uneven legs or legs that don’t fit correctly. Using a ruler or tape measure may seem like an easy solution, but it may not always provide accurate measurements. It is best to invest in specialized tools such as calipers, angle gauges, or protractors to get precise results.
Another common mistake when measuring table legs is failing to account for uneven surfaces. When measuring table legs on an uneven surface, there are chances of getting inaccurate measurements leading to unstable table legs. To avoid this problem, one should use shims or other leveling tools to ensure that all four corners are at equal heights before taking measurements. This will lead to precise measurements and ultimately create sturdy and stable table legs.
Joining Securely
When it comes to building sturdy and stable table legs, measuring accurately is just one aspect of the process. Joinery techniques and design considerations must also be taken into account to ensure that the legs are securely joined and able to withstand weight and pressure.
Joinery techniques such as mortise and tenon joints, dowel joints, or even metal brackets can be used to join table legs securely. Each technique has its advantages and disadvantages, but ultimately, the goal is to create a strong bond between the leg and tabletop. It is essential to follow instructions carefully when using these techniques to avoid mistakes that could weaken the joint.
Additionally, design considerations such as leg angles, thickness, and material choice can also impact the stability of table legs. Angled legs may provide better support than straight legs when it comes to bearing weight. Thicker legs made from solid wood may also provide more stability than thinner or hollow ones. Material choice can also affect stability; hardwoods like oak or maple are typically stronger than softwoods like pine.
In conclusion, achieving sturdy and stable table legs requires attention to detail throughout the entire process. Measuring accurately is crucial but must be complemented by secure joinery techniques and thoughtful design considerations. By following these tips, DIY enthusiasts can create tables that are not only beautiful but functional for years to come.
Stabilizing Structure
Now that we have discussed the importance of accurate measurements and secure joinery techniques in building sturdy and stable table legs, let us move on to another critical aspect: stabilizing the structure. One of the most common problems with tables is wobbling, which can be caused by uneven leg lengths or an unbalanced weight distribution. To prevent this, it is essential to stabilize the legs and ensure that they are all at the same height.
One way to achieve this is by using adjustable feet or levelers on each leg. These small devices can be screwed onto the bottom of each leg and adjusted to compensate for any unevenness in the floor or tabletop. Another option is to add crossbars or stretchers between the legs, which can provide additional support and prevent wobbling. These horizontal pieces can be attached using joint techniques like mortise and tenon joints or dowel joints.
It is also important to consider the weight distribution when designing table legs. If one leg bears more weight than others, it could cause instability and eventually damage the table’s structure. To evenly distribute weight, consider using thicker or wider legs on either end of the table where more weight will be placed. Alternatively, you can use a central support column under the tabletop to provide additional stability. By applying these tips for stabilizing structure, you can create a solid foundation for your DIY table project.
Tools You’ll Need For Diy Table Legs
As you embark on your journey to make your own table legs, it’s important to have the right tools on hand. Without them, you may find yourself struggling and frustrated with the process. Think of it like a chef without their knives or a painter without their brushes – having the proper tools is essential for success. Here are some must-have tools for DIY table leg making: a drill with various sized bits, a saw (circular or hand), clamps, sandpaper (both rough and fine grit), and a ruler or measuring tape.
However, before diving in with these tools, it’s crucial to prioritize safety precautions. Wear protective gear such as goggles and gloves when working with power tools to protect against flying debris or accidental cuts. Additionally, always read instruction manuals thoroughly before using any new tool and follow manufacturer guidelines for safe use.
By having the right tools and prioritizing safety measures, you’ll be well on your way to creating beautiful table legs that will stand the test of time. But even with all the preparation in the world, sometimes things can still go wrong in the crafting process. In the next section, we’ll discuss some common issues that may arise during DIY table leg making and how to troubleshoot them effectively.
Troubleshooting Common Leg-Making Issues
After gathering all the necessary tools for your DIY table legs project, it’s time to get started with the actual leg-making process. However, even with careful planning and preparation, some issues may arise during the construction process. In this section, we’ll discuss some of the most common leg-making issues and how to troubleshoot them.
One common issue that DIYers encounter when making table legs is wobbling or unevenness in the finished product. This can be caused by a variety of factors such as uneven cuts or inadequate support for the legs. Common solutions to this problem include ensuring that all cuts are straight and even, using a level to ensure that each leg is properly aligned, and adding additional support such as cross braces or corner brackets.
Another issue that can occur when making table legs is difficulty attaching them securely to the tabletop. This can be particularly challenging if you’re working with a heavier tabletop material like stone or concrete. In these cases, alternative methods such as using threaded inserts or metal mounting plates may be necessary to ensure a secure attachment. It’s important to carefully consider the weight and size of your tabletop before deciding on a method of attachment.
By being aware of these common leg-making issues and their potential solutions, you’ll be better equipped to troubleshoot any problems that arise during your DIY project. Remember to take your time and double-check your work at each step along the way. With patience and attention to detail, you’ll be able to create professional-looking table legs for your home or workspace.
Conclusion
When it comes to creating your own DIY table legs, there are a variety of materials and styles to choose from. Whether you opt for wood, metal, or something else entirely, measuring and cutting your materials accurately is crucial to achieving the desired height and stability for your table. Sanding and finishing your legs will ensure a polished look that matches the overall design of your table.
If you’re looking to create a traditional turned leg, patience and precision are key. This style requires careful attention to detail and steady hands as you shape the wood into its curved form. Alternatively, building tapered legs can be a great option for those seeking a more modern aesthetic.
When designing legs for a specific table, keep in mind the weight-bearing capacity needed for the type of tabletop you’ll be using. Tips such as adding cross supports or using thicker materials can help ensure that your DIY table legs are sturdy and stable.
To get started on your DIY project, make sure you have all necessary tools including saws, sanders, clamps, and drills. And if any issues arise during the process such as wobbling or unevenness, don’t be afraid to troubleshoot with solutions like adjusting screw placement or adding extra support.
As you embark on your DIY journey to create unique and personalized table legs, remember that each leg serves as the foundation for something much greater – just like how each person plays an important role in building a community or society. So take pride in each step of the process as you build not just tables but also connections with others through shared experiences of crafting something beautiful from scratch.
Image Credits
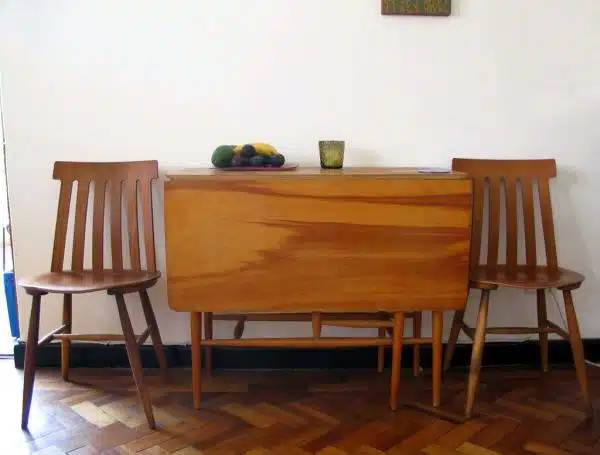
- “Gate leg table” by skinnylaminx (featured)









![How To Repair Rotted Wood 17 Texture : Altario Buick Estate Wagon : Rotting Faux Wood Paneling [1 of 2]](https://green-life.blog/wp-content/uploads/2023/05/z1CersK-gCjq-150x150.jpg.webp)
