Drywall repair is a crucial aspect of maintaining the appearance and integrity of any interior space. Whether you are a homeowner, DIY enthusiast or professional contractor, it is essential to have basic knowledge on how to repair small holes in drywall. Small holes can be caused by screws or nails used to hang pictures, curtains, shelves, and other wall decorations. These unsightly blemishes can easily be fixed with some basic tools and materials.
In this article, we will discuss step-by-step instructions on how to fill screw or nail holes in drywall without calling for professional assistance. We will provide tips on how to choose the right material for your specific situation, as well as give advice on best practices for patching small holes in drywall. By following these simple steps, you can save time and money while ensuring that your walls look sleek and flawless.
Assessing The Damage
Drywall damage can be a frustrating problem for homeowners. The first step in fixing the issue is to assess the damage and determine if repair or replacement is necessary. In some cases, the damage may be minimal and can be fixed with a simple patch. However, in other instances, the drywall may need to be replaced entirely.
One of the most common causes of drywall damage is from hanging pictures or shelves on walls. Over time, screws or nails can become loose and cause small holes to form in the drywall. This type of damage is typically superficial and can easily be repaired with spackle or joint compound. Other common causes of drywall damage include water damage, which can cause mold and rot, and structural issues that cause cracks or bulges in the walls.
Before beginning any repairs, it’s important to thoroughly assess the extent of the damage. This includes identifying any underlying issues that may have caused the damage in the first place. Once you’ve determined whether repair or replacement is necessary, you can move on to gathering materials and tools needed for the job at hand.
Gathering Materials And Tools
After assessing the damage, it’s time to gather the materials and tools needed to fill screw or nail holes in drywall. DIY enthusiasts may already have some of these items at home, while others may need to purchase them. Professional drywall repairers typically use higher quality tools and materials, but this comes with a higher cost. It’s important to weigh the pros and cons of DIY vs professional repair before making a decision.
When gathering materials, it’s important to choose the right filler for the job. Spackling is a popular choice as it dries quickly and can be sanded down for a smooth finish. Joint compound is another option that provides more durability but takes longer to dry. Other alternative filler options include toothpaste or soap, although these are not recommended for larger holes.
Cost comparison is also an important factor in deciding on which method to use. DIY repairs can save money upfront, but if done incorrectly may lead to additional costs in the long run if further repairs are needed. Professional repairs may come with a higher price tag, but offer peace of mind knowing that the job was done correctly.
When choosing the right filler for your drywall repair project, consider factors such as drying time, durability, and cost. It’s also important to properly prepare the area by cleaning and sanding before applying any filler. With the right tools and materials, filling screw or nail holes in drywall can be an easy DIY project or left up to professional drywall repairers.
Choosing The Right Filler
- There are a few types of filler available for drywall repair, including spackling paste, lightweight joint compound, and patching plaster.
- When selecting a color of filler, it is important to match it to the existing wall so that it blends in well.
- Before applying the filler, it is necessary to clean the area and remove any loose debris or dust.
- The area should then be lightly sanded to create a smooth surface before applying the filler.
- If the hole is large, it is important to use mesh tape to reinforce the area before applying the filler.
- The filler should be applied in thin layers and sanded between each layer until the desired level of smoothness is achieved.
Types Of Filler
As a drywall repair expert, I understand the frustration that comes with having unsightly screw or nail holes in your walls. Luckily, there are several types of filler available to choose from. Each has its own benefits and drawbacks, so it’s important to choose the right one for your specific needs.
One common type of filler is spackling compound. Spackling is affordable and easy to apply, making it a popular choice among homeowners. However, it may not be the best option for larger holes as it can crack over time. Another option is joint compound, which is typically used for larger repairs. While it takes longer to dry than spackling, joint compound provides a more durable finish that can withstand wear and tear.
For those looking for an even stronger solution, setting-type joint compound may be the way to go. This type of filler dries quickly and hardens like concrete, providing a long-lasting repair. However, setting-type joint compound can be more expensive than other options and requires more skill to apply properly.
When deciding on which type of filler to use on your drywall repairs, consider factors such as cost comparison and durability. By choosing the right filler for your needs, you can achieve a professional-looking finish that will stand the test of time without breaking the bank.
Selecting A Color
After selecting the right filler for your drywall repairs, the next step is to choose a color that matches the existing wall. Color matching can be challenging, especially if the original paint has faded or if there are slight variations in tone. However, taking the time to select the right color can have a significant impact on the aesthetic appeal of your space.
One option is to purchase pre-mixed spackling or joint compound in a variety of colors. This can make color matching easier and more convenient, as you won’t have to worry about mixing your own custom shade. However, these pre-mixed options may not always be an exact match for your wall.
If you prefer to mix your own color, start by gathering samples of the existing paint or wallpaper from an inconspicuous area. Use these samples to create a custom shade by combining different colors until you find one that matches as closely as possible. Remember to let the filler dry completely before assessing whether it matches or not.
By taking the time to select a color that blends seamlessly with your existing wall, you can achieve a professional-looking finish that enhances the overall aesthetic appeal of your space. Don’t rush through this process – it’s worth taking the extra time and effort for a flawless result.
Preparing The Wall
Before choosing the right filler for your drywall repair, it is important to prepare the wall surface properly. Wall cleaning is one of the essential steps before applying any filler. Dust and debris on the wall can interfere with the adhesion of the filler and cause it to crack or flake off over time. Therefore, use a clean cloth or sponge to wipe down the wall surface thoroughly before starting any repairs.
Measuring space is another crucial step in preparing the wall for drywall repair. Accurately measuring the damaged area will help you determine how much filler you need and ensure that you don’t end up with excess material or run out of it midway through your repairs. Use a tape measure to determine both width and height dimensions of the damaged area, so you know how much space needs filling.
Once you have cleaned and measured your wall space, you can move onto selecting the right filler for your repair job. Choosing high-quality fillers can provide long-lasting results that blend seamlessly into your existing walls. By taking these preparations seriously, you can achieve a professional-looking finish that enhances the overall aesthetic appeal of your living space.
Preparing The Filler
To prepare the filler for filling screw or nail holes in drywall, it is important to first understand the mixing technique. The right mixing technique can ensure that your filler is consistent and easy to apply. Start by pouring some of the powdered filler into a clean container, and then add water slowly while stirring continuously with a mixing stick. It is essential to add water gradually to avoid making the mixture too runny or thick.
When mixing the filler, one should pay close attention to consistency. The consistency should be neither too thin nor thick; it should be similar to that of toothpaste. A thinner mixture will not hold up well in the hole and may crack easily during sanding or painting. On the other hand, a thicker mixture will not spread evenly across the hole’s surface, leaving an uneven finish that may require additional sanding or patchwork.
Achieving perfect consistency takes practice, so don’t worry if you don’t get it right on your first try. Remember to mix small amounts at a time and always start with less water than recommended by the manufacturer. Once you have achieved the desired consistency, cover your container with a lid or plastic wrap until you are ready to use it. Now that you have prepared your filler correctly let’s move on to applying it effectively.
Applying The Filler
After properly preparing the drywall surface, it’s time to apply the filler. A smooth application is important to ensure a seamless repair. To achieve this, use a putty knife, and spread the filler evenly over the hole. Be sure to fill the hole completely, but avoid overfilling as this will require more sanding later on.
Once you’ve filled all of the holes, allow sufficient drying time before continuing with further repairs or painting. The drying time for most fillers is generally around 24 hours, but it may vary depending on the type of filler and the humidity level in your area. It’s important not to rush this step as insufficient drying time can lead to cracking or sinking of the filler material.
To summarize:
- Use a putty knife to apply filler evenly over each hole.
- Fill each hole completely without overfilling.
- Allow sufficient drying time (around 24 hours) before moving on.
- Rushing this step can cause future problems with cracking or sinking of filler material.
With these tips in mind, you’re ready to move on to the next step: sanding the surface.
Sanding The Surface
After applying the filler, it’s time to let it dry completely. This is an important step because if you try to sand or paint over it before it’s dry, it will just come off and ruin your hard work. The drying time can vary depending on how much filler you used and the humidity level of the room. Generally, it takes around 24 hours for the filler to dry properly.
Common mistakes when filling screw or nail holes include overfilling or underfilling them. Overfilling can create a large bump that will be difficult to sand down, while underfilling won’t provide enough coverage and the hole may still be visible even after painting. Another mistake is not using enough pressure when applying the filler, which can result in air pockets that will also be visible after painting. It’s important to apply enough pressure so that the filler adheres well to the surface and fills in any gaps.
Alternative methods for filling screw or nail holes include using spackling paste or joint compound instead of filler. Spackling paste is a lightweight option that dries quickly and can be sanded easily. Joint compound is a bit heavier than spackling paste but has good adhesive properties and can be used for larger holes as well. Both options are easy to apply with a putty knife and can be sanded down nicely once dry.
Now that the filler has dried completely, it’s time to move onto sanding the surface. But before doing so, wipe down the area with a clean cloth or sponge to remove any excess dust or debris that may have accumulated during the drying process. This will ensure that you have a smooth surface to work with when sanding down any rough edges left by the filler application.
Wiping Down The Area
After filling in the holes, it is important to wipe down the area to ensure that it is clean and free of any debris. There are various cleaning techniques that can be used, but the most common method is to use a damp cloth or sponge. It is important not to use too much water as this can damage the drywall.
In addition to a damp cloth or sponge, there are other equipment needed to properly wipe down the area. A vacuum cleaner with a brush attachment can be used to remove any dust or debris from around the hole before wiping it down. A putty knife or scraper can also come in handy for removing any excess filler that may have been left behind.
Wiping down the area after filling in screw or nail holes may seem like an unnecessary step, but it is crucial for achieving a smooth and seamless finish. By using proper cleaning techniques and equipment, you can ensure that your repaired drywall looks just as good as new. The next step in the process is priming the area, which we will discuss in detail in the following section.
Priming The Area
Congratulations! You have filled in all the holes in your drywall like a pro. Now, it’s time to give yourself a pat on the back and move on to the next crucial step: Priming the Area.
Techniques for Priming: Priming is essential as it helps to seal and prepare the surface for paint. There are various techniques you can use, depending on your preference. You can either use a spray or brush primer, but whichever technique you choose, make sure to apply it evenly over the patched area. To achieve an even finish, start from the center of the repair and work outwards towards the edges.
Common Mistakes to Avoid: A common mistake many people make when priming their drywall is not waiting long enough after applying spackle or joint compound before priming. It’s important to allow enough time for these materials to dry completely before applying primer; otherwise, you risk cracking or peeling paint later on. Another mistake is not using enough primer; remember that this coat sets up your wall for painting, so make sure you apply enough of it.
Now that we’ve covered some techniques for priming and some common mistakes to avoid let’s move onto our next step: Painting the Area.
Painting The Area
After priming the area, it’s time to move on to painting. Before diving into this step, make sure that the primer is completely dry. This usually takes about 24 hours, but it’s best to check the manufacturer’s instructions for specific drying times. Once you’ve confirmed that the primer is dry, you can start painting.
Color matching can be a tricky task when you’re trying to blend in a patch with the surrounding wall. The key is to match not only the color but also the texture of the paint. If possible, take a sample of the paint from an inconspicuous area of the wall and bring it to your local hardware store for color matching. Alternatively, you can purchase a small amount of paint and do some trial and error until you find a suitable match.
Finishing techniques are also important when it comes to blending in a patch with the surrounding wall. Use a brush or roller to apply thin layers of paint in multiple coats rather than one thick coat. This will help avoid drips and ensure that the texture matches that of the surrounding wall. After applying each coat, let it dry completely before applying another layer. It may take several coats before you achieve a seamless finish.
To blend the patch with the surrounding wall, use sandpaper or a sanding sponge to gently smooth out any rough edges or bumps around the patched area. Be careful not to sand too aggressively as this could damage both the patch and surrounding wall. After sanding, wipe down the area with a damp cloth or sponge to remove any dust or debris before proceeding with finishing touches such as baseboards or trim work.
Blending The Patch With The Surrounding Wall
- Sanding is a necessary process to create a smooth surface for the patch to blend seamlessly with the wall.
- Priming the area before applying the patch is crucial to ensure that the new patch has a better adhesion to the wall.
- The type of primer used should be chosen based on the type and material of the wall and patch.
- It is important to wait for the primer to dry completely before applying the patch to guarantee that the repairs last longer.
Sanding
Have you ever tried to patch a hole in your drywall only to find that the patch is noticeably different from the surrounding wall? It can be frustrating and even embarrassing, especially if it’s in a prominent location. One of the most important steps in blending the patch with the surrounding wall is sanding. As a drywall repair expert, I recommend using wet sanding for best results.
Wet sanding involves using a damp sponge or cloth to smooth out the joint compound or spackle used to fill the hole. This method helps prevent dust from getting into the air and makes it easier to see any imperfections that need further attention. Once you’ve sanded down the patch, wipe away any excess water and let it dry completely before painting or texturing.
Dry sanding is another option, but it tends to create more dust and can be more difficult to control. If you choose this method, be sure to wear a mask and eye protection to avoid inhaling dust particles. Use a fine-grit sandpaper and gently sand until smooth, being careful not to over-sand or damage the surrounding wall.
Blending a patch with the rest of your drywall requires patience and attention to detail, but with proper sanding techniques like wet or dry sanding, you’ll be able to achieve a seamless finish that matches your existing walls. Remember, always take safety precautions when sanding and make sure your work area is well-ventilated.
Priming
Blending the patch with the surrounding wall is an essential step in drywall repair. Achieving a seamless finish that matches your existing walls requires patience, attention to detail, and proper sanding techniques such as wet or dry sanding. However, sanding alone is not enough to ensure that your patch blends in perfectly. To achieve flawless results, it’s crucial to use primer before painting.
Primers are specially formulated coatings that prepare surfaces for paint application. They help seal porous surfaces such as drywall and create a smooth and even base for paint to adhere to. Using primer before painting also helps prevent stains and discoloration from bleeding through the topcoat. In addition, primers can help reduce the number of coats needed for full coverage, which can save you time and money.
Tips for seamless priming include choosing the right type of primer for your project, applying it evenly with a brush or roller, and allowing it to dry completely before painting. There are different types of primers available depending on the surface you’re working with and the type of paint you plan to use. For example, if you’re painting over a dark color or a glossy surface, you may need a specific type of primer designed for those conditions. By following these tips, you’ll be able to achieve professional-looking results that blend seamlessly with your existing walls.
Dealing With Larger Holes
When it comes to drywall repair, larger holes can be a bit more challenging to fix than smaller ones. Repairing plaster is often necessary before covering holes that are bigger than one inch in diameter. Plaster provides an adhesive surface for the patching material to stick to and creates a secure bond.
To repair plaster, start by removing any loose or damaged areas by gently scraping away debris with a putty knife. Then, apply a thin layer of joint compound over the damaged area and let it dry completely. After it dries, sand down any rough spots until the surface is smooth and even. Now you’re ready to cover the hole.
When covering larger holes in drywall, using mesh tape can create stronger repairs. Mesh tape is designed to reinforce joints and prevent cracking or splitting over time. To use mesh tape, first cut a piece of tape slightly longer than the hole you need to cover. Then, center the tape over the hole and press it into place with your fingers, smoothing out any wrinkles or bubbles as you go along. From here, you can apply joint compound over the top of the mesh tape until it’s flush with the wall surface.
Using Mesh Tape For Stronger Repairs
When it comes to repairing drywall, using mesh tape can provide a stronger and more durable repair compared to traditional paper tape. Mesh tape is made of fiberglass and has a self-adhesive backing which makes it easier to apply onto the wall. The benefits of mesh tape include its ability to prevent cracks from reappearing, its resistance to moisture and mold, and its overall durability.
Compared to paper tape, mesh tape provides better reinforcement for larger holes or areas that require multiple layers of joint compound. Paper tape tends to tear or bubble when used for such repairs whereas mesh tape can easily cover the area without any issues. Additionally, since mesh tape is self-adhesive, it eliminates the need for applying an initial layer of joint compound before applying the tape.
It’s important to note that while mesh tape may seem like the better choice for all repairs, it’s not always necessary for smaller holes or cracks. In these cases, paper tape can still be effective and cost-efficient. However, if you’re looking for a stronger repair or dealing with larger damages in high-moisture areas such as bathrooms or kitchens, then opting for mesh tape would be the smarter choice. In the next section, we will discuss how to repair textured walls using joint compound and texture spray.
Repairing Textured Walls
As a drywall repair expert, one of the most common requests I receive is for repairing textured walls. Whether it’s a small hole or a large crack, there are ways to fix it while keeping the texture uniform. Matching texture is essential for any wall repair job, and it requires careful attention to detail and expertise.
When repairing textured walls, it’s important to assess the extent of damage before starting any work. If there are only minor imperfections such as nail holes or dents, then filling them with spackle or joint compound should suffice. However, if the damage is more extensive, such as large cracks or holes, professional services may be required.
Matching texture is an art that requires patience and skill. Once the damaged area has been repaired and smoothed out, applying texture can be tricky. It’s important to match both the pattern and color of the existing wall so that repairs blend seamlessly into the surrounding area. With proper technique and materials, however, even large repairs can be made invisible to the naked eye. But how can you prevent future holes from appearing on your beautifully restored wall?
Preventing Future Holes
After successfully repairing the textured walls, it’s important to take preventive measures to avoid future holes in drywall. Not only will this save you time and money in the long run, but it will also keep your walls looking flawless for years to come.
One of the most effective preventive measures is to reinforce the areas around common spots for holes such as door handles or light switches. You can do this by placing adhesive patches or metal plates over the area before installing these fixtures. Additionally, consider using self-adhesive wall guards behind furniture or near high-traffic areas to prevent accidental bumps and scratches.
Another maintenance tip is to regularly inspect your walls for any signs of damage. Catching small cracks or dents early on can prevent them from turning into larger holes that require more extensive repairs. It’s also a good idea to touch up any minor imperfections with paint or spackle as soon as they are noticed.
Lastly, be mindful of how you hang items on your walls. Use appropriate hardware such as anchors or screws designed for drywall rather than nails which can easily pull out of the material. When hanging heavier objects, distribute weight evenly across multiple anchors or studs instead of relying on one point of support.
By following these preventive measures and maintenance tips, you can ensure that your repaired textured walls stay intact for years to come. However, if you do encounter future holes in drywall, don’t panic – there are still plenty of final tips and tricks that can help you achieve flawless results once again.
Final Tips And Tricks
When it comes to filling screw or nail holes in drywall, there are a few final tips and tricks to keep in mind. First, it is important to avoid common mistakes that can lead to unsightly results. For example, using too much spackle or joint compound can create a noticeable bump on the wall once it dries. Additionally, failing to sand down the filled hole can leave an uneven surface.
To achieve a professional-looking finish, consider using advanced techniques such as feathering the edges of the spackle or joint compound with a putty knife. This will help blend the repair into the surrounding wall and create a seamless result. Another technique is to use a spray texture product to match the existing texture of the wall.
While DIY repairs can save money, hiring a professional may be worth considering for more complex repairs or larger areas of damage. A professional has access to specialized tools and materials and can ensure that the repair is done correctly and efficiently. Ultimately, whether you choose to tackle the repair yourself or hire a professional, following these tips and techniques can help you achieve a successful result.
Conclusion
Assessing the damage to your drywall is the first step in any successful repair. Once you have determined the extent of the damage, gather your materials and tools. You will need a putty knife, sandpaper, filler material, and possibly mesh tape for stronger repairs.
Choosing the right filler is crucial for a long-lasting repair. Spackling compound is ideal for small holes while joint compound works best for larger holes. Preparing the filler involves mixing it to a smooth consistency and applying it evenly with a putty knife. For added strength, use mesh tape to reinforce the repair.
Repairing textured walls requires extra care and attention to detail. Using a stippling brush or roller can help match the texture of the surrounding wall. Finally, preventing future holes can be achieved by using anchors or toggle bolts when hanging heavy items on your walls.
In conclusion, filling screw or nail holes in drywall requires patience and attention to detail. With the right tools and materials at hand, anyone can achieve professional-looking results. Remember to assess the damage carefully before choosing your filler and use mesh tape for added strength in larger repairs. By following these tips and tricks, you’ll be able to restore your walls to their former glory in no time!
Image Credits
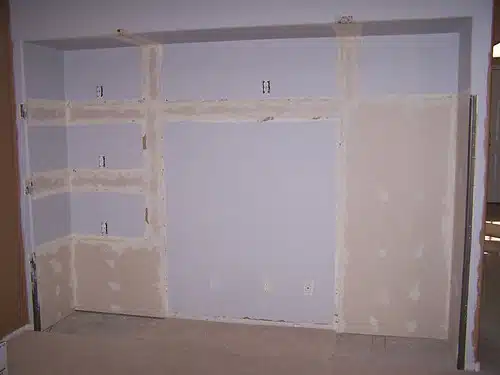
- “Family Room: Entertainment Wall Drywall and Mud” by JillWillRun (featured)













![How To Repair Rotted Wood 26 Texture : Altario Buick Estate Wagon : Rotting Faux Wood Paneling [1 of 2]](https://green-life.blog/wp-content/uploads/2023/05/z1CersK-gCjq-150x150.jpg.webp)

