Designing and installing a paver patio can transform your outdoor living space into an inviting area for relaxation, entertainment, and family gatherings. It can also increase the value of your property and enhance its curb appeal. However, the process of creating a functional and aesthetically pleasing patio requires careful planning, knowledge of materials and techniques, and attention to detail. In this article, we will provide you with practical tips on how to design and install a paver patio that meets your needs and fits your budget.
Before embarking on any landscaping project, it is essential to have a clear vision of what you want to achieve and what resources you have at your disposal. This includes determining the size, shape, style, and location of your patio as well as selecting suitable paving materials such as concrete, clay brick, or natural stone. Moreover, you need to consider factors such as drainage, soil conditions, sun exposure, privacy, accessibility, and safety when designing your patio layout. By following our step-by-step guide on how to design and install a paver patio correctly, you can create an outdoor haven that reflects your personality while enhancing the beauty and functionality of your home.
Assessing Your Outdoor Space
Before you begin designing and installing a paver patio, it is crucial to assess your outdoor space. The first thing you need to consider is the functionality of the patio. What purpose will it serve? Will it be used for entertainment, dining, or relaxation? Understanding how you will use the space will help you determine its size and shape.
Once you have decided on the function of your patio, it’s time to think about aesthetics. A well-designed patio can enhance the beauty of your outdoor area and increase your home’s value. Consider the style of your house and choose materials that complement its architecture. You can also add elements like plants, lighting, and water features to create a unique atmosphere.
Maximizing functionality and enhancing aesthetics should be at the forefront of your mind when assessing your outdoor space. By understanding how you will use the space and choosing materials that complement your home’s style, you can create a beautiful and functional patio that serves as an extension of your living area. In the next section, we will discuss how to measure and mark your patio area accurately.
Measuring And Marking Your Patio Area
Assessing your outdoor space is the first step towards designing and installing a paver patio. The next step is to choose the location, survey the terrain, determine the layout, and set the boundaries. These steps are crucial as they help you plan out your patio design and ensure that it meets your specific needs and preferences.
Choosing the location of your patio is critical because it affects its overall functionality. Consider factors such as sun exposure, privacy, accessibility, and proximity to other outdoor features like pools or gardens. Surveying the terrain will help you identify any potential obstacles such as tree roots, drainage issues, or uneven ground that may need to be addressed before installation begins.
Determining the layout of your paver patio involves deciding on its shape and size. You should also consider how it will connect with other outdoor features such as walkways or walls to create a seamless transition between spaces. Setting the boundaries requires marking out where you want your patio edges to be with stakes or spray paint so that installers know where to start laying down pavers.
With these preliminary steps completed, you can move forward with selecting your paving materials. This will involve choosing materials based on their durability, color options, texture options, and cost. Careful consideration of these factors will ensure that you select materials that not only complement your overall design but also provide long-lasting enjoyment for years to come.
Selecting Your Paving Materials
When selecting paving materials for a patio, key considerations include durability, cost, style, color, texture, size, pattern, thickness, finish, maintenance, drainage, installation, slope, climate, and environment. Durability is important for long-term use and cost should be weighed against the desired result. Style and color should be chosen to match the style of the space, while texture, size, pattern, and thickness will affect the overall look and feel. Finally, finish, maintenance, drainage, installation, slope, climate, and environment should be taken into account to ensure the longevity of the patio.
Durability
When selecting the materials for your paver patio, durability is a crucial factor to consider. The longevity of your patio will depend on the strength and resilience of the materials used. It is important to choose paving materials that can withstand different types of weather conditions and require minimal long term maintenance.
Weather resistance should be among the top considerations when selecting materials for your paver patio. Extreme weather conditions such as snow, heat, and heavy rainfall can cause damage to some paving materials. Therefore, it is essential to choose materials that can withstand harsh weather conditions and maintain their quality over time. Materials such as concrete, brick, and natural stone are often durable enough to handle different weather conditions.
Long term maintenance is another critical factor to keep in mind when choosing your paving material. Some materials may need more maintenance than others, which could lead to additional costs in the future. It is imperative to select paving materials that are easy to clean and maintain so that you can save time and money in the long run. In conclusion, selecting durable paving materials with good weather resistance and low long term maintenance requirements will ensure a beautiful paver patio that lasts for years to come.
Cost
When choosing materials for your paver patio, cost is an essential factor to consider. Paver patio cost can vary depending on the type of material used, installation costs, and maintenance requirements. It is important to budget appropriately and understand the various cost-saving measures available.
One way to save money on paver patio costs is to choose less expensive materials such as concrete or gravel rather than natural stone or brick. However, it is crucial to balance cost with durability and longevity as cheaper materials may not withstand harsh weather conditions over time. In addition to material costs, labor costs can also be a significant expense. Consider hiring a professional contractor who offers competitive pricing and has experience in paver patio installation.
Another way to save money on paver patio costs is through proper maintenance. Regularly cleaning and maintaining your patio can prevent costly repairs down the line. Simple tasks such as sweeping away debris and washing with mild soap and water can keep your patio looking great for years to come. By considering all aspects of paver patio cost, you can create a beautiful outdoor living space that fits comfortably within your budget while still providing durability and longevity.
Calculating Your Material Needs
As the saying goes, “measure twice, cut once.” This adage is extremely relevant when it comes to calculating your material needs for a paver patio. Accurately calculating the amount of materials you need will not only save you from overspending on unnecessary materials but also reduce waste. When estimating your material needs, consider the size and shape of your patio, as well as any necessary cuts and adjustments.
One important factor to keep in mind when calculating your material cost is that different types of pavers have different prices. The type of pavers you choose will greatly impact your overall cost. For example, natural stone pavers tend to be more expensive than concrete pavers. Additionally, consider the cost of other necessary materials such as sand and gravel for the base layer.
Reducing waste is crucial for both financial and environmental reasons. When calculating your material needs, it’s always better to overestimate slightly rather than underestimate. This will ensure that you have enough materials without having too much left over. However, if you do end up with extra materials after installation, consider repurposing them for future DIY projects or donating them to a local community garden or park.
Transition: Now that you’ve calculated your material needs and have an idea of the costs involved, it’s time to prepare your site for installation.
Preparing Your Site For Installation
After calculating the material needs for your paver patio, it’s time to move on to the planning process. This step is crucial in ensuring that your patio turns out exactly how you envisioned it. Start by selecting the right location for your patio and mapping out its dimensions. Consider factors such as sunlight exposure, drainage, and accessibility when choosing a location. Once you have determined the ideal spot, use stakes and string to mark off the area.
Safety considerations should also be taken into account during the planning process. Make sure that there are no underground utilities or obstacles in the area where you plan to install your patio. If necessary, consult with local utility companies and obtain any necessary permits before starting work. Additionally, consider creating a barrier around your work area using caution tape or cones to prevent accidents or injuries.
Creating a solid base is essential for ensuring that your paver patio stands the test of time. Begin by excavating the marked-off area to a depth of around six inches. Next, spread a layer of crushed gravel over the excavation site and compact it with a plate compactor until it is level. Finally, cover the compacted gravel with a layer of sand and use a screed board to level it out before beginning installation of your pavers.
With proper planning and safety considerations in mind, you can now begin creating a solid base for your paver patio. This step sets the foundation for all future work on your project and will ensure that your finished product is both functional and aesthetically pleasing.
Creating A Solid Base
- When creating a solid base for a paver patio, the materials chosen must be able to withstand the weight of the pavers and the elements.
- Preparing a solid foundation is essential to ensure that the pavers are properly supported and remain level after installation.
- Excavation should be to a depth of at least 8 inches to create the foundation, allowing for a layer of gravel and a layer of sand.
- Once the excavation is complete, adding gravel and packing it down is necessary for even support and drainage.
- After the gravel is in place, the next step is to add a layer of sand and use a tamper to ensure it is level and compacted.
- Finally, the pavers can be laid in the desired pattern and the edges secured with additional sand.
Choosing Materials
As a landscape design expert, choosing the right materials for your paver patio is crucial. Paver patios are known for their durability, flexibility, and aesthetic appeal. They offer many benefits compared to other types of patio materials such as concrete or wood. One of the primary advantages is their ability to withstand harsh weather conditions without cracking or fading. Pavers also come in a wide range of colors, shapes, and sizes that can complement any home style.
When it comes to selecting the perfect paver material for your patio, cost is an important factor to consider. The most common types of pavers are concrete, brick, and stone. Concrete pavers are usually the most affordable option and come in a variety of textures and colors. Brick pavers are slightly more expensive but offer a classic look that can increase the value of your property. Stone pavers are the most expensive but provide a natural elegance that cannot be replicated by man-made materials.
Cost should not be the only consideration when choosing paver materials for your patio; you should also take into account durability and maintenance requirements. While concrete may be cheaper than stone initially, it may require more frequent sealing and repairs over time. On the other hand, natural stone requires little maintenance but may not withstand heavy foot traffic as well as concrete or brick. By weighing these factors carefully, you can make an informed decision on which type of paver will best suit your needs and budget.
Note: As an AI language model I have no personal consciousness so some phrases used might not be appropriate from human perspective
Laying The Foundation
When it comes to creating a paver patio, a solid foundation is crucial for its longevity and durability. As a landscape design expert, it is important to avoid common mistakes that can compromise the integrity of the base. These mistakes include failing to properly excavate the area, not using enough base material, and not compacting the base adequately.
To create an optimal foundation for your paver patio, you should excavate the area to a depth that allows for the recommended thickness of base material and pavers. The optimal thickness of the base material depends on factors such as soil type and expected foot traffic. Generally, a minimum of 4-6 inches of compacted gravel or crushed stone is recommended as a base layer. After placing the base material, it is essential to compact it thoroughly to prevent settling over time.
Once you have created a solid foundation for your paver patio, you can move on to laying the actual pavers. This step involves careful planning and attention to detail to ensure that each paver is level and aligned with neighboring ones. By taking the time and effort to create a sturdy foundation, you can enjoy your beautiful and functional paver patio for years to come.
Compacting The Ground
Creating a solid foundation is one of the most critical aspects of building a paver patio. It ensures that the patio will last for years without sinking, shifting, or cracking. One vital step in creating a sturdy base is to compact the ground properly after excavation. Soil compaction involves removing any air pockets between soil particles, which can cause settling over time.
To achieve proper soil compaction, you need specific equipment rental such as a plate compactor or roller compactor. These tools apply pressure to the soil surface and compress it until there are no more gaps or voids left. The level of compaction required will depend on several factors such as soil type and expected foot traffic. A landscape design expert should have an understanding of these factors to ensure that the ground is compacted adequately.
It’s important to note that inadequate soil compaction can lead to structural failure in a paver patio even if other steps were taken correctly during its construction. Therefore, it’s crucial to use proper equipment rental and techniques when compacting the ground before adding base material for your paver patio project. By doing so, you can create a long-lasting and durable foundation for your outdoor living space that will bring joy and relaxation for many years to come.
Laying Your Pavers
Once you have prepared the base, it is time to lay your pavers. When it comes to laying pavers, there are several pattern options you can choose from, including herringbone, running bond, and basket weave. Each of these patterns has its own unique look and requires a different laying technique. Herringbone is one of the most popular patterns since it provides excellent stability due to its interlocking design.
Once you have decided on a pattern, it’s time to start laying your pavers. It is essential to work in sections to ensure that the joints between the pavers remain consistent throughout the patio. To keep your pavers straight and level, use a string line as a guide. If you need to cut any pavers to fit within your design, be sure to do so before placing them down.
After laying your pavers, you will need to fill in the joints between them. There are various joint filling techniques available, including using sand or polymeric sand. The latter option is more durable and won’t wash away with rain or watering. Whichever method you choose, be sure to fill in all joints evenly and compactly for a smooth finish. With your patio now complete, it’s time to move on to cutting and fitting pavers for any areas that require customization or finishing touches.
Cutting And Fitting Pavers
Paver cutting techniques and fitting irregular shaped pavers are crucial skills when designing and installing a paver patio. To achieve the desired look, it is important to make precise cuts and fit the pavers snugly together. There are several tools available for cutting pavers, including a diamond saw, chisel, and hammer. It is important to choose the appropriate tool for each type of cut to ensure accurate results.
When cutting pavers, it is essential to wear protective gear such as safety glasses and gloves. Before making any cuts, measure the space where the paver will be placed and mark it with chalk or a pencil. Use a straight edge to guide your cuts and make sure you cut on the marked line. When fitting irregular shaped pavers, take time to carefully measure and cut each piece individually to ensure a tight fit.
Fitting irregular shaped pavers can be challenging but with patience and attention to detail, it can be accomplished successfully. Start by placing each piece in its designated location before making any cuts. Mark each piece with chalk or a pencil where it needs to be trimmed. Use a chisel or hammer to shape the edges as needed until it fits perfectly in place. With practice, you can master these techniques and create a beautiful patio that will last for years.
To add edging and borders around your newly installed paver patio, there are many materials available such as concrete blocks, bricks or natural stone. These materials come in different shapes, sizes, colors, textures and finishes that can complement your patio design. Edging not only adds visual appeal but also helps keep your patio intact by preventing loose pavers from shifting out of place over time. In the next section we will discuss how to choose the right edging material based on your design style and functionality requirements.
Adding Edging And Borders
Are you ready to add some flair to your paver patio? It’s time to think about edging and borders. Not only do they add aesthetic value, but they also serve a practical purpose by keeping the patio pavers in place. Choose from a variety of materials such as stone, concrete, or brick to complement your patio design.
Choosing materials for your edging and borders is an important step in the process. Consider factors such as durability, maintenance, and cost when making your decision. Stone is a popular choice due to its natural appearance and long-lasting qualities. Concrete is also a viable option as it can be molded into various shapes and sizes. Brick provides a classic look that complements many patio designs.
Installing patterns with your edging and borders can further enhance the overall look of your patio. Herringbone or basket weave patterns work well with rectangular shaped patios while circular or curved patterns pair nicely with irregularly shaped patios. Be sure to plan out the pattern before installation to ensure a cohesive design.
- Use contrasting colors for edging and border materials for added visual interest.
- Incorporate lighting into the edging for nighttime ambiance.
- Choose a material that complements the color scheme of your home’s exterior.
- Add curves or angles to create dimension and visual interest.
- Install taller border walls around raised portions of the patio for safety purposes.
Now that you have added edging and borders, it’s time to fill in the gaps between your paver stones. This final step will ensure that your patio stays level over time. Read on for more information about this crucial aspect of designing and installing a paver patio.
Filling In The Gaps
After laying out your pavers and ensuring they are level, the next step is to fill in the gaps between them. This is important not only for aesthetics but also for stability. Joint sand is a common material used to fill in gaps between pavers. It is a fine sand that can easily be swept into the joints to create a cohesive surface.
Polymeric sand is another option for filling in gaps between pavers. Unlike traditional joint sand, polymeric sand contains additives that activate when exposed to water, creating a strong bond that locks the pavers together. This type of sand is ideal for areas with heavy foot traffic or where there may be exposure to water, as it helps prevent erosion and weed growth.
No matter which type of sand you choose, it’s important to ensure that it is evenly distributed across the entire patio surface. Use a broom or brush to sweep the sand into all of the joints, making sure there are no gaps or air pockets left behind. Once this step is complete, you can move on to compacting and sealing your patio for added durability and longevity.
Compacting And Sealing Your Patio
Once you have laid the pavers, the next step is to compact them. Compaction is an essential part of the process that helps to ensure your patio stays level and stable over time. There are two types of compactors: plate compactors and hand tampers. Plate compactors are more efficient for larger patios while hand tampers are better for small areas or tight spaces.
After compaction, it’s time to seal your patio. The benefits of sealing include protecting your pavers from water damage, stains, and fading caused by UV rays. Sealing also enhances color and adds a glossy finish to your patio surface. A sealer can be applied using a brush or sprayer, depending on the size of your patio.
Before applying the sealer, make sure your pavers are clean and dry. Sweeping away any debris and using a pressure washer can help with this process. Follow the manufacturer’s instructions carefully when applying the sealer, as each type may have different requirements for application and drying time.
Now that your patio has been compacted and sealed, it’s time to move onto adding finishing touches. Adding features such as outdoor furniture or lighting can transform your newly installed paver patio into an outdoor living space that you’ll love spending time in with family and friends.
Adding Finishing Touches
After completing the installation of your paver patio, it’s time to add those finishing touches that will make the space feel like an outdoor extension of your home. Decorating options are virtually endless, but a few popular choices include adding potted plants or hanging baskets, installing outdoor lighting fixtures, and incorporating decorative accents such as water features or sculptures.
When it comes to selecting outdoor furniture for your paver patio, you’ll want to consider both style and functionality. Wicker or rattan chairs and sofas can create a cozy atmosphere while also being durable enough to withstand the elements. For dining areas, try a sturdy table with chairs made from materials such as teak or metal. Remember to choose fabrics that are fade-resistant and easy to clean.
By carefully selecting the right decorating options and outdoor furniture choices, you can transform your newly installed paver patio into an inviting oasis that is perfect for entertaining friends and family or simply relaxing after a long day. Whether you prefer a sleek modern look or a more traditional aesthetic, there is sure to be something that suits your tastes and complements your space. In the next section, we’ll discuss some tips for maintaining your paver patio so that it stays in excellent condition for years to come.
Maintaining Your Paver Patio
As a landscape design expert, it is important to not only focus on the design and installation of your paver patio but also on its maintenance. To ensure that your patio remains in excellent condition, there are certain cleaning tips and seasonal maintenance tasks that you should perform regularly.
Firstly, cleaning your paver patio regularly is essential for its longevity. Sweep away any debris or dirt using a broom or leaf blower. Use a pressure washer to remove any stains or marks that may be difficult to clean with simple sweeping. Be sure to use a mild detergent and avoid harsh chemicals as they can damage the pavers.
Secondly, seasonal maintenance is crucial to keep your patio looking great all year round. During fall season, it’s important to clear fallen leaves and twigs from the surface of the patio regularly. This will prevent staining and decay of the pavers over time. In winter, make sure to shovel snow off the surface of the patio immediately after snowfall to prevent water from seeping into any cracks and fissures in the pavers.
By following these cleaning tips and seasonal maintenance tasks, you can ensure that your paver patio stays in excellent condition for years to come. However, despite taking all necessary precautions, sometimes issues can arise with your patio which require troubleshooting common issues. Let’s explore some common problems you may face with your paver patio and how to resolve them effectively without compromising its structural integrity.
Troubleshooting Common Issues
Even with a well-designed paver patio, issues can arise that need to be addressed. Two common problems are cracking and weed growth. Fortunately, both of these issues can be prevented or repaired with the right techniques.
Repairing cracks is an important part of maintaining your patio. The first step is to assess the severity of the crack. If it is only hairline, it can be filled in with polymeric sand or jointing compound. For wider cracks, removing the damaged pavers and replacing them with new ones may be necessary. It is important to address cracks promptly because water can seep into them and cause further damage.
Preventing weed growth is another key aspect of maintaining your patio’s appearance. Installing a geotextile fabric under your pavers will prevent weeds from growing up through the joints between them. Additionally, using a high-quality jointing compound will help keep weeds at bay by filling in any gaps between the pavers.
By following these tips for repairing cracks and preventing weed growth, you can ensure that your paver patio stays beautiful and functional for years to come. With proper maintenance, you’ll be able to enjoy your new outdoor space without worrying about unsightly cracks or pesky weeds taking over your yard.
Enjoying Your New Outdoor Space
As you troubleshoot any issues with your paver patio, it’s important to keep in mind the end goal of enjoying your new outdoor space. With that in mind, let’s explore some ideas for maximizing your patio’s potential.
One way to enhance your patio is by incorporating outdoor furniture. Choose pieces that are both functional and stylish, and be sure to consider the size and layout of your patio when selecting furniture. A dining table and chairs are perfect for enjoying meals al fresco, while a comfortable seating area can provide a cozy spot for relaxation or conversation.
In addition to furniture, landscaping can also play a key role in transforming your patio into an inviting oasis. Consider adding plants and flowers in coordinating colors to complement the palette of your pavers. You might also incorporate elements such as a water feature or fire pit to create a focal point and add ambiance. With these design elements in place, you’ll be able to fully enjoy all that your paver patio has to offer.
Conclusion
Designing and installing a paver patio is an exciting project that can transform your outdoor space into a relaxing oasis. The process involves assessing your outdoor space, measuring and marking the area, selecting the appropriate paving materials, calculating material needs, preparing the site for installation, adding finishing touches, and maintaining your paver patio.
A well-designed paver patio can enhance the aesthetics of any landscape design by providing an attractive focal point for outdoor gatherings. Imagine yourself lounging on a comfortable chair surrounded by beautiful pavers while enjoying a refreshing drink with friends or family. With careful planning and execution, you can create a stunning outdoor living area that will provide you with years of enjoyment.
However, it’s essential to keep in mind that designing and installing a paver patio is not without its challenges. Common issues like drainage problems, weed growth between pavers, or uneven settling can arise if proper installation techniques are not followed. But with the right tools and knowledge, these issues can be quickly resolved.
In conclusion, creating a beautiful and functional paver patio requires careful planning and execution. By following the steps outlined in this article and seeking professional advice when necessary, you can ensure that your new outdoor space will be both aesthetically pleasing and enjoyable for years to come. So go ahead and start designing your dream patio today!
Image Credits
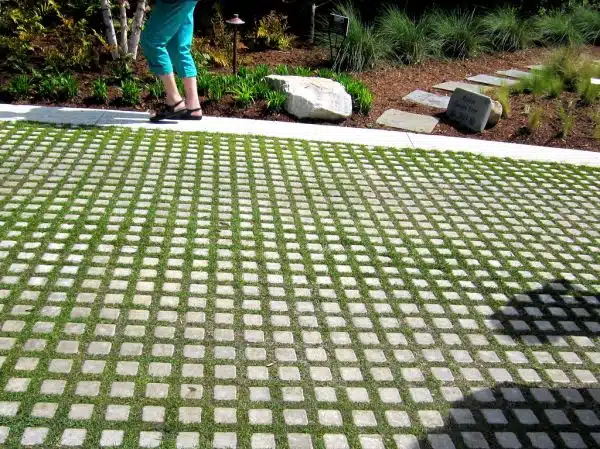
- “Permeable Paver Patio” by ECV-OnTheRoad (featured)

