Laying patio pavers is an excellent way to add value and beauty to your outdoor living space. Whether you are looking to create a new patio or simply enhance an existing one, laying pavers can be a cost-effective and attractive solution. However, the process of laying patio pavers requires careful planning and attention to detail in order to achieve optimal results.
In this article, we will provide you with expert guidance on how to lay patio pavers effectively. We will cover all aspects of the process, from choosing the right materials to preparing the site and laying the pavers themselves. With our step-by-step instructions and helpful tips, you will be able to create a stunning and functional outdoor living area that you can enjoy for years to come. So let’s get started on this exciting journey towards transforming your outdoor space into a beautiful oasis!
Assessing Your Space
The first step in laying patio pavers is to assess your space. This is crucial to ensure that you choose the right materials and design for your project. Assessing drainage is one of the most important considerations when planning a patio. You want to make sure that water doesn’t pool on the surface, which can lead to damage over time.
Another factor to consider when assessing your space is sun exposure. Depending on where you live, your patio may get a lot of direct sunlight or be shaded for most of the day. This will impact the type of material you choose and how you lay it out. For example, if your patio gets a lot of sun, you may want to opt for a lighter color paver that won’t absorb as much heat.
By taking the time to properly assess your space, you can ensure that your patio will not only look great but will also function well for years to come. Once you’ve considered drainage and sun exposure, it’s time to move on to choosing the right materials for your project.
Choosing The Right Materials
When it comes to laying patio pavers, choosing the right materials is crucial. The type of material you choose can affect the overall look and durability of your patio. There are several types of patio pavers available in the market, each with its own unique features and benefits.
Types of Patio Pavers:
- Concrete pavers
- Natural stone pavers
- Brick pavers
- Rubber pavers
- Travertine pavers
Concrete pavers are the most popular choice due to their durability and affordability. They come in a wide range of colors and shapes, making them easy to customize to fit any design aesthetic. Natural stone pavers, on the other hand, offer a more natural look but come at a higher cost. Brick pavers offer a timeless appeal and are perfect for traditional or historic homes. Rubber pavers are eco-friendly and slip-resistant, making them ideal for pool areas or high-traffic spaces. Finally, travertine pavers have a unique textured surface that creates an elegant look.
Cost is also an important factor when choosing patio paver materials. The price varies depending on the type of material you choose, as well as the size and complexity of your project. It’s important to consider both upfront costs as well as long-term maintenance expenses when making your decision.
When choosing materials for your patio project, take into account your personal style preferences and budget constraints. Each type of material has its own benefits and drawbacks, so make sure to do your research before making a final decision on what will work best for you. In the next section, we’ll discuss the tools and equipment you’ll need to get started on your project.
Tools And Equipment You’ll Need
To begin your journey towards creating the perfect patio, you’ll need to have the right tools and equipment. This is where your creativity and expertise come into play. With so many options available in the market, it can be overwhelming to choose what’s best for your project. It is important to note that safety precautions should always be taken when working with any type of equipment.
Before embarking on a patio paving project, you must consider your budget. The cost of materials and tools needed for this project can quickly add up, so it’s important to make sure you’re not breaking the bank. You can always save money by purchasing cheaper materials or renting tools instead of buying them outright. However, keep in mind that investing in high-quality materials and equipment may result in a more durable and long-lasting patio.
When working on any DIY project, safety should always be a top priority. Make sure you wear protective gear such as gloves, goggles, and sturdy shoes. Always read the instructions carefully before using any power tools or equipment to avoid accidents or injuries. Once you have all the necessary tools and have established a budget plan, you’re ready to move on to measuring and marking your space for the patio pavers.
Measuring And Marking Your Space
Measuring techniques are crucial when laying patio pavers. Before you start any project, ensure that you have the correct measurements of your space. For an accurate measurement, use a measuring tape or laser level to measure the length and width of your area. Consider marking out the area with stakes and strings or using spray paint to mark boundaries.
Design considerations are also essential when planning for your patio paver installation. Do you want a straight or curved edge? What pattern do you want to create? Your design will determine how many pavers you’ll need, so it’s essential to consider this before purchasing them. Additionally, ensure that the design complements your home’s exterior aesthetic.
Once you have your measurements and design plan, it’s time to mark out your space. Use chalk or spray paint to mark where the edges of your patio will be located. Ensure that all corners are square by measuring diagonally from one corner to another. Adjust accordingly until everything is square, and then move onto preparing your site.
- Use a measuring tape or laser level for accurate measurements
- Mark out the area with stakes and strings or spray paint
- Ensure that all corners are square by measuring diagonally from one corner to another
With precise measuring techniques and thoughtful design considerations, marking out your space will be a breeze. By taking these steps seriously, you’ll avoid costly mistakes down the line, ensuring that your patio project is smooth sailing from beginning to end. Next up: preparing your site for installation!
Preparing Your Site
Your patio is like a blank canvas, and before you begin creating your masterpiece, you must prepare the site. Site preparation is critical to ensure that your patio will be durable and long-lasting. Just as a painter prepares their canvas by priming it, so too must you prime your site for paving.
The first step in preparing your site is to conduct soil testing. Soil testing will tell you about the composition of the soil and its ability to support your patio. You want to avoid any surprises during the installation process that could lead to costly repairs down the road. Testing for soil pH levels, drainage, and compaction will help determine how much work needs to be done before laying down pavers.
Once soil testing is complete, it’s time to begin site preparation. This involves removing any grass or vegetation from the area where your patio will be located. Next, you’ll need to level the ground and make sure there are no high or low spots that could cause problems later on. Finally, compacting the soil ensures that it can withstand heavy foot traffic and won’t shift over time.
Moving onto excavation and grading, which is an essential step in ensuring a level surface for laying pavers.
Excavation And Grading
Before beginning your patio paving project, it is crucial to properly prepare the area by excavating and grading. This step involves removing any grass, plants, or debris in the designated area for your patio. It is important to ensure that the soil is level so that there will not be any unevenness in your patio once it is installed.
Additionally, it is recommended to conduct a soil test to determine if there are any drainage issues that need to be addressed. Poor drainage can lead to water pooling on your patio and causing damage over time. Solutions such as installing drain pipes or creating a slight slope away from your home can help mitigate these issues and ensure the longevity of your patio.
Proper excavation and grading of your patio area will provide a solid foundation for the rest of the installation process. By taking the time to address any potential drainage issues and ensuring that the soil is level, you are setting yourself up for success when it comes to laying your base material. With these steps completed, you can move on to installing your base material with confidence knowing that you have taken all necessary precautions for a successful project.
Installing Your Base Material
Choosing a Base Material requires consideration of the patio purpose, climate, and budget. Preparing the Ground involves removing existing vegetation and leveling the soil for a sturdy foundation. Adding a layer of gravel beneath the patio pavers ensures proper drainage and helps to keep weeds from growing. Finally, a layer of sand should be added to fill any remaining gaps and stabilize the pavers.
Choosing A Base Material
To ensure the longevity and stability of your patio, choosing the right base material is crucial. There are several types of base materials to consider, each with its unique benefits and drawbacks.
One option is a gravel base, which consists of crushed stone and provides excellent drainage. This type of base material is ideal for areas with heavy rain or soil that retains moisture easily. However, it may not be suitable for regions with harsh winters as the gravel can shift under heavy snowfall.
Another choice is a sand base, which is commonly used for patios due to its versatility and affordability. Sand provides adequate drainage and is easy to install but can become unstable over time, especially if exposed to heavy foot traffic frequently.
Finally, there’s the option of using concrete as a base material. While this option ensures maximum stability, it can be an expensive choice and requires professional installation. It’s best suited for larger patios or those that will have heavy furniture or equipment on them.
In conclusion, selecting the appropriate material for your patio’s foundation depends on various factors such as weather conditions, budget constraints, and intended usage. Understanding the pros and cons of different base materials will aid you in making an informed decision that will result in a secure and long-lasting patio.
Preparing The Ground
Before installing your base material, it’s crucial to prepare the ground adequately. This step involves assessing the soil quality and ensuring proper drainage solutions are in place. First, conduct a soil test to determine its composition and whether amendments are necessary. A soil test will reveal if the soil is acidic or alkaline and if it lacks essential nutrients. Amending the soil with compost or other organic matter can improve its quality, making it suitable for a stable patio foundation.
The next step is to ensure adequate drainage solutions are in place. Poor drainage can lead to standing water, which can be damaging to your patio’s foundation over time. Installing a French drain system or incorporating a slope into your patio design can help prevent water from pooling on your patio. Proper grading is essential when preparing the ground, as it ensures that water flows away from the foundation.
In summary, preparing the ground for your patio installation involves conducting a soil test and addressing any issues with soil quality as well as ensuring proper drainage solutions are in place. These steps are critical in creating a stable and long-lasting patio foundation that will withstand weather conditions and heavy use over time. By taking these measures, you’ll be able to enjoy your outdoor space comfortably and safely for years to come.
Adding Edge Restraints
As the saying goes, “the devil is in the details,” and this certainly applies to laying patio pavers. One important detail that often gets overlooked is the use of edge restraints. These are necessary to prevent the pavers from shifting or spreading out over time, which can lead to unsightly gaps and uneven surfaces. To ensure a long-lasting, beautiful patio, it’s imperative that you invest in quality edge restraints and install them correctly.
Using proper adhesives is key when installing edge restraints. The adhesive you choose should be strong enough to hold up against weather conditions and foot traffic but also flexible enough to allow for some movement without cracking or breaking. Be sure to follow the manufacturer’s instructions carefully when applying the adhesive and allow plenty of time for it to dry before continuing with the installation.
When it comes to creative edging ideas, the possibilities are endless. You can opt for classic brick pavers laid on their sides or try something more modern like metal edging or even incorporating plants into your design. Whatever you choose, make sure it complements your overall design aesthetic and provides adequate support for your patio pavers.
Now that you have your edge restraints in place, it’s time to move on to laying your pavers. With a solid foundation and secure edging, this step should be relatively straightforward. However, it’s important not to rush through this process as any mistakes made now could impact the longevity of your patio in the long run. So take your time and enjoy creating a beautiful space that you’ll love spending time in for years to come.
Laying Your Pavers
After adding edge restraints, it’s time to move on to laying your patio pavers. But before we dive into the process, let’s talk about the types of pavers you can choose from. There are several options available such as brick, concrete, and natural stone. Each type has its unique characteristics that may suit different design choices and budgets.
Design options are endless when it comes to laying patio pavers. You can create different patterns like herringbone or basket weave using different colors and sizes of pavers. Some designs even incorporate multiple shapes and textures to add interest and depth to your outdoor space. Keep in mind that the pattern you choose should complement the style of your home and landscape.
Once you have decided on the type of paver and design for your project, it’s time to start laying them down. But what if you need to cut some pavers to fit in specific spaces? Don’t worry; we’ll cover cutting pavers to size in our next section. For now, let’s focus on getting those full-size pavers laid out in a beautiful pattern that will enhance your outdoor living area.
Cutting Pavers To Size
Cutting pavers may be necessary to achieve a perfect fit for your patio design. It is an essential step in ensuring that your patio looks aesthetically pleasing and functions well. Using a saw to cut pavers requires precision and skill, but with the right tools and techniques, anyone can do it.
Choosing the right blade for cutting pavers is crucial. A diamond blade with a continuous rim is ideal for cutting through hard materials like concrete or stone. This type of blade produces smooth cuts without chipping or breaking the paver. It is also important to consider the size of the blade; a bigger diameter allows for deeper cuts, creating more significant pieces of paver.
To ensure accuracy when cutting pavers, it is recommended to use a guide rail or straight edge as a reference point. This helps maintain consistency in the size of each piece cut. Always wear safety goggles and gloves when using a saw to prevent injury from flying debris or accidental contact with the blade.
Next, we will move on to filling the joints between each paver. This step will provide stability to your patio surface while also preventing weed growth and water damage.
Filling The Joints
Once the pavers have been laid, it’s time to fill in the joints. There are two main options for filling: polymeric sand and wet joint filling. Polymeric sand is a mixture of sand and polymer that hardens when exposed to water. Wet joint filling involves using a concrete-like mixture to fill in the gaps between the pavers.
Polymeric sand is a popular option due to its ease of use and durability. It can be easily swept into the joints between pavers and then compacted with a vibrating plate compactor. Once water is added, it hardens and creates a strong bond between the pavers. However, it’s important to note that polymeric sand should not be used in areas with heavy rainfall or standing water as it can wash away.
Wet joint filling involves mixing together cement, sand, and water before spreading it over the entire patio surface. The mixture is then pushed into the joints between each paver using a trowel or brush. This method creates a solid surface that prevents weeds from growing through the cracks but may require more maintenance over time as cracking and shifting can occur. Ultimately, choosing between these two methods comes down to personal preference and climate conditions in your area.
Transitioning into sealing your patio, once you’ve filled in your patio joints it’s important to consider adding an extra layer of protection by sealing your patio surface. This will help prevent damage from weather conditions such as rain or extreme heat while also enhancing its appearance by adding shine or color depth depending on what type of sealant you choose.
Sealing Your Patio
- Preparing the patio area for sealing involves first removing all existing debris, vegetation and existing sealant.
- Applying the sealant requires using a roller or brush to ensure even coverage of the sealant.
- The sealant should be applied in several thin layers, allowing each layer to dry before applying the next.
- Once the sealant has been applied, it should be allowed to cure before any traffic or furniture is placed on the patio.
- The curing time of the sealant will depend on the manufacturer’s instructions and the local climate conditions.
- After the curing process is complete, the sealed patio should be washed with water to remove any debris that may have accumulated during the curing process.
Preparing The Patio
To prepare your patio for sealing, you must start by measuring the area. Measuring requirements are important to ensure that you have enough pavers to cover your patio. This step will also help you determine how much sand and gravel you need for the base of your patio. It is essential to measure twice and cut once, as they say, to avoid any mistakes in estimation.
Another critical consideration in preparing your patio for sealing is drainage. Water pooling on your patio can cause damage and create a safety hazard. Therefore, you must analyze the natural slope of your yard and make sure that water flows away from the house. You may need to install a drainage system or add more gravel beneath the pavers to improve water flow.
Lastly, before laying down any pavers, it is crucial to clear the area of debris and level out the ground. Removing any grass or plants within the boundaries of your patio will prevent unwanted growth from sprouting through the cracks between pavers. A leveled surface will also make installation easier and ensure a stable foundation for the pavers. With these preparations complete, you are now ready to begin laying down your pavers and sealing your beautiful new patio!
Applying Sealant
After preparing your patio for sealing, the next step is to apply sealant. Applying sealant is necessary to protect your patio from damage caused by weather and outdoor elements. Sealant fills the pores of the pavers, making them more resistant to water, stains, and UV rays. Regular application of sealant will prolong the life of your patio and keep it looking great for years to come.
There are two types of sealant that you can use: film-forming and penetrating. Film-forming sealants create a protective layer on top of the pavers, while penetrating sealants penetrate deep into the pavers to provide protection from within. Film-forming sealants are ideal for areas with heavy traffic or exposure to harsh weather conditions. Meanwhile, penetrating sealants are better suited for areas where maintaining a natural appearance is important. Consider which type best suits your needs before purchasing.
Applying sealant is easy but requires careful preparation beforehand. Start by cleaning your patio thoroughly with soap and water, ensuring that all dirt and debris are removed. Allow it to dry completely before applying the sealant evenly with a roller or sprayer. Two coats may be necessary depending on the porosity of your pavers. Always follow manufacturer instructions when applying any product to ensure proper adherence and maximum benefits from sealing your patio.
Curing The Sealed Patio
After applying sealant to your patio, the next step is to cure it properly. Curing is an essential process that allows the sealant to fully dry and harden, ensuring maximum protection against outdoor elements. It is important to note that curing time varies depending on the type of sealant used and the weather conditions in your area.
The benefits of curing your sealed patio cannot be overstated. Curing ensures that the sealant fully bonds with the pavers, creating a strong and durable protective layer. This layer helps prevent damage caused by water, stains, UV rays, and other outdoor elements. Additionally, proper curing prolongs the life of your patio and keeps it looking great for years to come.
Timing considerations are crucial when it comes to curing your sealed patio. Generally, you should wait at least 24 hours after applying the final coat of sealant before allowing foot traffic on your patio. For heavy traffic areas or areas exposed to harsh weather conditions, it may be best to wait up to 48 hours before allowing any use. Always check manufacturer instructions for specific curing times and follow them closely for optimal results.
Maintaining Your Patio
Now that your patio is complete, it’s time to think about how you will maintain it. Proper upkeep is essential for preserving the longevity and aesthetic appeal of your pavers. Here are some tips to help you keep your patio in tip-top condition.
Firstly, regularly clean your patio to prevent dirt and debris from building up. It’s crucial to remove any stains or spills as soon as possible to prevent them from seeping into the pavers. You can use a pressure washer or a simple garden hose with a nozzle attachment for cleaning. Additionally, consider using a sealant on your pavers every few years to protect them from weathering.
Secondly, take care of your patio furniture by protecting it from harsh weather conditions. Invest in high-quality covers that are designed to withstand rain, wind, and sun exposure. This way, you can ensure that your furniture stays in excellent condition without needing regular repairs or replacements.
Lastly, consider adding outdoor lighting fixtures strategically placed around your patio area. Not only do they provide an ambiance for evening gatherings but also can make walking around at night safer.
Incorporating these maintenance tips will not only prolong the life of your patio but also enhance its overall look and feel. Next, we’ll discuss some troubleshooting common problems that may arise with paver patios.
Troubleshooting Common Problems
Common mistakes while laying patio pavers can be frustrating obstacles for even the most experienced DIYer. Among these common problems are uneven paver placement, improper drainage, and a lack of proper adhesive. Fortunately, there are simple prevention strategies for each of these issues. For example, to prevent uneven paver placement, make sure to measure and mark your layout before placing any pavers. Additionally, using a level during installation can help ensure that each paver is placed at the correct height.
If you encounter any common problems during the installation process, don’t worry – there are troubleshooting tips that can help you solve them. For instance, if you notice that water is pooling on your patio after rainfall, this may be a sign of improper drainage. To address this issue, consider adding gravel underneath your patio or installing a drain pipe below ground level. If pavers have become loose or shifted over time, use a rubber mallet to gently tap them back into place.
In summary, by following prevention strategies and problem solving techniques when laying patio pavers, you can avoid many common mistakes and ensure that your new patio space stays beautiful for years to come. In the next section we will discuss ways to enjoy your new patio space with friends and family.
Enjoying Your New Patio Space
Once you’ve successfully laid your patio pavers, it’s time to start enjoying the new outdoor space you’ve created. As the saying goes, “The proof of the pudding is in the eating.” Adding outdoor furniture is a great way to make your patio more functional and comfortable. Consider your space when choosing furniture pieces – smaller patios may benefit from a bistro set, while larger ones can accommodate a full dining table and seating area.
In addition to furniture, plants and lighting can add a touch of personality to your patio space. There are many ways to incorporate greenery into your design – hanging baskets or potted plants can add color and texture while also being easy to care for. Lighting options can range from simple string lights to more elaborate fixtures, depending on your style and needs. Be sure to choose lighting that enhances the ambiance of your space and provides enough illumination for evening use.
Overall, decorating your new patio space should be both fun and functional. Don’t be afraid to experiment with different furniture arrangements or plant combinations until you find what works best for you. With careful planning and thoughtful design choices, you can create an outdoor oasis that’s perfect for relaxing or entertaining guests.
Conclusion
In conclusion, creating a patio space with pavers can be a rewarding project for any homeowner. It not only adds value to your property but also provides an outdoor oasis for relaxation and entertainment. As a landscaping and patio paving expert, I urge you to take the time to assess your space, choose the right materials, and properly prepare your site before laying your pavers.
Once your patio is complete, don’t forget to maintain it by regularly cleaning and sealing it. Troubleshoot common problems such as uneven settling or weed growth to ensure that your patio remains in top condition for years to come. Remember, a well-designed patio can be the focal point of any backyard and create lasting memories with friends and family. Invest in creating a beautiful outdoor living space that will bring joy and relaxation for years to come.
Image Credits
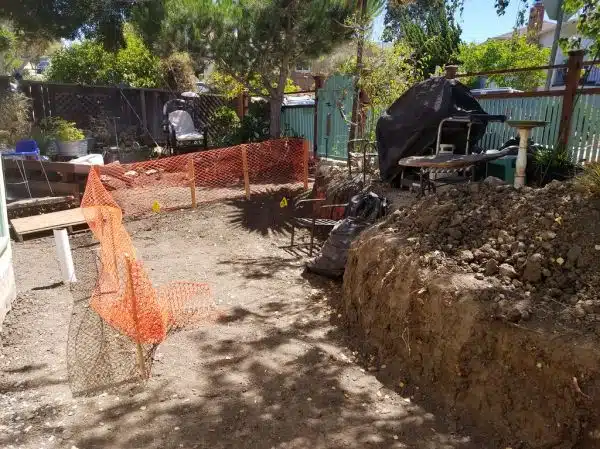
- “Almost ready to lay base rock for patio pavers” by LISgirl (featured)






![Calculating How Much Stone Dust You Need 11 [Blog Post]Stone Dust © Oxfam Australia](https://green-life.blog/wp-content/uploads/2023/05/GdZVzgTqPhjq-150x150.jpg.webp)

