Insulating a garage floor can be a cost-effective and efficient way to maintain comfortable temperatures in your home and save on energy bills. Plywood is an excellent material for insulation as it provides an effective barrier against cold, moisture, and noise. In this article, we will explore the step-by-step process of how to insulate a garage floor with plywood, including materials needed, preparation steps, and installation techniques.
One of the benefits of insulating your garage floor with plywood is that it helps keep the area warm during cold weather. This means you can use your garage space more comfortably for activities such as storage or DIY projects without having to worry about being exposed to inclement weather conditions. Additionally, insulating your garage floor with plywood also helps reduce noise from foot traffic and vehicles passing by outside. By learning how to insulate a garage floor with plywood, you can create a more functional space that serves both you and others in your household.
Benefits Of Insulating Your Garage Floor
Insulating your garage floor provides a myriad of benefits, not the least of which is energy savings. When you insulate your garage floor, you prevent heat from escaping through the ground. This means that during colder months, the heat produced by your home’s heating system will stay inside longer and require less energy to maintain a comfortable indoor temperature. As a result, you’ll be able to save money on heating costs.
In addition to energy savings, insulating your garage floor can improve comfort levels in your home. Garages are often unheated spaces that let cold air seep into homes through gaps in walls and floors. Insulating your garage floor can help reduce the amount of cold air coming in from underneath and make your home more comfortable overall.
In summary, there are several benefits to insulating your garage floor, including energy savings and improved comfort levels in your home. By taking this simple step, you can save money on heating costs while creating a more comfortable living environment for yourself and your family. Now that we’ve discussed why it’s important to insulate your garage floor, let’s move on to how you can prepare for this project.
Preparing Your Garage Floor For Insulation
Before you start insulating your garage floor with plywood, it’s important to prepare the surface properly. The first step is to clean the floor thoroughly. Use a broom or vacuum to remove any dirt, dust, or debris from the surface. If there are any oil stains or other stubborn marks, use a degreaser and scrub them off with a stiff brush.
Once the floor is clean and dry, you can begin installing the insulation. There are two main options when it comes to garage floor insulation: DIY or professional installation. Doing it yourself can save you money on labor costs, but it does require some skill and knowledge of construction techniques. Hiring a professional may be more expensive upfront, but they will have the expertise and tools needed to do the job right.
Garage floor insulation costs can vary depending on several factors, including the size of your garage and the type of insulation you choose. While DIY installation may seem like a cheaper option at first glance, it’s important to consider all of the costs involved, such as materials and tools needed for installation. Ultimately, the decision whether to go for DIY or hire a professional will depend on your budget and level of expertise in home improvement projects.
As you move onto measuring and cutting plywood for your garage floor insulation project, it’s important to keep safety in mind. Make sure you wear appropriate protective gear such as gloves and eye goggles when handling sharp tools like saws. With proper preparation and attention to detail in each step of the process, insulating your garage floor can be a satisfying home improvement project that provides lasting benefits for years to come.
Measuring And Cutting Plywood
Before installing plywood on your garage floor, it is important to use precise measuring techniques to ensure that the plywood fits snugly and accurately. To begin, measure the length and width of your garage floor using a tape measure. Be sure to take into account any irregularities or obstructions that may affect the measurements. Once you have precise measurements, add an extra inch to each side to allow for any necessary adjustments during cutting.
Cutting plywood can be done using various cutting tools such as a circular saw or table saw. When choosing a cutting tool, consider the thickness of the plywood as well as its hardness. A circular saw with a carbide tipped blade is ideal for thinner sheets of plywood while thicker sheets require a table saw. Always wear proper safety gear when operating power tools such as eye protection and gloves.
Once you have measured and cut the plywood to fit your garage floor, it is time to lay it down properly. In the next section, we will discuss how to choose the right type of plywood based on your specific needs and preferences in order to achieve optimal insulation results for your garage floor.
Choosing The Right Type Of Plywood
- Plywood is a popular choice when it comes to insulating a garage floor as it is both cost-effective and durable.
- The most important factor to consider when choosing plywood for insulation is its durability, as it must be able to withstand the weight of heavy objects and other outdoor elements.
- The price of plywood varies depending on the type and thickness, so it is important to compare prices of different brands and types before making a purchase.
- Thickness is another important factor to consider when selecting plywood for insulation, as the thicker the plywood is, the more effective the insulation will be.
- Thinner plywood is cheaper, but it may not provide the same level of insulation as thicker plywood.
- Ultimately, it is important to choose a plywood that is durable, cost-effective, and the appropriate thickness in order to effectively insulate a garage floor.
Durability
When it comes to insulating a garage floor with plywood, choosing the right type of plywood is crucial. One important factor to consider is durability. No one wants to go through the trouble of installing insulation only for it to break down after a short time.
Plywood made from softwoods like pine may be less expensive, but they are not as durable as hardwoods like oak or maple. Softwoods are prone to scratches and dents which can affect the lifespan of your insulation. In contrast, hardwoods are more resistant to wear and tear making them a better option for long-term maintenance.
Another consideration is moisture resistance. Garages can be damp environments due to humidity and temperature changes. Plywood that has been treated with water-resistant coatings such as marine-grade or pressure-treated plywood can help prevent moisture damage and increase the lifespan of your garage floor insulation.
In conclusion, when selecting plywood for your garage floor insulation project, it’s important to prioritize durability and moisture-resistance over cost savings. This will ensure that your insulation will withstand the test of time and require less maintenance in the long run.
Price
Now that we have discussed the importance of durability and moisture-resistance when selecting plywood for garage floor insulation, let’s move on to another crucial factor: price. While it’s natural to want to choose a plywood option that is budget-friendly, it’s important not to sacrifice quality for cost savings.
When it comes to plywood insulation cost, there are several options available in the market. One popular choice is CDX plywood, which is made from softwoods like pine and fir. CDX plywood is often used in construction projects due to its affordability. However, while it may be a budget-friendly option, it may not be the most durable choice for garage floor insulation.
Another budget-friendly option is OSB (oriented strand board) plywood. OSB plywood is made from wood chips and resin pressed together into sheets. This type of plywood is often used as a subfloor material because of its strength and affordability. While OSB may not be as moisture-resistant as marine-grade or pressure-treated plywood options, it can still provide adequate protection against dampness in a garage environment.
In summary, while cost should be a consideration when choosing plywood for garage floor insulation, it shouldn’t be the only factor influencing your decision. Plywood options such as CDX and OSB provide budget-friendly alternatives but may not offer the same durability or moisture resistance as more expensive options such as hardwood or marine-grade plywood. Ultimately, choosing the right type of plywood involves balancing cost with quality and considering the specific needs of your project.
Thickness
Now that we have discussed the importance of durability, moisture-resistance, and cost when selecting plywood for garage floor insulation, let’s move on to another crucial factor: thickness. The thickness of plywood you choose will depend on the specific needs of your project. Plywood thickness is measured in fractions of an inch, with common sizes ranging from 1/4 inch to 3/4 inch.
When it comes to choosing the optimal thickness for your garage floor insulation, it’s important to consider the weight-bearing capacity of your garage floor. A thicker plywood option may be necessary if you plan on storing heavy equipment or vehicles in your garage. However, a thicker plywood option may also be more expensive and harder to work with.
Another factor to consider when choosing the thickness of your plywood is insulation performance. Thicker plywood options may offer better insulation properties than thinner options. Ultimately, the optimal thickness for your project will depend on a combination of factors such as weight-bearing capacity, insulation needs, and budget constraints.
In summary, plywood thickness is an important factor to consider when choosing the right type of plywood for garage floor insulation. While a thicker option may provide better weight-bearing capacity and insulation properties, it may also come at a higher cost and be more difficult to work with. Choosing the optimal thickness involves balancing these factors with the specific needs of your project.
Acquiring Necessary Tools And Materials
After identifying the right type of plywood for insulating your garage floor, the next step is to acquire necessary tools and materials. It’s important to have all the required items before starting the project to avoid delays and interruptions. The materials needed for this project can be purchased both online and offline.
Where to buy: Plywood sheets can be found in most home improvement stores such as Home Depot or Lowe’s. You can also purchase them online from Amazon or other retailers. In addition to plywood, you will need insulation foam, a hammer, nails, a saw, measuring tape, gloves, and safety glasses among other tools.
Cost of tools and materials: The cost of acquiring these tools and materials varies depending on where you purchase them from. However, on average, you should expect to spend between $300-$400 on everything you need. Keep in mind that investing in high-quality tools will make your job easier and ensure that the final product is sturdy and long-lasting.
In order to achieve the best results when insulating your garage floor with plywood, it’s essential that you start with a clean slate. This means removing any debris or dust particles that may have accumulated over time. In the subsequent section about ‘cleaning your garage floor’, we’ll discuss some effective methods for preparing your garage floor before installing insulation foam and plywood sheets.
Cleaning Your Garage Floor
Imagine you have just finished installing plywood insulation on your garage floor. You have put in a lot of effort and time into it, but before you celebrate the completion of your project, there is one more crucial step that requires attention: garage floor cleaning. It is essential to clean your garage floor thoroughly before laying down any moisture barrier or protection.
Garage floor cleaning is not a simple task, especially if the area has accumulated dirt and grime over time. Before starting the cleaning process, remove all objects from the floor and sweep away any debris. Once you have cleared the space, use a pressure washer or hose to spray water all over the surface. If there are stubborn stains, use a degreaser and scrub them with a stiff-bristled brush.
Floor protection is another critical aspect that needs attention after cleaning your garage floor. A well-protected garage floor can withstand heavy traffic and harsh weather conditions. The most popular types of protection are sealers and epoxy coatings, which act as barriers against moisture and chemicals. Applying these protections will ensure that your garage floor remains durable for years to come.
Now that you have cleaned your garage floor thoroughly and applied adequate protection, it’s time to move onto laying down a moisture barrier to prevent any possible damage from occurring beneath the insulation layer.
Laying Down A Moisture Barrier
Before laying down the plywood, it is important to install a moisture barrier. This is crucial in preventing moisture from seeping through the concrete slab and into the plywood, which can lead to rot and mold growth. A vapor barrier or plastic sheeting can be used as a moisture barrier.
To install the moisture barrier, start by cleaning and drying the garage floor thoroughly. Then, roll out the vapor barrier or plastic sheeting over the entire floor, making sure to overlap any seams by at least 6 inches. Tape the seams together using waterproof tape to ensure a tight seal. Trim any excess material from the edges of the floor with a utility knife.
Once the moisture barrier is installed, it’s time to level out any uneven spots on the garage floor. This will help prevent any gaps between the plywood sheets and ensure a smooth surface for installation. There are various floor leveling techniques that can be used depending on how uneven your garage floor is. Self-leveling compounds or cementitious leveling products can be applied to low spots on the floor, while high spots can be ground down using a concrete grinder. With these steps completed, you are now ready to begin installing the first row of plywood onto your newly prepared garage floor without any worries about moisture damage or uneven surfaces interfering with your project.
Installing The First Row Of Plywood
As we lay down the moisture barrier, we are reminded of the importance of taking steps to protect our work from potential damage. Just as a seed needs fertile soil to grow, our garage floor needs proper insulation to remain in good condition. We must think ahead and anticipate any issues that may arise during installation.
Now that we have established a solid base for our insulation project, it is time to move on to installing the first row of plywood. Before doing so, it is important to consider spacing requirements and cutting angles. Proper spacing allows for expansion and contraction of the wood due to temperature changes, while precise cuts ensure a snug fit between planks. This attention to detail will result in a more stable and long-lasting floor.
To secure the plywood in place, we will use a combination of screws and adhesive. The adhesive provides added stability and prevents shifting over time, while screws ensure a secure hold. As we work, it is essential to maintain accuracy and consistency throughout the process. By taking care with each step, we can create an insulated garage floor that will withstand years of use and keep us comfortable all year long.
Securing The Plywood In Place
When using plywood to insulate a garage floor, adhesive can be used to secure the plywood to the floor for a strong bond. Additionally, hammering nails into the plywood and the floor can provide extra security. Attaching the plywood with screws is also a viable option, as well as securing it with staples. All of these methods can be used to ensure that the plywood is properly secured in place.
Using Adhesive
To secure the plywood in place, using adhesive is an effective method. Applying adhesive is easy and can prevent any gaps between the insulation and the plywood. To begin, apply a generous amount of adhesive on the garage floor before laying down the plywood. Make sure to spread it evenly to ensure proper adhesion. Additionally, be mindful of the drying time of the adhesive as this plays an important role in securing the plywood.
When applying adhesive, it’s crucial to follow the manufacturer’s instructions carefully. This includes understanding how much adhesive to use and how long it takes for it to dry completely. Typically, most adhesives require about 24 hours to dry fully. During this time, avoid walking or placing any weight on top of the plywood. Once dried, you can confidently proceed with insulating your garage floor.
Using adhesive is a straightforward approach that ensures your insulation stays secured in place for years to come. By allowing ample time for drying, you can guarantee that your insulation will not shift or move over time. Properly using adhesive can give you peace of mind knowing that your garage floor will stay insulated for maximum comfort and energy efficiency.
Hammer Nails
When it comes to securing plywood in place for garage floor insulation, there are various methods available. One commonly used method is by using adhesive, which we have previously discussed. However, another effective method is by using nails. Hammering nails into the plywood and subfloor can be a simple and fast way to secure the plywood in place.
Firstly, it’s important to choose the right type of nail for your project. There are different types of nails available on the market such as common nails, finishing nails, and roofing nails. Common nails are ideal for general construction projects while finishing nails are smaller and perfect for delicate work such as trim work or molding. On the other hand, roofing nails have a large head that provides extra holding power making them ideal for outdoor projects.
Once you’ve chosen the right nail type, it’s essential to use proper hammering techniques. It’s recommended to position yourself in front of the nail and hold it between your thumb and index finger while hammering with your other hand. Start by tapping gently until you create a small dent before driving the nail completely into place. Make sure not to hammer too hard as this may split the wood or damage your subfloor. By following these steps, you can ensure that your plywood stays securely in place for optimal insulation.
In summary, using nails is an effective method of securing plywood in place for garage floor insulation. By selecting the right type of nail and using proper hammering techniques, you can prevent any movement or gaps between the insulation and subfloor. This ensures that your garage floor remains well insulated providing maximum comfort and energy efficiency for years to come.
Insulating Gaps And Cracks
Gaps and cracks in the garage floor can allow cold air to seep through, which can reduce the effectiveness of your insulation efforts. To prevent this from happening, you should fill all gaps and cracks before installing your plywood insulation. Begin by using a vacuum or broom to remove any debris or loose material that may be present in the gaps or cracks.
Next, use a putty knife or caulking gun to fill the gaps and cracks with an appropriate sealant. Silicone caulk is a great option for small gaps and cracks, while expanding foam is ideal for larger gaps. Make sure that you apply enough sealant to completely fill the gap or crack, and then use a putty knife to smooth out the surface of the sealant.
After filling all of the gaps and cracks in your garage floor, allow the sealant to dry completely before proceeding with your insulation installation. This will ensure that your subfloor is completely sealed against any cold air infiltration. With these steps completed, you can now move on to installing the remaining rows of plywood insulation in your garage floor.
Installing The Remaining Rows Of Plywood
Having insulated the gaps and cracks in your garage floor, it is now time to install the remaining rows of plywood. According to a recent study by the National Association of Home Builders, insulating your garage can increase your home’s energy efficiency by up to 20%. By using plywood as a subfloor, you can further improve this efficiency while also creating a more comfortable space for your family.
Before laying down the remaining sheets of plywood, it is important to carefully plan out your layout. Start by measuring the width and length of your garage floor and then divide these numbers by the length and width of each sheet respectively. This will give you a rough idea of how many sheets you need and how they should be arranged. Keep in mind that you will likely need to make some cuts around corners or obstacles.
Once you have determined your plywood layout, it is time to start installing the remaining sheets. Use screws or nails to secure each sheet to the subfloor below, ensuring that they are flush with one another. As you work, periodically check that each sheet is level and adjust as necessary. With all of the sheets securely fastened in place, you can move on to finishing techniques such as sanding and trimming any excess wood from around the edges.
- Use a jigsaw or circular saw for precise cuts around obstacles.
- Consider adding a layer of insulation between the subfloor and plywood for even greater energy efficiency.
- Apply sealant along all seams between sheets to prevent drafts from entering your home.
With proper insulation and a sturdy subfloor in place, your garage is now ready for whatever projects lie ahead. In our next section on finishing touches and trimming, we will explore ways to add some personality and functionality to this new space without sacrificing its practicality.
Finishing Touches And Trimming
Now that the plywood is installed and secured, it’s time to focus on the finishing touches and trimming. Trimming techniques can vary depending on personal preference, but one popular option is to use baseboards or molding around the edges of the floor. This not only provides a polished look, but it also helps to cover any gaps or imperfections in the installation process.
Another decorative option for insulating your garage floor is to paint or stain the plywood. This can add an extra layer of protection against moisture and wear, while also allowing you to customize the look of your garage. Make sure to choose a paint or stain specifically designed for floors, as they are formulated to withstand heavy foot traffic and other forms of wear and tear.
Once you have finished with the trimming and decorative options, it’s important to check for proper insulation before using your newly insulated garage floor. This can be done by feeling for drafts or cold spots around the edges of the floor, as well as monitoring the temperature inside your garage during different weather conditions. Additionally, consider hiring a professional inspector who can provide a thorough evaluation of your insulation and make any necessary adjustments for optimal performance.
Checking For Proper Insulation
As homeowners, we all want spaces that are warm and inviting. Insulating your garage floor is one way to achieve this. But before you start enjoying the benefits of a cozy garage, it’s important to ensure that your insulation job is effective.
Checking insulation effectiveness is critical because poorly insulated floors allow heat to escape, making it difficult to maintain a comfortable temperature in your garage. To check for proper insulation, look for any gaps or cracks in the insulation material. You can also use an infrared camera to identify insulation gaps that are not visible to the naked eye.
Once you have identified any gaps or cracks in your insulation, it’s time to address them. One way to do this is by using expanding foam to fill in any gaps or cracks. Another option is to add additional layers of insulation material on top of the existing layer. This will increase the R-value of your insulation and improve its effectiveness.
To ensure that your garage remains warm and inviting, maintaining your insulated garage floor is essential. In the next section, we will discuss some simple steps you can take to maintain your insulated garage floor and prolong its lifespan.
Maintaining Your Insulated Garage Floor
After properly insulating your garage floor with plywood, it is important to maintain the insulation to ensure its longevity and effectiveness. One key aspect of maintaining insulated floors is preventing moisture buildup. Moisture can seep through the smallest of cracks and lead to mold growth or even structural damage over time.
To prevent moisture buildup, it is recommended to regularly check for any leaks or cracks in the floor that may allow moisture to enter. Additionally, using a dehumidifier in the garage can help reduce excess moisture in the air. It is also important to avoid storing wet items such as snow-covered vehicles or damp sports equipment on the insulated floor.
Another way to maintain insulated floors is by keeping them clean and free of debris. Sweeping or vacuuming regularly can prevent dust and dirt from accumulating, which can degrade the insulation over time. Avoid using harsh chemicals or abrasive cleaning tools that could damage the plywood insulation.
By taking these steps to maintain your insulated garage floor, you can ensure that it remains effective for years to come. In the next section, we will discuss how you can enjoy your newly insulated garage space and make the most out of this valuable addition to your home.
Enjoying Your Newly Insulated Garage Space
Now that your garage is properly insulated, you can start to enjoy your newly transformed space. One of the first things you may want to consider is garage organization. With a well-insulated garage, you can now use it for storage without worrying about temperature fluctuations damaging your items. Invest in some shelving units and storage containers to keep everything organized and easily accessible.
In addition to organization, there are plenty of DIY garage projects that you can take on. Installing new flooring, painting the walls, or adding additional lighting can all make a big difference in the overall look and feel of your garage. With a little creativity and elbow grease, you’ll have a functional and attractive space that you’ll be proud to show off.
Overall, insulating your garage floor with plywood has numerous benefits beyond just keeping the area warmer in colder months. By organizing your space and taking on DIY projects, you can create a practical and inviting environment that will add value to your home. So get started today and see what kind of transformation you can make!
Conclusion
Insulating your garage floor with plywood is a great way to create a more comfortable and energy-efficient space. By following the simple steps outlined in this article, you can easily insulate your garage floor and start enjoying the benefits of a warmer, quieter, and more functional space.
Before starting the insulation process, it’s important to prepare your garage floor by removing any debris or dirt. Measuring and cutting the plywood correctly is also crucial to ensuring proper insulation. Choosing the right type of plywood, as well as acquiring the necessary tools and materials, are essential steps in creating an effective insulation system.
Finishing touches like trimming and checking for proper insulation will ensure that your insulated garage floor is both aesthetically pleasing and functional. Regular maintenance will help keep your newly insulated garage space in top condition. With these simple steps, you can create a more comfortable and efficient garage space that will be useful for years to come. As the saying goes, “A stitch in time saves nine,” so don’t hesitate to start insulating your garage floor today!
Image Credits
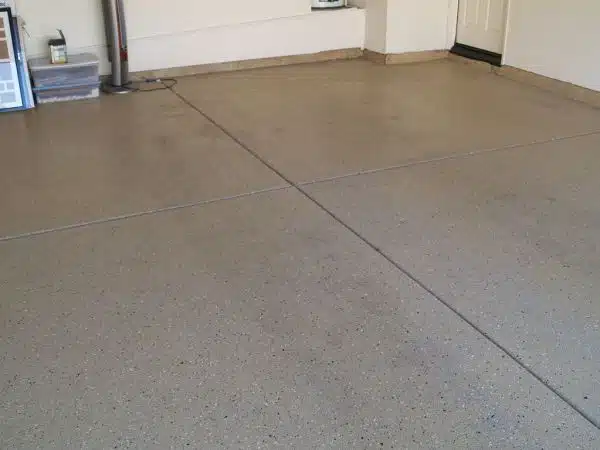
- “Speckled garage floor at the new house 01.11.2008” by bossco (featured)

