Composting is a powerful way to turn kitchen scraps and garden waste into something useful – it’s like giving nature a jump start. But if you want to make the most of your composting efforts, you need the right bin. That’s why we’re here to show you how to build the ultimate outdoor compost bin.
This project is perfect for gardeners looking for a cheap, easy way to create natural fertilizer for their plants. With just a few tools and materials, anyone can build this simple structure that will last for years and provide nutrient-rich soil for their gardens. Plus, with our step-by-step instructions, you’ll be able to construct this bin faster than your plants can grow!
So grab your shovels and gloves and get ready to transform your garden into an oasis of fertility with the ultimate outdoor compost bin. Like a caterpillar in its cocoon, watch as your waste transforms into something beautiful!
Gather Supplies Needed
The tantalizing aroma of composting wafts through the air, beckoning you to embark on a journey of creating the ultimate outdoor compost bin. The supplies needed for this endeavor are scattered in front of you, ready to be transformed into something special.
Imagining the potential of your compost bin is exciting! To start building it, you’ll need a few basic tools and materials: 4 pallets, screws, galvanized wire mesh, and a drill. You can also opt for more durable materials such as cedar or redwood planks. Gather all your supplies before you get started.
Once everything is ready, it’s time to assemble your bin. All you need to do is put the pieces together and secure them with screws. It’s important to make sure that each piece is tightly secured so that your compost bin will last for many years to come. With a little bit of effort and creativity, your outdoor compost bin will be ready soon enough!
Choose Bin Location
Choosing an appropriate location for your compost bin is an important step in the process of creating the ultimate outdoor compost. When selecting a spot, you should look for a level surface that’s far enough away from the house or other structures to avoid any potential odors from entering your home. Additionally, it should be in a place that gets plenty of sunlight and has good drainage.
If possible, try to find an area with both direct and indirect sunlight; this will help speed up the decomposition process and make sure your compost will be ready quickly. You’ll also want to check with your local government before you start building as some areas have regulations regarding where compost bins can be located.
When deciding on a location, consider how accessible it will be for adding materials and removing finished compost when needed. Making sure you select an area that meets all requirements will ensure that the process runs smoothly and efficiently.
Cut Wood Planks
How do you cut the wood planks to build the ultimate outdoor compost bin? To get started on this step, you’ll need a few supplies. You’ll need a saw, screws, and wood planks.
First, measure and mark your wood planks according to the size of your bin. This will help make sure everything lines up correctly when it comes time to assemble everything together. Next, use your saw to cut the wood planks according to the measurements you took. Be sure to take all necessary safety precautions while working with power tools. Once your pieces are cut, it’s time to move on to assembling them together!
You’ll want to make sure that each piece is properly aligned and securely fastened with screws as you build the base of your bin. This will ensure that your compost bin is able to withstand extreme weather conditions without collapsing or breaking down over time. Pay attention to detail during this step as it’s important for longevity of your project. With each plank in place and securely fastened, you’re ready for the next step – assembling the base of the bin!
Assemble Base Of Bin
Spiraling deeper and deeper into the compost bin building process, it’s time to assemble the base. To construct this ultimate outdoor compost bin, one needs to be ready to get their hands dirty – literally! With a few wood planks cut to size from before, we can now piece together the foundation of our diy project.
First things first: start by laying out four of the sides on the ground in an even square. Then, take two pieces of scrap lumber and place them across each corner so that they form a cross. This will act as a stringer – or support beam – and will provide stability for the entire bin. Once these are in place, you can begin nailing down each side together with galvanized nails to create a box shape with an open top.
At this step, it is important to take your time and make sure everything is lined up correctly before continuing on. After all, if you don’t have a sturdy base then your bin won’t last very long! So take your time and give yourself plenty of space while building this essential part of your compost bin; it will be well worth it in the end. As we finish assembling the base, we move onto attaching support legs – but that’s another story!
Attach Support Legs
Next, it’s time to attach the support legs. These will provide additional stability and strength for the bin. Start by cutting four 6-inch pieces of 2×4 lumber. You’ll also need four 3-inch pieces of wood, one for each corner of the bin. Place the pieces in an ‘L’ shape, with the short piece on top and the long piece on the bottom. Secure them together using wood screws or nails.
Attach each leg to a corner of the bin, making sure they are all at an equal height. You may need a helper to hold them in place while you secure them with screws or nails. Make sure that all screws or nails are flush with the surface of your boards so that nothing is sticking out and snagging clothing when children use the compost bin.
Then, add extra support between each leg by attaching a 2×4 in an ‘X’ formation across two legs. This will help support any weight placed on top of your compost bin and ensure it doesn’t topple over easily. With that done, you’re ready to move onto creating a top lid for your outdoor compost bin.
Create Top Lid
Did you know that over the past five years, the number of people who compost has increased by over 30%? This is due to the many benefits of composting, such as reducing waste and improving soil health. One way to get started with composting is by building an outdoor compost bin. Here’s how to create a top lid for your bin.
First, cut a piece of plywood that fits snugly over the top of your compost bin. Measure twice and cut once to ensure the lid fits properly. Once you’ve got your plywood cut, attach hinges along one side so the lid can open and close easily. Drill pilot holes in both the lid and bin before attaching each hinge with screws.
Next, add some handles or knobs on opposite sides of the lid so it can be opened from either side. Be sure to use hardware specifically designed for outdoor use so it won’t rust or corrode in wet conditions. Finally, apply a waterproof sealer all over your lid to protect it from moisture and decay. With your top lid installed, you’re now ready to move onto cutting and installing a front door for your compost bin!
Cut And Install Front Door
The seventh step in building the ultimate outdoor compost bin is to cut and install a front door. This will provide easy access to the compost and keep any animals out. It’s important to use a durable material that won’t rot or deteriorate over time, such as metal mesh or galvanized hardware cloth. To do this, measure and mark the area for the door on the side of the bin. Cut it along your marked lines using tin snips, then secure it into place with screws.
Once you have installed the door, you need to make sure that it is securely fastened so that it won’t come apart when opened and closed frequently. You can use hinges, bolts, or a latch for this purpose. Make sure that whatever type of hardware you choose is also rust-resistant so that it will last longer in an outdoor environment.
Finally, make sure that there is enough clearance between the edges of the door and the sides of the bin so that air can still flow through freely while still keeping out pests. With this last step completed, your compost bin will be ready to fill with organic matter!
Install Aeration Vents
As if in a scene from a time-traveling movie, I stood surrounded by tools and supplies. It was time to install the aeration vents – the finishing touches to build the ultimate outdoor compost bin.
The installation process wasn’t too difficult, although it required some attention to detail. First, I located the pre-drilled holes on each side of the bin’s walls. Then, I inserted the aeration vent pieces into each hole and secured them with screws. After that, I used a hammer and nails to attach chicken wire over each vent for extra security.
When all was said and done, my compost bin had all its necessary components installed – ready for use! All that remained was to attach hinges to the front door so I could access its contents with ease.
Attach Hinges To Front Door
Opening the door to a world of possibilities, the front door is a portal to a greener tomorrow. Much like doors in our homes, an outdoor compost bin needs to have hinges in order to function properly. Attaching hinges to the front door of your compost bin will give you easy access and make it easier for you to add ingredients and mix up the compost regularly.
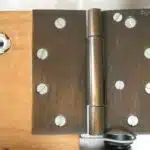
The process for attaching hinges is relatively simple – all you need are some metal screws, a drill and some basic tools. To begin, make sure that the hinge is aligned with the edges of the structure so that when opened it opens properly. Securely attach each side of the hinge using two screws at each point – this will ensure that it’s firmly in place and won’t come loose over time.
Once complete, test out your new setup by opening and closing the door several times. You should find that it moves smoothly without any issues or squeaks. With this step taken care of, you’ll be able to open and close your compost bin quickly and easily whenever necessary. As a final touch, next comes attaching handles to the front door, adding even more convenience!
Attach Handles To Front Door
The next step in building the ultimate outdoor compost bin is to attach handles to the front door. This will make it easier to open and close, which is great for convenient access when adding scraps or turning the compost pile. Handles come in a variety of shapes and sizes, so you can choose whichever fits your style best. Be sure that you securely attach the handles with screws to ensure that they stay in place over time.
When attaching handles, it’s also important to think about placement. If they are placed too low or too high, they may be difficult to reach, making them useless. Aim for installing them at a comfortable height that allows easy access without any straining or stretching.
Once the handles are attached, your compost bin is almost ready! All that’s left is to seal it with a weatherproof finish. This will protect against water damage and ensure that your bin stays structurally sound no matter what Mother Nature throws its way.
Seal Bin With Weatherproof Finish
A compost bin is a great way to reduce kitchen waste and create nutrient-rich soil for the garden. According to the EPA, over 34 million tons of food waste was generated in 2018 alone. To ensure your compost bin can withstand all weather conditions, sealing it with a weatherproof finish is essential.
Starting with sandpaper, lightly rough up the edges and surface of the wood. This will help the sealant adhere better to the material and provide an even coat. Make sure you use a brush or roller suitable for outdoor use for your sealant and apply multiple coats if needed. Ensure each coat is completely dry before applying more layers. Once you’re finished, you’ll have a durable outdoor compost bin that can last many years!
Using natural materials like fallen leaves and vegetable scraps to fill your new compost bin adds further environmental benefits by reducing plastic waste while enriching your soil with essential nutrients. Get started today and enjoy fresh produce grown from your own backyard!
Fill Compost Bin With Brown And Green Materials
Now that the compost bin is complete, it’s time to fill it with the necessary ingredients. Compost is made up of two components: brown and green materials. Brown materials are high in carbon and can include items such as dried leaves, straw, newspaper, cardboard or sawdust. Green materials are high in nitrogen and produce a good source of heat when breaking down. These items can include vegetable and fruit scraps, grass clippings, coffee grounds or tea bags.
It’s important to remember to layer your bin with both brown and green materials throughout – this ensures a balanced compost pile with an ideal ratio of carbon to nitrogen. Additionally, make sure you add some soil or compost starter to help kickstart the decomposition process.
Before getting started on your next composting step – monitoring temperature, moisture, and air flow – make sure your compost bin is full of all the essential ingredients needed for successful composting. With a well-balanced mixture of browns and greens in place, you’ll be ready for the next step in no time!
Monitor Temperature, Moisture, And Air Flow
According to the EPA, food scraps and yard waste make up 20 percent of what Americans throw away. This amounts to a staggering 54 million tons of material per year, meaning composting is an important activity for any outdoor enthusiast. Step 12 in building the ultimate outdoor compost bin is to monitor temperature, moisture, and air flow.
Temperature is key to effective composting, as too much heat will kill beneficial microorganisms while too little will prevent the compost from breaking down properly. A thermometer can be used to check the temperature at different points in the pile or bin. The ideal range for most materials is between 135-150 degrees Fahrenheit for optimal microbial activity.
Monitoring moisture levels is also important because bacteria need oxygen to break down organic matter. Soil should feel damp but not overly wet – if it feels slimy or like mud, add more dry materials such as leaves until it reaches an ideal consistency. Finally, air flow should remain consistent throughout the pile; if there are large clumps of material blocking airflow, use a garden fork to break them apart and fluff up the pile.
By maintaining these conditions in their outdoor compost bin and turning their compost pile regularly, gardeners can ensure faster decomposition and healthier soil overall.
Turn Compost Pile To Increase Decomposition
Turning the compost pile is essential to the process of breaking it down. This helps to increase decomposition by aerating the materials, which encourages useful bacteria and fungi to grow. It’s also important for mixing the ingredients, so that all parts get exposed to oxygen and moisture.
To turn a compost pile, use a pitchfork or shovel to move the compost from one side of the bin to another. Make sure not to compact it while doing this, as this will limit air exposure. Be sure that you also turn any wet spots into drier ones and vice versa – this helps with moisture levels in different parts of the pile.
Once you’ve turned your compost pile, monitor temperature, moisture and airflow levels in order to ensure its optimal decomposition. This ensures that your efforts are being put into good use; it also ensures that you can harvest your compost for garden use when it’s ready.
Harvest Compost For Garden Use
After the compost pile has been properly turned and broken down, it’s time to finally harvest the compost. Harvesting the compost is fairly easy and straightforward, as long as all of the steps have been done correctly. All that’s needed is a shovel or pitchfork and a bucket or container to put the finished product in. The compost should be light, fluffy and dark in color. It should also have an earthy smell when it’s ready to be harvested.
Once the compost has been taken out of the bin, it can then be used in gardens, flower beds and other areas of landscaping. Compost adds essential nutrients back into soil and helps plants keep their structure and health for many years to come. It also helps retain moisture in soil which can help conserve water and reduce runoff from heavy rains or irrigation systems.
Harvesting compost is just one of many steps involved in creating a successful outdoor compost bin system. Next up is maintaining the bin for future use so that more compost can be produced with minimal effort.
Frequently Asked Questions
What Is The Ideal Temperature For Composting?
Composting is a great way to reduce waste and create nutrient-rich soil for your garden or outdoor space. But in order to make sure your compost bin is as effective as possible, it’s important to understand the ideal temperature for composting.
The optimal temperature range for composting is between 75 and 120 degrees Fahrenheit. This is because this temperature range enables beneficial microorganisms to break down organic matter quickly and efficiently. Compost piles that are too hot or too cold will not be able to break down materials adequately, resulting in a slow process of decomposition.
If you’re looking to build an effective compost bin, it’s important to consider how you can best control the temperature of your pile. Adding insulation such as straw or hay can help maintain the ideal temperature range for your compost pile. Additionally, adding more material (such as leaves or grass clippings) will help regulate heat production and keep your pile at the appropriate temperature.
By understanding the ideal temperature for composting and taking steps to ensure it’s maintained, you’ll be well on your way to creating a successful outdoor compost bin.
What Is The Best Ratio Of Green To Brown Materials In A Compost Bin?
Have you ever wondered what the best ratio of green to brown materials is for a compost bin? This ratio is an essential part of creating a successful composting environment. Achieving the right balance can be tricky, but with the right guidance, it is possible to create a nutrient-rich blend that will help your plants thrive.
What does this ratio look like? Generally, your compost should be around two parts green materials to one part brown materials. Green materials are usually nitrogen-rich and include fresh grass clippings, vegetable scraps, and green leaves. Brown materials are carbon-rich and typically include straw, dried leaves, paper products, and cardboard. This combination of both types of material helps create an ideal environment for microorganisms responsible for breaking down the organic matter into valuable nutrients.
To make sure your compost is working correctly, it’s important to regularly turn it over or mix it up so it has enough oxygen. Additionally, keep an eye on how wet or dry it is; too much moisture will cause excess bacteria growth while too little will slow down the process. With these steps in mind and a balanced mix of greens and browns in your compost bin, you can easily create nutrient-filled soil that will benefit your garden!
How Often Should I Turn The Compost Pile?
Turning your compost pile is a vital step to creating nutrient-rich soil for your garden. But how often should you turn it? With the right mix of green and brown materials, you can create an outdoor compost bin that will efficiently break down organic matter into usable fertilizer.
To keep your compost bin running smoothly, the frequency of turning it is key. Compost piles should be turned at least once a month, but more frequently if possible. This aerates the pile and encourages microbial activity, which helps speed up the decomposition process. The amount of material in the bin also affects the frequency of turning; larger piles may need to be turned multiple times a month or even twice a week for optimal results.
While turning the compost pile is essential to its success, getting the ratio of green to brown materials correct is just as important. Aim for an equal mix of both types of material; too much green material can cause unpleasant odors while too much brown material can slow down decomposition. By following these guidelines, you’ll have no trouble creating the ultimate outdoor compost bin!
How Do I Know When The Compost Is Ready To Be Used?
Composting is a great way to reduce your environmental footprint and create nutrient-rich soil for your garden. But understanding how to build the ultimate outdoor compost bin, as well as when the compost is ready to be used, can seem like a daunting task. Here’s what you need to know about recognizing when your compost is ready for use.
The first indicator that your compost has finished its process is its texture. Finished compost should feel crumbly, with an earthy smell – not wet or slimy. If it still feels too wet or slimy, it likely needs more time in the bin. You should also check for temperature – if the temperature of the center of your pile reaches around 120-150 degrees Fahrenheit and stays there for several days, this indicates that the microorganism activity has peaked and that your compost is ready to be used.
Finally, you should check whether your materials have broken down enough by looking at them closely. Compost is done when all materials have been reduced into small particles and are unrecognizable. This means everything from food scraps to paper products has been broken down into fine particles that do not resemble their original form. If you notice some recognizable chunks in the mix, allow them more time in the bin before using it in your garden bed.
Once you have checked these indicators of readiness, you can confidently use your homemade outdoor compost bin for enriching soil in your garden!
What Are The Best Methods For Keeping Animals Out Of The Compost Bin?
It’s no secret that animals can be attracted to compost bins, so it’s important to know how to keep them out of yours. One idiom I’ve heard that really speaks to this situation is ‘Build a better mousetrap, and the world will beat a path to your door’. In other words, if you build an effective outdoor compost bin, animals may come knocking. To ensure your compost remains secure from critters and pests, here are some methods worth considering.
First off, you’ll want to make sure the bin is completely sealed. This means using sturdy materials like plywood or metal for the sides and lid of the bin. You’ll also want to select a location for your compost bin that is away from trees, fences or other items that animals could use as a bridge into the bin.
In addition, you’ll want to consider adding additional layers of protection around the compost bin itself. For example, try surrounding the outside of the box with chicken wire or mesh netting as an extra deterrent against animals looking for a meal in your compost pile. Also make sure there isn’t any food waste visible inside or outside of the bin – if you do spot any scraps lying around, be sure to dispose of them quickly!
By following these tips and making it difficult for animals to access your outdoor compost bin, you can rest assured knowing your hard-earned efforts won’t be wasted on furry visitors!
Conclusion
Composting is an invaluable way to create nutrient-rich soil for your garden. It is a process that requires patience and the knowledge of the ideal temperature, ratio of green to brown materials, and frequency of turning the compost pile. Once you understand these variables, you’ll be able to recognize when your compost is ready for use. Lastly, it’s important to consider how to keep animals out of the compost bin so that your hard work isn’t wasted.
To think of composting as an allegory, imagine yourself standing on a beach with a large bucket in hand. You fill it up with sand and rocks – this represents the green and brown materials needed for compost. You stir it up with a shovel – this signifies the need to turn the pile every now and then. As you continue stirring, eventually you’ll notice small bits of coral starting to form – this indicates that your compost is almost ready for use! Lastly, you build a fence around the bucket – this symbolizes setting up barriers like fences or netting around your outdoor compost bin so that animals can’t get in.
With dedication and some effort on your part, you will soon have beautiful nutrient-rich soil for your garden thanks to building an outdoor compost bin. With its endless benefits from reducing waste to providing healthy soil for plants, having an outdoor compost bin will make any gardener proud!

