Composting is an excellent way to turn food scraps and yard waste into nutrient-rich soil that can benefit your garden and reduce the amount of waste sent to landfills. While composting may seem daunting at first, it is a straightforward process that requires minimal effort. With the right knowledge, anyone can create compost in their own backyard.
In this article, we will explore five easy steps to make high-quality compost. We will cover everything from selecting the right location for your compost bin to troubleshooting common issues that arise during the composting process. By following these simple guidelines, you can transform waste into a valuable resource and support sustainable living practices.
Benefits Of Composting
Composting is like nature’s own recycling system. It takes waste materials and transforms them into a nutrient-rich substance that can enhance soil health and plant growth. Composting is an excellent way to reduce waste, reuse resources, and improve the environment. The benefits of composting extend beyond just improving soil health and reducing waste; it also helps to conserve water, prevent erosion, and reduce greenhouse gas emissions.
Reducing waste is one of the most significant benefits of composting. By diverting organic material from landfills, we can reduce methane emissions, which are harmful to the environment. Composting also reduces the need for synthetic fertilizers and pesticides, which can have negative impacts on soil quality and human health. Instead, compost provides a natural alternative that promotes healthy soil ecosystems.
Improving soil health is another essential benefit of composting. Compost provides vital nutrients that promote healthy plant growth while improving soil structure and moisture retention. This results in healthier plants that are more resistant to pests and diseases, reducing the need for chemical interventions. With these benefits in mind, understanding the composting process is crucial for anyone interested in creating their own compost pile at home.
Understanding The Composting Process
Composting is a natural process that involves breaking down organic matter into a nutrient-rich material that can be used as fertilizer for plants. This process is beneficial in many ways, including reducing waste, improving soil health, and promoting sustainable gardening practices. Composting benefits the environment by minimizing the amount of waste that goes to landfills, reducing greenhouse gas emissions, and conserving water and energy.
There are several composting techniques available, ranging from simple backyard methods to more complex industrial systems. Some commonly used techniques include aerobic composting, vermicomposting, and anaerobic digestion. Each technique has its advantages and disadvantages depending on the specific needs of the user. For example, aerobic composting requires oxygen to break down organic matter quickly, while anaerobic digestion works without oxygen but takes longer to produce usable compost.
Choosing the right composting technique depends on various factors such as the type and quantity of waste available, space availability, and desired outcome. Moreover, selecting the appropriate container for your compost is essential in achieving optimal results. The container should be large enough to hold all the waste materials while allowing proper air circulation for efficient decomposition. Additionally, it should be made of a durable material that can withstand outdoor conditions and prevent unwanted pests from entering. With proper selection of both technique and container for your composting needs you can enjoy numerous benefits from this environmentally friendly practice!
Choosing The Right Container
While it may be tempting to simply pile your compost materials in a corner of your yard, choosing the right container is essential for successful composting. Not only will a container help keep your compost neat and contained, but it can also speed up the process by creating an ideal environment for decomposition.
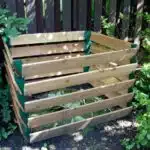
When selecting a container, there are several options to consider. Traditional compost bins made from wood or plastic are popular choices, as they allow for easy mixing and aeration. Tumbling composters are another option that can make turning the compost easier and quicker. Some gardeners even opt for worm bins, which use worms to break down food scraps and other organic matter.
Regardless of the type of container you choose, proper maintenance is key to achieving optimal results. Make sure your container is placed in a location that receives plenty of sunlight and airflow. Regularly adding water and turning the contents will also help ensure that the materials break down evenly and produce rich, fertile soil.
Now that you’ve chosen the right container for your needs, it’s time to move on to selecting the right location. By following these simple steps and taking care to maintain your compost properly, you’ll soon be rewarded with nutrient-rich soil that will help your plants thrive.
Selecting The Right Location
When it comes to composting, choosing the right location is crucial. The area should have enough space for your compost pile, be accessible for regular maintenance, and have a good source of shade. These factors will not only ensure the success of your composting efforts but also prevent any potential issues.
The Importance of Space cannot be overstated in composting. You’ll need enough room to accommodate a pile that’s at least 3 feet high by 3 feet wide. This size will provide sufficient volume to generate heat and allow microorganisms to break down the materials into nutrient-rich soil. Additionally, make sure the area has proper drainage so that excess moisture doesn’t stagnate and create an unpleasant odor.
Location Considerations are another essential aspect when selecting a spot for your compost pile. Avoid areas that are too close to your home or any structures as the odor can become overpowering and attract pests like rodents or flies. Also, steer clear of places with direct sunlight exposure since this can dry out the pile and slow down decomposition.
- Choose an area with enough space
- Ensure proper drainage
- Locate away from homes or structures
- Avoid direct sunlight exposure
Now that you understand how critical it is to select the right location for your composting efforts let’s move on to adding the right ingredients, which will ensure your pile breaks down efficiently and effectively without any unpleasant odors or other issues interfering with your progress.
Adding The Right Ingredients
After selecting the right location for your compost pile, it’s time to move on to adding the right ingredients. Composting techniques vary depending on the materials you have available and how quickly you want your compost to decompose. But no matter what method you choose, there are some basic ingredient combinations that will help ensure your compost is healthy and nutrient-rich.
One important factor in making good compost is balancing greens and browns. Greens are nitrogen-rich materials such as grass clippings, food scraps, and fresh leaves. Browns are carbon-rich materials such as dried leaves, straw, and newspaper. A good rule of thumb is to aim for a mix of roughly one-third greens to two-thirds browns. This balance helps create an environment where microorganisms can thrive and break down the organic matter into usable nutrients.
Another key ingredient for successful composting is water. Your compost pile should be moist but not soaking wet; aim for a consistency like a damp sponge. Too much water can lead to anaerobic conditions (meaning there isn’t enough oxygen), which can slow down decomposition or even cause unpleasant odors. On the other hand, if your pile is too dry, it won’t break down as quickly because the microorganisms need moisture to do their work.
Now that you understand the basics of ingredient combinations and moisture levels, it’s time to start building your compost pile! In the next section, we’ll walk through the steps of layering greens and browns to create a healthy environment for decomposition. By following these guidelines and paying attention to your pile’s needs along the way, you’ll soon have nutrient-rich compost that will help nourish your garden or houseplants without relying on synthetic fertilizers or harmful chemicals.
Balancing Greens And Browns
As a composting expert, it is important to understand the importance of balancing greens and browns in your compost bin. The carbon to nitrogen ratio, also known as C:N ratio, should be approximately 30:1 for optimal decomposition. Greens such as grass clippings or vegetable scraps provide nitrogen, while browns such as leaves or straw provide carbon.
To achieve the proper balance of greens and browns, it’s essential to regularly maintain your compost bin. This includes regularly turning the pile to aerate it and mixing in fresh greens and browns. If your compost seems too dry, add water to keep the pile moist but not too wet.
Balancing greens and browns is critical because an imbalance can lead to slow decomposition or unpleasant odors. By following these tips for proper carbon to nitrogen ratio and compost bin maintenance, you can create rich, healthy soil amendment for your garden.
Now that you have mastered balancing greens and browns, let’s move on to layering your compost. This technique involves creating alternating layers of greens and browns in your compost bin for maximum efficiency.
Layering Your Compost
Balancing your greens and browns is just the first step in making compost. The next step is layering your compost correctly. Properly layering your compost helps to create an environment that promotes decomposition and helps to prevent issues such as unpleasant odors or pests.
Compost layering techniques involve alternating layers of greens and browns, with each layer being roughly 2-3 inches thick. The first layer should be comprised of high nitrogen materials such as vegetable scraps or grass clippings, followed by a layer of high carbon materials such as dry leaves or straw. Repeat this process until you have created a pile that is approximately 3 feet tall.
Troubleshooting compost layering issues can be done by analyzing the composition of your pile. If your pile smells bad, it may be too wet or contain too much green material. In this case, add more brown material and turn the pile to aerate it. If your pile is not breaking down quickly enough, it may need more green material or water to activate the decomposition process.
- Layering your compost correctly creates an environment conducive to decomposition.
- Alternating layers of greens and browns promotes balance within your compost.
- Troubleshooting compost layering issues involves analyzing composition and adding necessary materials.
As a composting expert, my goal is to help individuals create healthy soil for their gardens while reducing waste in our landfills. By following proper compost layering techniques and troubleshooting any issues that arise, you can ensure that you are creating nutrient-rich soil for your plants while also contributing to a healthier planet.
In the next section, we will discuss one final step in making compost: watering your pile.
Watering Your Compost
As you work towards creating rich and healthy compost, it is important to keep in mind the value of moisture. Water plays a vital role in the decomposition process by enabling microorganisms to break down organic material. In addition, water also helps to regulate temperature and prevent your compost from drying out.
The frequency at which you add water to your compost depends on a variety of factors such as weather conditions, the type of materials added, and the size of your compost pile. Generally, you want to maintain a moist but not too wet environment that allows for proper aeration. A good rule of thumb is to water your compost whenever it starts to feel dry or when you notice that there is little microbial activity.
When watering your compost, be sure to do so evenly throughout the pile rather than just on top. This will help ensure that all materials are moistened and decompose at an even rate. It’s also important to avoid overwatering as this can lead to anaerobic conditions that produce unpleasant odors and slow down decomposition. With proper attention and care, maintaining adequate moisture levels in your compost can go a long way towards producing nutrient-rich soil for your garden.
As you continue working towards creating high-quality compost, another important step is turning it regularly. Turning mixes up the materials in your pile and promotes oxygen circulation which helps speed up decomposition. In the next section, we’ll discuss how often you should turn your compost and what tools can help make this process easier.
Turning Your Compost
- When beginning the process of composting, it is important to select a compost bin that is suitable for the size of the composting materials.
- Compost materials should be a combination of decomposable organic wastes such as kitchen scraps, lawn clippings and leaves.
- To ensure efficient decomposition, the compost should be aerated by frequently turning the materials, allowing oxygen to be introduced into the compost pile.
- Turning the compost pile should be done at least once a week, however more frequent turning is recommended to ensure maximum decomposition.
- For larger compost piles, turning the compost can be done with a pitchfork or shovel.
- For smaller compost piles, turning can be done with a garden fork or compost turning tool.
Choosing A Compost Bin
As a composting expert, choosing the right compost bin is an essential step in turning your compost. There are numerous options available, from DIY compost bins made of repurposed materials to store-bought models made of plastic or wood. When making your choice, consider the size of your outdoor space and how much organic material you’ll be composting. You’ll also want to think about the type of compost bin materials that work best for your needs.
If you’re looking for a more affordable option, consider building a DIY compost bin using scrap wood or wire mesh. These bins are easy to make and can accommodate large amounts of organic waste. If you prefer a sturdier option, look for a store-bought compost bin made of durable materials like plastic or wood. These bins often come with features like built-in aerators and drainage systems, which can help speed up the decomposition process.
Ultimately, the key to choosing the right compost bin is finding one that fits your specific needs and lifestyle. Consider factors like cost, durability, and convenience when making your decision. With the right tools in hand, turning your compost will be a breeze – and before you know it, you’ll have rich, nutrient-dense soil to nourish your plants and garden for years to come.
Preparing Compost Materials
Now that you’ve chosen the right compost bin for your needs, it’s time to start preparing your composting materials. The key to successful composting is creating a balanced mix of organic material, including greens and browns. Greens are high in nitrogen and include things like grass clippings and vegetable scraps, while browns are high in carbon and include materials like dried leaves and wood chips. A good rule of thumb is to aim for a 50/50 mix of greens and browns in your compost pile.
To get started, gather your composting materials and begin layering them in your bin or pile. Start with a layer of brown material at the bottom, followed by a layer of green material on top. Continue alternating layers until you have built up a pile that is at least three feet tall. Be sure to moisten each layer as you go – your compost should be about as damp as a wrung-out sponge.
Once your compost pile is established, there are several tips you can follow to speed up the decomposition process. Turning your compost regularly will help aerate it and distribute moisture evenly throughout the pile. You can also add additional nitrogen-rich materials like coffee grounds or blood meal to give the microbes in your compost more food to break down. With these simple steps, you’ll be well on your way to turning nutrient-rich soil for your garden or plants.
Turning Compost Regularly
Turning your compost regularly is an important step in the composting process. Regular turning helps to aerate the pile and distribute moisture evenly throughout, which speeds up the decomposition process. The benefits of turning your compost include faster decomposition, a more even breakdown of materials, and a reduction in unpleasant odors.
However, there are also some challenges associated with turning compost. It can be physically demanding, especially for those with limited mobility or strength. Additionally, turning too frequently or aggressively can disrupt the microbial activity needed for decomposition and lead to slower overall progress.
To turn your compost effectively, use a pitchfork or shovel to lift and mix the contents of your pile. Aim to turn your compost at least once a week during active periods of decomposition, but avoid overdoing it – if you notice that your pile has become overly dry or compacted, try adding more water or bulking agents like shredded paper or cardboard instead of turning it excessively. By following these guidelines, you’ll be able to turn your compost regularly and achieve nutrient-rich soil for your garden or plants in no time.
Monitoring The Temperature
Maintaining an optimal temperature is crucial for a successful composting process. The decomposition of organic matter requires specific temperatures to facilitate the growth and reproduction of microorganisms responsible for breaking down the materials. Regular monitoring of the temperature is essential to ensure that the conditions are favorable for these microorganisms to thrive.
There are several monitoring techniques you can use to check the temperature of your compost pile. One method is by using a compost thermometer, which can be inserted into the center of the pile to measure its internal temperature accurately. Another technique involves feeling the warmth produced by the pile with your hand or a stick regularly. However, it is important not to disturb or mix up the contents too much during this process.
Composting troubleshooting may arise if you notice that your pile’s temperature has dropped below 100°F or risen above 160°F. This could indicate that something is wrong with your compost pile, and corrective actions need to be taken immediately. For instance, if your compost pile’s temperature is too low, it could mean that there is not enough moisture or oxygen in it. On the other hand, if it’s too high, it might suggest that there’s too much nitrogen-rich material in it or insufficient ventilation.
- Use a thermometer to monitor your compost pile’s temperature regularly.
- If you don’t have a thermometer, use your hands or a stick to feel for warmth.
- Adjust your compost pile as necessary based on its temperature readings.
Transition: Monitoring the temperature of your compost pile is just one aspect of ensuring a successful outcome. However, even with careful monitoring and adjustments made accordingly, common mistakes can still occur in creating good compost piles; hence it’s essential to know how best to avoid them.
Avoiding Common Mistakes
Troubleshooting Tips
Even with the best intentions, composting can sometimes go awry. Here are a few common mistakes that can happen and how to avoid them.
Firstly, one of the most common misconceptions about composting is that it should smell bad. In reality, a healthy compost pile should have an earthy scent. If you notice a foul odor emanating from your bin or heap, it is likely due to too much moisture or inadequate ventilation. To fix this, add some dry materials like leaves or shredded paper and turn the pile more frequently to increase airflow.
Another issue that can arise is pests such as rodents, flies, or ants making their home in your compost pile. This can be avoided by keeping the pile covered with a tarp or lid and avoiding adding meat scraps or dairy products. If pests are already present, try adding some citrus peels or coffee grounds to deter them.
Finally, if your compost isn’t breaking down as quickly as you’d like it to, it may be due to an imbalance of carbon and nitrogen ratios. Make sure you’re adding equal amounts of “green” (nitrogen-rich) and “brown” (carbon-rich) materials to your pile and turning it regularly to mix everything together.
Table:
| Common Mistake | Solution |
|---|---|
| Smelly compost | Add dry materials and increase ventilation |
| Pests in compost | Cover with lid/tarp and avoid meat/dairy |
| Slow decomposition | Balance carbon/nitrogen ratios and turn regularly |
By following these troubleshooting tips, you can ensure that your composting journey goes smoothly without any hiccups along the way. In the next section, we’ll discuss how to deal with pests and odors specifically so that you can maintain a healthy and thriving compost pile.
Dealing With Pests And Odors
Preventing contamination is essential for maintaining a healthy compost pile. Contamination can come in the form of chemicals, such as pesticides and herbicides, or foreign objects like plastic or metal. To prevent contamination, it is best to use organic materials that are free from any chemicals. Also, ensure that you remove any non-organic materials before adding them to the pile.
Troubleshooting issues may arise when composting, such as odors and pests. Unpleasant smells can occur if the compost pile is too wet or contains too much nitrogen-rich material. Pests like rats and raccoons can also become attracted to your compost pile if it contains meat, dairy products or oily foods. To combat these issues, ensure that your pile is well-aerated and has a proper balance of carbon-rich and nitrogen-rich materials.
To further prevent pests from invading your compost pile, create a barrier around it using wire mesh or fencing. This will help to keep larger animals out while still allowing for air circulation. Additionally, regularly turning and aerating your compost pile will help to deter smaller pests like flies and ants.
Transition: Now that you have tackled the issue of preventing contamination and troubleshooting potential problems with your compost pile, it’s time to move on to the exciting process of harvesting your nutrient-rich compost!
Harvesting Your Compost
Dealing with pests and odors in your compost can be a challenging task, but with proper composting maintenance, you can avoid these issues. One of the main ways to prevent pests from invading your compost is by maintaining a proper balance between green and brown materials. This balance will ensure that your compost doesn’t become too wet or too dry, which can attract unwanted pests such as rats and flies.
Another important aspect of composting maintenance is keeping your compost well-aerated. This can be achieved by regularly turning your compost pile with a pitchfork or investing in a compost tumbler. By doing so, you allow oxygen to penetrate into the pile, which helps break down the materials faster and reduces the risk of unpleasant odors.
To make the most out of your composting experience, it’s essential to invest in good composting equipment. While it’s possible to create a quality compost pile without any equipment at all, having tools such as a pitchfork, tumbler or thermometer can make the process more efficient and effective. A thermometer allows you to monitor the temperature of your pile, ensuring that it stays within the optimal range for decomposition to occur. With good equipment and regular maintenance, you’ll have healthy soil amendment in no time.
Incorporate Composting maintenance practices and using appropriate equipment are critical factors that contribute significantly to successful home-composting processes. It is vital always to maintain a balanced ratio between green (nitrogen-rich) waste material such as food scraps and brown (carbon-rich) waste material like dried leaves or twigs in establishing an ideal environmental condition inside the pile. Furthermore, It’s essential always to keep piles aerated; this helps reduce bad odor emanating from fermentation processes while encouraging beneficial microorganisms growth inside the pile. Investing in good equipment such as pitchforks or tumblers can also help improve efficiency when handling larger piles of waste material.
When your compost is finally ready, using it is the ultimate goal. There are several ways of utilizing compost, including adding it to soil as a fertilizer or using it as mulch for plants. However, before using your compost, ensure that it has fully decomposed and matured, which can take anywhere from six months to two years. Once you’ve harvested your compost, start the process all over again by creating another pile with your waste materials. By doing so, you’ll be contributing to a more sustainable environment while also saving money on fertilizers and reducing waste in landfills.
Using Your Compost
Now that you’ve successfully made your compost, it’s time to put it to use. Congratulations! You’re now one step closer to having a beautiful garden or flourishing houseplants. Using compost tea is a great way to give your plants a nutrient boost. To make compost tea, simply steep some of your finished compost in water and then strain out the solids. This nutrient-rich liquid can be used as a natural fertilizer for your plants.
Composting can also be tailored to the specific needs of different gardening purposes. For example, if you have acid-loving plants such as blueberries or rhododendrons, consider adding pine needles or coffee grounds to your compost mix. If you’re growing vegetables, focus on adding more nitrogen-rich materials such as grass clippings or vegetable scraps. By understanding the specific needs of your plants, you can create a customized compost mix that will help them thrive.
Continuing your composting journey is an ongoing process that requires patience and dedication. As you become more experienced with composting, don’t be afraid to experiment with different materials and techniques. The key is to keep learning and refining your skills so that you can reap the benefits of healthy soil and thriving plants for years to come. Remember, with each batch of compost you make, you’re not only reducing waste but also creating a valuable resource for your garden ecosystem. Happy composting!
Continuing Your Composting Journey
Congratulations! You have successfully created your first compost batch. However, the journey does not stop there. As an experienced composter, you can continue to improve your composting skills and expand your knowledge on the topic.
One of the most important aspects of maintaining a successful compost pile is to troubleshoot any issues that may arise. For example, if you notice a foul odor coming from your compost pile, it could indicate that there is too much moisture or not enough oxygen present. To solve this issue, you can turn the pile and add more dry materials such as leaves or cardboard. By addressing these problems quickly, you can prevent them from becoming bigger issues down the line.
Additionally, creative uses for your finished compost are endless. Not only can you use it to enrich soil in your garden beds or potted plants, but it can also be used as a natural fertilizer for houseplants or even as a natural pest deterrent. By exploring different ways to use your compost, you are maximizing its benefits and reducing waste in other areas of your life.
- Experiment with creating different types of compost by varying the types of materials used.
- Research local community gardens or farms where you can donate excess compost.
- Consider starting a composting club or group in your community to share resources and knowledge about sustainable living practices.
As an experienced composter, you have already made great strides towards reducing waste and promoting sustainability in your daily life. By continuing to troubleshoot issues and explore creative uses for your finished compost, you are taking even greater steps towards serving others and making a positive impact on our planet.
Conclusion
Composting is an eco-friendly and cost-effective way to reduce waste and improve soil quality. By following just a few easy steps, anyone can create nutrient-rich compost at home. Understanding the composting process is crucial to creating a successful compost pile. It requires the right container, location, and ingredients, as well as proper maintenance.
Choosing the right container is important for managing the composting process, whether it’s a bin or a pile. The location should be in a shaded area with good drainage to avoid moisture buildup. Adding the right ingredients such as green and brown waste will help balance the carbon-to-nitrogen ratio needed for decomposition. Managing pests and odors are also important considerations.
One example of successful composting is that of a family who had been struggling with poor soil quality in their garden for years. They began composting their food waste and yard debris and noticed significant improvements in their soil quality within months. Their plants grew stronger and healthier, which resulted in higher yields during harvest season.
In conclusion, composting is an essential practice for anyone interested in reducing their carbon footprint while improving soil quality at home gardens. With the right knowledge and tools, anyone can make high-quality compost that will benefit both their garden and the environment. So start your composting journey today!
Image Credits
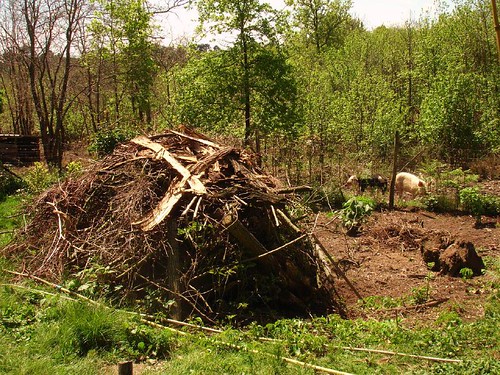
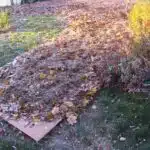
- “One of our compost piles made with branches, wool, weeds etc makes a hugelkultur pile” by hardworkinghippy : La Ferme de Sourrou (featured)

