Are you looking for an exotic and interesting houseplant that is also easy to care for? Look no further than the bird’s nest fern! With its lush, vibrant fronds and unique shape, this popular houseplant is sure to add a touch of drama to any home. Not only does it look great, but it’s also extremely hardy and adaptable to most indoor conditions. In this article, we’ll give you all the tips and tricks you need to keep your bird’s nest fern happy and healthy.
When grown indoors, the bird’s nest fern can reach up to two feet in height and width. Its long, green fronds are bright and wavy with a ruffled texture that gives it a truly unique appearance. The plant requires very little light or water, making it an ideal choice for first-time plant parents or those who may not have much time or space for regular maintenance.
Not only is the bird’s nest fern a beautiful addition to any indoor garden – it’s also incredibly easy to care for! In this article, we’ll provide you with a comprehensive guide on how to properly care for your bird’s nest fern so that it remains healthy and vibrant for years to come. Keep reading to learn more about this remarkable houseplant!
What Is A Bird’s Nest Fern?
At first glance, it might not seem like much of a feat to care for a bird’s nest fern — but appearances can be deceiving. With the right information, however, you can ensure your Asplenium nidus fern thrives and grows for years. So what is a bird’s nest fern and how do you care for it?
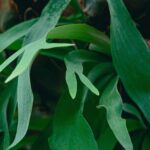
A bird’s nest fern is a tropical plant native to Southeast Asia and parts of Oceania. It features long, leathery fronds that arch out from the center in an attractive rosette shape. This unique look makes it popular as both an indoor houseplant and outdoor garden plant.
Caring for a bird’s nest fern requires providing the right amount of water, fertilizer, humidity, and light. Water regularly — once every one or two weeks — allowing soil to dry slightly between waterings. Feed with liquid fertilizer every two months during spring and summer; reduce feedings in winter. Mist occasionally to increase humidity around the plant while keeping its fronds dry. Place the plant in indirect or filtered light indoors or partial shade outdoors for best results.
With proper care, your bird’s nest fern will reward you with lush growth that will last for years to come! Now that you know what a bird’s nest fern is and how to care for one, let’s explore where to place them…
Where To Place A Bird’s Nest Fern
When it comes to finding the perfect place for a bird’s nest fern, there are several factors to consider. Firstly, it needs plenty of indirect light. Too much direct sunlight will scorch the leaves and can cause them to turn yellow or brown. Secondly, they need a humid environment – otherwise their fronds will start to dry out and curl up. Finally, if you’re growing your plant indoors, you should position it away from any drafts or air conditioning vents; this can also cause the leaves to curl up and dry out.
When positioning your bird’s nest fern in indirect light, you have a few options available. For instance, you could place it close to an east-facing window, where it’ll get some morning sun but not too much midday heat. Alternatively, if you don’t have access to natural light, you could use artificial lights such as fluorescent bulbs or LED lights placed around 12-14 inches away from the plant.
Whichever option you choose for your bird’s nest fern, make sure that when setting it up in its new home that you give the humidity levels some thought too. This can be done by misting the fronds regularly or placing a water tray near the base of the pot (but not directly underneath). With these steps taken care of, your bird’s nest fern should be happy and healthy for many years to come! Moving on from here then we need to consider how best to water our plant...
How To Water A Bird’s Nest Fern
The beautiful bird’s nest fern is so named for its fronds resembling a bird’s nest. But, while it may look like an ornamental piece, caring and tending to this fern is necessary if you wish to have it thrive in your home. So, how should you water the bird’s nest fern?
Watering a bird’s nest fern is relatively easy–it needs to be kept evenly moist and never dry out completely. You can water from the top of the soil or use bottom watering to keep the soil moist without getting the leaves wet. Water should be lukewarm and free of chlorine and other chemicals. Make sure there is good drainage in the pot and allow any excess water to drain away before replacing it.
It’s important not to overwater as this can cause root rot and eventually kill your plant. Instead, check by feel whether the soil is still damp after watering or not every few days. If it feels dry, give it some more water; if not, then wait until it dries out slightly before watering again. With proper care and attention, your bird’s nest fern will stay healthy and happy for years!
Now that we’ve gone through how to water a bird’s nest fern, let’s take a look at light requirements necessary for it to grow well.
Light Requirements For A Bird’s Nest Fern
Light is the lifeblood of a bird’s nest fern, providing it with the energy that fuels its growth. It’s like a beacon guiding them in their journey of development. Much like any other plant, the amount and quality of light they receive affects their health. To keep your bird’s nest fern flourishing, you must provide it with the right amount and type of light.
Direct sunlight should be avoided as it can burn the leaves or cause them to curl. Instead, opt for a bright, indirect light source such as filtered sun or strong fluorescent lighting. A bird’s nest fern can also grow well in shady areas but may not reach its full potential without more light exposure. For best results, place your fern near an east-facing window or find a good spot for artificial lighting.
To ensure optimal growth, check on your fern regularly to make sure it’s getting enough light each day. Signs of insufficient light include pale green leaves or slow growth rate – both are indications that your bird’s nest fern needs more of that golden glow! With the right amount of light and some regular TLC, your fern will stay healthy and vibrant for years to come.
Soil And Fertilizer Necessary For A Bird’s Nest Fern
Amazingly, the bird’s nest fern has a lifespan of up to 20 years. This is why it’s important for those who wish to cultivate one of these plants to understand how to care for them properly and provide the best nutrients.
When it comes to soil and fertilizer, a bird’s nest fern needs a soil that is moist but not wet and drains well. A potting mix that contains equal parts peat moss and perlite works best. Fertilizer isn’t necessary, however, if you decide to fertilize your fern then use one that is low in nitrogen. Applying fertilizer every few months during the growing season can help promote healthy growth.
It’s also important to remember that this type of fern doesn’t like its soil too dry or too wet; if it gets dry it will become discolored and limp. To avoid this, water your fern regularly by completely saturating the soil at least once a week. Letting the top layer of the soil dry out slightly between waterings can help prevent disease from occurring. With proper watering and care, you can enjoy having a beautiful bird’s nest fern in your home for years to come! Moving on, let’s look at how we can propagate this stunning plant.
How To Propagate A Bird’s Nest Fern
Propagating a bird’s nest fern is like giving a gift of life to the plant world. It’s not only a rewarding experience, but it can also help increase your collection of these beautiful plants. In this section, we’ll take a look at how you can propagate your own bird’s nest fern.
One of the most common methods for propagating a bird’s nest fern is through division. To do this, carefully remove the entire plant from its pot and cut away sections of soil and roots with a sharp knife, making sure each section contains some growth. Then, replant the sections in separate pots or containers filled with fresh potting soil and keep them well-watered until they begin to establish new growth.
Another option is to propagate from spores or offsets on the underside of the fronds. To do this, use tweezers to lightly remove any clumps or spore clusters from the frond and transfer them to damp paper towels that are stored in an airtight container. Once you see signs of growth, transfer them into small containers filled with moist potting soil and keep them in indirect light until they are ready for transplanting.
These two methods provide easy pathways for creating more of these beautiful plants without having to purchase additional specimens from nurseries or greenhouses. With just a little bit of care and attention, you can easily have your own mini garden full of birds’ nest ferns!
Common Problems With A Bird’s Nest Fern
As we continue our journey to uncovering the secrets of taking care of a bird’s nest fern, we come to the inevitable: common problems. They’re as much a part of owning any plant as the pleasure of seeing it thrive. It’s no different for this charming houseplant.
But fear not! In most cases, these issues can be easily remedied, and your fern will be back in tip-top shape in no time. Let’s take a look at some of the most common problems you may encounter with a bird’s nest fern.
Low humidity and too much direct light are two of the biggest culprits for ferns. To combat this, place your plant away from any heat sources or direct sunlight, and provide higher humidity levels through misting or placing it near other plants that prefer similar conditions. Overwatering can also cause yellow leaves and root rot; keep an eye on soil moisture levels and water sparingly but regularly instead.
By applying some simple prevention strategies, such as keeping an eye on watering amounts and locating your plant in a spot with indirect light, you’ll have a better chance of avoiding potential issues with your bird’s nest fern. Next up, let’s take a look at pests that can affect this lovely little houseplant.
Pests That Can Affect A Bird’s Nest Fern
Making matters worse, pests can also become problematic for bird’s nest ferns. Slugs, spider mites, and aphids are among the most common culprits that plague these plants. Slugs and snails feast on their tender leaves while spider mites suck out their juices, leaving them yellow and wilted. Aphids may also feed on the foliage of bird’s nest ferns, destroying their beauty and weakening the plant overall.
Fortunately, there are a few strategies to help manage these pesky problems. For starters, controlling the humidity around your fern can help reduce the risk of spider mite infestations. Additionally, it’s important to inspect your plant regularly so that you’ll be able to spot any signs of pests early on before they cause too much damage. Lastly, organic pesticides or other forms of natural pest control like neem oil may be used as a preventive measure against infestations.
Taking proactive steps to protect your bird’s nest fern from pests is key to keeping it healthy and thriving for years to come. With proper care and attention, you can ensure that your beautiful houseplant will stay in tip-top shape as you work to treat any ailing areas it may have.
How To Treat Ailing Bird’s Nest Ferns
As the saying goes, “A stitch in time saves nine” and this is certainly true when it comes to bird’s nest fern care. When a plant is not looking its best, it may be necessary to take action and treat any ailments that the plant may have. In this section, we will be discussing how to treat ailing bird’s nest ferns.
The first step in treating ailing plants is to identify the problem. Look for signs of disease, pests, or environmental stress that may be affecting the bird’s nest fern. Once you have identified the source of the problem, you can begin treating it. Depending on what kind of issue you are dealing with, different treatments may be required. For example, if there are pests present, then an insecticidal spray may be necessary in order to get rid of them. On the other hand, if the plant is suffering from too much or too little light or water then adjusting these conditions may help restore it to health.
No matter what kind of problem you are dealing with, it is important to act quickly in order to prevent further damage and keep your plant healthy. Regularly checking your plants for signs of trouble and taking immediate action can help ensure that your bird’s nest fern stays healthy for years to come. With proper care and attention, your beloved bird’s nest fern will remain vibrant and beautiful for many years ahead.
Tips For Maintaining A Healthy Bird’s Nest Fern
Maintaining a healthy bird’s nest fern is an important part of its care. To ensure your bird’s nest fern thrives, there are some helpful tips to keep in mind.
First, it’s a good idea to give your bird’s nest fern plenty of indirect sunlight. While they prefer humid environments, too much direct sunlight can cause the leaves to burn. Additionally, this species of plant needs regular watering, especially during the warmer months. Make sure you check the soil for dryness before watering and only water if necessary; standing water can lead to root rot.
Finally, fertilizing your bird’s nest fern is also important for keeping it healthy. Try using a diluted liquid fertilizer every few weeks during the growing season and make sure to follow the instructions on the packaging closely. With these tips in mind, you’ll be able to enjoy having a beautiful and vibrant bird’s nest fern in your home for many years!
As we’ve discussed, providing enough light and water, as well as fertilizing regularly are key elements for maintaining a healthy bird’s nest fern. Now let’s take a look at how to overwinter this special plant correctly so that it stays happy throughout all seasons.
How To Overwinter A Bird’s Nest Fern
You’ve worked hard at caring for your bird’s nest fern and now it’s thriving. But what happens when winter comes? How do you ensure that your beloved plant makes it through the colder months so you can enjoy its beauty next year? Here are some tips to help you overwinter a bird’s nest fern.
First, make sure the temperature of your home doesn’t drop too low. The ideal temperature range is between 40-60°F (4-16°C). To help maintain this, move the pot away from cold drafts and try to keep it in a bright area out of direct sunlight. If you have the option, you can also invest in a heated mat or terrarium cover to keep the temperature consistent.
Second, reduce watering during this time as the soil will stay wetter for longer due to lower temperatures and less evaporation. Make sure to check for moisture regularly and add water only when necessary – about every two weeks should be sufficient. Additionally, misting your plant with lukewarm water once a week can help keep humidity levels high, especially if your home has dry air.
Finally, if your bird’s nest fern is looking a bit lackluster, don’t worry – this is normal during winter months! With proper care, it’ll come back to life in no time once spring arrives. Now that you know how to overwinter a bird’s nest fern successfully, let’s explore how to repot one…
How To Repot A Bird’s Nest Fern
Repotting a bird’s nest fern is no small task, and it requires preparation and caution. But with the right steps in place, you can ensure your fern will remain healthy for seasons to come. On the other hand, overwintering a bird’s nest fern is much simpler.
When repotting your fern, it’s important to use a pot that has plenty of drainage holes and a high quality potting mix. Make sure the soil isn’t too wet or too dry; moist soil is ideal. If you’re using an old pot, be sure to thoroughly clean it with hot water before repotting your fern.
Gently remove your fern from its current pot and carefully break up the root ball if necessary. Place it into the new pot so that its crown is slightly above the soil line and fill in around the root ball with more of the potting mix. Water thoroughly afterward, but don’t forget to let the top layer of soil dry out before watering again.
With these simple steps in place, you can help ensure that your bird’s nest fern remains strong and healthy as you transition it into its new home. Now that we’ve covered how to repot a bird’s nest fern, let’s look at how to trim one for optimal care.
How To Trim A Bird’s Nest Fern
When it comes to trimming a bird’s nest fern, it can feel like you’re performing an art form! This lush and exotic plant is just begging to be trimmed into a work of beauty. With careful pruning and the right tools, you can make your bird’s nest fern look as if it was sculpted by a master gardener.
The first step to trimming a bird’s nest fern is to gather the necessary materials. You’ll need sharp scissors or pruning shears, gloves, and a few paper towels or newspapers. With these in hand, you can start the process of pruning your fern. Make sure to cut away any dead fronds that are yellowing or browning, as well as any fronds that are overgrown and starting to look messy. Be sure not to cut more than one-third of the total foliage at once; this will ensure your plant remains healthy while also maintaining its aesthetic appeal.
Once you’ve removed any dead or overgrown leaves, it’s time to shape up the remaining foliage. To do this, carefully trim off any stems that are growing outside of the desired shape of your fern. If needed, use a pair of tweezers for precision trimming around delicate fronds. After you’ve finished sculpting the perfect shape for your bird’s nest fern, all that remains is wiping down the leaves with damp paper towels or newspaper strips to remove dirt and dust from their surfaces.
With proper care and maintenance, your bird’s nest fern will stay looking its best for years to come! Now that you have mastered how to trim this beautiful plant with confidence, it’s time to learn how to revive a browning bird’s nest fern and bring back its vibrant green color…
How To Revive A Browning Bird’s Nest Fern
Oh, the horror! Your beloved bird’s nest fern is beginning to brown and losing its lush green hue. Is it time to give up hope and say goodbye? Absolutely not! There is still a chance to revive your precious plant.
Here’s the thing: browning of your bird’s nest fern can be caused by a range of factors, such as too much direct sunlight, extreme temperatures or lack of humidity. Fear not – with the right approach and care, you can bring your beautiful plant back from the brink of death.
You can save your bird’s nest fern by adjusting the conditions in which it is growing. Make sure that it is getting enough light but not too much direct sun, increase humidity levels by misting regularly or placing near a humidifier and adjust watering schedules according to the needs of your particular fern. With some effort, you can see results in no time at all!
The reward for taking care of your bird’s nest fern? A vibrant, healthy plant that will add life and beauty to any space – what could be better than that?
Benefits Of Growing A Bird’s Nest Fern
Growing a bird’s nest fern has some great benefits. First of all, these plants are very hardy and can tolerate low light conditions, making them a perfect choice for darker rooms or spaces that don’t get much natural sunlight. They also require minimal care and maintenance, so they’re great for those who don’t have a lot of time to devote to their plants.
Another benefit is that the long fronds of a bird’s nest fern add an elegant touch of greenery to any room. The bright green leaves provide a nice contrast against more neutral walls and furniture, making it easy to create an attractive home decor with this plant. Additionally, these plants are known for helping improve indoor air quality by removing toxins from the air around them.
Finally, growing a bird’s nest fern is relatively inexpensive compared to many other houseplants. With proper care, these plants can last for many years and provide your home with beauty and freshness throughout its life cycle. So if you’re looking for an attractive yet low-maintenance addition to your home decor, consider adding one of these delightful ferns!
Frequently Asked Questions
How Long Does It Take For A Bird’s Nest Fern To Establish Itself?
The bird’s nest fern is a fascinating indoor plant, known for its unique fronds that form nests as they grow. It’s an easy-care plant with few requirements, making it an ideal choice for those new to houseplant care. But how long does it take for a bird’s nest fern to establish itself?
According to experts, the bird’s nest fern can take anywhere from three months to a year for it to become fully established in its environment. During this time, the fern should be kept warm and humid, so misting the leaves regularly is important. Additionally, providing indirect light and ensuring regular watering are essential for helping the plant become properly established.
The time it takes for a bird’s nest fern to establish itself will depend on several factors including the environment it is placed in and how much care and attention it receives. With proper care, however, this hardy indoor plant can thrive and add beauty and texture to any home or office.
Is It Possible To Grow A Bird’s Nest Fern Indoors?
The Bird’s Nest Fern (Asplenium nidus) is a popular, easy-care houseplant that can be grown indoors with some simple tips. Take the case of Alicia who, after seeing a picture of the beautiful fern in a magazine, was eager to add it to her home. She was curious: is it possible to grow this plant inside?
The answer is yes! In order to get the best results, it’s important to provide your Bird’s Nest Fern with bright indirect light and high humidity. You should also make sure not to let it sit in water – instead, you should water when the soil is dry and mist regularly. To maintain healthy growth, fertilize every two weeks during spring and summer months and every four weeks during fall and winter months.
In short, if you take care of your Bird’s Nest Fern properly, it will quickly establish itself indoors and become an attractive addition to your decor. With some TLC and a few simple maintenance steps, you can enjoy this lush beauty for years to come.
How Often Should A Bird’s Nest Fern Be Repotted?
Ah, the age-old question of how often to repot a bird’s nest fern. It’s a quandary that has been perplexing plant enthusiasts for generations! If you’re looking to add a little flair to your indoor garden with this majestic greenery, then read on for some tips on how often you should be repotting your feathered friend.
First things first: bird’s nest ferns are not picky when it comes to pot size – in fact, they prefer tight ones! So don’t worry about over-potting and crowding out your poor plant. Instead, look at the soil quality – if it looks dry and depleted, it might be time for a fresh pot. The frequency of repotting will depend on the environment and climate in which the fern is growing; if you notice any signs of wilting or drying leaves, it may indicate that the roots need more space to spread out.
In any case, don’t leave your bird’s nest fern stranded in the same pot for too long – a once-a-year repot is usually enough to keep them happy and healthy. Make sure you use well-draining soil and give them plenty of light (but watch out for direct sunlight!), and soon enough your feathered friend will be thriving in their new home!
Is A Bird’s Nest Fern Susceptible To Diseases?
The Bird’s Nest Fern is an attractive plant with its unique fronds and texture. But, how susceptible is it to diseases? While this fern may look beautiful and exotic, it can suffer from common fungal issues, as well as other problems. Let’s take a closer look at the diseases that threaten this stunning fern and what you can do to prevent them.
The most common disease that affects Bird’s Nest Ferns is root rot. This occurs when the soil remains too wet for extended periods of time, causing the roots to become clogged and unable to absorb water or nutrients. If left untreated, root rot can cause the fronds to turn brown, yellow or black. To prevent root rot from occurring in your fern, make sure it is planted in well-draining soil and don’t overwater.
Other diseases that can affect Bird’s Nest Ferns include powdery mildew and Anthracnose. Powdery mildew appears as white spots on the leaves of the fern and can be treated by removing affected leaves or spraying with a fungicide. Anthracnose causes brown spots on the leaves that eventually turn black; again, remove affected leaves immediately and spray with a fungicide to prevent further spread of the disease. Additionally, ensure you are providing proper light levels for your fern – too much direct sunlight can also cause damage to its delicate fronds.
By following these simple steps and taking extra care when watering your Bird’s Nest Fern, you should be able to keep it healthy and free from disease – allowing you to enjoy this exotic beauty in all its glory!
What Is The Best Temperature Range For A Bird’s Nest Fern?
When it comes to growing a bird’s nest fern, temperature is a major consideration. The optimal temperature range for this plant is between 65 and 75 degrees Fahrenheit. Anything higher than 80 degrees can cause the plant to wilt and die.
On the other hand, temperatures that are too low can also be problematic. If you keep your bird’s nest fern in temperatures lower than 55 degrees, it could become weakened and susceptible to diseases. That’s why it’s important to monitor the temperature closely when caring for this species of fern.
In order to ensure that your bird’s nest fern stays healthy, make sure you maintain the ideal temperature range of 65-75°F in its environment. Make sure there are no drafty areas or extreme hot spots where your plant could be exposed to temperatures outside of this range. By keeping an eye on your fern’s environment and providing it with consistent warmth, you’ll be able to provide the best care possible for this stunning plant.
Conclusion
The Bird’s Nest Fern is a beautiful, lush plant that adds a bit of exotic flair to any room. It is an easy plant to care for and maintain, making it an excellent choice for novice gardeners. With proper care and attention, the Bird’s Nest Fern can thrive for years in the home. Its unique fronds bring texture and life to the environment.
The Bird’s Nest Fern is a low-maintenance plant that requires minimal effort to keep healthy and happy. With regular watering and occasional repotting, this tropical fern can stay vibrant and lush year round. The bright green foliage with its delicate fronds creates an atmosphere of tranquility in any room, while providing a sense of peace and serenity in the home.
The Bird’s Nest Fern is a wonderful addition to any living space. Its elegant leaves create a peaceful atmosphere, while its hardy nature makes it easy to care for. With a few simple tips, these plants can bring beauty and life into your home for many years to come.


