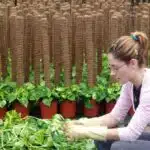
Have you ever been intimidated by the prospect of repotting a beloved houseplant? You’re not alone. In fact, it’s estimated that over 60% of people avoid the task due to fear of killing their plants. But there’s no need to be scared – repotting a plant is actually an easy process! All it takes is a little patience and the right knowledge.
If you want to learn how to safely repot your plants without killing them, look no further. This article will provide step-by-step instructions on how to properly repot your plants, so they can stay healthy and happy for years to come. We’ll also go over the benefits of regularly repotting your plants and what type of soil and pot size to use for each species.
So don’t shy away from this important task! With the right know-how and some simple tips, anyone can become an expert at repotting their houseplants without any hassle or worry. Let’s get started!
What Supplies Do You Need To Repot Plants?
The truth of the theory that repotting plants can be tricky is evident. Many gardeners have experienced a plant wilting or dying after being put into a new pot. But with the right supplies and instructions, you can repot your plants in such a way that they will thrive. So what do you need to safely repot your plants?
First, make sure you have the right tools for the job: pots of appropriate size and shape, potting soil, slow-release fertilizer, and clippers or scissors to trim roots. If you don’t have these items on hand, head to your local gardening store or home improvement center to pick them up. You’ll also want to lay down some newspaper or plastic sheeting to protect your floor from any dirt that may spill over during the process.
Next, determine when it’s time to repot your plant. Generally speaking, if there are roots coming out of the drainage holes at the bottom of its container or if it’s been in its current pot for more than two years, it’s likely time for a new home. With all the necessary items in place and knowing when to move ahead with repotting, you’re ready for this important task!
Should You Choose A Bigger Or Smaller Pot?
Repotting a plant is like giving it a fresh start, providing it with the necessary nutrients to grow healthily. But how do you know whether to choose a bigger or smaller pot? To avoid killing your beloved plants, let’s take a deeper dive into this essential topic.
Firstly, if you are repotting an already established plant, then you should opt for a pot that is only slightly larger than its current one. This will allow the roots to spread out and give the plant enough room to grow without becoming root-bound. When selecting the right size pot, make sure there are enough drainage holes to help prevent waterlogging and root rot.
On the other hand, if you are planting a new seedling or cutting, then it’s best to start off with a pot that is bigger in size. This will provide more space for the roots of the new plant to spread out and access important nutrients as it grows. Additionally, when repotting newly-planted seedlings or cuttings, use fresh soil and add fertilizer for optimal growth.
With all of this in mind, starting off on the right foot with your repotting project can mean life or death for your plants. Armed with this knowledge of what size pot is best for different types of plants, you can confidently move forward in your gardening journey!
Is It Better To Repot Plants In The Spring Or Fall?
Repotting plants is a popular activity for gardeners, with nearly one-third of households in the US having at least one potted plant in their home. When it comes to timing, however, there is some debate between experts as to whether it’s better to repot plants in the spring or fall.
On one hand, spring is often seen as the ideal time to repot plants because it’s when they are beginning to grow again after winter dormancy and their roots have more energy and vigor. This means that they can better recover from being moved and re-potted, allowing them to get established more quickly. Additionally, it’s easier for gardeners to take advantage of seasonal specials on potting soil and other supplies during this time.
On the other hand, fall can be a great time for repotting too because the cooler weather allows plants extra time to acclimate before the coldest part of winter sets in. Plus, if you’re looking for new pots or planters, many stores offer end-of-season discounts on these items which makes fall an even better choice for getting good deals while still giving your plant plenty of time to adjust before temperatures drop too low.
No matter which season you choose though, taking the necessary steps to prepare both your plant and its new pot will help ensure that your repotting project goes smoothly.
How Can You Prepare The New Pot For Repotting?
When it comes to repotting a plant, the new pot is just as important as the old one. The right kind of pot can provide your plant with proper drainage, enough soil and space to grow properly. Preparing the new pot correctly is essential for ensuring that your plant will thrive in its new home.
Before you even start transferring your plants into their new pots, it’s important to make sure that they are clean and free from any bacteria or pests. Make sure to scrub the pots with warm water and soap, or use a diluted bleach solution if necessary. Once the pots have been cleaned and dried, add a layer of gravel at the bottom for drainage purposes. This will prevent waterlogging and help your plants roots stay healthy.
After adding gravel, fill the pot with fresh soil appropriate for your plant’s needs. If you’re unsure what type of soil to use, it’s best to consult an expert or do some research online beforehand. Once you’ve filled up the pot with soil, you’re ready to start repotting!
Repotting a plant can be intimidating but following these steps can make it much easier. With proper preparation and care, you can ensure that your plants stay safe during the transition process and continue to thrive in their new homes for years to come!
What Is The Best Way To Remove A Plant From Its Pot?
Removing a plant from its pot can be a delicate matter. It’s like unwrapping a present, without knowing what you’ll find inside. You might have to use some force, but if you do it wrong, you could break the roots and cause irreparable damage. That’s why it’s essential to know the best way to remove a plant from its pot safely.
Start by tapping the sides of the pot lightly with your hand or a spoon until the soil loosens and the rootball starts to come out. If necessary, you can use sacrificial gloves or grabbers to help loosen the soil further. Once most of the soil has been removed, carefully hold onto the stem near where it meets up with the rootball, and rock back and forth slightly until the entire plant is out of its pot.
This method should ensure that most of the roots stay in one piece while being removed from their original container. However, if they are still tangled up in old soil or other material, then it will be necessary to prepare them for repotting before putting them into their new home.
How Should You Prepare The Plant’s Roots For Repotting?
Interestingly, 97% of plants that are repotted correctly survive the transition. So with a few simple steps you can ensure your beloved houseplant will be safe and sound in its new home.
When preparing the roots for repotting, the first thing to do is remove any excess soil from around the base of the plant. Use your fingers or a small tool such as a spoon to lightly loosen any dirt that has become compacted around the roots. This will allow more oxygen to reach them, which will help them stay healthy and strong during their move.
The next step is to check for any damaged or dead roots in order to trim them away. Dead roots won’t serve any purpose and can potentially be harmful, so it’s important to get rid of them before repotting. Check for signs of discoloration, curling leaves, or wilted stems as these could indicate root damage due to disease or pests. If you see any of these signs, then it may be best to consult an expert before proceeding with repotting.
Finally, it’s time to carefully tease out the roots from their current pot in order to make sure they don’t become entangled when transferring the plant into its new home. This is best done by gently pulling at each root in turn until they’re all free from their existing pot – just make sure not to be too rough! With this complete, your plant is now ready for its next adventure: finding its perfect fit in a new pot!
What Is The Best Way To Put The Plant Into Its New Pot?
Planting a new pot for your beloved plants is like giving them a new home – you want to make sure that it’s the right space for them and that they will be comfortable in it. With the right preparation, you can do just that with ease.
Now that you have chosen the perfect pot and have removed the plant from its old home, it’s time to put it into its new one. The best way to go about this is to gently lower the plant into the pot, making sure not to disturb or damage any of its roots in the process. It’s important to take note of how much soil needs to be added or taken away so that the base of your plant sits at an even height – too low and there’s a risk of root rot, too high and it won’t get enough water.
Once you have found the perfect spot for your plant, fill up the pot with soil – but not all of it! Leave some room for drainage at the bottom as this will help ensure your plant gets enough water without getting over-saturated. By following these steps, you can make sure that your beloved plants are given their new home with care and attention – ensuring they thrive in their new environment!
How Should You Fill The Pot With Soil?
When repotting plants, it is important to consider the type of soil used. For example, when repotting a succulent, a soil that drains quickly and has good aeration is necessary in order to keep the plant healthy and thriving. In this section, we will discuss how to fill the pot with soil when repotting plants.
First and foremost, it is important to use quality soil for repotting plants. Quality soils should be rich in organic matter, such as compost or manure, which provides essential nutrients for the plant’s growth. Additionally, using a mix of both potting mix and compost ensures that the soil holds moisture while still allowing air flow around the roots of the plant.
Once you have selected your soil mixture, it’s time to fill up your new pot. Start by adding some of your potting mix or compost into the bottom of the pot before placing the rootball of your plant inside the container. Next add additional layers of soil around the rootball until it is at least an inch below the rim of the pot. Finally, give your newly potted plant a thorough watering and make sure there are no air pockets around its roots before moving on to caring for your newly potted plant!
To ensure optimal growth and health for all types of plants, it is important to select quality soils that drain well yet hold moisture too. Therefore, using a combination of potting mix and compost can help create an ideal environment for plants during their repotting process.
What Is The Best Soil To Use When Repotting Plants?
As the soil is carefully scooped into the pot, it symbolizes a fresh start for the plant. It is a chance for the plant to grow bigger and stronger, and the right soil can make all the difference. The best soil for repotting plants should be a combination of peat moss, perlite, and composted bark – this ensures proper drainage and nutrient retention. Adding in some slow-release fertilizer will help ensure that your newly potted plant will have enough energy to thrive.
When selecting potting soil, it’s important to look at what type of plant you are repotting. Different plants need different levels of acidity and nutrients in order to stay healthy, so check with a local gardening store or online resources if you’re not sure which type of soil to choose. Additionally, make sure to avoid using garden soil – this can contain disease-causing organisms that can harm your plants.
By selecting quality potting soil and ensuring proper drainage, you are providing your plants with everything they need to remain happy and healthy in their new homes. Now that you’ve chosen the best soil for repotting plants, let’s turn our attention to figuring out the best way to water them after they’ve been transplanted.
What Is The Best Way To Water The Plant After Repotting?
Watering the repotted plant is the final step in ensuring its success. But, how much and how often? It’s important to give plants the right amount of water; too little or too much can damage their roots and even kill them. So, what is the best way to water a newly repotted plant?
When watering a newly repotted plant, make sure the soil is moist but not waterlogged. Using a watering can with a spout that has holes at the end helps avoid over-watering and keeps the soil from washing away when pouring. To test whether your potted plant needs watering, stick your finger into the potting mix up to your first knuckle. If it feels dry, it’s time to water; if it’s damp, hold off until next time. Giving your plant lukewarm water also helps protect its roots from shock since cold water can cause root rot or other health problems.
Finally, after you’ve watered your new plant, check its drainage system to make sure excess moisture is getting out of the pot and not pooling in there. If you don’t have one already, it’s a good idea to invest in some type of drainage material such as gravel or pebbles for inside the bottom of your container so that excess water doesn’t become stagnant around your plants’ roots. With proper care and attention, you can ensure that your repotted plants stay healthy and thriving!
How Much Sunlight Does A Repotted Plant Need?
In the process of repotting a plant, there are several important steps to make sure your plant is healthy and thriving. One of these steps is to make sure the new pot has enough sunlight for the plant. This can be tricky as different plants require different amounts of light.
Generally, most plants should get at least six hours of direct sunlight each day. If you’re not sure how much light your plant needs, research its specific type or check with a local nursery or gardening expert. It’s also important to ensure that the area you choose for your repotted plant isn’t too dark or too hot.
Finally, it’s important to monitor your repotted plant carefully after moving it. Are there any signs that it isn’t adjusting well to its new pot? Make sure you’re prepared to address any issues that arise quickly and effectively so your plant can stay healthy and happy in its new home!
What Are Some Signs That A Plant Is Not Adjusting Well To Its New Pot?
Repotting a plant can be both exciting and intimidating. You want your plant to thrive in its new home, but it can be difficult to know if a plant is adjusting well. To ensure your repotted plants stay healthy, it’s important to watch for signs that it may not be doing well.
One of the most common signs of distress is drooping or wilting leaves. This can indicate that your plant isn’t getting enough water or has been overwatered. Other signs include browning of the leaves and spots or yellowing on them, which could signal too much direct sunlight or an infestation of pests. If you notice any of these issues, it’s important to take action right away by providing the appropriate amount of light and water while addressing any pest problems quickly.
It’s also beneficial to check on the condition of the soil regularly after repotting. If your pot has inadequate drainage, this can lead to root rot and other issues with the roots of your plants. Make sure there are plenty of holes in the bottom for water to flow out freely when you water your plants and also use a soil mix that promotes good drainage. Taking these steps will help keep your plant healthy in its new home.
By keeping an eye out for signs that a plant may not be adjusting well after being repotted, you can take steps to correct any issues before they become too big a problem and potentially save your beloved houseplant!
How Can You Help A Plant That Is Struggling After Repotting?
Once a plant is repotted, it may not always adjust well to its new home. There are signs that the plant is struggling and needs help. It’s important to look out for these indicators so you can take action quickly.
Signs of distress include wilting leaves, yellowing foliage, brown spots, or slow growth. These are all indications that the plant isn’t getting its needs met in its new environment. To help the plant recover, it’s important to provide proper care and make sure it has enough light and water. You may also need to amend the soil if necessary to give it better drainage or nutrients.
It’s also a good idea to observe the potting mix throughout the process and check for signs of pests or disease. If there are any issues discovered, you’ll want to take steps to address them immediately. With careful monitoring and attention, you can help your plant get back on track after repotting and enjoy all the benefits of having a healthy houseplant.
What Are The Benefits Of Repotting Plants?
Repotting plants can be like an exhilarating journey—filled with anticipation and excitement! It’s a great way to give your plants the nourishment they need for growth and development. But before you get started, it’s important to know what benefits come from repotting.
For one, repotting can help provide plants with more room for their roots to spread out. This helps them absorb more nutrients and water, giving them the energy they need to grow bigger and healthier. Additionally, if the plant is becoming root-bound in its original pot, this can cause stress on the plant due to lack of space. Repotting can help alleviate this problem by providing ample room so that its roots can thrive.
Finally, repotting also gives you the opportunity to use fresh soil with better drainage capabilities. This new soil will provide plants with more access to air and nutrients, which are essential for their growth. Plus, it’ll allow excess water to be drained away quickly so that your plant isn’t sitting in waterlogged soil. All these aspects of repotting can help ensure that your plants stay healthy and happy in their new pots!
What Are Some Tips For Keeping Plants Healthy In Their New Pots?
Repotting plants can be a great way to give them the nutrients they need and extend their life. However, it’s important to do it right or else you risk killing your beloved plants. With just a few tips, you can make sure that your plants are safe and healthy in their new pots.
On the one hand, repotting can be a daunting task. You don’t want to cause any harm while transferring your plant from its old home to a new one. On the other hand, if done correctly, repotting can provide your plant with fresh soil and more space for growth, as well as relieving root crowding and giving it access to more nutrients.
Before you start repotting, make sure you have all the materials you need: potting soil, gloves (to protect your hands), an appropriately sized container for the plant and pruning shears or scissors (if needed). Once everything is ready, carefully remove the plant from its existing pot by turning it upside down and gently tapping around the edges until it slides out. If necessary, trim off some of the roots with shears or scissors before placing it in its new pot. Make sure there’s enough room around the sides so that roots can spread out easily. Finally, fill in around the edges with soil and water thoroughly.
Repotting may seem like a daunting task but with these tips in mind, you’ll be able to keep your plants healthy without putting them at risk!
Frequently Asked Questions
How Often Should I Repot My Plants?
It’s important to keep in mind that not all plants need repotting. Knowing when and how often to repot your plants can be like threading a needle – you have to find the right balance. Generally speaking, most indoor plants should be repotted every two or three years.
When it comes to repotting, timing is everything. If a plant is root-bound, then it may need to be moved into a larger container sooner than expected. Signs of root-bounding include fewer blooms, poor drainage, and yellow leaves. On the flip side, if you wait too long before repotting, the roots will become overly crowded and can make it difficult for the plant to absorb nutrients. It’s best to err on the side of caution – if in doubt, go ahead and give your plant some extra space!
So how do you safely repot your plants without killing them? First of all, make sure you’re using potting soil that’s specifically designed for your type of plant. It’s also important to water your plant thoroughly both before and after you move it into its new home – this will help keep stress levels low by providing moisture during the transition period. Taking these steps will ensure that your plants are happy and healthy for years to come!
What Do I Do If The Plant Is Too Big For The Pot?
Repotting your plants can be tricky business. It’s important to know the right time and methods to do so, otherwise you could end up killing them. But what if the plant is too big for the pot?
In this case, it’s best to choose a larger pot and break down the root ball into several pieces. When you repot, make sure to add in fresh soil and water it well. You can also prune away any dead or damaged roots to encourage new growth. Don’t forget to allow adequate drainage too!
If you’re worried about transplant shock, sprinkle a light layer of compost over the top of the soil once planted. This will help keep moisture in and help reduce stress on the plant as it adjusts to its new environment. Taking these extra steps will help ensure your plants stay healthy and vibrant for many years to come.
Is It Better To Use A Clay Pot Or Plastic Pot?
When it comes to repotting plants, a key decision is whether to use a clay pot or plastic pot. This can be a difficult decision to make, as both have their own advantages and disadvantages. Clay pots are heavier than plastic, which makes them better for larger plants that may be top-heavy. They also have better drainage and aeration qualities, which can help the plant’s roots to breathe more easily. However, they tend to be more fragile and costly than plastic pots.
On the other hand, plastic pots are much lighter and less likely to break when moving them around. They are also cheaper than clay pots and come in a variety of colors and shapes that can add aesthetic appeal to your space. However, the drainage quality is not as good as with clay since water can get trapped in the bottom of the pot.
Ultimately, you will need to consider factors like size, cost, and aesthetics when deciding between clay pots and plastic for repotting your plants. Though each has its own pros and cons, choosing the right one for your particular needs will ensure that you have created an environment where your plant can thrive safely without any issues.
Can I Repot A Plant In The Same Soil?
When repotting plants, it’s important to consider the type of soil you use. Can you repot in the same soil?
The answer is yes, but it depends on how much time has passed since you first planted the plant. If you’ve been taking care of the plant for only a few weeks or months, then you can use the same soil if it still looks healthy and moist. However, if it’s been more than a year since you planted it, then it may be best to use fresh soil for optimal growth.
It’s also important to remember that when repotting plants, clay pots are generally better than plastic ones. Clay pots allow air and moisture to move through them more easily than plastic pots do; this helps ensure proper drainage and prevents root rot from happening. Additionally, clay pots tend to be heavier than plastic ones, which makes them less likely to break when transferring your plant from one pot to another.
No matter what kind of pot you use for your plant, make sure that it provides adequate drainage so that water doesn’t pool at the bottom and suffocate your roots. Additionally, be sure to give your plants some extra love when repotting them—give them a nice drink of water afterwards and make sure they’re getting enough light and nutrients so they can thrive in their new home!
How Do I Know When A Plant Needs To Be Repotted?
Knowing when a plant needs to be repotted can be tricky. It’s an important step, though, as overcrowded roots can lead to stunted growth or even death. So how do you know when a plant needs a new pot?
First, take a look at the size of the pot. If it’s been in the same one for more than two years and the roots are hitting the sides of the pot, then it’s time for an upgrade. Another telltale sign is drainage holes that have become clogged with debris or soil. This means your plant isn’t getting enough oxygen and nutrients from its current pot.
Finally, check on your plant’s overall health. Is it growing slowly? Are there any signs of wilting or discoloration? These could also indicate that it’s time to give your plant some extra space in a larger pot. Repotting may seem intimidating, but following these steps will ensure your plants stay healthy and thriving!
Conclusion
Repotting plants is an important part of keeping them healthy and thriving. It can be daunting if you’ve never done it before, but with the right guidance and preparation, it doesn’t have to be a daunting task. Knowing when to repot your plants, what type of pot to use, and how to safely remove the plant from its old pot are all key steps in repotting successfully. With some patience and practice, any gardener can learn how to successfully repot their plants without killing them.
When it comes to repotting plants, timing is everything. The best time to repot is early spring after the last frost so that the roots have plenty of time to settle into their new home before winter comes around again. Additionally, when selecting a pot for your plant make sure it’s not too big or small; choose something that works with the size of the plant. Lastly, when removing the plant from its old pot try not to disturb too much of the existing soil as this can damage the delicate root system.
Repotting plants may seem intimidating at first but with just a little bit of knowledge and practice anyone can master this artful skill. Doing so will ensure that your plants stay healthy for years to come! So take your time and give yourself permission to make mistakes along the way—you’ll soon be a pro at correctly repotting your beloved plants!

