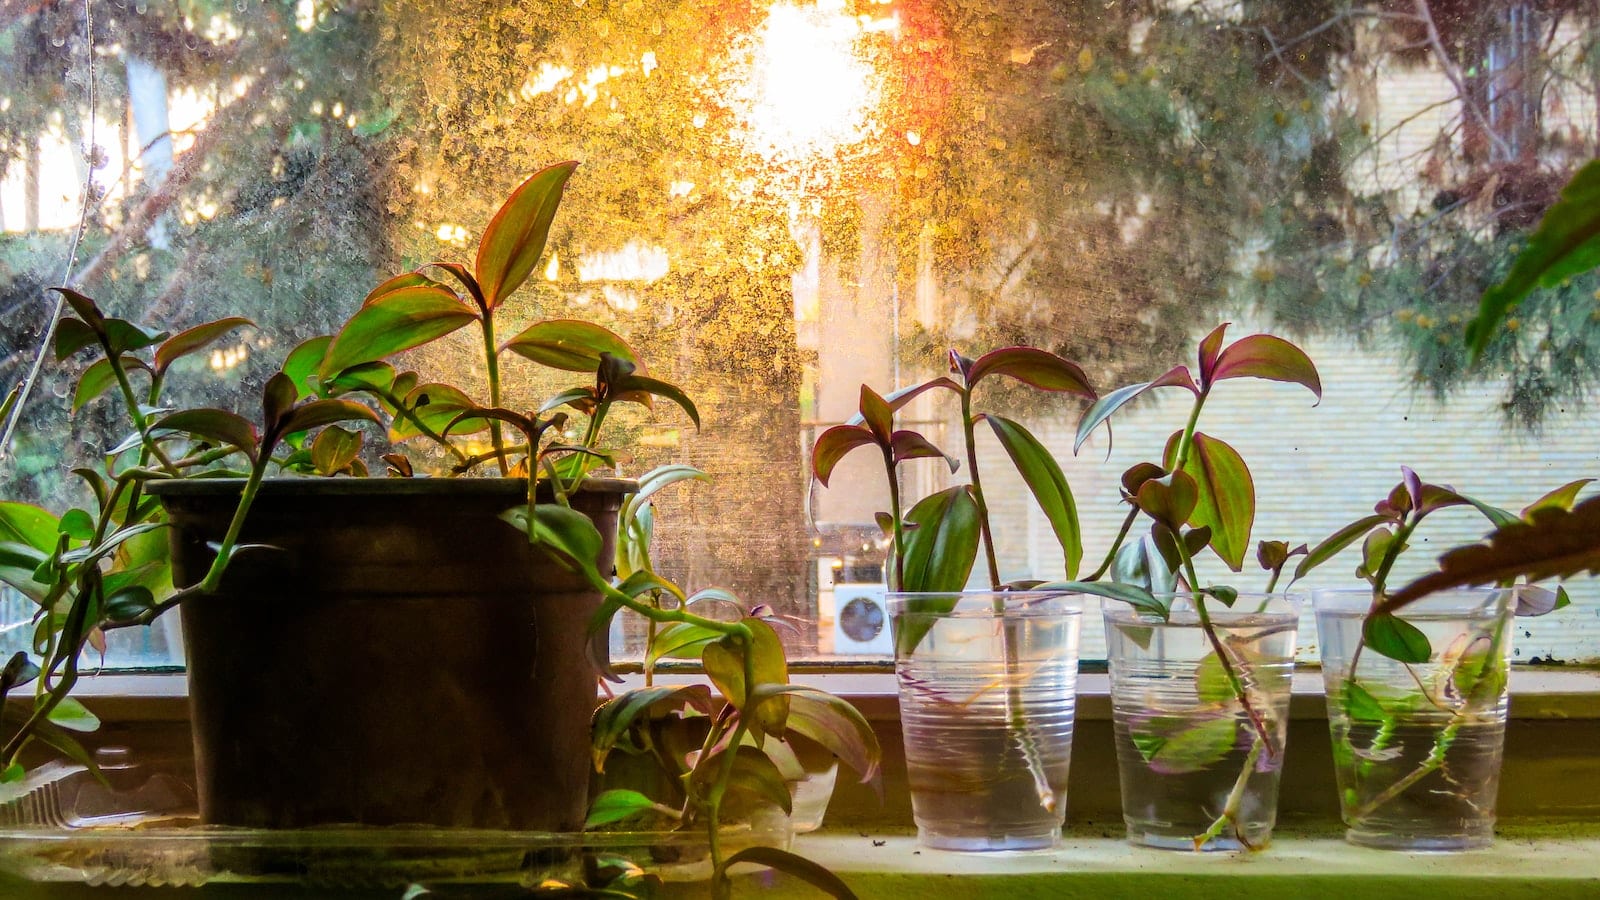
Propagating plants is like growing a garden of dreams: you take a small seed, give it some love and attention, and in return, you get an abundance of lush foliage to enjoy. Not only can propagating plants be an enjoyable hobby for green thumbs everywhere, it’s also an incredibly rewarding way to make your home more vibrant and inviting.
But how do you propagate a plant? It’s not as difficult as you may think! With the right tools, knowledge and guidance, anyone can learn how to propagate plants in their own home. In this article, we will discuss the steps involved in propagating plants so that you too can join the gardening community!
From understanding the basics of propagation to prepping your soil and selecting the right type of cutting – we’ll cover everything you need to know about propagating plants successfully. We’ll also explain why propagation is such a beneficial activity that has benefits far beyond just having some beautiful greenery around your house.
1. Understanding Plant Propagation
Rooting a new plant is like giving birth to a beautiful living thing! It’s an exciting process that requires knowledge and patience. Understanding plant propagation is the first step in ensuring successful growth and healthy plants.
Firstly, you need to familiarize yourself with the different types of plant propagation: seeds, stem cuttings, layering, division and tissue culture. While each type of propagation has its own set of benefits, it’s important to understand which one works best for your desired outcome. For example, stem cuttings are best for shrubs or trees while seed germination is perfect for annuals or vegetables.
Equally important is understanding the needs of your plants. Each species has its own specific requirements in terms of soil, sunlight, water and temperature. Knowing these conditions will help you create the right environment and meet the demands of your new plants as they grow and develop.
It’s time to choose the right propagation method for your plants – a method that suits both their needs and yours!
2. Choosing The Right Propagation Method
Did you know that there are over 250,000 species of plants in the world? With such an abundance of life, it’s no surprise that you can grow a variety of plants from seeds or cuttings. Now that you understand plant propagation, let’s look at how to choose the right method for your needs.
The first step is to decide whether you want to propagate from seeds or cuttings. Both methods have their benefits and drawbacks, so it’s important to consider them carefully. Seeds are easy to store and transport, but they require more time and energy than cuttings and may not always produce the exact same plants as the parent plant. Cuttings provide an identical clone of the parent plant, but they must be taken correctly for successful propagation.
No matter which method you choose, it is essential to pay attention to the environment where your propagated plants will be grown. Different plants require different temperatures, light levels, water requirements, and soils in order to thrive. Knowing these conditions before propagating will ensure your new plants stay healthy and strong as they grow.
So when selecting a propagation method for your garden or home project, make sure you consider all the factors involved in growing a healthy plant – from choosing the right type of cutting or seed, through to creating the right environment for growth.
3. Taking A Cutting
Taking a cutting is like opening a door to a new world of possibilities. It can seem intimidating at first, but with the right tools and knowledge, you can start your own propagation journey in no time.
First things first, let’s talk about getting the cutting ready. You’ll need sharp pruners or scissors to make sure you don’t damage any of the leaves or stems on the plant as you cut it. Taking a cutting from an existing plant ensures that the resulting propagated plants have the same characteristics and traits as their parent plant.
Once you have your cutting ready, it’s time to prepare it for its new home. If there are any additional stems or leaves on your cutting, trim them off so that the propagated plant has more energy to put into growing roots instead of extra foliage. Inspect your cutting for pests and diseases, and make sure to sanitize your pruners before moving on to preparing the soil for planting.
Now that your cutting is ready, you are well on your way towards successful propagation! With just a few simple steps and some patience, you will soon be able to enjoy the fruits of your labor in no time.
4. Preparing A Cutting
Propagating plants is a fulfilling endeavor, like a ray of hope that extends through troubled times. With 4 simple steps, anyone can achieve success in propagating their favorite plants. The fourth step – preparing a cutting – requires careful attention and preparation to ensure the best chance of success.
First, it is important to select healthy plant material for taking cuttings. Look for vibrant green leaves with no signs of disease or discoloration. Choose stems or branches that are free of insect damage and have some new growth at the tips.
Second, make sure to use clean tools for taking the cuttings. This will help reduce the risk of transferring disease to the new cuttings. Use sharp scissors or pruners so you can make clean cuts that heal quickly without leaving jagged edges where pathogens may enter.
Third, treat the ends of the cuttings with a rooting hormone to increase their chances of successful propagation. Many rooting hormones come in powder form which can be applied by dipping the ends of the cutting into it; others are available as gels which can be painted onto the end of each cutting before planting it into its growing medium.
The effort put into this step will pay off when you transplant your new cuttings into their final home – an environment where they can thrive and bring joy to those who care for them! Onward we go towards planting our cutting and watching it grow!
5. Planting The Cutting
Planting the cutting is like a new beginning for your plant – one that should be tended to with care and consideration. Once you have prepared the cutting, it’s time to dig in and get to planting.
To start, find a pot with drainage holes at the bottom, lay down some gravel on the bottom for extra drainage, then fill it with a light soil mix. Next, take your cutting and prepare its base by snipping off any leaves near it and then dip the end of the stem into some rooting hormone powder or gel. Then use a pencil or chopstick to make a hole in the soil big enough to accommodate your cutting – it should be deep enough so that two-thirds of your cutting is buried underground. Gently place your cutting in the hole, fill in around it with more soil, lightly press down around it and give it a good watering.
Now that you’ve completed this step, move onto caring for your newly planted cuttings by providing them with plenty of sunlight and water. It is important to keep an eye out for signs of stress such as wilting or discoloration so you can adjust accordingly. With consistent proper care, you’ll soon see new growth emerging from these little babies!
6. Watering And Caring For Cuttings
It seems like such a daunting task – watering and caring for your cuttings. But, believe it or not, it can be surprisingly easy! By following a few simple steps, you can make sure that your cuttings get the attention they need to grow into beautiful new plants.
First off, water your cuttings right away. Make sure you give them enough water so that their roots are completely covered. This will help prevent them from drying out and wilting. You may also want to add a bit of fertilizer to the water as well, as this will help promote healthy growth.
Once you’ve got the basics down, you’ll need to keep an eye on your cuttings throughout the propagation process. Make sure they have sufficient light and air circulation, and check regularly for any signs of disease or pests. If any of these issues arise, take action quickly so that you don’t lose your precious plants!
Caring for cuttings may seem overwhelming at first glance – but with some patience and effort, you can turn all of those little nubs into stunning new additions to your garden!
7. Propagation With Seeds
Sowing the seeds of success! Plant propagation with seeds is an easy and inexpensive way to start growing a garden. But, before getting your hands dirty and planting those precious little seeds, there are certain steps that must be taken to ensure successful propagation. Let’s take a look at what needs to be done:
First and foremost, it is important to find the right type of seed for your desired plants. Depending on what kind of plants you’re looking to propagate, different types of seeds may have higher chances of success than others. Additionally, it’s important to consider the climate in which you’ll be growing your plants as some varieties may do better in warmer regions while some may require cooler temperatures.
Once the appropriate seed type has been determined, it’s time for planting! Here are five key points for planting seeds successfully:
• Gather the necessary materials such as pots or planters, potting soil, labels or markers and gloves (optional).
• Select a spot that allows for optimal drainage and sunlight.
• Prepare the soil by adding fertilizer if desired and mixing it well with any existing dirt in the planter or pot.
• Place two or three seeds per pot no deeper than 1/4 inch into the soil.
• Water lightly after sowing and keep moist throughout germination.
The next step is ensuring proper care while they germinate – this includes keeping them warm in temperatures around 50-70 degrees Fahrenheit (10-21 degrees Celsius) during their growth period so that they can develop healthy roots and stems. Providing adequate light sources such as grow lights or natural sunlight is also essential as this will help them photosynthesize properly and develop into strong plants. Lastly, fertilizing every few weeks will give them an extra boost of nutrients they need to grow properly!
With these simple steps followed carefully, you’ll soon have beautiful flowers and vegetables blooming in your garden! Now all that’s left is to get those little sprouts planted – happy gardening!
8. Planting Seeds
Once you have gathered the necessary items to propagate your plants, it’s time to plant the seeds. To do this, fill a pot or container with soil and sprinkle the seeds onto the surface of the soil. Gently press them down into the soil so they make contact with it. For larger seeds, you may want to bury them a bit deeper.
When planting your seeds, be sure to keep in mind what type of environment each seed requires for best results. Some like lots of sunlight and warmth, while others require cooler temperatures and partial shade. Make sure you provide what each seed needs for better success rates!
You’ll also want to ensure that there is adequate drainage in your containers or pots before planting your seeds. This will help prevent water from standing on top of the soil, which can drown out your new little plants before they even get started! With that said, don’t forget to water regularly after planting – just be careful not to overwater as this can lead to rot. From here, you’re ready to move on to caring for propagated seeds – let’s dive in!
9. Caring For Propagated Seeds
All that glitters is not gold. Propagating plants from seeds can be a rewarding experience, but it does take effort. Growing plants from seeds isn’t just about planting them in the ground and hoping for the best; there are certain steps to take to ensure that your seedlings make it to maturity. Caring for propagated seeds is an important part of the process.
The first step in caring for propagated seeds is to provide them with plenty of light. Most seeds require direct sunlight or at least bright indirect light throughout the day in order to germinate and grow properly. It’s also important to keep the soil moist but not wet, as too much moisture can cause mold and mildew growth, which can kill young seedlings. Make sure to water your seedlings regularly and check the soil daily using your finger or a hand trowel; if it feels dry, add some more water until it’s damp but not soggy.
It’s also important to fertilize your propagated plants periodically in order to help them achieve their full potential. Fertilizers come in many different forms, so make sure you choose one that’s appropriate for the type of plant you’re growing. When applying fertilizer, do so sparingly – too much can lead to over-fertilization and stunted plant growth. Be sure to read any instructions carefully before applying any products to your plants!
With regular care and monitoring, your propagated plants should thrive and reach maturity without issue – but if something does go wrong, don’t panic! Troubleshooting propagation techniques is an important part of gardening, and with a little research and some simple adjustments you’ll soon be back on track with success.
10. Troubleshooting Propagation Techniques
“The best way to learn is by doing”, so the old adage goes. When it comes to propagating plants, this couldn’t be more true. However, even with practice, you may encounter some issues that can’t be solved with trial and error alone. Troubleshooting propagation techniques requires a bit of patience and understanding of the process. Here are four tips for troubleshooting plant propagation:
- Start with healthy plants – Before attempting to propagate your plants, it’s important to make sure they’re in good health; otherwise, any clones you create will also be unhealthy. Check for signs of disease on the leaves or stems and look out for pests such as aphids or caterpillars.
- Ensure adequate humidity – Humidity levels need to remain consistent throughout the entire propagation process in order for plants to thrive and root successfully; otherwise, they can dry out quickly, leading to death if left unattended. Investing in a humidifier can help maintain the desired level of moisture in the air for your propagated plants.
- Monitor temperature – Temperature is key when it comes to successful plant propagation; too hot or too cold could cause issues such as wilting or stunted growth. Keep an eye on the temperature in your greenhouse or room where you’re propagating plants – ideally between 65-75 degrees Fahrenheit – and invest in heating mats when needed.
- Provide proper nutrition – Proper nutrition is essential for healthy plant growth during all stages of propagation; therefore, adding fertilizer regularly will ensure that all nutrients are present at optimal levels throughout the process. Be sure not to over-fertilize though, as this can lead to nutrient burn and other problems in your new plants!
No matter how much effort you put into propagating a plant, sometimes things don’t turn out exactly as expected due to environmental factors or other issues beyond our control. By following these tips and having patience when troubleshooting any problems that may arise during propagation, you’ll be able to successfully propagate beautiful plants that will last a lifetime!
Conclusion
Propagating plants is an enjoyable activity that can bring you closer to nature and provide a fun hobby. It’s rewarding to watch your efforts grow into vibrant, healthy plants that you can either keep or share with family and friends. Propagation is also a great way to save money on buying new plants since you can use your existing ones to create more.
The process of propagation can be daunting at first, but with time and practice, it becomes easier and more enjoyable. To illustrate this point, I recently tried propagating my favorite type of plant – succulents. After some trial and error, I was able to successfully propagate several succulents from just one original plant – something I couldn’t have done without the knowledge I gained through researching how to propagate plants.
Overall, learning how to propagate plants is a fun experience that anyone can enjoy. With the right information and some patience, anyone can become an expert in propagating their favorite plants. So don’t be afraid to get your hands dirty – you never know what amazing things you may grow!

