As organic gardeners, we are always looking for ways to save money and resources while still producing healthy and delicious crops. One way to do this is by saving the seeds from our favorite heirloom tomatoes so that we can grow them again next year. Not only does this help us save money on buying new seeds each year, but it also allows us to preserve the genetic diversity of these special varieties.
Saving tomato seeds is a simple process that requires a little bit of planning and some basic supplies. By following a few easy steps, you can easily collect and store your own tomato seeds, ensuring that you have access to your favorite varieties for years to come. In this article, we will discuss the benefits of saving tomato seeds, as well as provide detailed instructions on how to properly harvest and store them. Whether you are a seasoned gardener or just starting out, learning how to save tomato seeds is a valuable skill that will pay off in the long run.
The Benefits Of Saving Tomato Seeds
The art of seed saving is an essential skill for any organic gardener. It is the process of collecting and storing seeds from plants, which can be used to grow new crops in the following season. In addition to being a practical way to ensure a continuous supply of produce, seed saving has become increasingly important due to the need for biodiversity preservation.
The importance of biodiversity cannot be overstated. By preserving a variety of plant species, we are creating a more resilient ecosystem that can better withstand environmental changes and pests. Seed saving communities have emerged as a response to this need, with many gardeners actively participating in preserving heirloom varieties. These communities work together to maintain genetic diversity in plants and promote sustainable agriculture.
As an organic gardening expert, I cannot stress enough how crucial it is to save tomato seeds. Tomatoes are one of the most popular fruits grown in gardens around the world and they come in countless varieties. By saving seeds from your favorite tomatoes, you are not only ensuring their availability but also preserving genetic diversity within this beloved fruit. Understanding seed saving basics is crucial for any gardener wanting to preserve tomato varieties and contribute to a sustainable future.
Understanding Seed Saving Basics
Seed saving is a crucial aspect of sustainable agriculture. It involves collecting and storing seeds from crops to be used in the next planting season. One essential factor to consider when seed saving is seed viability, which refers to the ability of seeds to germinate and produce healthy plants. Proper storage techniques are necessary for maintaining seed viability.
Crop diversity is also an important consideration in seed saving. It helps to preserve plant genetic diversity, which is crucial for maintaining resilience in agricultural systems. Plant genetic diversity provides a buffer against pests, diseases, and environmental stresses that may affect crops adversely. Therefore, it’s essential to save seeds from a wide range of crop varieties.
Seed saving can be an exciting and rewarding experience for any gardener or farmer interested in sustainable agriculture. By understanding the basics of seed saving, one can contribute to preserving crop diversity while ensuring future food security. The next step is selecting the best tomatoes for seed saving by considering factors such as disease resistance, flavor, size, color, and shape. These factors determine the quality of tomato seeds and ultimately contribute to healthy and robust plant growth in subsequent planting seasons.
Selecting The Best Tomatoes For Seed Saving
- When selecting tomatoes for seed saving, it is important to choose ripe fruit, as unripe tomatoes will produce seeds that are unlikely to germinate.
- When deciding on a tomato variety, consider the desired flavor, size, color, and disease resistance of the fruit.
- Generally, determinate tomatoes are preferred for seed saving, as they have shorter growing season and are typically more uniform in size and shape.
- Additionally, hybrids are not recommended for seed saving, as the resulting offspring may not produce the same fruit characteristics as the parent plants.
Choosing Ripe Tomatoes
As an organic gardening expert, I understand the importance of choosing ripe tomatoes when seed saving. Identifying ripeness is key to ensuring that the saved seeds will produce healthy and vibrant plants next year. When selecting tomatoes for seed saving, it is important to look for fruits that have reached their full maturity. This can be determined by observing changes in color and texture.
Common mistakes to avoid include selecting unripe or overripe tomatoes for seed saving. Unripe fruits are not yet fully mature and their seeds may not be viable enough to germinate. On the other hand, overripe tomatoes may have already begun to decompose, affecting the quality of their seeds. It is also important to avoid selecting diseased or damaged fruits as they may carry pathogens that can affect the health of future plants.
When identifying ripeness, look for a uniform color on the tomato’s surface and a slightly soft texture when pressed gently with your fingers. The stem should also begin to loosen from the fruit as it reaches full maturity. By avoiding common mistakes and carefully selecting ripe tomatoes for seed saving, you can ensure that your future plants will thrive and produce delicious fruits.
Determining Tomato Variety
Identifying tomato varieties is an important aspect of selecting the best tomatoes for seed saving. There are two main types of tomatoes: hybrid and heirloom. Hybrid tomatoes are a cross between two different tomato varieties, resulting in plants with specific characteristics that are desirable to growers. Heirloom tomatoes, on the other hand, are open-pollinated varieties that have been passed down from generation to generation and have unique flavors and traits.
Differentiating hybrid and heirloom tomatoes is crucial when determining which plants to save seeds from. Hybrid plants do not produce offspring with the same characteristics as the parent plant, so it is important to choose only heirloom varieties for seed saving if you want to ensure consistency in your future crops. Additionally, some hybrids may be sterile or produce seeds that are not viable for germination.
To determine whether a tomato variety is an heirloom or hybrid, look for information on the seed packet or do some research online. It is also helpful to observe the plant’s growth habits and fruit characteristics over time. By identifying tomato varieties accurately, you can select the best fruits for seed saving and ensure that your future crops will be healthy and vibrant.
Preparing Tomatoes For Seed Saving
To prepare tomatoes for seed saving, it is important to start with the right tomato varieties. Choose heirloom or open-pollinated varieties, as hybrid varieties may not produce viable seeds. It is also important to ensure that the plants are healthy and disease-free, as this will increase the odds of producing healthy seeds.
Once you have chosen your tomato plants, allow them to fully ripen on the vine before harvesting. This will ensure that the seeds are mature and ready for saving. Cut open the tomatoes and remove the seeds, being sure to separate any pulp or flesh from the seeds. Rinse them in water until they are clean and then dry them thoroughly.
Proper seed saving techniques can ensure that you have a bountiful harvest year after year. By selecting healthy plants, allowing them to fully ripen before harvesting, and properly preparing and storing the seeds, you can be sure that your next crop will be just as successful as the first. In the next section, we will explore how fermenting tomato seeds can further improve their viability.
Fermenting Tomato Seeds
- When selecting tomatoes for fermenting tomato seeds, it is important to choose tomatoes that are ripe, healthy, and free from disease.
- Prior to fermenting tomato seeds, it is important to remove the seeds from the tomato and rinse them to remove any remaining pulp.
- The fermenting process for tomato seeds is simple, and involves combining the cleaned tomato seeds with a small amount of water and allowing them to sit for several days.
- During the fermentation process, the seed coats will soften and the seeds will sink to the bottom while the pulp will float to the top.
- After the fermentation process is complete, the tomato seeds should be thoroughly rinsed and then dried completely before storing them for future planting.
- Tomato seeds that have been properly fermented and stored can last up to three years, ensuring a successful harvest for the next season.
Selecting Tomatoes
As an organic gardening expert, I understand the emotional connection one can have with their tomato plants. Choosing the right tomato variety is crucial when it comes to saving seeds for next year’s harvest. It is recommended to select heirloom or open-pollinated varieties as they produce offspring that resemble their parents. Hybrid tomatoes, on the other hand, may not produce viable seeds or may produce offspring that vary significantly from their parents. When selecting tomatoes for seed saving, it’s important to choose healthy and disease-free fruits.
Seed maturity plays a significant role in determining whether or not your saved seeds will grow into healthy plants. Tomato seeds must be fully mature before harvesting; this usually takes around 10-14 days after the fruit has ripened. To check if the seeds are ready, cut open a ripe tomato and scoop out some of its gel-filled seeds onto a paper towel. Allow them to dry for a few days before rubbing them between your fingers. Mature tomato seeds should easily come off the paper towel without any gel attached.
In conclusion, selecting the right tomato variety and ensuring seed maturity are essential steps when it comes to saving tomato seeds for future plantings. Careful selection of healthy and ripe fruits will ensure that your saved tomato seeds will produce healthy plants next season. By following these simple guidelines, you’ll be able to ensure bountiful harvests every year while also serving others by sharing your knowledge of organic gardening practices with those around you.
Preparing Seeds
Now that we have discussed the importance of selecting the right tomato variety and ensuring seed maturity, let’s move on to the next step in saving tomato seeds: preparing them for storage. One method for preparing tomato seeds is fermentation. Fermenting tomato seeds involves breaking down the gelatinous coating around the seeds, which can inhibit germination if not removed.
To ferment tomato seeds, scoop out the gel-filled seeds from a ripe tomato into a jar or container. Add some water to cover the seeds and let it sit for 2-3 days at room temperature. During this time, the mixture will begin to ferment and develop a layer of mold on top. Stirring the mixture once a day will help break down the gel coating and prevent mold from growing too thickly.
After 2-3 days of fermentation, pour off any mold and floating debris at the top of the mixture. Then add fresh water to fill up the container again and stir well. The good, viable seeds will sink to the bottom while any remaining debris or bad seeds will float to the top and can be poured off. Repeat this process until only clean, sunken seeds are left in your container. These fermented tomato seeds can then be dried on a paper towel or screen before being stored in an airtight container for future use.
Fermenting Process
Fermenting tomato seeds is a crucial step in the process of saving seeds for next season’s planting. The benefits of fermentation are many, including breaking down the gel coating around the seeds that can inhibit germination, identifying bad seeds that can be discarded, and improving seed quality overall. However, some issues may arise during the fermentation process that could affect the viability of your saved tomato seeds.
One common problem that can occur during fermentation is mold growth. This can be prevented by stirring the mixture once a day to break down the gel coating around the seeds and prevent mold from growing too thickly. Another issue to watch out for is over-fermentation, which can lead to seed damage or loss of viability. Therefore, it is essential to monitor your fermenting tomato seed mixture closely and not let it sit for longer than 2-3 days.
Despite these potential issues, fermenting tomato seeds remains an effective method for preparing seeds for storage and ensuring high-quality plants next season. By following these simple steps and troubleshooting any problems that may arise, you can successfully ferment your tomato seeds and create a bountiful crop year after year.
Separating Tomato Seeds From Pulp
After selecting the best tomatoes from your garden, it is time to separate the seeds from the pulp. This process will ensure that you have viable and healthy tomato seeds for next year’s planting season. Using tomato pulp to separate the seeds is an easy and effective method.
To begin, cut open your selected tomatoes and scoop out the pulp into a container. The next step is to let the pulp ferment for one or two days. During this period, bacteria in the pulp will break down any germination inhibitors in the seed coat, which will encourage seed germination once planted. After fermentation, pour water over the top of the mixture and stir gently. Viable tomato seeds will sink to the bottom while remaining pulp and debris will float.
In order to separate viable tomato seeds from remaining debris, pour off as much liquid as possible without losing any of the tomato seeds at the bottom. Then use a fine mesh strainer or cheesecloth to strain out any remaining pulp or debris from your tomato seed mixture. With these simple steps, you can easily obtain clean and healthy tomato seeds for growing season after season.
Moving on to cleaning tomato seeds, there are several ways to ensure that they are free of any potential diseases or pathogens before storing them away for next year’s planting season.
Cleaning Tomato Seeds
After successfully separating the tomato seeds from the pulp, it’s time to prepare them for storage. One method of saving tomato seeds is through fermentation. The process involves placing the seeds in a jar with a small amount of water and allowing them to ferment for several days. Fermentation breaks down the gel-like coating around the seeds, making them easier to clean.
Once fermented, pour the mixture into a fine-mesh sieve over running water. Use your hands or a soft cloth to rub off any remaining residue. Rinse until only clean seeds remain. Spread the cleaned seeds out onto a paper towel or screen and allow them to dry completely before storing.
Seed cleaning techniques, like fermentation, can improve germination rates and increase seed viability. Properly stored tomato seeds can last up to six years, ensuring you have plenty of fresh produce year after year. In our next section, we will discuss how to dry tomato seeds in preparation for long-term storage.
Drying Tomato Seeds
Cleaning tomato seeds is an essential step for successful seed saving as it removes any remaining pulp, which can hasten decay. Air drying tomato seeds is the most common method of drying and should be done in a cool, dry, dark place with good airflow. Once the tomato seeds are completely dry, they should be stored in an airtight container in a cool, dry place. Storing tomato seeds in a dark, airtight container can help to extend their shelf life, up to three years. Proper cleaning, air drying, and storage of tomato seeds are essential for successful seed saving and can help ensure successful crops in the future. With the right knowledge and preparation, tomato seeds can be saved and used to grow successful, healthy crops in future seasons.
Cleaning Tomato Seeds
The process of drying tomato seeds is an essential step in ensuring the continued growth and supply of healthy plants. However, before the seeds can be dried, they must be properly cleaned. Seed cleaning techniques are crucial in maintaining seed purity, as contaminated seeds can lead to poor yields or disease outbreaks. As an organic gardening expert, I recommend several methods for cleaning tomato seeds.
The first step in cleaning tomato seeds is to remove any remaining flesh or pulp from the seeds. This can be done by soaking the seeds in water and gently rubbing them between your fingers. Next, rinse the seeds thoroughly and spread them out on a flat surface to dry. You can also use a strainer or sieve to separate the seeds from any remaining debris.
Another effective method for cleaning tomato seeds is fermentation. Simply place the extracted tomato pulp and seeds in a jar with some water and allow it to ferment for a few days. The fermentation process will break down any remaining tissue around the seed and help remove pathogens that may be present on the seed surface. After fermentation, rinse the seeds thoroughly and dry them on a flat surface.
In conclusion, proper seed cleaning techniques are fundamental to ensuring seed purity and healthy plant growth. By following these methods for cleaning tomato seeds, you can rest assured that your plants will thrive next season while preserving their genetic traits for future generations of gardeners to enjoy. Remember that investing time into effective seed cleaning practices now can save you time and resources later down the line.
Air Drying Seeds
Drying tomato seeds is a crucial process in seed-saving, as it ensures that the seeds remain viable for future planting seasons. One of the most common methods of drying tomato seeds is air-drying. Air-drying involves allowing the seeds to dry naturally in the open air, without using any heat or artificial means. As an organic gardening expert, I highly recommend this method for its simplicity and effectiveness.
When air-drying tomato seeds, it’s important to ensure that they are completely dry before storing them. This can take anywhere from several days to a few weeks, depending on the humidity and temperature in your area. To speed up the drying process, you can use desiccants such as silica gel packets or rice grains. However, be cautious when using desiccants as they may damage or contaminate the seeds if not used properly.
While air-drying is a popular method for drying tomato seeds, there are some precautions that need to be taken to avoid damaging or contaminating the seeds. Firstly, ensure that the space you’re using to dry your seeds is clean and free from dust and debris. Secondly, avoid exposing your seeds to direct sunlight as this can cause them to overheat and become damaged. Lastly, label your seed packets clearly with information such as variety name and date of harvest to prevent confusion later on. By following these simple steps, you can successfully air-dry your tomato seeds and store them safely for future use.
Storing Seeds
After successfully drying your tomato seeds, the next crucial step is to store them properly. Poor storage conditions can lead to decreased seed viability and ultimately, reduced yield in the next planting season. As an organic gardening expert, I highly recommend using seed preservation methods and long-term storage techniques to ensure that your tomato seeds remain viable for many years.
One of the most effective ways to store tomato seeds is by using airtight containers such as glass jars or plastic bags. These containers should be labeled clearly with information such as variety name, date of harvest, and any other relevant details. Additionally, consider adding a desiccant such as silica gel packets to absorb any excess moisture that may damage or contaminate the seeds.
Another important factor to consider when storing tomato seeds is temperature. Seeds should be stored in a cool, dry place away from direct sunlight. A temperature range of 32-41°F (0-5°C) is ideal for long-term seed storage. By following these simple yet effective storage techniques, you can ensure that your tomato seeds remain viable for many years and continue to provide you with a bountiful harvest year after year!
Proper Storage Of Tomato Seeds
As the old adage goes, “One rotten apple spoils the bunch,” and the same can be said for tomato seeds. Proper storage of tomato seeds is essential to maintaining their viability for future use. After all, your hard work in saving these seeds will be wasted if they fail to germinate when you plant them next year.
To ensure that your saved tomato seeds remain viable, it is important to conduct seed viability testing. This involves testing a small sample of your saved seeds to determine their germination rates. If the germination rate is below 80%, it may not be worth saving those particular seeds as they may not produce healthy plants. It is recommended to store only those seeds that have a high germination rate.
Once you have identified which seeds have a high germination rate, proper storage is crucial. Store your tomato seeds in a cool, dry place away from direct sunlight and moisture. Airtight containers such as glass jars or plastic bags with zip-lock seals are ideal for storing seeds. Labeling your tomato seeds with the variety and date saved will help you keep track of which ones have been tested and stored properly for future use.
Labeling Your Tomato Seeds
Labeling Your Tomato Seeds:
After saving tomato seeds, it is essential to label them properly. Labeling your tomato seeds is crucial as it helps you identify the variety of the seed, the date of harvesting, and any other relevant information that might be useful in future plantings. Benefits of seed labeling include avoiding confusion, preventing mix-ups with other crop varieties, and ensuring that you do not lose track of important details.
To organize labeled tomato seeds effectively, you can use a simple system such as storing them in labeled paper envelopes or plastic bags. Ensure that each labeled container contains only one variety of seed to prevent mixing. You can also keep a journal or spreadsheet with detailed records of your saved seeds for easy reference. This can help you keep track of any changes in the plant’s characteristics over time and monitor its growth.
In conclusion, labeling your tomato seeds is an important step that should not be overlooked when saving seeds. Not only does it help you avoid confusion and mix-ups with other crop varieties but also ensures that you have all the necessary information for future plantings. Tips for organizing labeled tomato seeds include using labeled containers and keeping detailed records. In the subsequent section about troubleshooting common seed saving issues, we will discuss some common problems that gardeners face when saving seeds and how to overcome them.
Troubleshooting Common Seed Saving Issues
- When saving tomato seeds, it is important to separate them from the surrounding pulp and juice in order to obtain viable seeds for the upcoming season.
- To prevent any potential disease and contamination, tomato seeds should be thoroughly cleaned and dried before storing them.
- While some tomato varieties have better germination rates than others, proper planting techniques can also help to ensure successful germination from the saved seeds.
- To ensure the highest germination rate, it is recommended to use fresh seed with proper seed depth and spacing.
- Monitoring the temperature and moisture of soil when planting saved tomato seeds can also help to improve germination rates.
- Finally, saving tomato seeds from mature fruits with the least amount of blemishes or damage can help to ensure healthy plants for the upcoming season.
Separating Seeds
To ensure a successful and bountiful tomato harvest next year, it is important to properly save and store your tomato seeds. One common issue that gardeners encounter when saving tomato seeds is the difficulty in separating them from the rest of the fruit. However, with the right techniques, seed separation can be a breeze.
The first step in separating tomato seeds is to ensure that they are fully ripe before harvesting. This ensures maximum seed viability and makes it easier to separate them from the pulp. To do this, wait until the tomatoes have fully ripened on the vine and have started to soften slightly. Then, cut them open and scoop out the seeds into a bowl.
Once you have harvested your seeds, there are several techniques you can use to separate them from the pulp. One popular method is to simply place the seeds and pulp in a jar filled with water and let it sit for a few days. The pulp will ferment and rise to the top, while the viable seeds will sink to the bottom. You can then pour off the pulp and rinse away any remaining debris before drying your seeds thoroughly. With these simple seed separation techniques, you can ensure that your tomato plants will thrive year after year.
Preventing Disease
When it comes to saving seeds, one of the main concerns for organic gardeners is preventing contamination and disease. This is especially important when it comes to tomato seeds, as they are prone to a variety of diseases that can affect the quality and yield of future crops. To prevent these issues, it is important to use proper seed storage techniques and take steps to minimize contamination during the harvesting process.
One key way to prevent disease in your tomato seeds is to only save seeds from healthy plants. This means avoiding plants that show signs of disease or pest infestations, as these issues can be passed on to future generations through the seeds. Additionally, it is important to properly clean and sanitize any tools or equipment used during the harvesting process, such as scissors or bowls.
Another important factor in preventing disease in your tomato seeds is proper seed storage. After harvesting your seeds, it is essential to dry them thoroughly before storing them in an airtight container. You can also add a desiccant packet or some rice grains to help absorb any excess moisture and prevent mold growth. It is also a good idea to label your containers with the variety of tomato and date of harvest, so you can keep track of how old your seeds are and avoid using outdated ones.
In conclusion, preventing contamination and disease in your tomato seeds requires careful attention throughout the entire seed saving process. By only harvesting from healthy plants, properly cleaning equipment, and using effective seed storage techniques, you can ensure that your future tomato crops will be healthy and thriving.
Poor Germination Rates
Common mistakes in seed saving can lead to poor germination rates, which is a frustrating issue for any organic gardener. It is important to understand that not all seeds are created equal, and some varieties may have lower germination rates than others. However, there are several steps you can take to improve your chances of success.
One common mistake that can lead to poor germination rates is harvesting seeds too early or too late. To ensure the highest quality seeds, it is essential to wait until the fruit is fully ripe before harvesting. Additionally, it is important to properly dry and store the seeds after harvesting. If they are not adequately dried or stored in a cool, dry place, they may become damaged and lose their viability.
Another factor that can affect germination rates is soil temperature. Tomato seeds require a warm soil temperature of around 70-80 degrees Fahrenheit for optimal germination. If the soil is too cold or too wet, the seeds may rot or fail to sprout. To improve your success rate, consider using a seed starting mix and a heating pad to create the ideal environment for your tomato seeds.
In summary, poor germination rates are a common issue in seed saving that can be improved by avoiding common mistakes such as harvesting too early or late, improper drying and storage techniques, and inadequate soil temperatures. By taking these steps to improve your success rate, you can increase your chances of producing healthy and thriving tomato plants in future growing seasons.
Testing Tomato Seeds For Viability
Tomato seeds are a valuable resource for any gardener who is passionate about growing their own produce. With proper care and storage, tomato seeds can be saved from one year to the next, allowing you to grow your favorite varieties again and again. However, before planting saved seeds, it’s important to test their viability to ensure that they will germinate and grow into healthy plants.
Seed viability testing is a simple process that involves analyzing the seed germination rate. To do this, start by placing ten seeds on a damp paper towel and folding it over them to create a moist environment. Keep the paper towel in a warm location for several days, checking regularly for signs of sprouting. Once the seeds have had ample time to germinate, count how many have successfully sprouted. If less than seven out of ten have sprouted, then the seed lot may not be viable enough for planting.
If you find that your saved tomato seeds are not viable enough for planting, don’t despair! There are several ways to improve seed viability rates, such as stratifying or scarifying the seeds before planting. Additionally, certain environmental factors like temperature and moisture can greatly impact seed germination rates. By understanding these factors and taking appropriate action to improve seed viability, you can increase your chances of success when growing tomatoes from saved seeds.
Moving forward with confidence in your tomato seed’s viability rates means now being able to start them indoors with peace of mind. Here’s how…
Starting Tomato Seeds Indoors
- When selecting tomato seeds for starting indoors, be sure to look for disease-resistant varieties that are appropriate for the region and climate.
- Before planting, prepare the soil with nutrient-rich compost or manure and be sure to loosen it to a depth of 12 to 15 inches.
- When watering the tomato seedlings, avoid over-watering and be sure to keep the soil moist, but not soggy.
- When the seedlings reach 4 to 6 inches in height, begin to feed them a balanced fertilizer every two weeks.
- To ensure the tomato seedlings’ long-term health, it is important to rotate the plants in the garden bed every season.
- Finally, to save tomato seeds for planting the following season, wait until the fruit is fully ripened and then scoop out the seeds, rinse and allow them to dry on a paper towel before storing.
Selecting The Right Seeds
When it comes to starting tomato seeds indoors, selecting the right seeds is crucial. As an organic gardening expert, I recommend paying close attention to seed viability and selection. Seed viability refers to the ability of the seed to germinate and grow into a healthy plant. It’s important to choose seeds that have a high viability rate for optimal results.
When selecting tomato seeds, consider your growing conditions and the characteristics of the plant you desire. There are many different types of tomatoes with varying sizes, colors, and flavors. If you have limited space or prefer smaller tomatoes, cherry or grape varieties may be your best bet. Alternatively, if you’re looking for larger slicing tomatoes, beefsteak or heirloom varieties may be more suitable.
It’s also important to select seeds from reputable sources. Look for companies that specialize in organic and non-GMO seeds to ensure that you’re getting high-quality seeds that will produce healthy plants. By carefully selecting your tomato seeds based on viability and desired characteristics, you’ll be well on your way to a successful indoor garden.
Preparing The Soil
To successfully grow tomato plants indoors, it is essential to prepare the soil well before sowing the seeds. Soil preparation is crucial in ensuring that the young seedlings have all the nutrients they need for healthy growth. The first step in preparing the soil is to choose a high-quality potting mix that is formulated for indoor gardening. This will ensure that the soil has adequate drainage and aeration, which are both critical for healthy root development.
Once you have selected your potting mix, it’s time to add amendments to enhance nutrient management. One of the best ways to do this is by adding compost or organic fertilizers such as fish emulsion or bone meal. These will provide essential nutrients such as nitrogen, phosphorus, and potassium that are necessary for plant growth. It’s important to follow recommended application rates carefully, as too much fertilizer can burn the roots and damage the plant.
Before planting your tomato seeds, be sure to moisten the soil mixture thoroughly and evenly distribute it into your planting containers. Gently press down on each container to remove any air pockets and ensure good contact between the soil and seeds. With proper soil preparation and nutrient management, you can give your tomato seedlings a strong start and set them up for success in their indoor growing environment.
Watering And Feeding
After preparing the soil, the next crucial step in starting tomato seeds indoors is watering and feeding. Proper watering techniques are essential for healthy plant growth. Overwatering can lead to root rot, while under-watering can cause stunted growth and wilting. When watering your tomato seedlings, it’s important to provide enough moisture without drowning them. A good rule of thumb is to water when the top inch of soil feels dry to the touch.
In addition to proper watering, it’s important to provide your tomato seedlings with adequate nutrients. As they grow, they will require more nutrients than what was initially provided in the potting mix and amendments added during soil preparation. Organic fertilizers such as compost tea or worm castings are excellent sources of nutrients that will help your plants thrive. It’s important to follow recommended application rates and not over-fertilize, as this can cause nutrient burn and damage your plants.
Feeding frequency will depend on the plant growth stage, but generally speaking, young seedlings should be fed every two weeks until they have developed their first set of true leaves. After that point, you can increase feeding frequency to once a week or as needed depending on plant growth and nutrient requirements. With proper watering techniques and nutrient management, you can ensure that your tomato seedlings have everything they need for healthy growth indoors.
Transplanting Tomato Seedlings Outdoors
Tomato seedlings are delicate and require proper care during the transplanting process. Before moving the seedlings outside, it’s essential to harden them off by gradually exposing them to outdoor conditions over a week or two. This will help prevent transplant shock and increase their chances of survival. It’s best to transplant the seedlings on a cloudy day or in the evening when it’s cooler, as this reduces stress on the plants.
Common mistakes include transplanting seedlings too early, planting them too deep, or not providing enough water. The best time to transplant tomato seedlings is after all danger of frost has passed and soil temperatures are consistently above 60°F. When planting, make sure to bury only half of the stem and keep the top leaves above ground level. Water thoroughly after planting and continue to keep the soil moist but not waterlogged.
Once your tomato plants have grown from your saved seeds and are producing fruit, it’s important to harvest them at the right time for optimal flavor and ripeness. Tomatoes can be picked when they start changing color from green to their mature color, but waiting until they are fully ripe will result in a sweeter taste. Gently twist or cut tomatoes from the plant when they are ready for harvest and store them at room temperature until you’re ready to use or preserve them.
Harvesting Tomatoes From Your Saved Seeds
Transplanting tomato seedlings outdoors is an exciting step towards cultivating a bountiful harvest. However, have you considered preserving the longevity and optimizing the germination of your tomato seeds for next year’s planting? Harvesting and storing tomato seeds can help you save money, introduce new heirloom varieties, and diversify your tomato seed collection.
Preserving longevity is crucial in ensuring that your harvested tomato seeds remain viable for future plantings. The first step is to select healthy tomatoes from disease-free plants and allow them to ripen fully on the vine. Once ripe, extract the seeds by scooping them out with a spoon and placing them in a jar filled with water. Remove any floating seeds as they are less likely to germinate.
Optimizing germination requires proper storage of harvested tomato seeds. Place the jar containing extracted seeds in a warm location away from direct sunlight until it forms a mold on top of the water. Drain off excess water and spread the seeds out on a paper towel to dry thoroughly for several days before storing them in an envelope or container labeled with the variety name and harvest date.
- Exploring heirloom varieties: Experiment with unique heirloom varieties such as Black Krim or Cherokee Purple.
- Diversifying your tomato seed collection: Collect different colors, shapes, sizes, and flavors of tomatoes to add variety to your garden.
- Labeling your stored seeds: Ensure that you label each container accurately with information about the variety name, harvest date, and storage temperature.
- Testing germination rates: Test germination rates every few years by planting some saved seed alongside fresh seed to ensure viability.
By following these tips for collecting, storing, and labeling harvested tomato seeds properly, you can enhance diversity in your garden while enjoying high-quality home-grown produce every season.
Conclusion
Saving tomato seeds is an easy way to ensure that you have a bountiful harvest of your favorite tomatoes year after year. It also helps to preserve the genetic diversity of different tomato varieties, which is essential for the long-term health and sustainability of our food system. To save tomato seeds, you must first understand the basics of seed saving, including selecting the best tomatoes for seed saving and properly fermenting and testing the seeds for viability.
When selecting tomatoes for seed saving, choose healthy, disease-free fruits that are fully ripe but not overripe. Cut open the tomatoes and scoop out the pulp, seeds, and juice into a jar. Add water to cover the mixture and let it sit at room temperature for several days until it begins to ferment. After fermentation, rinse off the seeds in a sieve under running water until they are clean. Then spread them out on a paper towel or screen to dry completely before storing them in a cool, dry place.
Starting tomato seeds indoors allows you to get a head start on your garden before transplanting them outdoors. Once your seedlings are ready, transplant them into well-draining soil with plenty of organic matter. Make sure they receive plenty of sunlight and regular watering throughout their growth cycle. When harvesting tomatoes from your saved seeds, be sure to save some of the best fruits for seed saving next year so that you can continue to enjoy fresh, homegrown tomatoes season after season.
As they say, “you reap what you sow,” and by taking the time to save your tomato seeds each year, you will be rewarded with delicious fruit that is unique to your garden’s soil and climate. Seed saving is an essential practice for any organic gardener who values sustainability, biodiversity, and flavor in their produce. By following these simple steps for saving tomato seeds and starting your own plants from those saved seeds each year, you can create a self-sustaining ecosystem in your backyard that nourishes both your body and your soul.
Image Credits
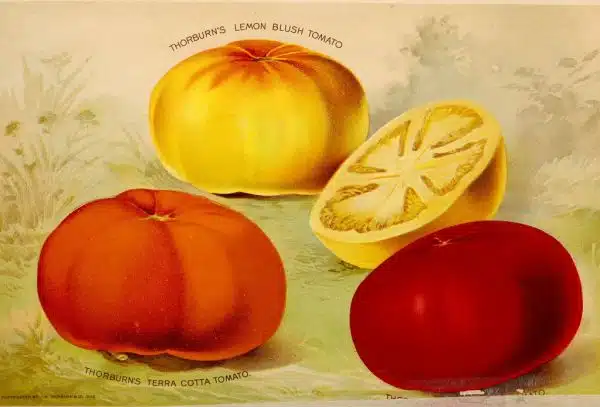
- “Thornburn’s tomatoes. J.M. Thorburn & Co.’s Annual Descriptive Catalogue of Flower Seeds. (circa 1893-1897)” by Swallowtail Garden Seeds (featured)

