Pilea peperomioides, commonly known as the Chinese money plant, is a popular and beloved houseplant due to its unique round leaves and easy-to-care-for nature. Propagating pilea peperomioides can be an exciting way to expand your collection or share this plant with others. In this article, we will explore various methods for propagating pilea peperomioides and provide tips for achieving success.
Propagation of pilea peperomioides can be done through several methods, including division, leaf cutting, stem cutting, and seed propagation. Each method has its own advantages and disadvantages that must be considered before deciding which method to use. Additionally, each method requires specific conditions such as humidity, temperature, light exposure, soil type, and rooting hormone application. With proper care and attention to detail, propagation of pilea peperomioides can yield beautiful new plants that can be enjoyed for years to come.
Meet The Chinese Money Plant
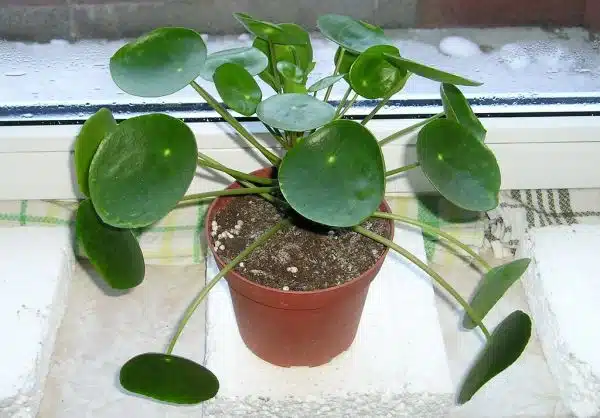
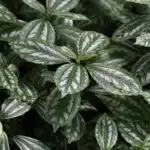
The Chinese Money Plant, commonly known as Pilea Peperomioides, is an exquisite plant that has taken the world of houseplants by storm. This beautiful and unique plant with its round, pancake-shaped leaves on long, thin stems is native to China’s Yunnan Province. The plant’s popularity can be attributed to its easy care and propagation benefits.
Pilea Peperomioides is a low maintenance plant that thrives in bright, indirect light and well-draining soil. It requires minimal watering and can withstand a wide range of temperatures. However, it is crucial to ensure that the soil is not waterlogged as this can lead to root rot.
Propagation benefits of Pilea Peperomioides are numerous; it can easily be propagated through stem cuttings or division. Propagation through stem cuttings involves taking a healthy stem cutting and placing it in moist soil until roots form. Division involves separating the parent plant into smaller sections with roots intact. Both methods have proven successful in propagating Pilea Peperomioides, making it an ideal plant for beginners looking to increase their collection. Understanding plant propagation is essential for anyone who wishes to propagate plants successfully.
Understanding Plant Propagation
Chinese Money Plant, also known as Pilea peperomioides, is a popular houseplant with its round, flat leaves that resemble coins. However, propagating this plant can be a challenge for some gardeners. Understanding plant anatomy and the importance of plant propagation can help in successfully propagating Pilea peperomioides.
Plant propagation is essential for maintaining healthy plants and creating new ones. It is the process of producing new plants from existing ones, either by seed or asexual methods such as cuttings, division, layering or grafting. Propagation helps to ensure genetic diversity and maintain desirable traits while also allowing gardeners to increase their collection without buying more plants.
When it comes to propagating Pilea peperomioides, the division method is one of the easiest ways to do it. This method involves separating the plant into smaller pieces, each with their own root system. This allows you to create new plants quickly without having to wait for seeds to grow or cuttings to root. In the next section, we will dive deeper into this simple yet effective propagation method.
- Creating new plants through propagation
- Importance of understanding plant anatomy
- Advantages of using the division method
- Tips for successful Pilea peperomioides propagation
- Common mistakes and how to avoid them – Common mistakes and how to avoid them when propagating Pilea peperomioides include overwatering, using soil that is too dense, not providing enough light, and not allowing the plant to establish roots before transplanting. To avoid these issues, it’s essential to use well-draining soil, only water when the top inch of soil is dry, provide bright, indirect light, and wait until the plant has developed strong roots before moving it to a new pot.
Division Method
Like a skilled baker dividing dough for perfect proportions of bread, horticulturists use the division method to propagate Pilea peperomioides. This process involves separating the plant into smaller sections and repotting them individually. By doing so, you can create new plants that are genetically identical to the original one.
Exploring variations in division methods can lead to varying results. One approach is to divide the plant into two equal parts by gently pulling it apart at the roots with your hands. Another is to use a sharp, sterilized knife or scissors to cut through the plant’s root ball and separate it into multiple sections. The latter method may be more effective for larger plants with established root systems.
Comparing results from different approaches can help determine which method works best for your Pilea peperomioides. It is important to note that you should only divide healthy plants that have outgrown their containers or those that need rejuvenation. After division, each section should be potted in well-draining soil and watered thoroughly. With proper care, your newly propagated Pilea peperomioides will thrive and bring joy to any space.
As we continue our exploration of plant propagation methods for Pilea peperomioides, let us move on to discussing another popular technique: leaf cutting method.
Leaf Cutting Method
Another way to propagate pilea peperomioides is through leaf cutting. This method involves taking a healthy leaf from the mother plant and using it to grow a new plant. It is important to select a mature and healthy leaf for this method to ensure successful rooting.
To begin, cut a healthy leaf from the mother plant using sharp scissors or pruning shears. Make sure there is at least an inch of stem attached to the leaf. Remove any excess leaves or stems from the bottom of the stem. Dip the end of the stem in rooting hormone and place it in a glass of water, making sure that the bottom of the stem is fully submerged. Keep the glass in a warm and bright location but away from direct sunlight.
After several weeks, roots should begin to form at the base of the stem. Once roots are established, transplant the cutting into potting soil and continue caring for it as you would with a mature pilea peperomioides plant. The success rate for this method can vary depending on factors such as humidity levels and temperature, but with proper care and patience, you can successfully propagate your pilea peperomioides through leaf rooting.
Moving on to another propagation method, let’s discuss how to propagate pilea peperomioides through stem cutting.
Stem Cutting Method
The stem cutting method is an efficient way to propagate pilea peperomioides. To begin, select a healthy stem that is at least four inches long and has two or three leaves attached. It’s best to take cuttings in the spring or summer when the plant is actively growing. Using a clean, sharp knife or scissors, cut just below a node (the point where leaves attach to the stem). Remove the bottom set of leaves, leaving only one or two sets at the top.
Choosing containers for your stem cuttings is essential for their success. Start by filling your chosen container with moistened potting soil, then poke holes in it where you will insert your cuttings. The container should be deep enough to support the stems without them falling over. A good rule of thumb is to choose a container that is about twice the length of the cutting you’re propagating. Once inserted into the soil, gently press down around each cutting to ensure contact with the soil.
Watering techniques are crucial when propagating pilea peperomioides through stem cuttings. Overwatering can cause root rot, while underwatering will cause your cuttings to dry out and die. Water your newly planted cuttings thoroughly and then wait until the top inch of soil feels dry before watering again. Mist your plants regularly as well to keep humidity levels high and prevent wilting.
Moving onto seed propagation method: it’s another way to grow pilea peperomioides from scratch if you don’t have any mature plants around. This method requires patience and attention since it takes longer than other propagation methods mentioned earlier. Nonetheless, it’s an exciting process that can yield excellent results over time.
Seed Propagation Method
Stem cutting is not the only method to propagate pilea peperomioides. Another popular way to propagate this plant is through seed propagation. Seed propagation is a great option for those who don’t have access to a mature plant or want to start from scratch. Benefits of propagation by seed include the ability to produce large quantities of plants, as well as the potential for genetic variation.
To begin, gather fresh seeds from a mature pilea peperomioides plant and sow them in a well-draining soil mix. Keep the soil moist but not waterlogged, and provide bright indirect light. In about two weeks, you should see sprouts emerging from the soil. Once they are large enough, transplant them into individual pots with potting soil.
When propagating pilea peperomioides through seed, there are some common mistakes to avoid. One mistake is using old or expired seeds, which may not germinate or produce healthy plants. It’s also important not to overwater the young seedlings, as this can lead to root rot and other issues. Finally, be sure to provide enough light for your plants so they can grow strong and healthy. By avoiding these common mistakes and following best practices for seed propagation, you can successfully grow your own pilea peperomioides plants at home.
Choosing the right method for you depends on your personal preferences and resources available. While stem cutting may be easier for some people, others may prefer starting from seeds for the potential genetic variation it provides. No matter which method you choose, remember that patience and care are essential ingredients in successful propagation. With proper attention and care, you can enjoy beautiful pilea peperomioides plants in your home or garden for years to come!
Choosing The Right Method For You
Plant propagation is an art that requires patience, dedication, and a bit of creativity. Choosing the right method for propagating your pilea peperomioides can be a daunting task, but it is essential if you want to achieve successful results. The process involves selecting the most suitable technique based on your preferences, resources, and environmental conditions.
One option you can consider is water propagation. This technique involves cutting off a leaf or stem from the mother plant and placing it in water until roots develop. The pros of this method include being able to see the roots grow and monitor plant growth closely. However, this technique may not be ideal for those who don’t have access to natural light or live in areas with low humidity levels. Personal experiences have shown that some plants may also struggle to adjust to soil after being in water for so long.
Another alternative is soil propagation. This method involves using a potting mix instead of water to encourage root development. It’s recommended to use a well-draining potting mix and place the container in an area with moderate natural light exposure. One advantage of this technique is that it’s less susceptible to mold growth compared to water propagation. On the downside, soil propagation may require more maintenance as you need to ensure proper moisture levels are maintained.
When choosing between these methods, consider factors such as time availability, resources at hand, as well as personal preference and experience level with plant propagation techniques. Now that you’ve identified which method works best for you let’s take a look at how you can prepare your tools and materials for the process without any hassle!
Preparing Your Tools And Materials
When propagating Pilea Peperomioides, it is important to have the right materials available. Pots, potting soil, pebbles, a watering can, scissors, and gloves should be gathered for the process. Additionally, fertilizer, sponges, measuring cups, a shovel, pruners, plant tags, twine, a trowel, and a saucer can be helpful. In order to ensure success, it is important to make sure all tools and materials are in good condition before beginning.
Pots
Decorative pots are a great way to add personality and flair to your home while propagating Pilea peperomioides. These plants are known for their unique, pancake-shaped leaves and are sure to be a conversation starter in any room. When choosing decorative pots, it is important to keep in mind the size of the plant and its root system. A pot that is too small may stunt growth or cause overcrowding, while a pot that is too large may lead to overwatering and other issues.
If you’re looking for DIY options for pots, there are many creative ideas out there! One popular option is to use mason jars or other repurposed containers. These can easily be painted or decorated to fit your personal style. Another option is macramé hangers, which not only add a touch of bohemian charm but also allow you to hang your Pilea peperomioides in a sunny window.
When preparing your tools and materials for propagating Pilea peperomioides, don’t forget about the importance of selecting the right pots. With so many decorative and DIY options available, you’re sure to find something that fits both your personal style and the needs of your plant. Whether you choose a classic terra cotta pot or get creative with repurposed materials, providing your Pilea with the right environment will help ensure healthy growth and a beautiful addition to your home decor.
Potting Soil
As you prepare your tools and materials for propagating Pilea peperomioides, it is essential to consider the type of potting soil that will best suit your plant’s needs. Choosing the right potting soil can make a significant difference in the overall health and growth of your Pilea. There are various types of potting soil available, and it is crucial to select one that has the right balance of nutrients, drainage, and moisture retention.
When selecting potting soil for your Pilea Peperomioides, it is recommended to choose a well-draining mix that allows air to circulate around the roots. This plant prefers slightly acidic soil with a pH level between 5.5 and 7.0. A good option is a mix containing peat moss, perlite, and vermiculite or coarse sand. The peat moss helps retain moisture while allowing for proper drainage, while perlite and vermiculite add necessary nutrients without becoming compacted.
It is important to note that using regular garden soil or compost as potting soil for Pilea Peperomioides is not ideal since they tend to be too heavy and dense for this plant species. Providing the right environment through appropriate potting soil will help ensure healthy growth and vibrant foliage for your Pilea Peperomioides.
Pebbles
Once you have selected the appropriate potting soil for your Pilea Peperomioides, it is time to consider the use of pebbles in propagating your plant. Pebbles are a popular and effective way to enhance drainage and improve moisture retention in pots. Properly arranging pebbles at the base of your pot can help prevent water from accumulating at the roots and causing root rot.
When preparing your tools and materials for Pilea Peperomioides propagation, it is essential to choose the right type of pebbles. River rocks or small stones are ideal for this purpose since they are smooth, non-porous, and will not break down over time. Avoid using gravel or rough-edged stones as they can damage delicate roots.
To properly arrange pebbles for propagation, start by adding a layer of pebbles at the bottom of your pot. The layer should be about an inch thick, enough to cover the drainage holes without blocking them. Then add a layer of potting soil on top of the pebbles before planting your Pilea Peperomioides. This technique provides excellent drainage while allowing air to circulate around the roots, ensuring optimal growth and health for your plant.
Creating The Ideal Environment
Creating the Ideal Environment To successfully propagate pilea peperomioides, it’s essential to create an environment that promotes healthy growth. One of the key factors in creating an ideal environment for your pilea is humidity. This plant thrives in environments with higher humidity levels, so it’s important to make sure you’re providing enough moisture in the air. A great way to do this is by using a humidifier or by placing a tray of water near the plant.
Choosing the right container is also important when propagating pilea peperomioides. You want to choose a container that’s just big enough for your cutting and has adequate drainage holes. Choosing a container that’s too large can lead to overwatering and root rot, which can be detrimental to your cutting’s health. Additionally, you should choose a container with good airflow to prevent mold growth.
To create an ideal environment for your pilea cutting, consider these three sub-lists:
- Place your cutting in a clear plastic bag or under a clear plastic dome to trap moisture and increase humidity levels around it.
- Use a well-draining soil mix that retains moisture but doesn’t become waterlogged.
- Place your container in bright, indirect light and avoid placing it in direct sunlight.
Creating the ideal environment for your pilea peperomioides is crucial to its success during propagation. With the right level of humidity and proper container selection, you’ll be on your way to growing healthy new plants from cuttings. In the next section, we’ll discuss how applying rooting hormones can further improve your chances of success.
Applying Rooting Hormones
Rooting hormone is a commonly used substance that promotes root development in cuttings. However, some gardeners prefer not to use synthetic rooting hormones due to concerns about their environmental impact and potential harm to plants. Fortunately, there are natural alternatives available that can be just as effective.
One alternative to synthetic rooting hormones is willow water. This DIY solution is made by soaking fresh willow branches or bark in water for several days until the water turns yellow. The resulting liquid contains natural plant hormones known as auxins which promote root growth. Willow water has been shown to be effective in promoting root development in cuttings of various plant species, including pilea peperomioides.
Another natural rooting hormone alternative is honey. Honey contains natural enzymes and sugars that can stimulate root growth. Simply dip the cut end of your pilea cutting into pure, raw honey before planting it in a potting mix. While success rates may vary depending on factors such as humidity and temperature, honey has been shown to be an effective rooting hormone alternative for some gardeners.
Comparing success rates between synthetic rooting hormones and natural alternatives can be difficult since results can vary depending on various factors such as plant species and environmental conditions. However, many gardeners have reported success with using natural alternatives such as willow water or honey. Ultimately, the choice of whether or not to use synthetic rooting hormones is up to the gardener’s personal preference and beliefs about sustainability and plant health.
Moving forward with your propagation journey, caring for your cuttings after they’ve rooted is crucial for their survival.
Caring For Your Cuttings
Symbolism can be a powerful tool when it comes to caring for your pilea peperomioides cuttings. Much like a parent raising a child, you must provide the proper environment and nourishment for your cuttings to thrive. Here are four tips on how to care for your pilea peperomioides cuttings:
Watering frequency: It is essential to keep the soil consistently moist but not waterlogged. Overwatering can lead to root rot, which will ultimately kill your cutting. On the other hand, underwatering can cause the leaves to wilt and dry out.
Optimal soil mixtures: Pilea peperomioides prefers well-draining soil with plenty of organic matter. A mixture of peat moss, perlite, and vermiculite provides excellent drainage while retaining moisture.
Light requirements: Pilea peperomioides thrives in bright, indirect light but cannot tolerate direct sunlight. Place your cutting near a window that receives filtered light or use artificial grow lights.
Temperature and humidity: Pilea peperomioides prefers temperatures between 60-75°F and moderate humidity levels. Keep your cutting away from drafts and provide consistent airflow using a fan or open windows.
By following these tips, you can ensure that your pilea peperomioides cuttings receive the necessary care they need to grow into healthy plants. In the next section, we will discuss monitoring progress and growth so that you can track the success of your propagation efforts without any guesswork involved.
Monitoring Progress And Growth
Accurately measuring and monitoring progress and growth of pilea peperomioides is essential for ensuring the success of propagation. Quantitative measurements, such as leaf size, leaf count and growth rate, can be used to assess the plant’s progress and health. Regularly checking the size and number of leaves can help determine the plant’s rate of growth. Additionally, taking note of environmental factors such as sunlight, temperature and soil conditions can help monitor the progress and growth of pilea peperomioides.
Measuring Progress
Measuring success is an essential aspect of monitoring progress and growth in plant propagation. It involves keeping track of the growth rate, health status, and overall development of the propagated plants. Measuring progress ensures that the plants are growing as expected and helps identify any issues that may arise during the propagation process.
In plant propagation, tracking growth is crucial in determining when to transplant or repot the propagated plants. The growth rate can help determine if the plants are getting enough nutrients, light, and water. Measuring progress also helps to identify any environmental factors that may be affecting the growth of the propagated plants.
Overall, measuring success and tracking growth are critical aspects of plant propagation. It enables horticulturalists to make informed decisions about when to take specific actions such as pruning or fertilizing. By effectively measuring progress, one can ensure healthy and robust propagated plants that will thrive in their new environment without issue.
Monitoring Growth Rate
Measuring success and tracking development are essential aspects of plant propagation that enable horticulturalists to make informed decisions about the growth and health of propagated plants. Monitoring the growth rate is a crucial element in measuring progress, as it helps determine when to transplant or repot the propagated plants. It also provides insights into whether the plants are receiving adequate nutrients, light, and water.
Monitoring growth rate involves keeping track of how much the propagated plants have grown over a specific period. This data provides information on the developmental stage of the plant and helps identify any issues that may be hindering its growth. By monitoring growth rate, horticulturalists can adjust environmental factors such as temperature, humidity, and light intensity to encourage optimal growth.
Overall, monitoring growth rate is an essential part of measuring success because it enables horticulturalists to make informed decisions about when to take specific actions such as pruning or fertilizing. It also ensures healthy and robust propagated plants that will thrive in their new environment without issue. By consistently monitoring growth rate, plant propagators can identify potential problems early on and take corrective action before they become serious.
Transplanting Your New Plants
After successfully propagating your pilea peperomioides, it’s time to transplant them into their own pots. Choosing the right pot is crucial for the health and growth of your new plants. Make sure to select a pot that is slightly larger than the root ball and has drainage holes at the bottom. This will prevent water from accumulating in the soil and causing root rot.
Maintaining proper soil moisture is also important for the survival of your new plants. Overwatering can drown the roots, while underwatering can cause stress and stunted growth. To ensure proper moisture levels, water your plants when the top inch of soil feels dry to the touch. Use a well-draining soil mixture that allows excess water to drain away from the roots.
In addition to choosing the right pot and maintaining proper soil moisture, it’s important to give your new plants plenty of light and nutrients. Place them in a sunny location or under grow lights for at least 6 hours a day. Fertilize them every 2-4 weeks with a balanced fertilizer to promote healthy growth. With these care tips in mind, your newly transplanted pilea peperomioides should thrive in their new home. In order to troubleshoot common issues that may arise during this process, it’s important to keep an eye out for signs of stress or disease such as yellowing leaves or wilting stems.
Troubleshooting Common Issues
Identifying pests is an important part of maintaining healthy plants. Pests can cause damage to the leaves, stems, and roots of a plant, and can quickly spread throughout your garden. Some common pests that may affect your pilea peperomioides include spider mites, mealybugs, and scale insects. Spider mites are tiny arachnids that feed on the underside of leaves, causing yellowing and stippling. Mealybugs are small white insects that suck sap from the plant and produce a sticky honeydew substance. Scale insects are small armored insects that attach themselves to the stems and leaves of plants.
Preventing fungal growth is crucial when propagating pilea peperomioides. Fungal growth can occur if the soil remains too moist or if there is poor air circulation around the plant. To prevent fungal growth, allow the soil to dry slightly between waterings and ensure adequate drainage in your potting mix. You can also improve air circulation by placing a small fan near your plants or by periodically opening windows or doors to increase airflow.
To further ensure the health of your propagated pilea peperomioides, consider these four tips: 1) Keep your plants away from direct sunlight as this can cause leaf burn; 2) Use a well-draining potting mix specifically designed for succulent plants; 3) Water thoroughly but infrequently and avoid overwatering as this can cause root rot; 4) Regularly inspect your plants for signs of pests or disease.
Now that you have successfully propagated your pilea peperomioides while also taking steps to identify pests and prevent fungal growth, it’s time to enjoy your new plants! Place them in bright indirect light and watch them thrive as they grow into mature specimens. Remember to keep an eye out for any signs of trouble so you can address any issues promptly and keep your plants healthy for years to come.
Enjoying Your Propagated Plants
When it comes to propagating pilea peperomioides, there are a few important steps to follow. First, choose a healthy and mature plant from which to take cuttings. Look for a stem with several leaves and no signs of disease or pest infestation. Using sharp, clean scissors or pruning shears, cut the stem just below a leaf node.
Next, prepare a pot with well-draining soil and water thoroughly before planting the cutting. Remove the lower leaves from the stem so that only one or two remain at the top. Dip the cut end of the stem in rooting hormone powder and then gently insert it into the soil. Cover with a plastic bag or clear dome to create a humid environment and place in bright indirect light.
Plant care tips for propagated pilea peperomioides include keeping the soil consistently moist but not waterlogged, providing ample humidity through misting or using a humidifier, and fertilizing every 2-3 months during growing season. Once your propagated plant has established roots and new growth, you can begin decorating with it! Pilea peperomioides is an excellent choice for adding greenery to shelves or hanging baskets, as its cascading stems and unique round leaves create an eye-catching display. With proper care and attention, your propagated pilea peperomioides will thrive and bring joy to your home for years to come.
Decorating with propagated plants is an excellent way to add greenery and life to any space while also saving money on new purchases. Pilea peperomioides is just one of many plants that can be easily propagated at home with patience and care. Whether you’re starting from scratch with a new cutting or watching your original plant produce offspring over time, following these propagation tips will ensure success in growing healthy new plants for yourself or others to enjoy.
Conclusion
The Chinese Money Plant, also known as Pilea peperomioides, is a charming and easy-to-grow houseplant that has quickly become a favorite among plant enthusiasts. Propagating your own plants can be a rewarding experience, allowing you to expand your collection or share with friends and family. Understanding the different propagation methods and monitoring the growth of your new plants are essential for successful propagation.
The division method involves separating the plant into smaller sections, while the leaf and stem cutting methods require taking cuttings from the parent plant. Regardless of the method used, it is crucial to monitor progress and growth by providing proper care, including adequate light and water. Troubleshooting common issues such as wilting or yellowing leaves can ensure healthy growth.
Transplanting your new plants into their own pots once they have established roots is the final step in propagating Pilea peperomioides. By following these steps, you can enjoy an abundance of new plants to add to your collection or share with others. The process of propagation symbolizes growth and expansion, reflecting how we too can nurture our passions and relationships to flourish and thrive.
Image Credits
- “Ufopflanze (Pilea peperomioides)” by blumenbiene (featured)

