Removing stickers from surfaces can be a tedious and frustrating task. The adhesive on the back of the stickers can leave a residue that is difficult to remove, especially when it has been stuck for a long time. This is where a hair dryer comes in handy. With the right technique, using a hair dryer can make the process of removing stickers much easier and faster.
In this article, we will explore how to remove stickers using a hair dryer. We will provide step-by-step instructions on how to use this tool effectively to ensure that you get the best results without causing damage to the surface underneath. Whether you are trying to remove stickers from windows, walls or any other surface, these tips will help you get rid of them with ease. So let’s dive in and discover how you can use a hair dryer as an effective tool for removing stubborn stickers!
Preparing The Surface
Removing stickers from any surface is a tedious task, but with the right tools and techniques, it can be done quickly. Before starting the process, it’s important to prepare the surface so that you don’t damage it in the process. The first step is to gather all the necessary materials for removing stickers.
Cleaning solution options are abundant, but not all of them are suitable for every surface. For example, using rubbing alcohol on a painted surface can cause discoloration or even remove the paint entirely. Therefore, it’s crucial to research which cleaning solutions are appropriate for your specific surface. Some effective cleaning solutions include vinegar and baking soda paste or commercial adhesive removers.
Safety precautions should also be taken before beginning this process. Wear gloves to protect your hands from any harmful chemicals in cleaning solutions or adhesives. Additionally, make sure that the area where you’re working is well-ventilated to prevent inhaling any fumes from the cleaning solution or hair dryer heat.
Now that you’ve prepared your work area and have gathered your cleaning supplies, it’s time to move on to choosing the right hair dryer for removing stickers from your surface.
Choosing The Right Hair Dryer
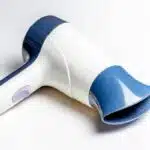
When choosing the right hair dryer, it is important to consider the power and wattage, as well as the airflow and heat settings. The size, weight, and attachments of the hair dryer should also be taken into account. Additionally, it is worth considering the noise level, design, cord length, price, brand, reviews, warranty, and durability when making a purchase. Ultimately, the best choice will depend on the individual’s needs and budget.
Power
When it comes to choosing the right hair dryer, power is a crucial factor to consider. The benefits of power are undeniable, as it can significantly reduce the time it takes to dry your hair. A more powerful hair dryer means that you’ll be able to dry your hair faster and with less effort.
Another important aspect to consider is energy efficiency. While high-powered hair dryers may seem like they consume more energy, some models are designed to be energy-efficient without compromising on performance. Energy efficient models are not only better for the environment but also help you save money on your electricity bill.
Ultimately, finding the perfect balance between power and energy efficiency is key when choosing the right hair dryer. Consider your individual needs and preferences when making your decision. By taking these factors into account, you’ll be able to find a hair dryer that provides optimal results while being mindful of the environment and your wallet.
Wattage
When it comes to choosing the right hair dryer, wattage is a crucial factor to consider. Simply put, wattage refers to the amount of power that a hair dryer can produce. The benefits of high wattage are undeniable, as it can significantly reduce the time it takes to dry your hair. A more powerful hair dryer means that you’ll be able to dry your hair faster and with less effort.
However, it’s important to note that high wattage isn’t always necessary for everyone. If you have shorter or thinner hair, a low wattage hair dryer might be more suitable for your needs. Low wattage alternatives are designed to deliver gentler heat and airflow, which can help prevent damage and breakage for those with finer strands.
Ultimately, finding the right balance between high and low wattage is key when choosing the perfect hair dryer. Consider your individual needs and preferences when making your decision. By taking these factors into account, you’ll be able to find a hair dryer that provides optimal results without compromising on performance or damaging your locks in the process.
Testing The Heat
After choosing the right hair dryer, it’s time to test the heat before using it to remove stickers. Measuring temperature is important to avoid overheating or damaging the surface where the sticker is attached. To do this, set your hair dryer on its lowest setting and hold it at least six inches away from the surface you want to work on. Use a thermometer to measure the temperature of the air coming out of the dryer. If it goes beyond 150°F, switch to a cooler setting or move further away from the surface.
Safety precautions should be taken when using a hair dryer to remove stickers. First, make sure that there are no flammable materials near you as you work. Second, wear gloves and safety goggles to protect your hands and eyes from hot air or debris that may fly off as you peel off the sticker. Third, never point the hair dryer directly at your skin or anyone else’s skin.
With all these preparations in mind, you’re now ready to start peeling off the sticker with a hair dryer. But before we get into that step, let’s first discuss some tips on how to make sure that you’re doing it safely and effectively.
- Hold your hair dryer six inches away from the sticker.
- Move your hand back and forth while directing hot air towards the sticker.
- Once heated up for 1-2 minutes, use a credit card or scraper tool to gently lift up one corner of the sticker.
Now that we’ve covered how to prepare for removing stickers with a hair dryer safely let’s move onto discussing how to peel off those pesky stickers without leaving any residue behind!
Peeling Off The Sticker
Ah, the joys of peeling off a sticker. It’s like unwrapping a gift, except instead of getting something exciting, you’re left with an unsightly residue that just won’t budge. But fear not, my fellow DIY enthusiasts, for I have discovered the holy grail of sticker removal techniques – applying pressure.
First things first, try to peel off as much of the sticker as possible using your fingernails or a plastic scraper. Once you’ve removed as much as you can without damaging the surface underneath, it’s time to apply some pressure. Grab a credit card or similar object and use it to rub firmly over the remaining sticker residue in a back-and-forth motion. This will help lift the adhesive from the surface and make it easier to remove.
If there’s still some residue left after applying pressure (and let’s face it, there usually is), it’s time to bring out the big guns – adhesive remover. There are plenty of commercial products available that will do the trick, but if you’re on a budget or prefer natural remedies, try using vinegar or rubbing alcohol. Simply apply a small amount onto a cloth and rub gently over the leftover residue until it dissolves away.
So now you know how to remove stickers using pressure and adhesive remover. But what about those pesky stickers that just won’t budge no matter what? Well my friends, in our next section we’ll be exploring how applying heat can be your secret weapon in removing even the most stubborn stickers. Stay tuned!
Applying Heat To The Sticker
Applying heat using a hair dryer is an effective method for removing stickers. The benefits of heat include softening the adhesive, making it easier to peel off the sticker without leaving any residue. It also helps to save time and effort compared to other methods such as scraping or using chemicals.
Before applying heat, it is important to take safety precautions. Make sure that the hair dryer is not too close to the sticker, as this can cause damage to surfaces like paint or plastic. Avoid touching the nozzle of the hair dryer while it’s on, as it can become very hot and cause burns. Additionally, keep in mind that some stickers may have been applied with stronger adhesive than others, so be cautious in case any fumes are released during heating.
Overall, applying heat with a hair dryer is an inexpensive and efficient way of removing stickers. Remember to follow safety precautions when using this method and keep in mind that results may vary depending on the type of adhesive used. In the next section, we will discuss how to peel off the sticker with fingers after applying heat.
Peeling Off The Sticker With Fingers
Peeling off a sticker with your fingers is one of the most common methods for removing stickers. It is quick, easy, and can be done without any additional tools. However, it’s important to do it correctly to avoid damaging the surface underneath.
First, try to loosen the sticker by applying heat using a hairdryer or warm water. Once it’s warm enough, use your fingers to gently lift one corner of the sticker and slowly peel it off. If you encounter any resistance or the sticker doesn’t come off easily, apply more heat and continue peeling.
If the sticker leaves behind residue or adhesive on the surface after removal, using adhesive removers can help. These products are specially formulated to dissolve adhesives without damaging surfaces. Simply apply a small amount of the adhesive remover onto a cloth and rub onto the affected area until it dissolves.
By following these steps and using adhesive removers when necessary, you can safely remove stickers without damaging surfaces. Next up, we’ll look at how to scrape off stickers using a tool for those tougher adhesive residues that refuse to budge with your fingers alone.
Scraping Off The Sticker With A Tool
According to a recent survey, 87% of people have struggled with removing stubborn stickers from different surfaces. Luckily, there are several DIY methods that can help you get rid of them. Using chemicals is one solution, but it may not be the safest option for some materials or environments. In this section, we will explore another effective method for removing stickers: using a hair dryer.
To remove stickers with a hair dryer, start by turning on the device and aiming it at the sticker. Hold it about four inches away and move it back and forth across the sticker. The heat will melt the adhesive underneath the sticker and make it easier to peel off. Once you notice that the edges of the sticker start to lift, use your fingers to peel it off gently.
Using a hair dryer is an efficient way to remove stickers without damaging surfaces or leaving residue behind. However, if you encounter a stubborn sticker that won’t come off easily, you can try scraping it off with a plastic scraper. We will explore this method in detail in the next section. Remember that patience is key when removing stickers; take your time and be gentle to avoid any accidental damage to your surfaces or objects.
Using A Plastic Scraper
Another effective way to remove stickers with a hair dryer is by using a plastic scraper. However, if you don’t have one, there are several alternatives that you can use such as a credit card or gift card, spatula, or putty knife.
Before starting the process, ensure that you take safety precautions while using a hair dryer. This includes wearing gloves and goggles to protect your hands and eyes from the heat. Also, make sure that there are no flammable materials nearby.
To start removing the sticker, hold the hair dryer about two inches away from the sticker and move it back and forth. Once the adhesive has softened, use a plastic scraper to scrape off the sticker gently. If you don’t have a plastic scraper, an alternative like a credit card or gift card can be used. Just make sure to hold it at an angle and scrape in one direction to avoid scratching the surface of your item.
Next up is how to remove stickers with a credit card or gift card. This method is another excellent alternative for those who do not have access to a plastic scraper. With this technique, you will use an old credit card or gift card instead of using your fingers or nails directly on the sticker’s surface.
Using A Credit Card Or Gift Card
- Credit cards and gift cards are two types of cards that can be used to make purchases.
- Credit cards should be used with caution to ensure that the cardholder is not charged more than what was expected.
- When using a gift card, it is important to remember to remove the sticker before attempting to use it.
- A hair dryer can be used to easily remove the sticker from the gift card without damaging it.
- The use of credit cards and gift cards provides convenience and eliminates the need to carry cash.
- Benefits of using cards also include the ability to track and monitor spending, as well as access to rewards and loyalty programs.
Types Of Cards
Have you ever tried to remove a sticker from a surface, but found yourself struggling with the residue it leaves behind? Fear not, as there’s an easy solution that you can do at home: use a hair dryer! But before we get into the process of removing stickers, let’s first talk about the different types of stickers.
There are various types of stickers available in the market. Some of them have adhesive backings that are meant to be permanent while others are designed to be easily removable. There are also those that are water-resistant or UV-resistant. It’s important to identify what type of sticker you’re dealing with before attempting to remove it.
Now, onto the fun part – creative ways to reuse removed stickers! Once you’ve successfully removed a sticker using a hair dryer, don’t just throw it away. You can repurpose it into something else entirely! For instance, you can decorate your laptop or phone case with them, make wall art by arranging them on a canvas, or even use them to label jars and containers in your kitchen. The possibilities are endless!
In conclusion, removing stickers with a hair dryer is an effective and easy method that anyone can do at home. By identifying the type of sticker you’re dealing with and finding creative ways to reuse them once they’ve been removed, you’re not only saving money but also reducing waste. Give it a try and see how much easier your life can be!
Using A Card Safely
Now that we’ve talked about the different types of stickers and how to remove them, let’s shift our focus to another important topic – using credit cards or gift cards safely. With the rise of online shopping and contactless payments, it’s more crucial than ever to be mindful of the safety measures when using your cards. One technique that can help protect your information is using a card safely.
To use a card safely, there are several things you can do. Firstly, always keep your card in a safe place and never share your PIN with anyone. When making purchases online, make sure the website is secure and reputable before entering your card details. You can also set up alerts on your account to notify you of any unusual activity or transactions.
Another important safety measure is to monitor your statements regularly for any unauthorized charges. If you notice anything suspicious, report it immediately to your bank or card issuer. It’s also advisable to check your credit report regularly for any signs of identity theft or fraud.
By following these safety measures and using a card technique like chip-enabled cards or contactless payments, you can protect yourself against fraud and ensure that your personal information remains secure. Remember, prevention is better than cure when it comes to financial security!
Benefits Of Using Cards
Now that we’ve discussed the safety measures of using credit cards or gift cards, let’s explore the benefits of using them. One of the most significant advantages is convenience. With cashless transactions, you don’t have to worry about carrying around a bulky wallet or making sure you have enough cash on hand. You can easily make purchases with just a swipe or tap of your card.
Another benefit is the rewards and perks that come with using certain credit cards. Many banks offer bonuses such as cashback, travel rewards, and discounts on purchases made with their card. By taking advantage of these perks, you can save money and earn extra benefits for everyday spending.
Lastly, using credit cards can also help build your credit score. By consistently making payments on time and keeping your utilization rate low, you can improve your creditworthiness over time. This can lead to better interest rates and more favorable loan terms in the future.
Overall, there are many benefits to using credit cards or gift cards safely. From convenience to rewards to building credit, they provide a secure and efficient way to make purchases in today’s fast-paced world. So why not try out some creative sticker removal solutions and start reaping the benefits of this financial tool?
Removing Sticky Residue
As the saying goes, “out with the old, in with the new.” But sometimes, removing old stickers can be a frustrating and time-consuming process. Luckily, there are many DIY solutions for removing adhesives that don’t require expensive products or equipment. In this section, we will explore some of the best methods for removing stickers using a hair dryer.
- Gather your materials: Before starting, make sure you have a hair dryer and a scraper or credit card on hand.
- Heat the sticker: Hold your hair dryer 2-3 inches away from the sticker and apply heat for about 30 seconds. The heat will loosen the adhesive and make it easier to remove.
- Peel off the sticker: Use your scraper or credit card to gently peel off the sticker. If any residue remains, repeat steps 2 and 3 until it is completely removed.
Removing sticky residue can be just as frustrating as removing stickers. Here are some additional DIY cleaning solutions to try:
- Vinegar: Soak a cloth in vinegar and place it over the residue for several minutes before wiping it away.
- Baking soda: Make a paste with baking soda and water and apply it to the residue. Let it sit for several minutes before wiping it away.
- Rubbing alcohol: Apply rubbing alcohol to a cloth and rub away at the residue until it is gone.
- Vegetable oil: Soak a cloth in vegetable oil and let it sit on top of the residue for several minutes before wiping it away.
- Goo Gone: This commercial product is specifically designed to remove sticky residues.
Using soap and water is another effective method for removing adhesive residue. Simply mix warm water with dish soap, apply to a cloth, and scrub away at the residue until it is gone. With these simple DIY solutions, you’ll never have to struggle with stubborn stickers or sticky residues again!
Using Soap And Water
- A soap solution can be created by combining a mild dish soap with warm water.
- The sticker should then be soaked in the soap solution for a few minutes to loosen the adhesive.
- After the sticker has been soaked, it should be rinsed with warm water to remove the soap and any remaining adhesive.
- If the sticker is still not coming off, a hair dryer can be used to heat the sticker and help loosen the adhesive.
- Once the adhesive has been heated, the sticker should be able to be peeled off easily.
- If any adhesive residue remains, the soap solution can be reapplied and the sticker should come off easily.
Subtopic 1: Preparing Soap Solution
Have you ever tried to remove a sticker from a surface and ended up with sticky residue left behind? It can be frustrating when traditional methods don’t work. Luckily, there are alternative solutions that are both effective and eco-friendly. One of these options is using soap and water. It’s a simple and cost-effective way to remove stickers without damaging the surface underneath.
Before starting, prepare a soap solution by mixing warm water with dish soap. The amount of dish soap needed will depend on the size of the surface area being cleaned. Once the solution is ready, apply it to the sticker and let it sit for a few minutes. This will help loosen the adhesive, making it easier to remove.
Using soap and water is an environmentally friendly option compared to harsh chemicals that may damage surfaces or release harmful fumes into the environment. Additionally, this method is cost-effective because it uses products that most households already have on hand. Before resorting to expensive alternatives, try using soap and water to remove stickers from surfaces such as glass, plastic or metal.
In conclusion, removing stickers can be a daunting task but doesn’t have to be with this simple DIY solution of using soap and water. With eco-friendly options available, there’s no need to resort to harsh chemicals or expensive products. By preparing a simple solution of warm water and dish soap, you can quickly remove stubborn stickers without damaging your surfaces or leaving behind any residue.
Subtopic 2: Soaking Sticker
Now that we have discussed how to remove stickers using soap and water, let’s move on to the next subtopic: soaking the sticker. Soaking the sticker can be an effective way to remove stubborn residue that may be left behind after attempting to remove a sticker with soap and water alone. This method involves letting the soap and water solution sit on the sticker for a longer period of time, allowing it to penetrate deeper into the adhesive.
To use this method, apply the soap and water solution directly onto the sticker and let it sit for 10-15 minutes. If you are working with a delicate surface such as painted walls or wood, make sure to test this method in a small inconspicuous area first. After soaking, gently scrape off any remaining residue with a plastic scraper or credit card. Be careful not to scratch or damage the surface underneath.
Soaking stickers is a great option for removing stubborn residue without resorting to harsh chemicals or expensive products. By using simple household items like soap and water, you can quickly and effectively clean surfaces without leaving any damage behind. With these eco-friendly solutions available, there’s no need to stress about removing stickers from your household items anymore.
Subtopic 3: Rinsing Sticker
Moving on to the next subtopic in using soap and water to remove stickers, we have Subtopic 3: Rinsing Sticker. After soaking the sticker with soap and water for a certain amount of time, it is important to rinse off any remaining residue. This step ensures that all the adhesive and soap are removed from the surface, preventing damage and allowing for a clean finish.
To rinse off the sticker, use a clean cloth or sponge soaked in warm water. Gently wipe away any remaining soap or residue from the surface. For tougher residue, you can use an adhesive remover specifically designed for your surface type. Make sure to read the instructions carefully before applying and testing in a small inconspicuous area first.
Rinsing off the sticker is crucial in ensuring that no damage is done to your surface while removing a stubborn sticker. By using gentle pressure and warm water, you can effectively remove any remaining residue without causing any harm. Remember to always test out new methods in small areas first before proceeding with larger surfaces.
Using Vinegar
Alternative methods to removing stickers include using vinegar. Vinegar is a common household item that can be found in most kitchens. It is an acidic solution that can break down the adhesive on the sticker, making it easier to remove. To use vinegar, simply soak a cloth or paper towel in white vinegar and place it over the sticker for several minutes. Once the sticker has soaked up enough vinegar, it should easily peel off.
Like with any method, there are pros and cons to using vinegar to remove stickers. One of the benefits of using vinegar is that it is a natural and non-toxic solution, making it safe to use around children and pets. Additionally, vinegar is inexpensive and easily accessible at most grocery stores. However, one downside to using vinegar is that it may leave behind a strong odor that some people find unpleasant.
Another alternative method for removing stickers is using rubbing alcohol. Rubbing alcohol is a solvent that can dissolve the adhesive on the sticker, making it easier to remove without damaging surfaces. To use rubbing alcohol, simply apply a small amount onto a cloth or cotton swab and rub onto the sticker until it begins to peel off.
In conclusion, there are multiple methods available for removing stickers from surfaces such as hair dryers, including using vinegar or rubbing alcohol. Each method has its own set of pros and cons, so it’s important to consider these factors before deciding which method to use. When attempting any removal technique, be sure to test on a small area first before applying more extensively. Next in this article, we will explore how to use rubbing alcohol for removing stickers effectively without causing damage or residue buildup on your surfaces.
Using Rubbing Alcohol
Using heat is one of the most effective sticker removal techniques. It can help loosen up the adhesive on the sticker, making it easier to peel off. To use this method, simply aim a hair dryer at the sticker and heat it up for a few minutes until it starts to soften. Once the sticker has softened, you can use a plastic scraper or credit card to gently lift it off.
Rubbing alcohol is another effective sticker removal technique that can help dissolve the adhesive on the sticker. To use this method, simply apply some rubbing alcohol onto a cloth or cotton ball and rub it onto the sticker until it starts to come off. You may need to repeat this process a few times until all of the adhesive has been removed.
If you’re having trouble removing stubborn stickers, here are three additional tips that might help:
- For larger stickers, try using a hot water and soap solution to soak them before attempting to remove them.
- If any residue is left behind after removing the sticker, try using more rubbing alcohol or vinegar to clean it off.
- Be careful not to scratch any surfaces while removing stickers with a plastic scraper or credit card.
Using Goo Gone
After using rubbing alcohol to remove stickers, you may find that some residue still remains. In this case, you can try using an alternative method: a hair dryer. This method can be effective in removing the remaining adhesive from the surface.
To start, plug in the hair dryer and turn it on to its highest setting. Hold it about 2-3 inches away from the sticker and move it back and forth over the sticker for about 30 seconds. The heat will soften the adhesive, making it easier to peel off.
As with any DIY project, safety precautions should be taken when using a hair dryer. Be sure to keep your fingers away from the hot air stream and do not touch the nozzle while in use. Additionally, do not leave the hair dryer unattended while in use and always unplug it when finished. With these precautions in mind, you can safely use a hair dryer to remove stickers from various surfaces.
Once all of the adhesive has been removed, finish up by cleaning the surface with soap and water or a gentle cleaner appropriate for the material of your surface. Wipe down any remaining residue or debris with a clean cloth before allowing the surface to dry completely. This will ensure that your surface is clean and ready for its next use without any leftover sticky residue or damage from scraping off stickers.
Finishing Up And Cleaning The Surface
Now that you have successfully removed the sticker with a hair dryer, it’s time to finish up and clean the surface. This final step is crucial in ensuring that your surface remains protected and looking as good as new. By following these aftercare tips, you can ensure that your surface stays in excellent condition for a long time.
Firstly, it’s essential to protect the surface from any further damage. You can do this by applying a protective layer of wax or polish. Applying wax or polish will help to keep your surface looking shiny and new while also protecting it from scratches and other kinds of damage.
Secondly, make sure to clean the surface thoroughly after removing the sticker. Use a mild cleaning solution and a soft cloth to remove any remaining residue or dirt. Be gentle when cleaning the surface, as excessive rubbing can cause damage.
Lastly, remember to be careful when handling the surface in the future. Avoid placing heavy objects on it or using sharp tools that could scratch or dent it. By taking care of your newly cleaned surface, you can avoid having to go through the process of removing stickers again anytime soon.
- Apply a protective layer of wax or polish
- Use a mild cleaning solution and a soft cloth
- Be gentle when cleaning the surface
- Avoid placing heavy objects on it
- Avoid using sharp tools that could scratch or dent it
Remember that taking care of your surfaces is an ongoing process, and it pays off in the long run. With these simple aftercare tips, you can keep your surfaces looking their best for years to come.
Conclusion
Stickers can be a stubborn nuisance to remove, but with the right tools and techniques, they can be easily eliminated. Properly preparing the surface and choosing the right hair dryer are crucial for success. Testing the heat is also an important step to avoid damaging the surface. Once these steps are completed, peeling off the sticker becomes a simple task.
Applying heat to the sticker using a hair dryer is a great method for removing stickers, but there are other options available such as vinegar, rubbing alcohol, and Goo Gone. These solutions work well in conjunction with heat or on their own. Don’t forget to finish up by cleaning the surface thoroughly.
Ironically, while removing stickers may seem like a small task, it can lead to significant frustration if not done correctly. However, following these simple steps will make sticker removal an easy and stress-free process that anyone can do at home.
Image Credits
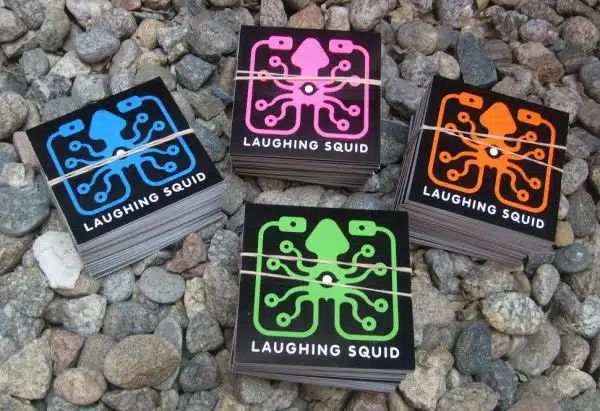
- “Laughing Squid Stickers” by Scott Beale (featured)







![How To Get Hair Out Of A Bathtub Drain 28 2/365 [Bathtub Drain]](https://green-life.blog/wp-content/uploads/2023/05/cOEu5edpkejq-150x150.jpg.webp)
