Gift wrapping is an art that requires patience, attention to detail and creativity. With the holiday season fast approaching, it’s time to start thinking about how to wrap your gifts in a way that impresses your loved ones and colleagues. As a gift wrapping expert with years of experience, I have learned some tips and tricks on how to wrap a gift so it looks professionally done. In this article, I will share some of these techniques that will help you elevate your gift wrapping game.
Firstly, selecting the right materials is crucial when it comes to wrapping a gift. The quality of the paper, ribbon, and embellishments can make all the difference in the final presentation. Also, choosing a color scheme or theme for your gifts can add an extra touch of elegance and sophistication. Secondly, mastering proper technique is essential in making sure your gift looks professional. From measuring the paper correctly to creating crisp folds and securing the ribbon tightly – every step counts towards achieving a polished finish. By following these guidelines and incorporating your own creativity, you can create beautifully wrapped gifts that show how much you care about those receiving them.
Choosing The Right Materials
Did you know that Americans generate an additional 25 million tons of waste from Thanksgiving to New Year’s Day? As a gift wrapping expert, it is important to choose eco-friendly materials when wrapping gifts. Not only does this reduce the amount of waste that goes into landfills, but it also shows your commitment to sustainability.
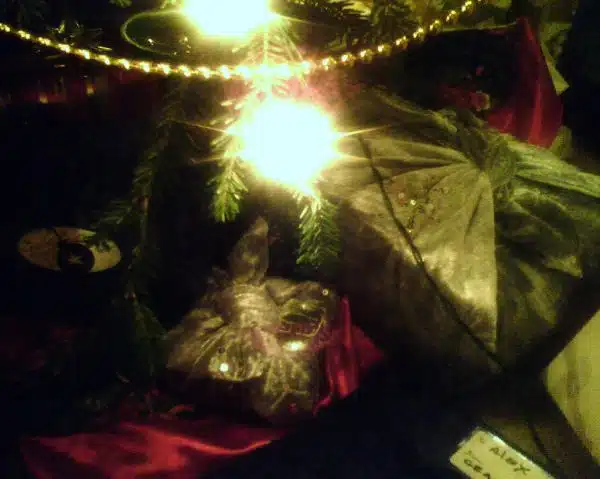
When choosing eco-friendly materials, consider opting for biodegradable or recyclable options such as brown kraft paper or reusable fabric wrap. These materials are not only environmentally friendly but also budget-friendly. Brown kraft paper is an affordable option that can be dressed up with ribbon and twine, while fabric wraps can be reused multiple times.
Budget-friendly wrapping options don’t have to sacrifice quality. By choosing high-quality paper and using simple embellishments like ribbon or a sprig of greenery, you can create a professional-looking gift without breaking the bank. In the next section, we’ll dive deeper into the importance of quality paper and how it can elevate your gift wrapping game.
The Importance Of Quality Paper
- Quality paper is essential for any gift wrapping project, since it must be able to withstand the rigors of the wrapping process and look good for the recipient.
- Durability is paramount when selecting wrapping paper, as it needs to resist tears and creasing while being wrapped, and afterwards when the wrapping is handled.
- Strength is also a crucial factor when selecting paper, as it must be strong enough to hold the weight of the gift and ensure that the wrapping remains intact.
- Variety is also a key consideration when selecting paper, as it needs to be available in a range of colors and patterns to suit the occasion and the recipient’s preferences.
- Quality paper is also important for any gift wrapping project as it must have a high-quality finish and look professionally done.
- By selecting quality paper for any gift wrapping project, you can ensure that the recipient will be impressed with the wrapping and feel appreciated.
Durability
As a gift wrapping expert, I understand the importance of using high-quality paper for wrapping presents. One crucial aspect that should not be overlooked is durability. A beautifully wrapped gift can quickly lose its charm if it falls apart during transportation or handling. Therefore, it’s important to use paper that can withstand wear and tear.
Here are some tips for ensuring durability when wrapping gifts. First, use double-sided tape instead of regular tape to secure the edges of the paper. This will prevent the paper from coming undone and makes for a neater presentation. Second, reinforce corners with extra folds or additional layers of paper to prevent them from tearing easily.
Another long-lasting wrapping technique is to wrap your gift in multiple layers of tissue paper before placing it in the gift box or bag. This will provide an extra layer of protection against scratches or bumps that may occur during transportation. Additionally, consider adding a ribbon or bow made from durable materials such as wired ribbon or thick grosgrain ribbon.
By following these tips for durability and long-lasting wrapping techniques, you can ensure that your beautiful masterpiece will remain intact until it reaches its intended recipient’s hands. Remember, taking the time to wrap a present with care is a way of showing how much you care about the person receiving it!
Strength
As a gift wrapping expert, I understand that the quality of paper used in wrapping presents plays a significant role in ensuring the durability of the gift. However, strength is another crucial factor to consider when choosing quality paper for wrapping gifts. Building endurance and mental resilience in the paper ensures that it can withstand wear and tear, even during transit.
When selecting paper for wrapping presents, it’s important to choose one with a high GSM (grams per square meter) rating. This indicates that the paper is thicker and has more fibers, making it stronger and more durable. Additionally, using recycled or eco-friendly paper may compromise its strength, so opt for papers made from natural materials such as cotton or jute fibers.
Another way to increase the strength of your wrapping paper is by using multiple layers. By layering two or three sheets of paper together, you create an extra barrier between the gift and any external elements that may cause damage during transit. This technique also adds depth and texture to your wrapping design while providing added protection.
In conclusion, when choosing quality paper for wrapping gifts, it’s essential to prioritize both durability and strength. Utilizing thicker papers with higher GSM ratings and opting for natural fibers can help build endurance in your gift wrap. Additionally, layering multiple sheets of paper adds an extra level of protection against external factors that could potentially damage your wrapped gift during transportation. Remember, taking these steps will ensure that your beautiful presentation remains intact until it reaches its intended recipient’s hands!
Variety
As a gift wrapping expert, I have learned that quality paper is crucial in ensuring the presentation of a gift is top-notch. However, one thing to consider when choosing the right paper for wrapping presents is variety. Variety adds depth and personality to your wrapping design and can make it stand out from the rest. By incorporating different colors, patterns, and textures, you can create unique and creative wrapping ideas that will make your gift memorable.
Gift wrapping techniques also play an essential role in creating variety in your designs. Some techniques you can use include adding bows, ribbons, or even small trinkets like bells or ornaments to your wrapped gifts. These small touches add character to your presentation and show that you put extra thought into making it special for the recipient.
In conclusion, incorporating variety into your gift-wrapping process is just as important as choosing quality paper. It allows you to personalize each gift based on the recipient’s taste and interests while showcasing your creativity and attention to detail. By utilizing various gift wrapping techniques and creative wrapping ideas, you can elevate any present into a unique and unforgettable experience for the person receiving it.
Ribbon And Embellishments: Adding The Finishing Touches
Embellishment alternatives can take your gift wrapping to the next level. While ribbons are a classic choice, there are other options such as twine, lace, or even fabric strips that can add unique texture and dimension to your wrapped present. Consider incorporating natural elements like sprigs of greenery or dried flowers for an earthy touch, or add some sparkle with metallic accents like ribbon or glittery embellishments.
When it comes to tying your ribbon, there are several techniques you can use to achieve a polished look. The classic bow is always a safe bet, but experiment with variations like the layered bow or the twisted bow for added interest. Another technique is the knot wrap, where you wrap the ribbon around the gift and tie a knot at the front for a simple yet elegant finish. Don’t be afraid to mix and match ribbons in different colors and widths for added visual appeal.
By utilizing embellishments and mastering ribbon tying techniques, you can truly elevate your gift wrapping game. But before you start adding those finishing touches, consider choosing a color scheme or theme that ties everything together for a cohesive look. In the next section, we’ll explore how to select colors and themes based on occasion and personal style to create stunningly wrapped gifts that will impress any recipient.
Color Schemes And Themes: Elevating Your Gift Wrapping Game
Now that you have added the finishing touches to your gift wrapping, it’s time to elevate your game by considering color combinations and themed wrapping paper. These elements can take your gift wrapping to the next level and make it look even more professional.
When choosing color combinations, consider the recipient’s favorite colors or their home decor. You can also choose complementary colors or go for a monochromatic look. For example, if your recipient loves blue, consider pairing it with white or silver for a classic and elegant look.
Themed wrapping paper can also add a special touch to any gift. Whether it’s for a holiday or a specific occasion like a baby shower or wedding, there are endless options available. Use holiday-themed paper for Christmas gifts or choose paper with patterns related to the occasion like baby animals for a baby shower gift. Remember to keep the recipient’s preferences in mind when selecting themed paper.
- Choose colors based on recipient’s preferences
- Consider complementary or monochromatic looks
- Use themed wrapping paper for specific occasions
Incorporating color combinations and themed wrapping paper into your gift wrapping will show the recipient that you put extra thought and care into their gift. So next time you’re preparing to wrap a present, take some time to select the perfect combination of colors and theme that will make your gift stand out from the rest. And don’t forget one last important detail – measuring the paper correctly!
Measuring The Paper Correctly
Imagine you have a beautiful gift to give to someone special, but it loses its appeal when the wrapping is messy and unprofessional. It happens all too often, especially when people struggle with measuring the paper correctly. However, this problem can be easily solved by following some simple tips.
Firstly, always measure your paper so that it is just the right size for your gift. This will avoid excessive paper waste and produce a clean and polished look. To do this, place your gift on top of the wrapping paper and fold the paper over so that it covers both sides of the box. Cut off any excess paper using sharp scissors or a cutting tool.
Secondly, remember to use proper cutting techniques when trimming your wrapping paper. Avoid jagged or uneven edges by making sure your scissors are sharp and cutting in smooth motions. A rotary cutter may also be used for a more precise cut.
At times, measuring and cutting wrapping paper can seem like a daunting task, but it is an essential step in achieving professional-looking gift wrapping. By following these simple steps, you can create perfectly sized sheets of wrapping paper without wasting any extra material. In the next section, we will delve into how to create neat and crisp folds for an even more polished finish.
Creating Neat And Crisp Folds
Achieving neat and crisp folds is essential in making a gift look professionally wrapped. To create sharp corners, it is important to start with the right size of wrapping paper. Too much or too little paper can result in messy folds and uneven corners. Begin by placing the gift on the center of the paper, then fold each side over the gift, making sure they overlap about an inch in the middle.
Next, create crisp folds by pressing down hard on each crease using a bone folder or your fingers. Take extra care when folding at the corners so that they are as sharp as possible. Enhancing the presentation with embossing is another way to add a professional touch to your wrapped gift. Embossing tools are readily available at craft stores and can be used to add texture and dimensionality to plain wrapping paper.
By following these tips for creating neat and crisp folds and enhancing the presentation with embossing, you can take your gift wrapping skills to new heights. In our next section, we will discuss how to wrap awkwardly shaped gifts, which can be a challenge even for experienced gift wrappers.
How To Wrap Awkwardly Shaped Gifts
Creating Neat and Crisp Folds is essential in achieving a professionally wrapped gift. Now, let’s move on to the next step in mastering the art of gift wrapping: How to Wrap Awkwardly Shaped Gifts.
Gifts come in all shapes and sizes, and sometimes, it can be challenging to wrap them neatly. But don’t worry, with the right Gift Wrapping Tools and Creative Wrapping Solutions, you can conquer even the most cumbersome items. For instance, for cylindrical objects such as bottles or candles, try using tissue paper to create a smooth surface before wrapping it with wrapping paper or cellophane. This method also works well for irregularly shaped items such as plush toys or baskets.
If there are still some areas that need hiding or smoothing out after wrapping your gift, using double-sided tape for a seamless look is an excellent solution. This type of tape is perfect for securing flaps and folds without leaving any visible marks on the surface of your gift. Remember that presentation is key when it comes to gift-giving; taking extra care in presenting your present will show how much thought you’ve put into it.
Next up: Using Double-Sided Tape for a Seamless Look. With this technique, you’ll learn how to achieve that professional finish that everyone will admire.
Using Double-Sided Tape For A Seamless Look
As a gift wrapping expert, I’ve seen it all – from poorly cut paper to messy tape jobs. It’s easy to tell when someone has put in the extra effort to wrap a gift beautifully, and one key element to achieving that professional look is using double-sided tape.
Double-sided tape offers a seamless finish that regular tape simply cannot achieve. The beauty of this adhesive is that it can be placed on the back of the ribbon or paper, ensuring no visible marks or bumps. However, there are some cons to consider before using double-sided tape. Firstly, it can be difficult to remove once applied – so make sure you have everything lined up perfectly first! Additionally, if you accidentally stick two surfaces together with double-sided tape, it can be almost impossible to separate them without damaging either surface.
If you’re not sold on using double-sided tape for your gift-wrapping needs, there are alternative adhesive options available. Glue dots provide a strong hold while still being easily removable, making them ideal for beginners or those who may need to make adjustments after wrapping. Washi tape also offers an excellent decorative option, as it comes in a wide variety of colors and patterns. Ultimately, the choice of adhesive will depend on personal preference and what works best for each individual’s wrapping style.
Transitioning into our next section: securing the ribbon: tying the perfect bow – we’ll explore how different types of ribbon can affect your final result and offer tips for creating flawless bows every time.
Securing The Ribbon: Tying The Perfect Bow
After selecting and cutting the ribbon to the appropriate length, it’s time to tie a bow. The perfect bow should be symmetrical and tightly secured on top of the gift. Here are some tips on how to tie a professional-looking bow:
- Choose a ribbon that is easy to manipulate and holds its shape well, such as satin or grosgrain.
- Use a double-sided ribbon for an added touch of elegance.
- Start by creating two loops with equal size and length.
- Cross one loop over the other while holding them in place with your fingers.
- Tuck one loop behind the other and pull it through the hole created by crossing them over.
Practice makes perfect when it comes to tying bows, so don’t hesitate to try again if you’re not satisfied with your first attempt. Common mistakes to avoid include using too much or too little ribbon, uneven loops, and loosely tied knots. With enough practice, you’ll soon master the art of tying a flawless bow.
To complete your professionally wrapped present, add gift tags and personal touches.
Adding Gift Tags And Personal Touches
After tying the perfect bow, it’s time to add the finishing touches to your gift wrapping masterpiece. One way to make your gift stand out is by creating DIY gift tags. This adds a personal touch to the present and lets the recipient know how much thought you put into their gift. To create a unique tag, use colored cardstock or scrapbook paper and cut out shapes such as hearts, stars, or Christmas trees. Then, write a heartfelt message with a metallic pen or marker.
Personalized gift embellishments are another great way to add flair to your wrapped gifts. You can create these embellishments with items you already have at home such as ribbons, buttons, or even dried flowers. For example, tie a small bundle of cinnamon sticks with twine for a rustic touch on a winter-themed present. Or glue a few shiny sequins onto plain wrapping paper for some added sparkle. The possibilities are endless when it comes to adding personalized touches to your gifts.
Now that you’ve added those special touches to your gift wrap, it’s time to decide if you want to use traditional wrapping paper or opt for a more convenient option like using gift bags and boxes. Gift bags and boxes come in various sizes and designs so you can easily find one that suits your needs. Plus, they eliminate the hassle of cutting and measuring wrapping paper while still looking polished and professional. Simply place your wrapped gift inside the bag or box and add tissue paper or shredded paper for extra cushioning before presenting it to the lucky recipient.
Using Gift Bags And Boxes
Another great way to wrap a gift is by using gift bags or boxes. These options are perfect for those who want to wrap their gifts quickly and efficiently. Gift bags come in various sizes, shapes, colors, and patterns, so choose one that suits your gift’s size and style. To make the present look even more attractive, add some tissue paper inside the bag before placing the gift inside.
When using a box, it’s essential to select the correct size and shape to fit your item correctly. Place some tissue paper at the bottom of the box before putting in your gift. When wrapping gifts without boxes, use tissue paper to cover the present entirely before placing it in a bag. This method helps protect delicate items from damage while making them look beautiful.
Using tissue paper is an excellent way to add color and texture to your gift wrap. Choose a color that complements your bag or box and place it on top of the present before closing it up. You can also use multiple colors of tissue paper for a layered effect. Remember always to make sure that you have enough tissue paper that can completely cover your gift.
Moving forward, let us now discuss how you can wrap multiple gifts together creatively. This method is perfect when you have several small gifts that you want to give as one package. With this technique, you can create stunning wrapped presents that look professionally done with ease.
Wrapping Multiple Gifts Together
Imagine you have a pile of gifts to wrap for a special occasion. You want them to look as professional and elegant as possible, but you’re not sure how to approach wrapping multiple gifts together. Fear not, as there are several techniques that can help you achieve this.
When wrapping large gifts, it’s best to keep the paper neat and tidy by folding it evenly around the edges of the gift. Use double-sided tape to ensure a seamless finish. For smaller items, consider grouping them together in a box or basket before wrapping them as one unit. This will add an element of surprise and make your gift stand out from the rest.
Wrapping fragile items requires extra care and attention to detail. Use tissue paper or bubble wrap to protect delicate items before placing them in a gift bag or box. To avoid any potential damage during transport, add some additional padding with shredded paper or foam peanuts. With these tips in mind, you can now confidently wrap multiple gifts together like a pro.
| Column 1 Header | Column 2 Header | Column 3 Header | Column 4 Header | Column 5 Header |
|---|---|---|---|---|
| Wrapping Large Gifts | Keep paper neat and tidy by folding it evenly around edges of gift | Use double-sided tape for seamless finish | Group smaller items together in box/basket before wrapping for added surprise factor | – |
| Wrapping Fragile Items | Protect with tissue paper or bubble wrap before placing in gift bag/box | Add additional padding with shredded paper or foam peanuts during transport | Choose sturdy packaging materials such as corrugated cardboard boxes for added protection during shipping/handling | – |
| Wrapping Multiple Gifts Together | Use ribbon or twine to tie multiple packages together for cohesive look | Consider layering different types of wrapping paper or adding embellishments such as bows or ornaments for added visual interest | Label each gift clearly with recipient’s name to avoid confusion | – |
Next, we will explore the art of wrapping gifts for different occasions. From birthdays to weddings, each occasion requires a unique approach to gift wrapping. By tailoring your techniques and materials to suit the occasion, you can create a truly memorable and personalized gift-giving experience.
Wrapping Gifts For Different Occasions
Moving on from wrapping multiple gifts together, let us now explore different types of wrapping styles to make your gift look professionally done. The presentation of a gift can be just as important as the gift itself, and there are many creative gift wrapping ideas for special occasions that can truly make your present stand out.
One popular style is the classic wrap where you fold the edges of the paper neatly and use tape to secure them in place. Another style is the Japanese Furoshiki where you use a cloth to wrap your gift instead of paper. This not only looks unique but also serves a sustainable purpose by reducing waste. Lastly, you can opt for a more rustic look with brown paper and twine or ribbon for an organic feel.
When choosing a wrapping style, keep in mind the occasion and recipient’s preferences. For example, vibrant colors and patterns may work well for birthdays while elegant metallics could be more suitable for weddings or anniversaries. Additionally, consider adding small details like personalized tags or embellishments such as dried flowers or beads to make your gift even more special.
By using these different wrapping styles and incorporating personal touches, you can easily elevate your gift-giving game. In the next section, we will delve into DIY gift wrapping ideas: adding your own creativity to further personalize each present.
Diy Gift Wrapping Ideas: Adding Your Own Creativity
- Creative supplies, such as ribbon, twine, and fabric, can provide a unique look to a gift without breaking the bank.
- Utilizing unique techniques, like creating bows with scissors or using a paper towel tube as a gift wrap roller, can add a creative and professional touch to any gift.
- Personalized touches, such as adding a personalized message or using a favorite color, can make a gift stand out from the rest.
- Adding extra elements, such as fabric flowers or paper cutouts, can help take a simple gift wrap to the next level.
- Utilizing a combination of supplies, techniques, and personalized touches can help create an aesthetically pleasing gift wrap that looks professionally done.
- Taking the time to craft the perfect gift wrap can create a memorable experience for the recipient.
Creative Supplies
As a gift wrapping expert, I understand the importance of having the right crafting techniques and DIY inspirations that can make your gift stand out from the rest. Creative supplies are an essential part of transforming an ordinary present into something extraordinary. Whether it’s adding a pop of color or texture, incorporating unique embellishments, or experimenting with different materials, creative supplies can elevate your gift wrapping game.
One way to add creativity to your gift wrapping is by using patterned paper. Choose papers that complement each other and experiment with layering them. Tissue paper is another versatile option that adds dimension and texture to any package. You can also use ribbons and bows in various colors and textures to give your gift a polished finish. Experiment with different types of ribbon like satin, grosgrain, or velvet to add more depth to your design.
Another way to add creativity is by incorporating unique embellishments such as buttons, stickers, flowers or even small toys! These additions will personalize your gift and make it special for the recipient. Lastly, consider creating custom tags or labels using calligraphy or printing techniques. This will give your package a professional look while also making it clear who the gift is for.
Incorporating creative supplies into your DIY gift wrapping ideas is a fun and fulfilling way to show someone how much you care. With these tips in mind, you’ll be able to create beautifully wrapped presents that are sure to impress anyone who receives them. So go ahead and let your creativity shine!
Unique Techniques
As a gift wrapping expert, I believe that adding your own creativity to DIY gift wrapping ideas is an excellent way to show someone how much you care. One unique technique that can elevate your gift wrapping game is by using layering techniques. Experimenting with different patterned papers and tissue paper can add dimension and texture to your package. When layering, it’s essential to choose papers that complement each other and mix textures for a polished finish.
Another way to add creativity is by incorporating creative embellishments. Instead of traditional ribbons and bows, try using buttons, stickers, flowers or small toys! These additions will personalize your gift and make it special for the recipient. For instance, adding a small toy or flower on top of the package can be an exciting addition to unwrapping the present.
Incorporating unique techniques into your gift wrapping ideas shows thoughtfulness and effort in making the recipient feel special. With these tips in mind, you’ll be able to create beautifully wrapped presents that are sure to impress anyone who receives them. So go ahead and let your creativity shine through these unique techniques!
Personalized Touches
As a gift wrapping expert, I firmly believe that personalized touches can make all the difference in DIY gift wrapping ideas. Customizing embellishments is a fantastic way to add a unique flair to your present. For example, you can use stickers or buttons that reflect the recipient’s hobbies or interests. This technique will show them how much thought and effort you put into their gift.
Another way to personalize your gift wrapping is by including a handwritten note. A heartfelt message can go a long way in making someone feel special and appreciated. You can write a short poem, quote, or simply express your gratitude for the person receiving the present. Adding this touch will undoubtedly make their day and create a lasting memory.
Incorporating personalized touches into your DIY gift wrapping ideas is an excellent way to show someone you care. By customizing embellishments and including handwritten notes, you are adding an extra layer of thoughtfulness that will make the present even more special. These small details will undoubtedly leave a lasting impression on the recipient and make them feel truly appreciated.
Wrapping Gifts With Children: Fun And Easy Techniques
Wrapping gifts with children can be an enjoyable activity that promotes creativity and fosters family bonding. Children have a natural enthusiasm for art projects, so it’s no surprise that they love decorating presents. With a few simple materials and some guidance, kids can create beautifully wrapped gifts that are sure to impress the recipient.
To make gift wrapping more fun for children, consider incorporating some games into the process. For example, you could challenge your child to wrap a present in under two minutes or see who can come up with the most creative use of ribbon or tissue paper. These playful activities will keep kids engaged and excited about the task at hand.
When it comes to creative wrapping techniques for kids, there are plenty of options to choose from. Some popular ideas include using stamps or stencils to add designs to plain wrapping paper, creating custom gift tags with glitter glue or markers, or even making your own wrapping paper by decorating plain white butcher paper with paint or markers. Encouraging children to experiment with different textures and colors will help them develop their artistic skills while also making each gift unique and special.
Gift wrapping is a wonderful opportunity to spend quality time together as a family while also giving something back to others. By incorporating fun games and creative techniques into the process, you can create lasting memories while also teaching valuable life skills. So why not gather your supplies and get started on your next gift-wrapping adventure today?
Conclusion
Gift wrapping is an art form that can elevate the presentation of any gift to a whole new level. By choosing the right materials and adding finishing touches, you can create a beautifully wrapped package that looks professionally done. Quality paper is key, as it provides a sturdy base for your wrapping and adds to the overall aesthetic. When selecting ribbon and embellishments, consider color schemes and themes to create a cohesive look.
Measuring the paper correctly is essential for a neat and tidy appearance. If you’re wrapping multiple gifts together, make sure they’re arranged in an orderly fashion before wrapping. Different occasions call for different techniques, such as using tissue paper or creating bows with wired ribbon. DIY ideas like stamping or stenciling your own designs add a personal touch to your gifts.
Wrapping gifts with children can be both fun and easy by using simple techniques like finger painting or creating paper chains. No matter the occasion or recipient, mastering the art of gift wrapping will bring joy to both the giver and receiver. So take these tips from a gift wrapping expert and get creative with your next present!
Image Credits
- “Fabric-Wrapped Gifts Under the Tree” by mamamusings (featured)

