As gift-giving culture continues to evolve, so does the art of gift wrapping. Gift wrapping a wine bottle is an excellent way to add a personal touch to your present that will not only impress your recipient but also showcase your attention to detail. With the right technique and material, you can turn an ordinary wine bottle into a stunning gift that reflects your thoughtfulness and generosity.
Gift wrapping a wine bottle requires specific skills and techniques. The process involves selecting the appropriate materials, assessing the shape of the bottle, and choosing the right style of wrapping. As a gift wrapping expert, I understand how important it is to create visually appealing packages that leave lasting impressions on recipients. In this article, I will provide you with practical steps on how to wrap a wine bottle like a pro while keeping in mind that gifting is an act of kindness and service towards others.
Gather The Necessary Materials
To properly gift wrap a wine bottle, it is important to gather all necessary materials before beginning. Firstly, you will need a roll of wrapping paper that is large enough to fully cover the bottle. You may choose any type of wrapping paper, but it is recommended to select a thicker material to avoid tearing during the wrapping process. Wrapping paper can be found at most craft stores or stationary shops.
In addition to the wrapping paper, you will also need some tape and scissors. The tape should be strong enough to hold the wrapping paper in place without peeling off easily. It is important to use sharp scissors for clean cuts and easier handling of the wrapping paper. These materials can typically be found alongside the wrapping paper at craft stores or stationary shops.
Lastly, consider adding some decorative elements such as ribbons or bows for an extra touch of elegance. These can be found in various colors and sizes at the same stores where you purchased your other materials. With these essential materials gathered, you are now ready to proceed with your gift wrap project by choosing the right wrapping paper for your wine bottle.
Choose The Right Wrapping Paper
When selecting the right wrapping paper for a wine bottle, it is important to consider factors such as color, pattern, texture, size, personalization, cost, recyclability, ease of use, material, brand, seasonal designs, customization, novelty prints, embellishments, and shelf life. Factors such as color and pattern can help to enhance the aesthetic appeal of the gift, while materials such as paper or cloth can influence the cost, recyclability and shelf life of the wrapping paper. Additionally, special touches like personalization, customization, and novelty prints can add a unique and special touch to the gift. Finally, seasonal designs and embellishments can be used to create the perfect gift-giving experience.
Color
As a gift wrapping expert, I understand the importance of choosing the right wrapping paper for a wine bottle. One crucial factor that you must consider is color, which can elevate the overall presentation of your gift. Color is significant because it can be used to enhance or complement the wine inside the bottle.
When selecting a color scheme, it’s essential to look at wine pairings and wine label design. For instance, if you’re gifting a bottle of red wine, consider using warmer colors like deep reds or burgundy for the wrapping paper. Alternatively, if you’re gifting white wine, cooler tones like light blue or silver can be an excellent choice. Additionally, take into account the label design on the bottle; you don’t want to choose colors that clash with or overpower the label.
Finally, remember that your goal is not only to wrap your gift but also to make it look beautiful and thoughtful. Choosing complementary colors will enhance your presentation and show how much effort you put into selecting this particular gift for your recipient. With these tips in mind, you’ll undoubtedly create an aesthetically pleasing gift that showcases both the wine inside and your attention to detail when wrapping it.
Pattern
Choosing the right wrapping paper for a wine bottle is crucial to elevating its overall presentation. As a gift wrapping expert, I understand that colors play a significant role in enhancing or complementing the wine inside the bottle. However, it’s not just about colors; patterns also add another layer of interest to your gift.
Wine bottle patterns can be an excellent way to incorporate personality and creativity into your wrapping. You can opt for classic stripes or polka dots, elegant damask or floral prints, or even festive holiday designs. When selecting patterns, it’s best to consider the recipient’s taste and preferences. If you’re unsure, you can always choose neutral patterns like stripes or dots that will suit any occasion.
If you’re feeling crafty, DIY wrapping ideas are limitless when it comes to using patterns. You can create your own unique designs by using stencils, stamps, or even freehand drawing. You can also mix and match different patterns and colors for a fun and eclectic look. The key is to have fun while creating a beautiful and thoughtful gift that showcases both the wine inside and your creative skills as a gift wrapper expert.
Measure The Paper
After choosing the right wrapping paper, it is essential to measure its size carefully. According to a survey conducted by the National Gift Wrapping Association, measuring accuracy is one of the most critical aspects of gift wrapping. A wine bottle’s unique shape makes it difficult to get an accurate measurement, and using incorrect measurements can lead to waste and frustration.
To ensure that you get the right measurement for your wine bottle gift wrap, there are alternative methods you can use. One way is by using a flexible measuring tape or a piece of string. Wrap the measuring tape around the widest part of the bottle and note down the measurement. Alternatively, wrap a piece of string around the bottle and mark where it overlaps before laying it flat on top of your wrapping paper.
Once you have an accurate measurement, it’s time to cut the paper to size. The key here is to ensure that you have enough wrapping paper to cover the entire wine bottle while leaving some excess on both ends. This excess will allow you to create neat folds at both ends while giving your gift wrap a professional finish.
Cut The Paper To Size
- Accurately measuring the bottle is essential for achieving the perfect gift wrap.
- Mark the circumference of the bottle with a pencil or pen, allowing for an extra inch or two to overlap and cover the sides, before cutting the paper.
- Cut the paper along the marked circumference, ensuring that the paper is slightly larger than the bottle.
- Fold the edges of the paper to create a neat and snug fit around the bottle.
Measure Bottle
Measuring the wine bottle is an essential step in gift wrapping it. Measuring tips are necessary to ensure that the paper fits snugly and securely around the bottle, preventing it from slipping off or tearing during transport. When measuring the bottle, start with its dimensions. Wine bottles come in various sizes, so make sure to measure both the height and circumference of the bottle.
To measure the height of the wine bottle, place a ruler or tape measure at its base and extend it to its highest point. Note down this measurement as it will be used to determine how much paper is needed to cover the length of the bottle. For determining the circumference of the wine bottle, wrap a flexible measuring tape around its widest part, usually near its base. Add an inch or two to this measurement for extra coverage and ease when wrapping.
Remember that each wine bottle is unique in size and shape. Therefore, accurate measurements are crucial for successful gift-wrapping outcomes. By following these measuring tips, you can ensure that your wine bottle looks elegant and professionally wrapped for any occasion – be it Christmas or someone’s birthday!
Cut Paper
Measuring the wine bottle is just the first step in gift wrapping it. The next crucial step is to cut the paper to size accurately. This process may seem simple, but it requires both creative designs and efficient techniques to make sure that the wrapped wine bottle looks presentable and attractive.
Before cutting the paper, measure its exact length by placing it beside the wine bottle and marking where it should end with a pencil. Then, add an inch or two to this measurement for extra allowance when wrapping. Next, cut the paper along this line using scissors or a rotary cutter for a more precise cut. Remember that uneven cuts can ruin even the most beautiful wrapping paper designs.
Additionally, consider choosing a gift wrap that complements both your recipient’s taste and personality while still incorporating your own style. Experiment with different color combinations or patterns like stripes or polka dots for an eye-catching appearance. With these creative designs and efficient techniques, you can make your wrapped wine bottle stand out from others and leave a lasting impression on your recipient.
Decide On The Style Of Wrapping
Gift wrap inspiration can come from anywhere! It can be something as simple as a color scheme that you love or a piece of ribbon that catches your eye. A wine bottle is an elegant gift, and it deserves to be wrapped in a way that reflects its sophistication. There are many creative wrapping techniques that you can use to make your gift stand out.
One idea for wrapping a wine bottle is to use tissue paper. Cut a large sheet of tissue paper into a square, and place the wine bottle in the center. Gather the edges of the tissue paper together at the top of the bottle, and secure them with a piece of ribbon or twine. This creates a beautiful ruffled effect on top of the bottle.
Another option is to use decorative wrapping paper. Choose a patterned or solid-colored paper that complements the wine label or matches the recipient’s taste. Cut the paper to size, and wrap it tightly around the body of the bottle, securing it with tape. Finish off with a bow made from ribbon or twine.
Creative wrapping techniques can take your gift presentation to another level! Using materials like burlap, lace, or even fresh flowers adds texture and depth to your wrapping. Experiment with different combinations until you find one that speaks to you and suits your recipient’s style.
Transition: Now that you have decided on your style of wrapping, it’s time to move onto how to wrap the bottom of the bottle.
Wrap The Bottom Of The Bottle
After deciding on the style of wrapping, it’s time to start wrapping the wine bottle. The first step is to wrap the bottom of the bottle. This ensures that the bottom is secure and protected from any accidental falls or bumps. To do this, you will need a piece of wrapping paper that is approximately twice the height of your wine bottle.
To wrap the bottom of your wine bottle, follow these steps:
- Place the bottle in the center of your wrapping paper.
- Bring one side of the paper up and over the bottom of the bottle.
- Fold this side upwards until it reaches about halfway up the side of the bottle.
- Repeat with the other side of the paper, folding it upwards to meet with the first fold.
- Fold both sides together at a slight angle towards each other so that they meet in a point just above where they started.
Once you have wrapped the bottom of your wine bottle, it’s time to think about decorative accents and sleeve options for added flair. Consider adding ribbon or twine around the neck of your bottle for an extra touch of elegance. Bottle sleeve options are also available, such as kraft paper sleeves or custom printed sleeves featuring holiday designs or personalized messages.
By taking these extra steps to decorate your wine bottle gift, you can make it stand out and show how much thought you put into presenting it to someone special. Next, we will move onto folding the sides of our wrapping paper securely around our gift without damaging its contents.
Fold The Sides Of The Paper
When it comes to gift wrapping a wine bottle, the way you fold the sides of the paper is crucial. It’s important to make sure that the paper is secure enough to hold the weight of the bottle, without being too tight or too loose. To illustrate this point, think of it as wrapping a present for your best friend’s wedding. You want it to look beautiful and elegant, but you also want to make sure that nothing falls apart when they pick it up.
To achieve this level of elegance and security, there are several alternative folding techniques that you can use. One option is the diagonal fold, which involves folding one corner of the paper over the bottle at a 45-degree angle, then folding in the other side to create a neat triangle shape. Another technique is called “the envelope,” where you fold both sides of the paper inwards towards each other until they meet in the middle, then tuck them together like an envelope. These techniques not only add creative embellishments to your gift wrap but also provide additional support for your wine bottle.
In addition to these folding techniques, there are also many creative embellishments that you can add to your gift wrap. Consider adding ribbons or bows in complementary colors or textures to make your gift stand out even more. And don’t forget about personal touches such as handwritten notes or customized labels – these small details will make all the difference in how your gift is received and appreciated. Once you have folded and decorated your gift wrap, secure it with tape before moving on to our next step: tying a bow around the neck of the bottle for an extra touch of elegance.
Secure The Paper With Tape
Once you have placed the wine bottle in the center of the wrapping paper and folded the sides, it is essential to secure the paper with tape. This step is crucial as it ensures that your gift will not come apart easily during transportation or handling. To do this, you can use any adhesive tape that you prefer, such as clear tape or double-sided tape.
When using clear tape, place a small piece on each side of the paper where it meets in the middle to hold it together. Make sure to smooth out any wrinkles or bubbles in the paper before applying the tape. Alternatively, you can use double-sided tape to create an even cleaner look without any visible adhesive showing.
Decorative options for securing your wine bottle wrap include using colored or patterned tape that complements your wrapping paper’s design. Adhesive alternatives also include decorative stickers or ribbons that can add an extra touch of elegance to your presentation.
Now that you have securely wrapped your wine bottle with tape, it’s time to move on to creating a neck and top cover for an added level of sophistication.
Create A Neck And Top Cover
- To begin making a neck and top cover for a wine bottle, it is important to measure the bottle to ensure that the fabric is of the right size and shape.
- Cut out the fabric according to the measurements taken, allowing for a few extra centimeters for a neat finish.
- When selecting the fabric, consider the occasion and colour scheme in order to keep the presentation looking elegant.
- The fabric should be cut into a circular shape with a diameter that is slightly larger than the circumference of the neck and top of the bottle.
Measure Bottle
Before creating a neck and top cover for your wine bottle, it’s important to measure the bottle accurately. Accurate measurements will ensure that your wrapping material fits snugly around the bottle, giving it a polished and professional look. To measure a wine bottle, start by measuring its height from the base to the top of the neck. Then, measure the circumference of the thickest part of the bottle.
When measuring your wine bottle, keep in mind that not all bottles are created equal. Some bottles may have an odd shape or asymmetrical features that make them difficult to measure accurately. In these cases, it’s best to use a flexible measuring tape or string to wrap around the widest part of the bottle and take note of the length. This will give you an accurate measurement that you can use when selecting your wrapping material.
Once you have measured your wine bottle accurately, you can move on to creating a neck and top cover that fits perfectly. With these tips for measuring odd shaped bottles in mind, you’ll be able to create a beautiful gift wrap for any type of wine bottle. So go ahead and get creative with your wrapping materials – with accurate measurements in hand, you’re sure to create a stunning presentation that will impress any recipient!
Cut Fabric
Moving on to the next step in creating a neck and top cover for your wine bottle, it’s time to cut the fabric. The type of fabric you choose will depend on your personal style and the occasion, but some popular choices include silk, linen, or cotton. Using scissors or a rotary cutter, carefully cut the fabric according to your measurements. For an added touch of creativity, consider using alternative materials like lace or burlap to create unique designs.
When cutting your fabric, be sure to leave enough room for seam allowances. This will ensure that your cover fits snugly around the bottle without any gaps or wrinkles. If you’re using a patterned fabric, take care to match up any seams or patterns for a polished look. Once you’ve cut your fabric to size, it’s time to move on to sewing.
Creating a neck and top cover for your wine bottle is a thoughtful way to present a gift that shows how much you care. By measuring your bottle accurately and cutting your fabric with care, you’ll be able to create a beautiful and professional-looking wrap that is sure to impress. With so many creative designs and alternative materials available, there’s no limit to the possibilities when it comes to creating stunning covers for any occasion!
Tie A Ribbon Or Bow
When it comes to gift wrapping a wine bottle, the final touch is tying a ribbon or bow around the neck of the bottle. There are various types of ribbon that can be used when wrapping a wine bottle. Satin ribbon is elegant and adds a touch of sophistication to the gift. Grosgrain ribbon is perfect for those who prefer a more rustic look. For those going for a modern twist, try using metallic ribbons in gold or silver.
Once you have chosen your desired type of ribbon, it’s time to get creative with bow ideas. A classic bow tied on top of the wine bottle is always an option, but there are other designs that can add an extra special touch. One idea is to tie multiple small bows along the length of the ribbon, creating a cascading effect. Another option is to use two different colors of ribbon and tie them together in a knot at the front of the bottle.
While tying a ribbon or bow may seem like a small detail, it can really elevate the overall presentation of your gift-wrapped wine bottle. Remember to choose your favorite type of ribbon and get creative with your bow ideas to make your gift stand out from all others. Next up, we’ll discuss how to add decorative touches to complete your wine bottle wrapping process.
Add Decorative Touches
To continue with the wine bottle gift wrapping process, let’s move on to adding creative embellishments and personalization ideas. These finishing touches can elevate the presentation of your gift and make it stand out from others. Here are some ideas to inspire you:
- Use a decorative wine bottle stopper or cork as a topper for your wrapped bottle.
- Tie a small ornament or charm onto the ribbon or bow for an extra touch of flair.
- Create a personalized label for the wine bottle with the recipient’s name or a special message.
- Use metallic markers to write directly onto the gift wrap, adding a personal touch without any additional materials.
With these ideas in mind, let your creativity flow as you add the final touches to your wine bottle gift wrap. Remember that personalization is key and can make all the difference in making your gift stand out. Consider using colors that reflect the recipient’s personality or interests, or incorporating their favorite hobbies into the design.
If you find that wrapping a wine bottle is too challenging or time-consuming, don’t worry! There is always the option of using a gift bag instead. Gift bags come in many sizes and styles, so choose one that fits your needs and adds an extra element of surprise to your present. With these tips and tricks in mind, you can create beautiful and thoughtful gifts for any occasion.
Use A Gift Bag Instead
Interestingly, a survey conducted by the National Retail Federation found that gift bags are becoming increasingly popular among consumers. In fact, in 2019, over half of those surveyed said they would be using gift bags for their holiday presents.
If you’re struggling with wrapping a wine bottle and don’t want to use traditional wrapping paper, consider using a gift bag instead. Not only is it a simple and quick option, but it also adds an extra touch of elegance to your gift.
Gift bags come in a variety of sizes and designs, making it easy to find one that fits your wine bottle perfectly. Plus, many gift bags now come with handles, making them easy to transport and carry. Alternative wrapping options like gift bags are not only practical but add an extra layer of thoughtfulness to your gift giving experience.
When considering using a gift bag, don’t forget to consider adding a gift tag! This small addition can make all the difference when it comes to personalizing your present and showing that you put effort into the presentation. With so many options available online or at your local store, finding the perfect tag to complement your chosen design has never been easier.
Consider Adding A Gift Tag
Creative tag ideas can add a personal touch to your wrapped wine bottle. After all, it’s not just about wrapping the bottle, but also about making the recipient feel special. You can opt for a classic gift tag or get creative with unique shapes and designs. Consider using recycled materials such as old Christmas cards or even wine corks to make your own tags.
The importance of personalization cannot be emphasized enough when it comes to gift-giving. Adding a personalized message to a gift tag can make all the difference in creating a meaningful and memorable experience for the recipient. You can include their name, a heartfelt message, or even an inside joke that only they would understand. The possibilities are endless!
Your creative tag ideas and personalization efforts will not go unnoticed by the recipient. They will appreciate the extra thought and effort you put into their gift. Now that your wine bottle is beautifully wrapped and tagged, it’s time to transport it safely to its destination. Here are some tips on how to do so without damaging your hard work…
Tips For Transporting Wrapped Bottles
Imagine a beautifully wrapped gift, adorned with ribbons and bows, sitting on a table. It’s the perfect present, until you realize that it’s a fragile bottle of wine. Transporting a wrapped bottle can be tricky, but with these tips for storing wrapped bottles, you can ensure that your gift arrives safely.
Firstly, it’s important to choose the right container for your wrapped bottle. A sturdy cardboard box or wine carrier will work best. Make sure that the box is slightly larger than the bottle to allow for padding material. Once you’ve chosen your container, carefully place the wrapped bottle inside and surround it with packing material such as bubble wrap or packing peanuts. This will prevent the bottle from moving around during transport and protect it from any potential damage.
Accessorizing a wrapped wine bottle can add an extra touch of elegance to your gift. Consider tying a decorative ribbon or twine around the neck of the bottle and attaching a small ornament or tag with a personalized message. You can also create a custom label for the bottle using printable stickers or labels found at craft stores. These creative ways to accessorize wrapped wine bottles will make your gift stand out and show just how much thought went into its presentation.
As you prepare to give your beautifully wrapped wine bottle as a gift, keep in mind these tips for storing and accessorizing it during transport. By choosing the right container and packing materials, you can ensure that your gift arrives safely and without any damage. Adding unique touches like decorative ribbons or custom labels will make your gift even more special and memorable for its recipient. With these tips in mind, you’re ready to give an unforgettable gift that truly shows how much you care about serving others.
Final Thoughts On Gift Wrapping A Wine Bottle
After mastering the art of transporting wrapped bottles, it’s time to focus on wine bottle presentation. The way you present a gift to someone is just as important as the gift itself. A well-presented wine bottle can make all the difference in expressing your gratitude or appreciation towards someone. Here are some creative gift wrapping ideas that will help you make your wine bottle stand out from the rest.
Use a Wine Bag: Wine bags are an excellent option for those who want to keep things simple. They come in various sizes and designs, making them perfect for all occasions. One significant advantage of using a wine bag is that they can be reused multiple times.
Add Personal Touches: Adding personal touches such as ribbons, bows, or customized tags can make your gift more memorable. You can also add a handwritten note to express your feelings towards the recipient.
Use Wrapping Paper: If you want to add an extra layer of creativity to your gift wrapping, consider using wrapping paper instead of a wine bag. You can even use different types of paper such as recycled paper or patterned paper to give it a unique touch.
Create a Gift Basket: A gift basket is another fantastic option for presenting wine bottles. You can add other gifts such as chocolates, crackers, or cheese along with the wine bottle to make it more special.
In conclusion, there are numerous ways to present a wine bottle creatively. Whether you opt for a simple wine bag or decide to create an elaborate gift basket, remember that the presentation should reflect your appreciation towards the recipient and show them how much thought you put into their gift. With these tips and ideas in mind, you’re sure to impress anyone with your beautifully wrapped wine bottles!
Conclusion
Gift wrapping a wine bottle can be an elegant and sophisticated way to present this timeless gift. With the right materials, technique, and style, you can create a beautiful and memorable presentation that will impress any recipient.
When it comes to gift wrapping a wine bottle, preparation is key. Gather all necessary materials such as wrapping paper, tape, scissors, ribbons, and decorations before starting the process. Choose the right wrapping paper that complements the occasion and the recipient’s taste. Measure and cut the paper to size and decide on the style of wrapping that suits your theme or preference. If you are unsure of how to wrap a wine bottle, consider using a gift bag instead. Lastly, add a gift tag that expresses your sentiments in a personalized way.
Transporting wrapped bottles can sometimes be tricky. To avoid spills or damage during transport, secure the bottle with tissue paper or bubble wrap inside the bag or box. Always double-check for any loose ends or untied ribbons before handing over your beautifully wrapped wine bottle.
In conclusion, gift wrapping a wine bottle is an art form that requires attention to detail and creativity. With these tips and techniques, you can elevate your presentation game for any occasion. Remember to have fun with it and let your personality shine through in every wrap!
Image Credits
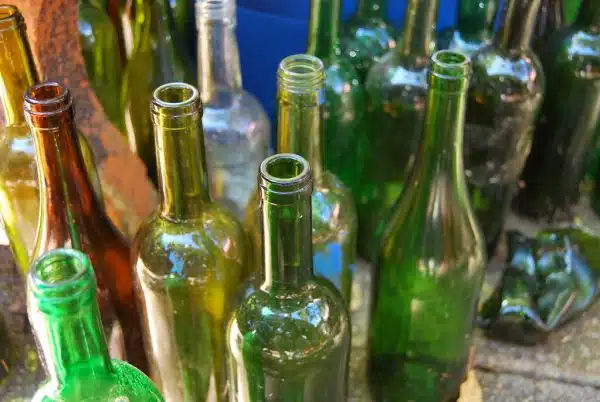
- “Wine Bottles” by Bayhaus (featured)

