Have you ever had a craving for potatoes but didn’t know where to get them? What if you could grow your own potatoes in the comfort of your own home garden? Growing potatoes is not only possible but it is also incredibly easy! All you need are a few supplies, some soil, and plenty of sun. Whether you’re a potato connoisseur or an aspiring gardener, this article will show you how to grow potatoes with ease.
At first glance, growing potatoes may seem like a daunting task. But with the right knowledge and preparation, anyone can have success with growing their own spuds! From choosing the right variety of seed potatoes to planting and harvesting times, this article will provide everything you need to know about growing potatoes in your own backyard.
Not only is growing potatoes fun and rewarding, it’s also a great way to save money on produce. With just a bit of effort and dedication, anyone can learn how to grow delicious potatoes at home! So what are you waiting for? Let’s get started!
Choosing A Variety Of Potato
Choosing the right variety of potato for your garden is key to a successful harvest. You’ll have to consider climate, soil type and which type of potato you plan to grow. Whether you’re looking for waxy potatoes or those that are good for baking, certain varieties do better in different regions. To get started, it’s a good idea to research what grows best in your area.
Once you’ve chosen your desired variety, it’s time to prepare the garden soil. The soil should be well-draining and rich in organic matter like compost and manure. If you’re planting seed potatoes, they should be cut into pieces with at least two eyes each before being planted about 8 inches deep and 12 inches apart. When planting cut potatoes directly into the ground, make sure that each piece has at least one eye too.
Your potatoes will need plenty of water during the growing season and fertilizer can also help ensure a bigger yield come harvest time. When the plants reach about 6-8 inches tall, use a hoe or shovel to mound up soil around them for additional protection from sunscald and frost damage as well as added insulation for developing tubers below ground level. With proper care and attention throughout the season, your potato harvest should be abundant come fall!
Preparing The Garden Soil
Growing potatoes is a rewarding experience, and begins with preparing the garden soil. Before you can think about planting potatoes, it’s important to ensure that the soil is ready for them. Getting your soil in great condition before planting will increase your chances of success.
The soil should be easily worked and have good drainage. If possible, test the soil pH to determine if it’s appropriate for growing potatoes – they need a slightly acidic environment (5.0-6.5 pH). If not, you may need to add some compost or peat moss to bring down the pH level. Additionally, make sure there are no weeds or debris in the area where you intend to grow your potatoes – these can harbor diseases and pests that could affect your crop.
When the soil is ready, it’s time to begin planting! Potatoes are usually planted from ‘seed potatoes’ – small pieces of potato that have been cut from larger tubers and then allowed to dry out so they don’t rot once planted in the ground. Planting multiple seed potatoes allows you to get more bang for your buck by producing more potatoes per plant, so consider how many plants you want before purchasing your seed potatoes. With properly prepared soil and seed potatoes in hand, you’re ready to take on growing potatoes!
Planting Potatoes
Planting potatoes can be likened to sowing a seed of hope – it requires patience, care and attention. As with any planting task, the soil you use is important. Potatoes need well-drained soil that is rich in organic matter, such as compost or aged manure. Before planting, break up the top 12 inches of soil to ensure it’s loose enough for the potatoes to spread their roots. Dig holes two feet apart and three inches deep, then add two tablespoons of fertilizer per hole before placing the seed potatoes inside. Cover them with soil and pat down gently so that they are firmly in place.
To promote healthy growth and a bumper yield, water frequently and deeply but avoid getting water on the leaves as this can cause a fungal disease called blight. To help keep weeds at bay and maintain moisture levels, cover the area with mulch once the potato plants have sprouted from the ground. Mulching also helps discourage pests like slugs from munching on your crop! Finally, regular checking for any signs of rot or other diseases is essential for ensuring a successful harvest come autumn.
Watering And Fertilizing
The nourishing power of water and fertilizer is a symbol of life’s abundance. Like a farmer tending to the soil, a gardener must take care when providing the necessary nutrients for their potatoes to flourish. To ensure your potatoes have all they need for optimal growth, here are five simple steps:
Water twice a week, making sure to moisten the soil around the plant’s roots without saturating it too much.
Fertilize twice a month with a balanced blend of nitrogen, phosphorus, and potassium that is specifically designed for potatoes or root vegetables.
Monitor your potato plants regularly to watch out for any nutrient deficiencies or imbalances that may arise.
Mulch heavily around potato plants in order to retain moisture and control weeds in the garden bed — this will also help prevent diseases from attacking your potatoes by keeping them dry and improving air circulation around them.
Harvest when the leaves turn yellow and die back — this is usually about two months after planting but will depend on the variety of potato you planted and other environmental factors like temperature and rainfall levels.
These steps will keep your potato plants healthy throughout the growing season and yield an abundance of delicious potatoes by harvest time! It’s important to remember that even after you have planted your potatoes, there is still work to be done in order to ensure success; however, following these easy steps will help you achieve maximum results with minimal effort! With proper maintenance and care, you can look forward to having an abundance of potatoes at harvest time!
Mulching For Weed Control
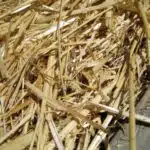
Weeding can be a time-consuming task for anyone who grows potatoes. But mulching is an effective way to protect your plants from weeds and conserve moisture at the same time. By covering the soil around the potatoes with organic material such as straw, wood chips, or hay, you can reduce weeding significantly.
Mulch also helps to regulate soil temperatures so that the plants don’t suffer during extreme heat or cold. It’s important to keep an eye on the temperature of your soil when growing potatoes, as this will affect how quickly they grow and how well they produce. By adding a layer of mulch in the spring and summer months, you’ll keep your potato plants cool and healthy.
On top of all this, mulching has another benefit: it reduces water loss from evaporation by trapping moisture in the soil. This is especially important if you’re growing potatoes in a dry region, as it can help ensure that your plants are getting enough water throughout their growth cycle. With these advantages, it’s easy to see why adding a layer of mulch to your potato garden is so important!
But remember – mulch is only one part of managing soil temperature for successful potato cultivation. The next step is to learn more about what other techniques you can use to regulate soil temperatures for optimal growth!
Managing Soil Temperature
Managing soil temperature is a major milestone in growing potatoes. Alliteration aside, it’s an essential element for ensuring that your potato plants remain healthy and thrive. To do this, you’ll need to consider the temperature of your soil and adjust accordingly.
There are several ways to maintain and adjust the temperature of your soil. Optimally, you should aim for a range between 55 and 75 degrees Fahrenheit for ideal potato growth. If your area is particularly warm or cool, you can use mulch or row covers to regulate the soil temperature. Additionally, if you want to get fancy with it, there are also digital thermometers which can provide an accurate reading of your soil’s temperature.
In addition to these practices, it’s also important to keep an eye out for any extreme temperatures that could cause damage to your plants’ roots. Protecting the roots by adding organic matter or compost to the soil will help keep them safe from extreme weather conditions too! By taking these steps and monitoring the temperature of your soil carefully, you’ll be well on your way towards harvesting a successful crop of potatoes. Next up is protecting against pests and diseases!
Controlling Pests And Diseases
Pests and diseases can be a nightmare for any gardener looking to grow potatoes! But with the right knowledge and control measures, you’ll be able to successfully grow a bumper crop of potatoes. It’s almost like walking on clouds!
The first step to controlling pests and diseases is to understand what kind of pests and diseases are likely in your area. Different areas have different types of pests and diseases, so it’s important to know exactly what kind of infestation you might be dealing with. Once you know what threats you’re up against, you can take steps to prevent them from occurring in the first place. This may include rotating crops, using pest-resistant varieties, or even planting companion plants that naturally repel certain pests.
In addition to prevention, there are also several control methods that can be employed if an infestation does occur. These range from physical barriers such as fencing or netting, to chemical treatments such as insecticides or fungicides. Whatever method you choose, it’s important to keep an eye out for signs of trouble throughout the growing season so that any problems can be addressed quickly before they become too severe.
By following these steps and taking proactive steps towards pest and disease prevention, you’ll be well on your way towards growing a delicious crop of potatoes! Now let’s move on to hilling potatoes – another important step in getting the most out of your potato patch!
Hilling Potatoes
Ultimately, it’s hilling time. For gardeners looking to get the most out of their potato crop, hilling is a critical step in cultivating a bountiful harvest. Hilling is the practice of mounding soil around the base of the plants while they’re growing. It’s important to hill potatoes as soon as they start to emerge from the ground, usually when they reach 4-6 inches in height.
Hilling serves several purposes for potato growers. One of them is to ensure that tubers are kept well-covered in soil. This helps protect them from damage from light and heat, which can cause them to turn green and become toxic if exposed for too long. Additionally, hilling helps potatoes form stronger roots, allowing them to better absorb nutrients and moisture from the soil. And finally, it helps keep weeds away so that potatoes have more room to grow without competition from other plants.
To hill your potatoes correctly, you’ll need some extra soil or compost that doesn’t have any large stones or clumps in it. Carefully mound the soil around each plant until there’s about two inches of extra soil on all sides – this will protect your potatoes as they grow bigger and encourage new ones to form along their stems. Finally, water thoroughly so that all of the dirt is firmly settled around each plant and there are no air pockets or gaps between the plants and their mounds of earth. With these steps taken care of, you’re now ready for harvesting!
Harvesting Time
Harvesting potatoes is the final step in growing your own potatoes, and it can be both thrilling and rewarding. For gardeners who have done their best to ensure that their potatoes are healthy, this is the moment of truth! You can expect to harvest mature potatoes 8–10 weeks after planting, depending on the variety. Here are a few tips to bear in mind when harvesting:
Firstly, wait until the foliage has turned yellow and died back before harvesting your spuds. This indicates that they have reached maturity. Secondly, be gentle when harvesting so as not to damage the tubers. A fork or garden claw works well for this task. Thirdly, if you don’t plan on using your harvested potatoes immediately, make sure you cure them first (more on this later). And finally, pull up any remaining plants and discard them – leaving them in place can lead to disease problems in subsequent years.
All of these steps will help you harvest a bounty of healthy potatoes that will last for months. As with all types of food storage, proper curing and storing is key for ensuring maximum shelf life for your home-grown spuds. This critical step plays an important role in preserving the flavor and texture of your harvest – something that you’ll definitely want to take advantage of!
Curing And Storing Potatoes
According to the National Potato Council, potatoes are the fourth most popular crop in the world. With that in mind, it’s no wonder many of us have an interest in learning how to grow and store potatoes. When it comes time to harvest those delicious tubers, there are a few important steps necessary for proper curing and storage.
The first step is to wait until the tops of the plants turn yellow and die back before harvesting. This usually takes about two weeks after flowering. Once this happens, carefully dig up each potato plant with a spade or trowel while taking care not to damage them. It’s also important to remember that any potatoes left behind in the ground will likely rot over time due to soil moisture.
The next step for successful potato storage is curing them. This process helps heal any cuts or bruises on the potatoes that may have occurred during harvesting or digging up the plants from the ground. Place your freshly dug potatoes in a cool, dark area with 50-60% humidity for two weeks where they can sit undisturbed and develop their skins further. Make sure you check regularly for any signs of rot or decay and remove any affected potatoes immediately as they can contaminate others nearby if left untreated.
After two weeks of curing, your potatoes are ready for long-term storage! Store them in a cool (but not freezing), dark place like a basement or root cellar where temperatures range between 35-45°F and humidity is around 85%. If stored properly your potatoes should last anywhere from 3-6 months depending on variety, temperature, humidity levels and other factors like air circulation.
By following these steps you’ll be able to enjoy your own homegrown crop of potatoes throughout the winter months! Now let’s take a look at how you can use potato plants for ornamental value in your garden as well as other fun ways to get creative with this versatile vegetable!
Using Potato Plants For Ornamental Value
Who would have thought that potato plants would be a great addition to any garden? While they’re known mostly for their edible nature, they can also bring a unique ornamental value. Surprisingly, these plants can be used in more ways than one!
At first glance, it may seem odd to think of using potatoes as an ornamental plant. After all, most people’s minds immediately go to their culinary uses. But the truth is that these plants are actually quite beautiful when given enough space and care. Plus, they provide an interesting texture when planted in a flower bed or along a walkway.
Additionally, you can use the foliage of potato plants as an accent piece in your landscaping design. Their sprawling green leaves make for a gorgeous background for other flowers or shrubs. Plus, the small white flowers that often bloom on potato vines add a lovely splash of color to any garden.
So next time you’re considering adding some beauty to your garden, don’t forget about the humble potato vine! It may just be the perfect touch you need to give your outdoor space that extra bit of charm and personality it’s been missing.
Composting Potato Plants
The potato plant is a symbol of the capacity for growth, resilience, and tenacity. It can serve as a reminder to us all that even in the face of adversity we can persevere and thrive. Composting potato plants is an important step in ensuring that these hardy vegetables are able to continue producing healthy tubers year after year.
Composting helps to create rich, nutrient-dense soil that is ideal for growing potatoes. It also helps to reduce the amount of waste generated when harvesting potatoes, as well as improving soil structure and reducing the need for chemical fertilizers. Composted potato plants should be cut at ground level, and then placed in a compost pile or bin with other organic materials such as kitchen scraps and garden waste. The mixture should be turned regularly over time in order to allow air circulation and promote decomposition.
Once the compost has broken down fully it can then be used as a mulch or topsoil around existing potato plants or added directly into new planting beds for a boost of nutrients. Composting helps to improve soil health by retaining moisture, providing nutrients and beneficial microorganisms, and helping to suppress weeds. With regular composting practices, this essential gardening activity will help ensure healthy harvests of potatoes year after year!
Troubleshooting Potato Growing Problems
What a coincidence! Just when you were about to start replanting leftover potatoes, you come across this section about troubleshooting potato growing problems. In this section, we’ll take a look at what can go wrong when growing potatoes and how to address them.
So, what might go wrong? Common issues include pest infestation, disease, and inadequate harvest. Pests such as wireworms or cutworms can cause damage to the potato plants. Diseases like blight or scab can affect both the leaves and the tubers of the potato plants. Lastly, insufficient yields are often due to a lack of fertilization or poor soil quality.
Fortunately, there are several steps you can take to address these issues. For pests and diseases, it’s important to keep an eye on your potato plants and act quickly if any signs of an infestation or disease appear. You should also rotate your crops annually and practice crop rotation with other vegetables in order to reduce the risk of pests and diseases. Additionally, ensure that any fertilizer you use is suitable for potatoes specifically. Finally, make sure your soil is rich in organic matter before planting potatoes by tilling compost into it ahead of time.
By taking these steps regularly while growing potatoes, you can avoid common problems and ensure that your crop yields are healthy each season!
Replanting Leftover Potatoes
Sometimes, we don’t use all of our potatoes from the garden. But don’t throw them out! You can replant leftover potatoes for a second harvest. It’s surprisingly easy to do and could save you money on buying new potatoes for the next season.
To replant your leftover potatoes, make sure that each potato has at least two ‘eyes’ or growth points. Cut the potatoes into 2-3 inch chunks and make sure each chunk has one eye. We suggest saving some of the smaller eyes to plant if needed as well. Place them in a sunny spot with plenty of water and wait for the shoots to appear.
Once you’ve planted your leftover potatoes, it’s important to monitor soil moisture levels carefully and keep weeds under control. Too much water can cause rotting, while too little will stunt growth. When the plants reach 6 inches tall, add an additional layer of soil around the base of each plant to encourage further growth. With just a little care, you’ll be able to enjoy another harvest in no time!
Replanting leftover potatoes is a great way to get more value out of your garden without having to invest in more seeds or start plants from scratch. With this simple technique, you can easily double your harvest and maximize your yield!
Potato Varieties For Containers
Tempting tastes and tantalizing textures – that’s what potato varieties for containers offer! From creamy Yukon Golds to crispy Reds, these potatoes can be planted in containers for a delicious harvest. Let’s take a look at how to grow them in your own backyard.
As with any garden project, the key is preparation. Before planting, make sure you select a container that will provide adequate drainage and allow plenty of room for root growth. Consider using a half wine barrel or raised bed. For soil, use a mixture of organic material such as compost and peat moss; this will give the potatoes the nutrients they need to thrive. Now it’s time to get planting!
Choose your variety: there are several types of potatoes that do well in containers, including fingerlings and French fingerlings. For best results, choose an heirloom variety like Purple Viking or Kennebec; these will have excellent flavor and texture when harvested. After selecting your favorite potatoes, cut them into small pieces with two or three eyes each before planting; the pieces should be approximately 1-2 inches in size. Plant them 1-2 inches deep into the soil mix and then cover lightly with soil; water them thoroughly afterwards. With regular watering and fertilizer applications throughout the season, you’ll soon have an abundant crop of potatoes!
With some simple preparation, you can enjoy tasty varieties of potatoes right from your own backyard – no matter how much space you have available! Start planning now for a harvest full of flavor that will tantalize your taste buds all season long.
Frequently Asked Questions
How Many Potatoes Can I Expect To Harvest From One Plant?
It seems like the age-old question that plagues every potato grower: How many potatoes can I expect to harvest from one plant? Well, if you’re anything like me, you’ve spent countless hours trying to figure out the answer. But after much trial and error, I’ve come up with a solution that’s sure to make any aspiring potato farmer proud.
Satirically speaking, the number of potatoes you can harvest from one plant is infinite! However impractical this may be, it serves as a reminder for all of us to not give up on our dreams of plentiful potato harvests. We should never cease striving for more than what we currently have, because there’s always more potential awaiting us.
On a deeper level, this idea speaks volumes about the power of resilience when faced with difficult tasks. Harvesting an abundance of potatoes requires patience and hard work; it’s something that cannot be accomplished overnight – but with dedication and the right resources, anything is possible. So let this serve as an invitation to set your sights higher than before and push yourself towards achieving your goals.
When Is The Best Time To Plant Potatoes?
Have you ever wondered when is the best time to plant potatoes? It’s a common question among gardeners, especially those who are just starting out. Of course, timing can make a huge difference in the success of your potato crop – and it all comes down to when you choose to start.
But before we dive into the best time to plant potatoes, let’s take a look at what makes them so popular among gardeners. Potatoes are easy to grow and require minimal maintenance, making them an attractive option for beginner gardeners and experienced green thumbs alike. Plus, they’re incredibly versatile – you can use them in soups, stews, salads, or simply boiled or roasted as a side dish.
So when should you start planting? In most climates, late winter or early spring is the ideal time to begin planting potatoes. This gives the plants enough time to mature before the summer heat sets in and also ensures that they have ample access to sunlight. Additionally, make sure that your soil is loose and well-drained so that your potatoes will be able to grow without becoming waterlogged. With careful planning and patience, you’ll be rewarded with an abundant yield of delicious potatoes!
How Often Should I Water And Fertilize Potatoes?
Satire: A potato farmer stands in a field, watering and fertilizing his potatoes with a big grin on his face.
Watering and fertilizing potatoes may seem like an arduous task, but it doesn’t have to be! Knowing how often to water and fertilize will ensure your potatoes are healthy and abundant when harvest time arrives.
When it comes to watering potatoes, consistency is key. Water your potatoes once or twice a week during the growing season, making sure the soil is moist but not soggy. As for fertilizer, use a balanced 10-10-10 fertilizer every four weeks throughout the growing season. If you’re looking for additional nutrients, apply a side dressing of compost around the plant’s base every six weeks or so.
Taking care of your potato crop doesn’t have to be difficult or time consuming – just make sure to give them enough water and fertilizer for maximum yield come harvest time! With these few simple steps, you’ll be enjoying delicious homegrown potatoes in no time.
How Do I Know When Potatoes Are Ready To Harvest?
Harvesting potatoes is an art, requiring a combination of knowledge and intuition. Knowing when the potatoes are ready to be gathered can be a tricky business, as the timing will vary depending on the variety you are growing and local climate. Fortunately, there are a few ways to determine when it’s time to gather your crop.
Firstly, take a look at the plants themselves: do they look healthy? Are they starting to yellow or wilt? It’s generally recommended that you wait until the majority of foliage has died back before harvesting potatoes, as this indicates that most of the nutrients have been transferred from the leaves into the potato tubers. Additionally, if you lightly dig around in the soil with your fingers or a trowel, you should be able to feel some larger tubers beneath the surface.
Finally, another way to test for readiness is to try gently tugging on one of the leaves near where you think a tuber might be located. If it comes away easily and cleanly from its stem, then you know that it’s time to start harvesting. With these tips in mind, gathering potatoes can become an enjoyable process rather than an intimidating one!
Are There Any Special Considerations For Growing Potatoes In Containers?
Are you looking for a way to grow delicious potatoes in your garden, even if you don’t have much space? Growing potatoes in containers can make it possible to enjoy this tasty treat at home. But before you get started, there are some special considerations that you should be aware of.
When it comes to growing potatoes in containers, the key is finding the right size and type of pot. For example, a five-gallon bucket is ideal for one or two plants. You’ll also want to use soil specifically designed for container gardening and add organic fertilizer before planting your potatoes.
But don’t worry if you’re not an experienced gardener—growing potatoes in containers is actually quite simple! All you need to do is fill your container with soil, plant your potato seeds about four inches deep, and water regularly. With just a little bit of effort, you’ll soon be able to enjoy fresh potatoes from the comfort of your own backyard!
So if you’re looking for a fun and creative way to get more out of your garden space, why not try growing potatoes in containers? It’s an easy way to turn your small garden into a bountiful feast! Plus, you can rest assured knowing that all of the produce will be completely free from any harmful chemicals or fertilizers.
Conclusion
The conclusion to growing potatoes is that with a few simple steps, anyone can achieve success in the garden. Potatoes are an easy crop to grow and can provide an abundance of delicious harvests. Knowing when to plant, how often to water and fertilize, and when to harvest are key factors in successful potato production. Growing potatoes in containers also has its own unique considerations.
Potato production doesn’t have to be complicated or intimidating. With some patience and perseverance, you can create a thriving crop of potatoes year after year. By following the tips outlined above, you’ll soon have your very own potato patch – overflowing with nutritious vegetables for your enjoyment!
Gardening is a time-honored activity that promotes both physical and mental health benefits. From sowing the seeds in the springtime to harvesting the fruits of your labor come fall, there’s nothing quite like watching potatoes develop from small plants into robust ready-to-eat snacks! So why not give it a shot? With a little practice, you too can become a master potato grower!

