Black-eyed peas, also known as cowpeas, are a staple crop in many parts of the world. These legumes are not only delicious but also packed with nutrients that promote good health. Growing black-eyed peas is an easy task, and they can be grown in a variety of climates.
Before you begin planting your black-eyed peas, it’s important to understand the ideal growing conditions for this crop. Black-eyed peas thrive in warm temperatures and require plenty of sunlight to grow. They prefer well-drained soil with a pH range of 5.5 to 7.0 and can tolerate drought conditions once established. In this article, we will explore the steps involved in growing black-eyed peas successfully. Whether you’re a seasoned gardener or a novice, these tips will help you produce healthy plants that yield bountiful harvests.
Understanding The Benefits Of Growing Black-Eyed Peas
Imagine a garden filled with lush green leaves, vibrant flowers, and an array of vegetables that could satisfy your hunger for weeks. Now, imagine this garden being able to provide not just nourishment but also enhance the soil it grows in. This is where black-eyed peas come in. These legumes are not only rich in nutritional value but also play a significant role in soil improvement.
Black-eyed peas are packed with essential nutrients such as protein, fiber, and iron. These legumes are a great source of plant-based protein that can substitute meat in any meal. In addition to that, they contain soluble and insoluble fiber, which is good for digestion and helps maintain healthy cholesterol levels. Furthermore, black-eyed peas are abundant in iron that can help prevent anemia and provide energy to the body.
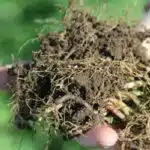
Aside from its nutritional benefits, planting black-eyed peas can improve soil quality. Legumes have the ability to fix nitrogen into the soil through nodules on their roots. This process allows other plants to use nitrogen as a nutrient without fertilizing the soil artificially. Moreover, planting black-eyed peas as a cover crop can help control weeds by shading them out and preventing them from growing.
With these benefits in mind, it’s easy to see why black-eyed peas are an excellent addition to any garden. But before you start planting them, it’s crucial to select the right varieties suitable for your region.
Selecting The Right Varieties For Your Region
When it comes to growing black-eyed peas, selecting the right varieties for your region is crucial. Not all varieties are created equal, and some may perform better than others depending on where you live. The best varieties will be those that are well-suited to your local climate and growing conditions.
When choosing which black-eyed pea variety to grow, it’s important to consider the climate in your region. Some varieties thrive in hot, dry climates while others do better in cooler, wetter regions. For example, if you live in a hot and humid area, you might want to consider planting a heat-tolerant variety such as the California Blackeye #5 or the Queen Anne. On the other hand, if you live in a cooler region with shorter summers, you might have more success with a faster-maturing variety like Early Moonbeam or Top Pick.
Below is a table outlining some of the best black-eyed pea varieties for different climate considerations:
| Climate Consideration | Best Varieties |
|---|---|
| Hot and Humid | California Blackeye #5, Queen Anne |
| Cool and Short Summer | Early Moonbeam, Top Pick |
| Dry Conditions | Coronet |
| Wet Conditions | Mississippi Silver |
Selecting the right variety of black-eyed peas for your region can make all the difference when it comes to having a successful harvest. By taking into account your local climate considerations and choosing a suitable variety from our table above, you’ll be well on your way to growing healthy and hearty plants that produce an abundance of delicious peas. In order to ensure optimal growth and yield potential for any selected variety, let us now move on to preparing the soil for planting.
Preparing The Soil For Planting
Selecting the right varieties for your region is a crucial step in growing black-eyed peas. Once you have chosen the appropriate variety, it is time to prepare the soil for planting. Soil preparation is an essential aspect of gardening and should not be overlooked.
Before planting, it is important to test the pH level of your soil. Black-eyed peas grow best in soil with a pH range of 5.5 to 6.0. If the pH level is too high or too low, it can affect nutrient availability and plant growth. You can purchase a soil testing kit at your local garden center or send a sample to a lab for analysis.
Once you have determined the pH level of your soil, it’s time to prepare it for planting. Start by removing any weeds or debris from the area where you plan to plant your black-eyed peas. Then, loosen the soil with a garden fork or tiller to a depth of at least 6 inches. Incorporate compost or well-rotted manure into the soil to improve its texture and fertility. By doing so, you’ll create an ideal environment for your black-eyed pea plants to thrive.
To start seeds indoors or directly sow in the garden, there are several steps that need to be taken before planting can begin.
Starting Seeds Indoors Or Directly Sowing In The Garden
- Starting seeds indoors requires preparing a potting mix and using a seed starting tray or container.
- Sowing seeds directly into the garden requires preparing the soil by loosening, removing weeds and amending with fertilizer or compost.
- When starting black-eyed peas indoors, it is important to use a potting soil mix that is well-draining, and place the seedling tray in a warm, sunny location.
- When sowing black-eyed peas directly in the garden, it is important to choose a sunny location with well-draining soil, and to work the soil to a depth of 8-12 inches.
- To ensure adequate moisture for the growing black-eyed peas, it is important to water the soil thoroughly before and after planting the seeds.
- Once the black-eyed peas have germinated, it is important to maintain consistent moisture levels in the soil and to provide additional nutrients for optimal growth.
Seed Starting Indoors
Starting black-eyed peas indoors can be a great way to ensure that your plants have a head start before transplanting them outdoors. To begin the indoor setup, you will need high-quality soil, seedling trays, and grow lights. Black-eyed pea seeds should be planted about an inch deep in the soil and watered gently. It is important to keep the soil moist throughout the germination process, which usually takes about 7-10 days.
When starting black-eyed peas indoors, it is essential to create an ideal environment for their growth. The ideal temperature for germinating black-eyed peas is between 75-85 degrees Fahrenheit. Place the seedling trays in a warm environment with good air circulation and plenty of light. If using grow lights, position them no more than 2 inches above the seedlings to ensure they receive enough light.
Starting black-eyed peas indoors can give you more control over their growth and increase your chances of success when transplanting them into your garden. As they mature, make sure to gradually acclimate them to outdoor conditions by exposing them to brief periods of sunlight and wind each day. With proper care and attention during the indoor setup and germination process, your black-eyed pea plants are sure to thrive once transplanted into your garden!
Sowing Seeds Directly
Another way to start black-eyed peas is by sowing seeds directly into the garden. This method offers several benefits, including saving time and resources as well as creating a more natural environment for the plants to grow. There are many varieties of black-eyed peas to choose from, each with unique characteristics such as size, color, and flavor.
To sow black-eyed pea seeds directly in the garden, it is important to follow certain techniques and tips for optimal success. First, select a location that receives plenty of sunlight and has well-draining soil. The soil should be prepared by removing any weeds or debris and loosening it with a garden fork or tiller. Next, create furrows about an inch deep and space them about 2-3 feet apart. Place the seeds in the furrows about 4 inches apart and cover them with soil.
To ensure proper germination, keep the soil moist but not waterlogged throughout the growing season. Black-eyed peas tend to thrive in warm weather conditions between 70-85 degrees Fahrenheit. Once they have sprouted, thin out any weak or overcrowded seedlings to encourage healthy growth. With these techniques and tips in mind, sowing black-eyed pea seeds directly into your garden can be a rewarding experience that yields delicious results.
Preparing Soil For Planting
One of the primary considerations when starting seeds indoors or directly sowing in the garden is soil preparation. Soil is a crucial factor that can affect the growth and overall health of your plants. Proper soil preparation ensures that your plants receive the necessary nutrients, water, and support to thrive. Before planting, it is important to assess your soil’s composition and pH level.
To prepare your soil for planting, first remove any weeds or debris that may impede seedling growth. Next, loosen the soil using a garden fork or tiller to create a loose and aerated texture. Incorporate organic matter such as compost or aged manure into the soil to improve its quality and provide additional nutrients for your plants. Additionally, consider applying fertilizers to supplement any nutrient deficiencies in your soil.
When selecting fertilizers, be sure to choose those that are appropriate for the type of plant you are growing and follow instructions carefully. Over-fertilization can cause damage to your plants rather than enhance their growth. By preparing your soil properly before planting, you can ensure optimal conditions for germination and healthy growth throughout the growing season.
Providing Adequate Water And Nutrients
Black-eyed peas require adequate water and nutrients to grow properly. To ensure that the plants receive enough water, it is important to irrigate them regularly. The best time to water black-eyed peas is in the morning or evening when the temperatures are cooler. This will help prevent the water from evaporating too quickly and reduce stress on the plants. It is also important to monitor soil moisture levels to avoid overwatering, which can lead to root rot.
In addition to water, black-eyed peas require essential nutrients such as nitrogen, phosphorus, and potassium for optimal growth. The importance of soil pH cannot be overstated when it comes to nutrient uptake by plants. Black-eyed peas prefer a slightly acidic soil pH range of 5.5-6.5. If the soil pH is too high or too low, the plants may have difficulty absorbing certain nutrients, leading to stunted growth and poor yields.
Fertilizer application techniques should be tailored according to soil test results and plant requirements. Excessive fertilization can result in nutrient imbalances and cause environmental problems such as leaching into groundwater sources. Organic fertilizers such as compost or manure can improve soil texture, increase organic matter content, and provide slow-release nutrients over time. Inorganic fertilizers can offer a quick supply of essential elements but should be applied judiciously according to manufacturer recommendations or professional advice from a horticulturist or agricultural extension agent.
To manage pests and diseases effectively, it is crucial to recognize symptoms early on before they become severe issues that could destroy your entire crop yield.
Managing Pests And Diseases
Preventing infestations and diseases is crucial to the success of growing black-eyed peas. There are a few techniques you can use to prevent pests from taking over your crop. The first method is to practice crop rotation, which involves planting different crops in the same area each year. This technique helps to disrupt the life cycle of pests that may have taken up residence in the soil.
Another technique is to use disease-resistant varieties of black-eyed peas. These types of seeds are bred specifically to withstand common diseases that affect this type of plant. Disease-resistant varieties can be found at most garden centers or through online seed catalogs.
Lastly, it is important to keep your garden clean and tidy. Remove any weeds and debris from your garden bed, as these can attract pests and harbor diseases. Be sure to properly dispose of any diseased plants or plant parts, as they can spread disease if left in the garden.
| Pest | Prevention Technique |
|---|---|
| Aphids | Introduce ladybugs or lacewings into your garden |
| Cutworms | Place collars around plants made from cardboard or toilet paper rolls |
| Spider Mites | Spray plants with a mixture of water and dish soap |
By following these pest prevention techniques, you can increase your chances of having a successful harvest. However, it is important to note that even with preventative measures in place, some pests and diseases may still find their way into your garden. In such cases, it is best to consult with a gardening expert or horticulturist for advice on how best to manage the issue.
Next, we will discuss staking or trellising plants for support. By providing proper support for your black-eyed pea plants, you can help them grow taller and stronger while also making harvesting easier.
Staking Or Trellising Plants For Support
Staking or trellising black-eyed peas is an essential task for any gardener looking to increase their yield and improve the overall health of their plants. Vertical gardening techniques can help to maximize space in small gardens and provide a stable structure for the vines to grow upward. Staking ensures that the plant receives adequate support and prevents it from sprawling on the ground, which can lead to disease and pest problems.
There are many alternative supports that gardeners can use when staking or trellising black-eyed peas. Bamboo poles, wooden stakes, tomato cages, and wire mesh are all effective options. It is important to choose a support system that matches the size of your plant and allows for easy access when pruning or harvesting. Additionally, many gardeners prefer using natural materials like bamboo because they are environmentally friendly.
Overall, staking or trellising black-eyed peas improves their growth rate, encourages more productive blooms and pods, and reduces the risk of disease. By following these simple steps, you will be able to grow healthy plants that produce abundant yields throughout the growing season. In the next section, we will discuss how pruning and pinching can further enhance your crop’s output by removing dead leaves and encouraging new growth.
Pruning And Pinching For Better Yield
Pruning involves removing unwanted stems, branches, and other parts of the plant to encourage healthy, new growth. Pinching involves pinching off terminal buds on plants to encourage bushier, more compact growth. Plant growth is dependent on many factors, including soil preparation, fertilization, adequate light, pest and disease control, and watering. Pollination is necessary for successful yields, and can be achieved through natural pollinators or manual pollination techniques.
Pruning
Pruning black-eyed peas is an essential task for any gardener who wants to ensure a healthy and bountiful harvest. Not only does pruning help to control the plant’s growth and shape, but it also encourages stronger stems and larger pods. Additionally, pruning can prevent disease and pest infestations, making it a crucial step in maintaining the overall health of your plants.
The best time to prune black-eyed peas is after the first set of flowers bloom. At this point, you should remove any dead or damaged leaves, as well as any lateral shoots that are growing off the main stem. This will allow more nutrients to be directed towards the developing pods, resulting in larger yields. It’s also important to thin out any overcrowded areas of the plant by removing some of the smaller stems and leaves.
When pruning black-eyed peas, be sure to use clean, sharp tools to prevent damaging the plant. Cut at a 45-degree angle just above a leaf node or bud to encourage new growth. It’s also important not to remove too much foliage at once, as this can shock the plant and stunt its growth. Instead, aim for gradual pruning over several weeks to achieve optimal results.
In conclusion, pruning is an essential part of growing healthy and productive black-eyed pea plants. By following these best practices for pruning techniques, you can ensure that your plants stay strong and disease-free while producing a bountiful harvest for you and your loved ones to enjoy. So get out there with your gardening shears and start shaping those black-eyed peas!
Pinching
Pruning is not the only technique that can help improve the yield of black-eyed peas. Pinching techniques can also be used as an alternative method for pruning. Pinching involves removing the tips of the plant’s stems, which encourages branching and results in more pods and a bushier plant. It’s best to start pinching when the plant has 4-6 leaves, and it should be done every 2-3 weeks until about a month before harvest.
Pinching is easy to do with your fingers or gardening shears, but it’s important to be gentle and not damage the plant. You should also make sure to sterilize your tools between plants to prevent the spread of disease. While pinching is effective in increasing yields, it may result in smaller pods than those produced by pruned plants. Therefore, it’s important to weigh the benefits and drawbacks of each technique before deciding which one to use.
In conclusion, while pruning remains an essential task for growing healthy black-eyed pea plants, pinching can also be a useful alternative method for improving yields. By incorporating these techniques into your gardening routine, you can ensure that your plants produce a bountiful harvest while maintaining their overall health and vitality. So whether you choose to prune or pinch, remember to be gentle with your plants and enjoy the fruits of your labor!
Harvesting At The Right Time
Black-eyed peas are usually ready for harvesting 70-90 days after planting. The most commonly used method to determine the optimal harvest time is by observing the plant’s physical characteristics, such as the color of its foliage and pods. When the leaves start to turn yellow or brown, and the pods become dry and brittle, it is an indication that they are ready for harvest.
Harvesting at the right time is crucial to ensure that black-eyed peas are of high quality. It is best to collect them early in the morning when the dew has dried up, as this helps prevent damage during handling. Gently pull each pod off its stem while wearing gloves, as some varieties have spines that can prick your skin. Make sure to discard any discolored or damaged pods before storing.
To achieve optimal yield, it is recommended to harvest black-eyed peas intermittently instead of all at once. This practice allows you to pick only those that are mature enough, leaving the rest on the plant to fully develop. It also prolongs their shelf life and ensures a steady supply throughout their growing season. By following these best harvesting practices, you can enjoy fresh and delicious black-eyed peas throughout summer and into fall.
Moving forward, drying and storing black-eyed peas properly will help preserve their flavor and texture for future use.
Drying And Storing Black-Eyed Peas
Once you’ve harvested your black-eyed peas, it’s important to properly dry and store them to ensure maximum freshness and longevity. Preservation techniques will vary depending on whether you’re dealing with fresh or dried beans. If you’re working with fresh black-eyed peas, they should be shelled from their pods and then spread out in a single layer to dry in a warm, well-ventilated area for several days. Stir the peas occasionally to ensure even drying. Once they are fully dried, they can be stored in an airtight container for up to one week.
If you have already purchased dried black-eyed peas, then your main focus should be on storing them properly so that they don’t spoil or lose their nutritional value over time. It’s best to keep dried beans in an airtight container in a cool, dark place such as a pantry or cupboard. Avoid storing them near sources of light or heat as this can cause the beans to spoil more quickly.
When it comes to nutritional value, black-eyed peas are packed with fiber, protein, and essential vitamins and minerals. They are also low in fat and calories, making them an excellent addition to any diet. By properly drying and storing your black-eyed peas, you can ensure that they retain their nutritional value for months at a time. In the next section, we’ll explore some delicious ways that you can use black-eyed peas in recipes that are sure to please even the pickiest of eaters.
Using Black-Eyed Peas In Recipes
After properly drying and storing black-eyed peas, it’s time to explore the different recipes in which this versatile legume can be used. As the saying goes, “variety is the spice of life,” and this holds true when it comes to incorporating black-eyed peas into your diet. From salads to soups, stews to casseroles, black-eyed peas can add a nutritious boost to any meal.
One of the primary benefits of consuming black-eyed peas is their high nutritional value. These legumes are an excellent source of protein, fiber, iron, and folate. They also contain vitamins and minerals that promote heart health and reduce inflammation. Incorporating black-eyed peas into your meals not only adds flavor but also provides numerous health benefits.
To make the most out of these benefits, here’s a table showcasing some delicious black eyed pea recipes:
| Recipe Name | Ingredients | Directions |
|---|---|---|
| Black-Eyed Pea Salad | cooked black-eyed peas, diced bell peppers, chopped onion, olive oil, red wine vinegar | Mix all ingredients together in a large bowl and refrigerate for at least 30 minutes before serving |
| Black-Eyed Pea Soup | cooked black-eyed peas, diced tomatoes, chicken broth or vegetable broth, diced celery stalks and carrots | In a large pot on medium heat add all ingredients and stir occasionally until heated through |
| Black-Eyed Pea Casserole | cooked black-eyed peas mixed with sautéed garlic and onions then topped with breadcrumbs | Preheat oven to 375°F. In a baking dish combine ingredients then top with breadcrumbs. Bake for 15-20 minutes |
Incorporating these recipes into your weekly meal plan will not only add variety but also provide you with essential nutrients that are beneficial for your overall health. For improved growth when planting black-eyed peas consider companion planting techniques such as planting with corn or okra. These companion plants provide shade and support for the black-eyed peas while also deterring pests and other plant diseases.
Companion Planting For Improved Growth
- Carrots and black-eyed peas can be planted together to create a beneficial companion planting.
- The roots of the carrots and the roots of the black-eyed peas will help aerate and loosen the soil, leading to improved nutrient uptake for both plants.
- Beans can also be grown alongside black-eyed peas to provide a greater yield and improved soil fertility.
- Radishes can be planted in between the rows of black-eyed peas to deter pests and add beneficial nitrogen to the soil.
- Allowing the black-eyed peas to climb up the bean poles will also help to conserve space and provide better air circulation.
- Furthermore, companion planting with carrots, beans, and radishes can help to improve the growth and yield of black-eyed peas.
Carrots
Growing carrots in containers is an excellent way to maximize space in your garden. Carrots prefer well-draining soil that is loose and free of rocks, so it’s important to choose the right container and soil. The best soil for carrots is sandy loam that is rich in organic matter.
When choosing a container for growing carrots, opt for one that is at least 12 inches deep to allow for proper root development. A wider container will also allow you to plant more carrot seeds, but be sure to space them out according to the package instructions. Fill the container with a mix of potting soil and compost or well-rotted manure to create a loose, fertile mix.
To ensure optimal growth and development, it’s important to keep the soil consistently moist but not waterlogged. Carrots need about an inch of water per week, so be sure to check the soil regularly and water as needed. With proper care and attention, you can enjoy fresh, homegrown carrots all season long.
Beans
Companion planting is an effective way to improve the growth and health of your garden plants. By pairing certain plants together, you can create a mutually beneficial relationship that helps to deter pests, boost nutrient uptake, and promote overall plant health. One popular combination is beans and carrots.
Beans are excellent companion plants for carrots as they help to fix nitrogen in the soil. Nitrogen is a vital nutrient for plant growth, but it can be depleted over time. By growing beans alongside your carrots, you can replenish the nitrogen levels in the soil naturally. Additionally, beans also provide some shade for the carrot roots, which helps to keep them cool during hot summer days.
When it comes to growing techniques for both beans and carrots, there are a few things to keep in mind. Both plants prefer well-draining soil that is rich in organic matter. When planting them together in containers or beds, make sure they have enough space to grow without overcrowding each other. It’s also important to water them regularly but avoid getting water on their leaves as this can lead to disease issues. Taking these measures not only ensures optimal growth but also aids in disease control by maintaining healthy plant roots and foliage.
Companion Planting For Improved Growth
Companion plant combinations are an effective way to enhance the growth and yield of your black-eyed peas. Certain plants, when grown next to each other, have a symbiotic relationship that benefits both plants. For instance, planting beans with black-eyed peas is a popular combination because beans release nitrogen into the soil, which is crucial for the growth of black-eyed peas. Additionally, planting herbs such as basil or rosemary near your black-eyed peas can help repel pests and improve their overall health.
Benefits of intercropping go beyond enhancing the growth of plants. It also helps in reducing pest problems through natural pest control measures. When you plant different crops together, they attract different insects that feed on pests that are harmful to one crop while ignoring others. This helps in reducing pest damage without having to use chemical pesticides. Intercropping also reduces soil erosion and nutrient depletion as it ensures that every inch of soil is used efficiently.
Incorporating companion planting into your garden can be an exciting way to experiment with new plant combinations and maximize your harvest. Next up, we will discuss the importance of crop rotation for soil health to further optimize your garden’s productivity and ensure long-term sustainability.
Crop Rotation For Soil Health
How can we ensure soil health and fertility in the long term? One simple, yet effective way to maintain soil health is through crop rotation. Crop rotation involves changing the type of crops planted in a particular area over time. This technique helps to prevent pests and diseases from getting established in the soil, while also improving soil fertility.
Crop rotation can be done in various ways, depending on the crops being grown and their nutrient requirements. A common practice is to alternate between plants that have different nutrient needs. For example, legumes like black-eyed peas are known to fix nitrogen in the soil, which makes them ideal for planting after heavy feeders like corn or tomatoes. This way, the black-eyed peas can help replenish nitrogen levels naturally.
Overall, implementing crop rotation practices is an essential step towards maintaining healthy soils for future generations. By rotating crops and avoiding monoculture farming practices, we can reduce pest pressure and build up organic matter in our soils. This will ultimately lead to more productive and sustainable agriculture systems that benefit both farmers and consumers alike.
With a solid understanding of the benefits of crop rotation for soil health, it’s time to shift our focus back to growing black-eyed peas. In the next section, we’ll provide tips on how to grow these delicious legumes in containers effectively.
Tips For Growing Black-Eyed Peas In Containers
Crop rotation is an essential practice for maintaining soil health and maximizing crop yields. It involves growing different types of crops in a specific area each year to avoid depleting the soil of nutrients. By rotating crops, you can break disease cycles and reduce weed pressure. To get the most out of your soil, it’s essential to plan ahead and choose crops that complement one another.
If you’re interested in growing black-eyed peas, container gardening may be a good option for you. You’ll need to select the right container size based on the number of plants you want to grow. A pot that’s at least 12 inches wide and 12 inches deep can accommodate up to two black-eyed pea plants. Choose a well-draining soil mixture with plenty of organic matter like compost or peat moss. Be sure not to overwater your plants as they prefer slightly dry conditions.
Black-eyed peas are a warm-weather crop that requires plenty of sunlight and heat. They thrive in temperatures between 70-80 degrees Fahrenheit but can tolerate temperatures up to 90 degrees Fahrenheit if adequately watered. If you live in an area with hot summers, consider using shade cloth or planting them in a spot with partial shade during the hottest part of the day. Keeping your plants healthy means staying vigilant against common pests like aphids, spider mites, and caterpillars, which can cause damage to your crop if left unchecked.
As mentioned earlier, pests can be a significant problem when growing black-eyed peas. Another issue is fungal diseases caused by excess moisture or poor air circulation around the plant’s base. If you notice any signs of leaf yellowing or wilting, it could be an indication of root rot caused by overwatering or poorly draining soil. Consider using an organic fungicide or removing infected plants altogether if necessary. Proper care and attention will ensure that your black-eyed pea plants thrive throughout the growing season!
Common Problems And Solutions For Growing Black-Eyed Peas
Black-eyed peas are a popular crop to grow because of their nutritional value and delicious taste. However, they can be challenging to cultivate due to common pests and diseases that can harm the plants. According to recent statistics, black-eyed peas have been grown in over 100 countries worldwide, making them a vital source of protein for many people.
One of the most common pests that affect black-eyed peas is the aphid. These tiny insects suck the sap from the plant’s leaves, causing yellowing and curling. To prevent aphids from damaging your crops, use insecticidal soap or neem oil regularly. Another pest to watch out for is the bean beetle, which feeds on young leaves and seedlings. Handpicking these beetles is an effective way to control their population.
When it comes to fertilizing black-eyed peas, there are several options available. One method is using organic fertilizers such as compost or well-rotted manure. These provide slow-release nutrients that help promote healthy growth without burning the plants’ roots. Another option is using synthetic fertilizers with high levels of nitrogen, phosphorus, and potassium (NPK). However, it’s essential not to over-fertilize as this can lead to excessive vegetative growth at the expense of fruit production.
In conclusion, growing black-eyed peas requires careful attention to common problems such as pests and fertilizer options. By being proactive in managing these issues, you can ensure a healthy and bountiful harvest. Remember to choose appropriate fertilizers for your soil type and use natural pest control methods whenever possible. With patience and perseverance, you can enjoy a successful crop of nutritious black-eyed peas!
Frequently Asked Questions
Can Black-Eyed Peas Be Grown In A Hydroponic System?
Black-eyed peas are a nutritious and protein-rich crop that can thrive in various growing environments. One of the methods that gardeners and horticulturists have been exploring is hydroponic farming, which offers numerous benefits such as efficient use of space, water, and nutrient solutions. In a hydroponic system, black-eyed peas can grow faster and yield more substantial crops than traditional soil-based cultivation methods. However, it requires careful monitoring of nutrient solutions, pH levels, and environmental factors to ensure optimal plant growth. With the right knowledge and resources, hydroponic farming can be an excellent option for growing black-eyed peas with minimal resource usage while maximizing yields.
How Long Do Black-Eyed Peas Take To Mature?
Imagine a race where all the participants start at the same time, but only a few are able to reach the finish line. This is similar to black-eyed pea germination, where all seeds have the potential to grow, but only a handful actually reach maturity. The optimal growing conditions for black-eyed peas include warm soil temperatures of at least 60°F and well-drained soil with a pH between 6.0 and 6.5. Once planted, black-eyed peas take approximately 70 to 90 days to mature, depending on the variety and growing conditions. Regular watering and fertilization can aid in their growth and development, ultimately resulting in a bountiful harvest for those who successfully cross the finish line of this race towards maturity. As a gardening or horticulture expert, it is important to provide guidance for those seeking to serve others through cultivating these nutritious legumes.
Can Black-Eyed Peas Be Grown In A Cold Climate?
Black-eyed peas, also known as cowpeas, are a warm-season crop that thrives in temperatures between 75 and 85 degrees Fahrenheit. While they can be grown in cooler climates, black-eyed peas require specific growing techniques and ideal temperatures for optimal growth. In colder regions, it is best to start the seeds indoors before transplanting them outside after the last frost date. To promote healthy growth, it is essential to provide ample sunlight, well-draining soil, and regular watering. Additionally, using mulch can help retain moisture and regulate soil temperature. With proper care and attention to growing conditions, black-eyed peas can thrive in colder climates, providing a delicious and nutritious addition to any garden or farm.
How Often Should Black-Eyed Peas Be Fertilized?
Black-eyed peas are a popular crop that can be grown in a variety of climates, with proper care and attention to soil health. In order to ensure optimal yields, it is important to fertilize black-eyed peas regularly using high-quality fertilizer types that are appropriate for the specific needs of the plant. Soil pH is also an important consideration when fertilizing black-eyed peas, as this can impact the availability of key nutrients like nitrogen and phosphorus. Experts recommend fertilizing black-eyed peas every 4-6 weeks during the growing season, using a balanced fertilizer that contains equal parts of nitrogen, phosphorus, and potassium. With proper fertilization techniques and careful attention to soil health, gardeners can enjoy bountiful harvests of delicious and nutritious black-eyed peas year after year.
Can Black-Eyed Peas Be Grown In A Raised Bed Garden?
When considering the best way to grow black-eyed peas, there are a few factors to consider. One of these is whether to plant in a raised bed or traditional garden. Both methods have their advantages, but raised beds are often preferred due to their ability to offer better drainage, aeration, and soil control. Optimal soil conditions for black-eyed pea growth require well-draining soil with a pH range between 6.0 and 7.5. Additionally, it is recommended to add organic matter such as compost or aged manure before planting. By adhering to these guidelines and selecting the appropriate growing method, growers can successfully cultivate healthy and productive black-eyed pea plants.
Conclusion
Black-eyed peas can indeed be grown in a hydroponic system, but it is important to note that they require a lot of space and sufficient nutrients. The average time for black-eyed peas to mature is about 70-90 days, but this can vary depending on the climate and growing conditions. While they are typically grown in warmer climates, they can also thrive in cooler temperatures as long as they receive enough sunlight.
Fertilizing black-eyed peas regularly is crucial for their growth and health. It is recommended to fertilize them every two weeks with a balanced fertilizer. Additionally, black-eyed peas can also be grown in raised bed gardens, which provide better drainage and less risk of soil-borne diseases.
According to the USDA National Agricultural Statistics Service, the United States produced over 1.5 million pounds of black-eyed peas in 2019 alone. This impressive statistic highlights not only the popularity of this crop but also its potential impact on local economies and food systems. By growing black-eyed peas at home or supporting local farmers who grow them, individuals can contribute to sustainable agriculture practices and access nutrient-rich foods.
Image Credits
- “I GOTTA FEELING -TONIGHT is a GOOD NIGHT ( BLACK EYED PEAS)” by JOHN CORVERA (featured)


