Vacuuming is one of the most basic home cleaning tasks, and yet it can make a significant difference in the overall cleanliness and hygiene of your home. It is important to vacuum every room in your home regularly to remove dust, dirt, pet hair, and other debris that accumulate over time. However, vacuuming can be a daunting task for many homeowners, especially those who have large homes or busy schedules. In this article, we will provide you with a comprehensive guide on how to vacuum every room in your home effectively and efficiently.
As a home cleaning expert, I understand the importance of having a clean and tidy home. A clean home not only looks good but also promotes good health and well-being for you and your family. Vacuuming is an essential part of any cleaning routine as it helps to remove allergens and pollutants from the air, making your indoor environment safer and healthier. Whether you are a busy professional or a stay-at-home parent, learning how to vacuum every room in your home correctly can save you time and effort while achieving optimal results. So let’s get started!
Preparing Your Vacuum Cleaner
They say that cleanliness is next to godliness, and it’s no secret that a clean home equals a happy home. However, vacuuming can be a daunting task, especially if you have multiple rooms to clean. But don’t worry – with the right preparation and equipment, you’ll be able to make your home sparkling clean in no time.
Before you start vacuuming every room in your home, make sure that your vacuum cleaner is in good working condition. The first step is to check whether all the cleaning attachments are present and accounted for. These attachments are crucial as they help you reach every corner of your home, from tight spaces under furniture to high shelves.
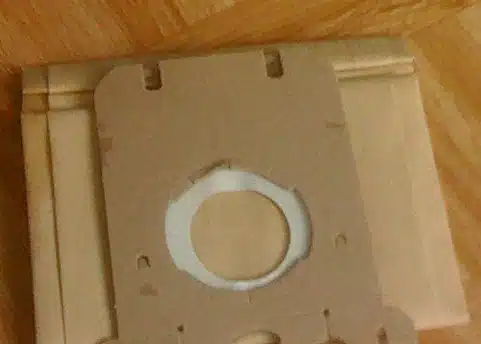
Another important thing to consider before starting to vacuum is checking the capacity of your vacuum bag. If you haven’t replaced it recently, chances are it’s already full of dirt and debris that can compromise its suction power. Make sure to replace the bag before starting to ensure maximum efficiency and effectiveness.
As a home cleaning expert, I cannot stress enough the importance of proper preparation before starting any cleaning task – including vacuuming your entire house. Cleaning attachments and checking vacuum bag capacity may seem like small details but trust me when I say that these steps can make all the difference between a quick and effortless cleaning routine or a frustrating one. Now that we’ve covered preparing your equipment let’s move onto choosing the right vacuum cleaner for your home.
Choosing The Right Vacuum Cleaner For Your Home
After preparing your vacuum cleaner, it’s essential to choose the right one for your home. When choosing a vacuum cleaner, it’s essential to consider its type, features, and price. One of the most important decisions you need to make is whether to buy a corded or cordless vacuum cleaner.
Corded vacuum cleaners are more powerful than their cordless counterparts. They are also more reliable since you don’t have to worry about battery life. Corded vacuums are great for cleaning larger homes with multiple rooms. On the other hand, cordless vacuums are lightweight and portable, making them ideal for smaller homes or apartments.
Vacuum filter maintenance is crucial in keeping your vacuum running efficiently. It’s recommended that you clean or replace your filter regularly. A clogged filter can cause your vacuum to lose suction power and decrease its overall performance. Be sure to check your manufacturer’s instructions on how often you should replace or clean your filter.
- Make sure to empty the dustbin after every use.
- Use the appropriate attachment for each surface.
- Regularly check and clean the brush roll.
- Store your vacuum properly when not in use.
Understanding proper vacuuming techniques is crucial in keeping a clean home. From choosing the right vacuum cleaner for your needs to maintaining its filters, there are many things you can do to improve its performance and keep it running smoothly. By following these tips, you’ll be well on your way to a cleaner home with less effort!
Understanding Vacuuming Techniques
When it comes to vacuuming, it is important to use the right vacuum for the job. The type of vacuum should take into consideration the type of floor you are cleaning, as well as the size of the room. Different vacuuming patterns may be employed based on the type of floor and the size of the room. A thorough vacuuming job should include pushing the vacuum in all directions and overlapping the cleaning pattern.
Using The Right Vacuum
When it comes to vacuuming every room in your home, it is essential to use the right type of vacuum. Choosing between corded and cordless vacuums can be a tough decision. Corded vacuums are usually more powerful and provide uninterrupted cleaning, while cordless vacuums offer greater maneuverability. Ultimately, the choice depends on your needs and preferences.
Another factor to consider when selecting a vacuum is the type of filter it uses, especially for those with allergies. HEPA filters are ideal for allergy sufferers as they trap even the smallest particles such as pollen, dust mites, and pet dander. On the other hand, washable filters are an excellent choice for those who want to save money in the long run as they eliminate the need for frequent filter replacements.
In conclusion, choosing the right vacuum cleaner for your home is crucial in ensuring effective cleaning results. When considering corded vs. cordless options or filter types, think about what works best for you and your family’s needs and preferences. Remember that using a high-quality vacuum will not only make cleaning more efficient but also promote better indoor air quality and overall health.
Vacuuming Patterns
Understanding vacuuming techniques is an essential aspect of maintaining a clean and healthy home environment. In addition to choosing the right type of vacuum cleaner, it is crucial to know how to use it effectively. One factor that affects the efficiency of vacuuming is the pattern in which you clean each room. Vacuuming patterns refer to the direction and speed at which you move the vacuum cleaner over your floors.
When it comes to vacuuming patterns, it is essential to start with a plan. Begin by dividing each room into sections and deciding on a pattern that works best for you. Vacuuming speed also plays a significant role in achieving thorough cleaning results. Slow and steady movements allow the machine’s suction power to pick up more dirt and debris from carpets and hard floors.
Another factor that can help improve your vacuuming technique is choosing the right attachments for specific cleaning tasks. For instance, using a crevice tool can help you reach tight spaces like corners, edges, and baseboards that are otherwise difficult to clean with regular attachments. Similarly, using an upholstery attachment can make cleaning sofas, curtains, and other furniture much easier.
In summary, understanding different vacuuming patterns and techniques can go a long way in ensuring effective cleaning results. By following a set plan in each room, moving at slow speeds, and choosing the right attachments for specific tasks can make all the difference in maintaining a clean home environment.
Creating A Cleaning Schedule
When it comes to keeping your home clean, having a cleaning schedule can make all the difference. Not only does it help ensure that every part of your home gets cleaned regularly, but it also helps you stay organized and on top of your cleaning tasks. Creating a cleaning schedule involves two key factors: frequency and prioritization.
Firstly, when determining how often to clean each room in your home, consider how much foot traffic each area receives. High-traffic areas like the kitchen and bathroom may need to be cleaned more frequently than lesser-used spaces like guest bedrooms or storage rooms. Additionally, take into account any specific cleaning needs for each room, such as dusting electronics or vacuuming carpets. Prioritizing these tasks will help you create a realistic schedule that ensures nothing gets overlooked.
Once you have determined which areas of your home need to be cleaned and how often, the next step is sticking to your schedule. Here are some tips for doing so: set designated cleaning days for each task, enlist help from family members or roommates if possible, break up larger tasks into smaller ones to make them more manageable, and reward yourself once you have completed everything on your list. By following these guidelines and creating a cleaning schedule that works for you, maintaining a clean home will become second nature.
Now that you have created a cleaning schedule that prioritizes each room in your home according to its specific needs and frequency of use, it’s time to put that plan into action by starting with one of the most important spaces in your house: the living room. Vacuuming this area regularly will not only remove dirt and debris from floors and furniture but also improve air quality by removing allergens from the environment. Let’s dive into how best to vacuum this space in the next section.
Vacuuming Your Living Room
Before beginning to vacuum the living room, it is important to ensure all furniture is moved out of the way and any other items that can be moved are relocated.
The vacuum should then be inspected to make sure it is in proper working order and that the bag is not full.
When vacuuming the living room, start in one corner and work your way systematically around the room.
It is important to ensure the vacuum is moved slowly and that it covers all areas of the room, including beneath furniture and in any hard to reach places.
Vacuuming should be followed by the use of a dust cloth to remove any remaining dust or debris.
Once the living room is vacuumed and dusted, furniture can be placed back in its original position and the room can be cleaned and tidied.
Preparing The Living Room
As a home cleaning expert, preparing the living room for vacuuming is an essential step to ensure that dirt and dust are effectively removed. To start, arrange your furniture in such a way that it allows you easy access to all corners of the room. Move any sofas or chairs away from walls and clear pathways leading up to them. This way, you can vacuum behind and under them without any obstructions.
Removing clutter from the living room is also crucial before vacuuming. Pick up any loose items such as toys, magazines, or books scattered around the room and place them in their designated storage spaces. Straightening up cushions and blankets on your couches or chairs will also prevent them from getting sucked into the vacuum cleaner’s intake valve. This will help ensure that your vacuum doesn’t get clogged with debris, which can hinder its suction power.
Lastly, if there are any stains on your carpet, take care of them before vacuuming. Using a spot cleaner or stain remover will help lift any tough stains out of your carpet’s fibers so that they don’t spread further during the vacuuming process. With these steps in mind, you’ll be able to prepare your living room thoroughly for effective vacuuming without missing a single spot.
Vacuuming The Living Room
When it comes to keeping your home clean and tidy, vacuuming your living room is a crucial step that cannot be overlooked. Not only does it help remove dirt and dust from your carpets and rugs, but it also ensures that the air quality in your home remains healthy and fresh. In this article, we will discuss how to properly vacuum a living room, including tips for removing pet hair from living room carpets.
Before you begin vacuuming your living room, it is essential to prepare the area adequately. As previously discussed, arranging furniture in such a way that allows easy access to all corners of the room is crucial. Additionally, removing clutter from the living room will prevent any obstacles that may hinder effective cleaning. Once you have prepared the space, it’s time to start vacuuming.
When vacuuming your living room, remember to use slow and steady strokes as this helps ensure maximum suction power. Also, be sure to use attachments such as crevice tools or upholstery brushes when cleaning around furniture or hard-to-reach areas like baseboards. Pet hair can be particularly challenging to remove from carpets and upholstery; using a high-quality pet hair attachment can help make this task easier.
As you continue vacuuming your living room, pay attention to high-traffic areas such as entryways and hallways where dirt tends to accumulate faster. Vacuum these areas more frequently than other parts of the room. With these tips in mind, you can effectively clean your living room with ease while ensuring that it remains a comfortable and inviting space for you and your family.
Finishing The Living Room
Now that you have finished vacuuming your living room, it is time to focus on the final touches that will make it look and feel clean and inviting. Start by using furniture attachments to clean around small decor pieces such as picture frames, vases, and figurines. Dust tends to accumulate in these areas quickly, so it’s essential to pay attention to them during the cleaning process.
Next, take a few minutes to fluff up pillows and cushions on your furniture. This not only makes them look more attractive but also helps maintain their shape over time. If you have any throw blankets or area rugs in your living room, shake them out outside and give them a quick once-over with your vacuum cleaner.
Finally, step back and admire your work! Your living room should now be clean and tidy, ready for you and your family to enjoy. Remember to keep up with regular cleaning tasks such as vacuuming, dusting, and decluttering to maintain a comfortable living space. By doing so, you can create a welcoming environment that will make guests feel at home while also reducing stress levels for yourself and those around you.
Vacuuming Your Dining Room
After vacuuming your living room, it’s time to move onto the dining room. Similar to the living room, start by removing any furniture that may be in the way of a thorough clean. Next, ensure that all loose items such as chairs and tablecloths are out of the way before starting to vacuum.
When it comes to properly vacuuming a dining room, it’s important to start in one corner of the room and work your way around. Use long strokes with the vacuum cleaner and pay special attention to areas where dirt and debris tend to accumulate such as around table legs or under chairs. Don’t forget to also vacuum any area rugs or carpets you may have in your dining room.
If you find yourself dealing with tough stains on your dining room carpets, there are a few tips you can try. First, try blotting the stain with a clean cloth dampened with cold water. If that doesn’t work, mix together equal parts white vinegar and water and apply it directly to the stain before blotting again. For particularly stubborn stains, consider using a carpet cleaner specifically designed for spot cleaning.
As you finish up vacuuming your dining room, take a moment to appreciate how clean it looks and feels. Next up is tackling the kitchen – but we’ll save that for later!
Vacuuming Your Kitchen
To properly vacuum your kitchen, start with removing any loose debris from the floor using a broom or dustpan. This step ensures that larger debris does not clog the vacuum cleaner’s brush roll or filter. Once you have removed all loose debris, use your vacuum cleaner to clean the entire surface of your kitchen floor. Pay close attention to corners and edges, where dirt and debris tend to accumulate.
Benefits of steam cleaning: Steam cleaning is an effective way to deep-clean your kitchen floors without using harmful chemicals. The high temperature of steam kills bacteria and viruses, making it an ideal method for those with allergies or sensitivities to harsh chemicals. Additionally, steam cleaning can loosen stubborn stains and grime that are resistant to traditional cleaning methods.
Alternative kitchen floor cleaning methods: If you do not have access to a steam cleaner, there are still several alternative methods you can use to clean your kitchen floors effectively. One option is to mix equal parts water and vinegar in a spray bottle and apply it directly onto the floor before mopping it up with a microfiber mop. Alternatively, you can use a commercial all-purpose cleaner or dish soap mixed with warm water.
Now that we’ve covered how to properly vacuum and clean your kitchen floors, let’s move on to another essential area of your home—the bedroom. A clean bedroom promotes relaxation and restful sleep, so it’s important to maintain a regular cleaning schedule. In the next section, we’ll cover how to effectively vacuum your bedroom carpets and floors for optimal cleanliness.
Vacuuming Your Bedroom
Efficient bedroom vacuuming requires attention to detail. To start, remove any clutter from the floor, such as clothes or shoes, and place them in designated areas. This will ensure that you are able to vacuum the entire room without any obstacles in your path.
When choosing attachments for bedroom vacuuming, consider the surfaces you will be cleaning. A crevice tool is helpful for getting into tight spaces like baseboards and corners, while a dusting brush can be used on delicate surfaces like curtains and lampshades. Additionally, using an upholstery tool can help remove dust and debris from furniture.
To maximize efficiency while vacuuming your bedroom, work from top to bottom. Start by dusting any ceiling fans or light fixtures with a microfiber cloth before moving onto vacuuming the floors. Remember to pay special attention to areas where dust and dirt tend to accumulate, such as under the bed or near the dresser.
Table:
| Attachment | Surface | Emotional Response |
|---|---|---|
| Crevice Tool | Baseboards and Corners | Satisfaction of reaching tough areas |
| Dusting Brush | Delicate Surfaces (Curtains/Lampshades) | Comfort that items are being cleaned properly |
| Upholstery Tool | Furniture | Relief knowing furniture is free of dust/debris |
Transition: Now that your bedroom is clean and tidy, it’s time to move onto another important space in your home – the bathroom.
Vacuuming Your Bathroom
Before vacuuming the bathroom, it is important to ensure that all items have been removed from the floor and countertops, and that any dust or debris that may have accumulated is swept away.
Vacuuming the bathroom should be done in an organized manner, starting with the area closest to the entrance and working your way out.
All corners and crevices should be well-vacuumed to ensure that all dust and dirt is removed.
After vacuuming, it is important to properly dispose of the vacuum bag or container to keep the bathroom clean and hygienic.
Preparing The Bathroom
Efficiently vacuuming every room in your home can seem like a daunting task, especially if you haven’t done it in a while. However, with the right preparation and technique, you can make this chore less intimidating. When preparing to vacuum your bathroom, it is important to start by organizing supplies and ensuring that you have all the necessary tools at hand. This will save you time and make the process smoother.
One of the most challenging aspects of vacuuming your bathroom is tackling tough stains. These may include hair clumps, dust bunnies, or pet dander that accumulate in hard-to-reach areas. To get rid of these stubborn spots, it is advisable to use an appropriate cleaning solution and scrub them gently before proceeding to vacuum them up. This will help loosen dirt particles and make it easier for the vacuum cleaner to pick them up.
Another essential tip when preparing to vacuum your bathroom is to clear away any clutter or obstacles that may obstruct your path as you clean. Remove items such as trash cans and laundry baskets from the floor so that you can easily maneuver around the room with your vacuum cleaner. With these tips in mind, you are now ready to tackle this task with confidence and efficiency!
Vacuuming The Bathroom
Vacuuming your bathroom is an essential task that should be done regularly to maintain cleanliness and hygiene. One of the key areas to focus on when vacuuming your bathroom is the tiles. Bathroom tiles are prone to accumulating dirt, dust, and grime, which can be challenging to remove without a proper cleaning technique. Using a vacuum cleaner with a brush attachment can help you effectively clean bathroom tiles as it can reach deep into the crevices and corners.
Another important area to focus on when vacuuming your bathroom is removing hair from bathroom floors. Hair can easily accumulate in damp areas such as bathrooms, and it can be unsightly and unhygienic if not cleaned promptly. To remove hair from your bathroom floor, start by using a broom or dustpan to sweep up larger clumps of hair. Then use a vacuum cleaner with strong suction power to pick up any remaining strands of hair that may have been missed.
When vacuuming your bathroom, it is also important to pay attention to hard-to-reach areas such as behind the toilet or under the sink. These areas are often overlooked but can quickly become breeding grounds for bacteria and mold if left uncleaned for too long. Use a handheld vacuum or extension hose attachment to reach these areas and ensure they are thoroughly cleaned. By following these tips, you can efficiently and effectively vacuum your bathroom, leaving it spotless and hygienic for you and your family’s use.
Vacuuming Your Stairs
After completing the task of vacuuming your bathroom, it’s time to move on to a more challenging space in your home – the stairs. Did you know that staircases are one of the most high-traffic areas in a house, with an average person going up and down them at least 50 times a day? This means that they accumulate a lot of dirt, dust, and debris over time. It’s important to keep them clean not just for aesthetic reasons but also for hygiene purposes.
Tips for tackling stairs start by removing any small objects or clutter from the steps. Next, use the crevice tool attachment on your vacuum cleaner to get into corners and edges where dust bunnies tend to hide. Make sure you vacuum each step thoroughly from top to bottom, paying extra attention to areas where people place their feet when walking up or down the stairs. Remember to lift up the area rugs at each step and clean underneath them as well.
Proper technique for vacuuming stairs involves using an upright vacuum cleaner or handheld model with an extension wand and adjustable hose length. For safety reasons, always start at the top of the staircase and work your way down. Take small steps backward as you go, rather than trying to stretch across several steps at once. This will help ensure that you don’t lose your balance or trip while cleaning. Once you’ve finished vacuuming each step, take a few minutes to wipe down handrails and banisters with a damp cloth to remove any lingering dirt or grime.
As you finish vacuuming your stairs, it’s important not to forget about other high-traffic areas such as hallways which often connect multiple rooms in a home. In our next section, we’ll discuss some useful tips for keeping these spaces clean and inviting for guests who may be visiting your home.
Vacuuming Your Hallways
Efficient hallway vacuuming is crucial to maintaining a clean and healthy home. Hallways are high-traffic areas that accumulate a lot of dirt, dust, and debris. To make the most out of your hallway vacuuming session, start by clearing out any large obstacles such as furniture or toys. This will give you more space to move around and ensure that you can vacuum every inch of the hallway.
Overcoming obstacles while vacuuming hallways can be challenging, but with some simple techniques, you can make it easier. One effective method is to use an extension wand or crevice tool attachment to reach tight spaces and corners. Additionally, consider using a handheld vacuum for smaller areas or hard-to-reach spots. By being strategic with your tools and technique, you’ll save time and energy while still achieving a thorough clean.
Remember that efficient hallway vacuuming is just one part of keeping your home clean and healthy. In the next section, we’ll discuss how to properly vacuum your carpets and rugs to eliminate allergens and other harmful particles from your home’s flooring surfaces. By following these simple steps, you’ll be well on your way to creating a cleaner, healthier living environment for you and your loved ones.
Vacuuming Your Carpets And Rugs
To effectively clean your carpets and rugs, vacuuming is the primary step. When it comes to vacuuming your carpets, it’s essential to use the right vacuum attachments for different areas of the carpet. For example, use a crevice tool for edges and corners and a beater bar attachment for high-traffic areas.
In addition to using the appropriate vacuum attachments, using carpet cleaning solutions can enhance the cleaning process. Before starting, test the solution on a small inconspicuous area to ensure that it does not damage or discolor your carpet. Once you have confirmed that it is safe to use, pre-treat any stains or heavily soiled areas before vacuuming by applying the solution and allowing it to sit for a few minutes.
To get the most out of vacuuming your carpets and rugs, follow these tips:
- Vacuum slowly and in multiple directions to remove embedded dirt.
- Adjust the height of your beater bar attachment based on the thickness of your carpet.
- Empty or replace your vacuum bag frequently.
- Schedule professional deep-cleaning every 12-18 months.
By following these tips, you’ll achieve cleaner carpets and rugs that look better and last longer. In our next section, we’ll discuss how to properly vacuum hardwood floors without causing damage or scratches.
Vacuuming Your Hardwood Floors
- Before beginning the vacuuming process, it is important to sweep the hardwood floors to remove any dirt, dust, and debris.
- When vacuuming, be sure to use a vacuum with a brush attachment to avoid damaging the hardwood floors.
- Pay special attention to corners, crevices, and edges to ensure that all dirt and dust is collected.
- Vacuuming should be done regularly to maintain the hardwood floors, preferably at least once a week.
- In addition to vacuuming, it is also important to use a wood-friendly cleaning solution to mop the floors and restore the wood’s shine.
- Lastly, it is important to keep furniture and other items off the hardwood floors to help protect them from scratches and dents.
Preparing The Floor
When preparing to vacuum your hardwood floors, it is important to start with a clean slate. Sweeping or mopping the floors prior to vacuuming will help remove any loose debris or dirt that may be present. This not only makes the vacuuming more effective, but also helps prevent scratches on the surface of the floor. If you prefer to use natural cleaners, consider using a mixture of warm water and vinegar for mopping or sweeping.
Next, take a moment to remove any obstacles from the floor. This could include things like chairs, rugs, or small furniture pieces. By clearing the floor space, you will be able to move around more easily and ensure that every inch of the floor is properly cleaned. It’s also important to check for any particularly dirty spots or stains that may require extra attention during the vacuuming process.
Finally, adjust your vacuum cleaner settings to match your hardwood flooring needs. Some vacuums come with attachments specifically designed for hardwood floors that are gentler and less abrasive than traditional carpet cleaning attachments. Using these attachments can make a big difference in ensuring that your floors are properly cleaned without causing damage. Once you have prepared the floor and adjusted your vacuum settings accordingly, you can begin vacuuming each room in your home with confidence and ease.
Vacuuming Properly
When it comes to maintaining the cleanliness of your hardwood floors, vacuuming is an essential part of the process. However, many people make common mistakes when vacuuming their floors that can actually cause damage instead of ensuring cleanliness. Proper vacuuming techniques can not only prevent damage, but also provide a deeper clean and extend the life of your flooring.
One of the most common mistakes that people make when vacuuming hardwood floors is using the wrong type of attachment or setting on their vacuum cleaner. Using attachments or settings meant for carpet may be too abrasive for hardwood floors and cause scratches or other damage. To avoid this, use gentle attachments specifically designed for hardwood floors or adjust the settings accordingly.
Another important aspect of proper vacuuming is paying attention to detail. This means taking extra care to thoroughly clean high-traffic areas, around furniture legs and in corners where dirt and debris may accumulate. By doing so, you can ensure that all parts of your floor are properly cleaned and maintained.
In conclusion, by following these tips for proper vacuuming techniques on your hardwood floors, you can achieve a deep clean while preventing damage and extending the life of your flooring investment. Taking time to pay attention to detail and using appropriate attachments will provide many benefits in terms of both cleanliness and aesthetic appeal.
Proper Maintenance
Proper maintenance is crucial in ensuring the longevity of your hardwood floors. Apart from regular vacuuming, there are other tips for effective upkeep that you can do to keep them looking their best. One of the most important things to remember is to avoid using too much water when cleaning your floors as this can cause damage and warping. Instead, use a damp cloth or mop and dry thoroughly after cleaning.
Another common mistake to avoid is neglecting spills or stains on your hardwood floors. If left unattended, these can seep into the wood and cause permanent damage. Be sure to clean up any spills immediately with a soft cloth and a gentle cleaning solution specifically made for hardwood floors.
Finally, it’s essential to protect your hardwood floors from scratches and dents by placing protective pads under furniture legs and avoiding wearing shoes with hard soles inside. By following these tips for proper maintenance along with effective vacuuming techniques, you can ensure that your hardwood floors remain beautiful and durable for years to come. Remember that maintaining your home’s flooring is not just about aesthetics but also about caring for one of your most significant investments.
Maintaining Your Vacuum Cleaner
Like any other household appliance, your vacuum cleaner requires maintenance to function efficiently and effectively. Cleaning filters and replacing bags are two essential tasks that you must perform regularly to keep your vacuum cleaner in good condition.
Cleaning filters is crucial because clogged filters reduce the suction power of your vacuum cleaner. To clean the filter, first, remove it from the unit and tap it gently to remove any loose debris. Then, rinse the filter under running water until it’s clean. Let it dry naturally before putting it back into the vacuum cleaner.
Replacing bags is equally important because full bags hinder suction performance and can cause overheating of the motor. Check your vacuum cleaner’s bag frequently, and replace it when it’s about three-quarters full. Always use the correct type of bag for your machine. Choose a high-quality replacement bag that fits securely to avoid any dust or debris escaping from the machine.
Now that we’ve covered cleaning filters and replacing bags let’s move on to troubleshooting common vacuuming issues. If you’re experiencing suction problems with your vacuum cleaner or notice an unusual noise, continue reading for practical solutions to these problems.
Troubleshooting Common Vacuuming Issues
Common vacuuming mistakes can cause a lot of frustration and result in an ineffective cleaning process. One common mistake is not emptying the vacuum bag or dustbin regularly, which reduces suction power and makes it difficult to pick up dirt and debris. Another mistake is not using the right attachment for different surfaces, such as using a carpet attachment on hardwood floors. This can damage the floor and reduce the lifespan of the vacuum cleaner.
To avoid these mistakes, be sure to empty the vacuum bag or dustbin after each use, or when it reaches half full capacity. Also, use the appropriate attachment for each surface you are cleaning. For example, use a crevice tool for tight spaces like baseboards and corners, and a soft brush attachment for delicate surfaces like upholstery.
Deep cleaning your vacuum cleaner is also important to maintain its performance. To do this, first unplug it from the wall outlet. Then remove any attachments and clean them with warm soapy water or disinfectant wipes. Next, clean out any remaining dirt or debris from inside the dustbin or bag area. Finally, replace any filters according to manufacturer instructions.
Remember that proper maintenance and usage of your vacuum cleaner will not only make your cleaning process more effective but also prolong its lifespan. By avoiding common mistakes and deep cleaning your machine regularly, you can ensure that your home stays clean and healthy for years to come.
Conclusion
Vacuuming is an essential task in keeping your home clean and healthy. In order to effectively vacuum every room, it is important to prepare your vacuum cleaner, choose the right one for your home, understand proper techniques, create a cleaning schedule, and maintain your machine. By following these steps, you can have a spotless living space in no time.
Did you know that according to a survey by the American Cleaning Institute, 72% of people vacuum their floors at least once a week? This statistic highlights the importance of regular vacuuming in maintaining cleanliness and hygiene in our homes. However, it is also important to note that not all vacuum cleaners are created equal and choosing the right one for your specific needs can make a significant difference in its effectiveness.
As a home cleaning expert, I recommend investing in a high-quality vacuum cleaner that suits your flooring type and lifestyle. Whether you have carpets or hardwood floors, pets or allergies, there is a perfect vacuum cleaner out there for you. By taking the time to properly care for and use your machine, you can ensure that every room in your home is free from dust and dirt buildup. Happy cleaning!
Image Credits
- “Vacuum Clean: Spare bag” by ebrunar (featured)

