Gourds, also known as calabashes, have been used for centuries to create various pieces of art and crafts. These versatile fruits come in different shapes and sizes, making them perfect for creating unique home decor items such as vases. Making vases out of gourds is a fun and creative way to add a touch of nature to any room in your home.
As a gourd crafts specialist, I have worked with gourds extensively and have discovered numerous techniques for turning them into beautiful vases. In this article, I will share with you some of the best tips and tricks for creating your own gourd vase. Whether you are a seasoned crafter or just starting out, this guide will provide you with everything you need to know to make stunning gourd vases that are both functional and decorative. So grab your tools and get ready to embark on an exciting journey of creativity!
Selecting The Right Gourd For Your Vase
When it comes to making vases out of gourds, the first step is selecting the right one. Different species of gourds have different properties that make them more or less suitable for vase making. The most common species used for this purpose are the bottle gourd, the birdhouse gourd, and the bushel gourd. These types tend to be thicker and sturdier than others, which makes them more resistant to cracking. It is important to choose a ripe gourd when making a vase since an unripe one will be too hard to work with and may not hold up as well over time.
Another consideration when selecting a gourd for vase making is its size and shape. While there are no strict rules about what size or shape works best, it is generally easier to work with larger gourds since they offer more space for carving and decoration. However, smaller gourds can also be used if you want to create a more delicate or intricate design. In terms of shape, it is best to choose a gourd that has a relatively even surface without too many bumps or irregularities.
Overall, choosing the right gourd is an essential step in creating a successful vase. By considering factors like species, ripeness level, size, and shape, you can ensure that your finished product will look beautiful and function well as a piece of decor or art. Once you have selected your perfect gourd, the next step is preparing it for crafting by cleaning and drying it thoroughly before beginning any carving or decorative work.
Preparing Your Gourd For Crafting
- To prepare a gourd for crafting, the initial step is to clean the gourd with a damp cloth or soft brush.
- After cleaning, sanding is recommended to create a smooth surface and to remove any rough or hard spots.
- Trimming and drilling can then be done to create the desired shapes and holes in the gourd.
- Carving, sealing, painting, designing, drying, prepping, cutting, shaping, polishing, refining, and protecting can then be done to complete the craft.
Cleaning
When it comes to gourd crafting, proper preparation is crucial for creating a beautiful finished product. One of the most important steps in preparing your gourd for crafting is cleaning. Effective cleaning will not only remove any dirt or debris on the surface of the gourd, but it will also eliminate any bacteria or mold that could potentially ruin your project.
To start, use a soft-bristled brush to gently scrub the surface of the gourd with warm, soapy water. Be sure to rinse thoroughly and then dry completely before moving on to any further preparations. For more stubborn dirt or stains, there are alternative cleaning methods such as using vinegar or hydrogen peroxide solutions.
In addition to removing surface dirt and bacteria, effective cleaning also helps to prepare the gourd for any decorative techniques you may want to apply later on. By taking the time to properly clean your gourd before crafting, you can ensure a beautiful and long-lasting finished product.
Sanding
Preparing your gourd for crafting does not end with cleaning. It is also important to sand the surface of the gourd to create a smooth and even texture. Sanding can help remove any rough spots or bumps that could affect the final appearance of your project.
To begin, choose a sandpaper grade that suits your needs. Coarse sandpaper can help remove larger imperfections, while fine sandpaper can be used for finer details. Some craftspeople prefer to use multiple grades of sandpaper to create unique textures on their gourds.
When sanding your gourd, it is important to take your time and work carefully. Use gentle strokes and avoid applying too much pressure, as this could damage the surface of the gourd. By taking care during the sanding process, you can create a beautiful base for any decorative techniques you may want to apply later on.
Cleaning And Sanding Your Gourd
After selecting the perfect gourd for your project, it’s time to prepare it for crafting. Cleaning and sanding your gourd is a crucial step in ensuring the final product is smooth and polished. There are several techniques to consider when cleaning and sanding your gourd, but the most important thing to remember is to choose tools that won’t damage the delicate surface of the gourd.
When selecting tools for cleaning and sanding your gourd, consider using natural methods such as scrubbing with a soft-bristled brush or soaking in a solution of water and vinegar. These methods are gentle on the gourd’s surface and won’t cause any harm. Alternatively, chemical methods like bleach or rubbing alcohol can be effective at removing stubborn stains or dirt buildup. However, be sure to use caution when working with chemicals and always wear protective gloves and eyewear.
Once you have chosen your preferred method for cleaning your gourd, it’s time to move on to sanding. Start with a coarse grit sandpaper (around 80 grit) to remove any rough spots or bumps on the surface. Gradually work your way up to a finer grit (around 220 grit) until you achieve a smooth finish. Sanding can be time-consuming, but taking care in this step will ensure that your final product is beautiful and long-lasting.
Now that you’ve cleaned and sanded your gourd, you’re ready to move on to choosing your design and style. With a smooth surface ready for decorating, the possibilities are endless! Consider painting intricate designs, carving patterns into the surface, or even adding embellishments like beads or feathers. Let your creativity run wild as you transform this humble gourd into a stunning piece of art.
Choosing Your Design And Style
Designing Your Gourd Vase
Choosing the perfect design and style for your gourd vase is a fun and exciting process that allows you to express your creativity. With so many options available, it can be challenging to decide which direction to take. However, by considering your color schemes and unique shapes, you can create a stunning piece that reflects your personal taste.
When selecting your color scheme, consider the environment where the vase will be placed. If it will be placed in a brightly lit room, bold colors such as red or orange may be ideal. If the room has more subdued lighting, softer colors like blue or green may work better. Additionally, consider using complementary colors to add visual interest to your gourd vase.
When choosing a unique shape for your vase, consider the natural shape of the gourd itself. Some gourds have elongated necks that would make an excellent base for a tall and slender vase while others have rounder bodies that would lend themselves well to shorter and wider designs. Don’t be afraid to experiment with different shapes until you find one that speaks to you.
By following these tips for choosing your design and style, you can create a beautiful gourd vase that is both functional and aesthetically pleasing. In the next section, we will discuss how to trace your design onto the gourd surface before carving it out into its final form.
Tracing Your Design Onto The Gourd
Once you have selected the appropriate gourd for your vase, it is time to begin tracing your design onto the surface. There are two methods you can use to transfer your design: using stencils or freehand drawing. Both methods have their advantages and disadvantages, so it is important to choose the one that works best for you.
If you are not confident in your drawing skills, using stencils may be the way to go. You can purchase pre-made stencils online or create your own by printing out a design and cutting it out with scissors or a craft knife. Once you have your stencil ready, secure it onto the gourd with masking tape and trace around the edges with a pencil or marker. Keep in mind that stencils may limit your creativity and result in a less unique final product.
Alternatively, if you prefer more creative freedom, freehand drawing may be the better option. Use a pencil to sketch out your design directly onto the gourd’s surface. If you make any mistakes, simply erase them and try again until you are satisfied with the outcome. This method allows for more personalization and customization but requires more artistic skill and patience.
Whichever method you choose, take your time and ensure that your design is accurately transferred onto the gourd before moving on to carving and cutting.
Carving And Cutting Your Gourd
- Before beginning to carve or cut a gourd, it is important to prepare the gourd by washing and drying it.
- Once the gourd is ready, carving and cutting techniques such as cutting, burning, and scraping can be used to create unique designs.
- A wood burning tool can be used to create intricate patterns and designs on the gourd’s surface.
- A rotary tool with a variety of attachments can be used to cut, grind, and sand the gourd to achieve a desired shape.
Preparing The Gourd
Preparing the gourd is a crucial step in carving and cutting it to make beautiful vases. First, you need to select the right type of gourd for your project. You can choose from different varieties like bottle, bushel, or birdhouse gourds. Once you have selected a suitable gourd, wash it with mild soap and water to remove any dirt or debris. Afterward, use sandpaper to smooth its surface and remove any remaining impurities.
Drying techniques are also essential in preparing your gourd for carving and cutting. Gourds have thick skins that need to be dried properly before being worked on. There are two ways to dry a gourd – natural drying and artificial drying. Natural drying involves leaving the gourd in a warm and dry area for several weeks until it becomes hard and lightweight. On the other hand, artificial drying uses an oven or dehydrator to speed up the process. Whichever method you choose, ensure that the gourd is completely dry before proceeding to carve or cut it.
Decorative options are endless when it comes to making vases out of gourds. You can use different tools like knives, saws, or drills to create unique designs on its surface. Some popular decorative options include painting, wood burning, carving intricate patterns or shapes, adding beads or shells as embellishments, among others. Remember that the key to creating a stunning vase is creativity coupled with precision in carving and cutting your gourd into different shapes and sizes that suit your desired design aesthetic.
Carving And Cutting Techniques
Carving and cutting techniques are crucial in creating beautiful gourd vases. Sharpening tools is a critical step before starting to cut. A sharp blade ensures clean cuts and reduces the risk of accidents. It’s essential to keep your tools sharp throughout the entire process. Safety precautions should also be taken into consideration, such as wearing gloves and protective eyewear.
Experimenting with textures and patterns can create unique designs on your gourd vase. Carving intricate patterns or shapes adds depth and dimension to the surface of your vase, while wood burning creates a beautiful contrast between light and dark areas. Adding beads or shells as embellishments can also enhance its overall appearance.
When carving and cutting your gourd, precision is vital to creating a stunning vase. Take your time when carving delicate details to ensure accuracy. Don’t rush through the process, but rather enjoy it as a therapeutic activity that allows you to express your creativity. With patience, practice, and these techniques, you’ll be able to create beautiful gourd vases that will impress anyone who sees them.
Adding Decorative Elements
To add more personality to your gourd vase, you can use paint and accessorizing techniques. When applying paint to a gourd, it is important to first clean and dry the surface thoroughly. You can use acrylic paints or spray paint in various colors and shades depending on your desired design.
Once the paint has dried, you can start accessorizing your gourd vase. This can include adding ribbons, beads, feathers, or other materials that complement your chosen color scheme. You can also attach decorative elements such as shells or small figurines to give your vase a unique touch.
Using paint and accessories is a great way to transform a simple gourd into an eye-catching piece of décor. Experiment with different colors and designs until you find what works best for you. In the next section, we will discuss how to properly dry and cure your gourd before using it as a vase.
Drying And Curing Your Gourd
The process of drying and curing gourds is a necessary step in creating versatile gourd crafts, such as vases. Gourds should be dried in an area with circulated air, a temperature of 25-30 °C, and a humidity of 50-60%. A curing process should take place next, with the gourds being left in a warm, dry area for at least three weeks, which allows the shell to harden and the interior to fully dry out. Proper drying and curing of gourds is essential for creating quality gourd crafts.
Drying Gourds
Drying gourds is an important step towards making vases out of them. The process of drying and curing gourds can be tricky, but with the right tips, you can achieve successful results. One of the most important things to remember when drying gourds is to make sure they are fully matured. This means that the skin should have hardened and turned brown or yellow, and the stem should be completely dry.
To ensure successful drying of your gourds, it’s important to choose a well-ventilated area where you can hang them up. Make sure they are not touching each other as this can cause rotting or bruising. Another tip is to rotate the gourds every few days to prevent flattening on one side. Once the gourd feels light and sounds hollow when tapped, it’s ready for decorating with paint or other materials.
When it comes to decorating your dried gourd vase, the possibilities are endless. You can use acrylic paint, wood stain, decoupage, or even carving techniques to create unique designs that match your personal style or home decor. Keep in mind that before painting or adding any other decorations, you’ll need to clean the surface of your gourd with soap and water and let it dry completely. With these tips for successful drying and decorating, you’ll be able to create beautiful vases out of gourds that will impress all your guests!
Curing Gourds
Harvesting techniques play a crucial role in the quality of gourds that you will be using for your crafts. It is important to understand that gourds should be harvested when they are fully matured. This means that the skin should have hardened and turned brown or yellow, and the stem should be completely dry. Choosing the right time to harvest your gourds will ensure that they are of high quality and will have a longer lifespan.
After harvesting your gourds, it is essential to dry and cure them properly before decorating them. Drying methods can be tricky, but with proper ventilation and rotation every few days, you can achieve successful results. Once your gourd feels light and sounds hollow when tapped, it’s ready for curing. Curing involves placing the dried gourds in a warm, dry area with good airflow for about four weeks. This process ensures that any remaining moisture is removed from the gourd, preventing rotting or molding.
Curing your gourds is an important step towards ensuring their longevity as well as preserving their shape and quality over time. Proper curing techniques involve keeping the dried gourds in a warm, dry area with good airflow for at least four weeks. This process allows any remaining moisture to evaporate from inside the gourd, making it less susceptible to rotting or molding. By following these drying and curing techniques, you’ll be able to create beautiful vases out of gourds that will last for years to come!
Applying A Protective Finish
While it can be tempting to leave your gourd vases bare, applying a protective finish is essential for preserving their beauty and longevity. Some may worry that adding a finish will detract from the natural look of the gourd, but fear not – there are many finishes available that will enhance rather than obscure the unique texture and color of each gourd.
Choosing the right finish for your gourd vase depends on several factors, such as the type of gourd you’ve used and the desired level of protection. For example, if you plan to use your vase as a functional piece of decor or table centerpiece, a durable, water-resistant finish like polyurethane or varnish may be best. If you want to maintain the organic look and feel of your gourd while still offering some protection, consider using natural waxes or oils like beeswax or tung oil.
Techniques for application will vary depending on the type of finish you choose. Generally speaking, it’s best to apply finishes in thin layers with a soft brush or cloth, allowing each layer to dry completely before adding another. Sanding between coats can help ensure a smooth surface. It’s also important to work in a well-ventilated area and wear appropriate safety gear when working with certain types of finishes.
As you wrap up your protective finishing process, keep in mind that adding a base or stand can help protect both your vase and any surfaces it sits on. Stay tuned for our next section where we’ll discuss how to create beautiful bases and stands that complement your unique gourd vases perfectly!
Adding A Base Or Stand
After applying a protective finish to your gourd vase, the next step is to add a base or stand. This is an important step in creating stability for your vase and ensuring that it stays upright. Choosing the right materials for your base or stand is crucial to achieving this.
There are several options when it comes to choosing materials for your vase’s base or stand. One popular choice is wood, which can be carved or shaped to fit the size and shape of your gourd. Another option is metal, which can add a modern and sleek touch to your vase. Ceramic and glass bases are also available, although they may require more careful handling.
When deciding on the best material for your vase’s base or stand, consider the overall aesthetic of your piece as well as its functional needs. It’s important to choose a material that complements the natural beauty of the gourd while also providing adequate support. With the right choice of materials and careful attention to detail, you can create a sturdy and stylish base for your gourd vase. Next up, we will discuss creating a handle or spout without compromising the integrity of the gourd itself.
Creating A Handle Or Spout
Like a potter molding clay on a wheel, creating a handle or spout for your gourd vase is an art form that requires patience and skill. The addition of a handle or spout can transform your gourd into a functional work of art that is both beautiful and practical. Before you begin, it’s important to consider the size and shape of your gourd, as well as the type of handle or spout that will best suit its unique characteristics.
Using alternative materials such as wire or hemp cord can add a unique touch to your gourd vase. When selecting materials, be sure to choose options that are sturdy enough to support the weight of the filled vase. For a rustic look, consider using twine or jute rope to create a simple looped handle. Alternatively, you could use metal wire to create an intricate woven design that adds visual interest while also providing function.
Decorating options for your handle or spout are limited only by your imagination. Consider adding beads, feathers, or even small bells for an added touch of whimsy. Painting the handle or spout with acrylic paints can bring out the natural beauty of the gourd and provide an opportunity for color coordination with the flowers you’ll display in your new vase.
The addition of a water reservoir is essential if you plan on using your gourd vase for fresh flower arrangements. Be sure to select appropriate materials such as floral foam or plastic liners that will prevent water from damaging the interior of your gourd. With careful attention to detail and some creativity, you can create a one-of-a-kind vase that not only showcases the natural beauty of gourds but also provides functionality for everyday use.
Adding A Water Reservoir
To prolong the life of your gourd vase, it is essential to implement watering techniques that will keep it hydrated. The most effective way to achieve this is by adding a water reservoir at the bottom of the vase. This way, water will be available for the plant’s roots whenever they need it, ensuring that your gourd vase lasts longer.
One sustainable option for creating a water reservoir in your gourd vase is by using recycled materials. You can use an old plastic bottle or container and fill it with water before placing it at the bottom of the vase. Not only does this save you money on purchasing new containers, but it also reduces waste and contributes to environmental conservation efforts.
Another sustainability option is to incorporate passive hydroponics into your watering techniques. This method involves using materials such as perlite, vermiculite, or coconut coir to create a moist, well-draining medium for your plant’s roots. By doing this, you can minimize water usage while still ensuring that your plant receives adequate moisture.
Transitioning into the next section about decorating your finished vase: Once you have successfully added a water reservoir to your gourd vase and established sustainable watering techniques, it’s time to move on to decorating your finished product.
Decorating Your Finished Vase
After successfully creating your gourd vase, it’s time to move on to the fun part – decorating it! Using colors is an excellent way to add some pizzazz and make your vase stand out. Consider using acrylic paints or spray paint in a variety of colors to achieve the look you desire. Use a brush or sponge to apply the paint, and let it dry before moving on to the next color.
Adding embellishments is another way to take your gourd vase from ordinary to extraordinary. You can use items such as shells, beads, feathers, or even small pieces of wood to add texture and interest to your vase. Glue these items onto the surface of your gourd with craft glue or hot glue for a secure hold.
When it comes to decorating your gourd vase, don’t be afraid to let your creativity shine! Experiment with different colors and embellishments until you find a combination that speaks to you. Remember that this is a chance for you to express yourself and create something truly unique.
Now that you’ve put the finishing touches on your gourd vase, it’s time to think about how best to display it in your home. In the next section, we’ll discuss some tips and tricks for showcasing your new creation in a way that will make it truly shine.
Displaying Your Gourd Vase
Now that you have successfully made your own gourd vase, it is time to display it in a way that accentuates its unique beauty. There are various ways to showcase your new creation, and it all depends on the setting and occasion. If you plan on using your gourd vase for a special event, such as a wedding or dinner party, consider arranging fresh flowers or greenery inside. This will not only add color and texture but also bring life to the space. Alternatively, if you want to showcase your gourd’s intricate design, opt for minimalistic arrangements such as dried flowers or branches.
Lighting can also play an essential role in displaying your gourd vase. Placing it near natural light sources can help highlight its details and create a warm ambiance. Additionally, using LED lights or candles can enhance the overall look of your display while providing a soft glow.
To take your gourd vase to the next level, consider decorating it with DIY techniques such as painting or decoupage. Painting allows you to customize the colors and patterns of your gourd vase while decoupage enables you to add texture by layering different materials onto its surface. These techniques allow for endless possibilities in creating a one-of-a-kind piece that is not only beautiful but also functional.
Incorporating these ideas for displaying and decorating your gourd vase will undoubtedly impress any guest who sees it. However, if you encounter any issues during this process, do not worry! Troubleshooting common problems such as chipping paint or wilting flowers is easy with a few simple tips and tricks which we will address in the subsequent section about common issues with gourd vases.
Troubleshooting Common Issues
Troubleshooting Tips for Making Gourd Vases
While making vases out of gourds can be a fun and rewarding craft, it is not uncommon to encounter some challenges along the way. If you are experiencing difficulties with your gourd vase project, don’t worry! Here are some troubleshooting tips to help you overcome common mistakes and get your vase looking beautiful.
One common issue that crop up during gourd vase making is cracking or splitting. This can happen when the gourd is dried too quickly or if there are any pre-existing cracks in the gourd. To prevent this from happening, ensure that you dry your gourd slowly over several weeks and avoid exposing it to direct sunlight or heat sources. Additionally, inspect your gourd carefully before starting to ensure that there are no visible cracks or damage that may worsen during drying.
Another problem you may encounter when creating a gourd vase is difficulty with cutting and shaping the gourd. This can be especially challenging for beginners who may not have experience working with tools like saws or knives. To avoid accidentally damaging the gourd or injuring yourself, take your time and use sharp, high-quality tools designed specifically for working with hard materials like wood and bone. Consider taking a class or workshop on carving and shaping techniques if you need additional guidance.
Finally, one mistake many people make when creating a gourd vase is rushing through the finishing process. While it can be tempting to hurry through sanding, sealing, and painting in order to see the finished product as soon as possible, doing so can result in an uneven finish or other imperfections that detract from the overall appearance of the vase. Take care to follow all finishing steps carefully and give each layer of paint or sealant plenty of time to dry before moving on to the next step. With patience and attention to detail, your gourd vase will turn out beautifully!
Conclusion
Gourd crafting is a delightful and rewarding hobby that can produce stunning and unique decor items. Making vases out of gourds is a fun and creative project that allows you to showcase your skills in designing, carving, and decorating. To create a beautiful gourd vase, you need to choose the right gourd, prepare it properly, follow a design plan, and add finishing touches.
One example of how gourd vases can be used is in wedding ceremonies. A bride who wants to have an eco-friendly and rustic-themed wedding can opt for gourd vases instead of traditional flower arrangements. The vases can be painted or carved with the couple’s initials or wedding date, filled with native flowers or leaves, and placed on tables as centerpieces. The guests will appreciate the natural charm and elegance of the gourds while also appreciating their sustainable qualities.
In conclusion, creating a vase out of a gourd is an enjoyable craft project that requires patience and creativity. By selecting the right gourd for your design idea, preparing it appropriately by cleaning and sanding it down to perfection, choosing an appropriate style/design for it, tracing your design onto the gourd before adding water reservoirs followed by decorating your finished vase; you get to enjoy the beauty of handmade pieces in your home or use them for special occasions like weddings. With these simple steps guided by a specialist in Gourd crafts coupled with personal touches added to each piece created; there are endless possibilities when crafting with gourds.
Image Credits
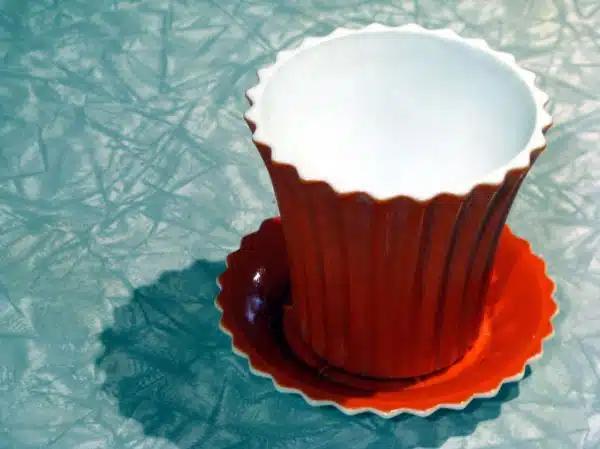
- “Vintage White Vitrock Milk Glass Vase and Saucer with Fired Orange Glaze – Made by Anchor Hocking” by GranniesKitchen (featured)

