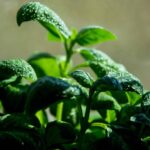
Herbs are a valuable addition to any kitchen and garden, but their freshness and potency can quickly deteriorate if not stored properly. Drying and storing fresh garden herbs is a crucial step in preserving their flavor, aroma, and medicinal properties for future use. As a herbalist and advocate of natural remedies, I have compiled a comprehensive guide on how to dry and store fresh garden herbs effectively.
The first step in drying fresh herbs is harvesting them at the right time. It is advisable to cut the herbs early in the morning when they are most flavorful. After harvesting, the next step is cleaning the herbs thoroughly by rinsing them with cold water. Once clean, dry the herbs gently with paper towels or by air-drying them for some time. This article will provide guidance on various methods of drying garden herbs such as air-drying, oven drying, microwave drying, and dehydrator drying. Additionally, it will outline essential tips for proper storage that will ensure that your dried herbs retain their flavor and potency for an extended period.
Understanding The Importance Of Proper Herb Storage
Fresh garden herbs are an excellent addition to any dish, but their shelf life is limited. Thus, proper herb storage is crucial to maintain the quality and flavor of these plants. The importance of freshness cannot be overstated when it comes to herbs as they lose their potency and aroma over time. Whether you purchase herbs from the store or grow them yourself, storing them correctly can extend their shelf life and prevent waste.
Drying fresh herbs is a common method to preserve their quality for later use. Properly dried herbs can last up to a year in an airtight container, making it easier for you to enjoy your garden’s bounty all year round. However, if not stored correctly, even dried herbs can lose their flavor and color over time. That’s why it’s essential to understand the right methods for drying and storing your fresh garden herbs.
The shelf life of dried herbs is affected by several factors such as temperature, humidity, light exposure, and air circulation. Herbs should be stored in a cool and dry place away from direct sunlight that may cause discoloration or loss of flavor. Additionally, storing them in transparent containers may also lead to light exposure that could impact herb quality over time. Thus, understanding the proper techniques for drying and storing fresh garden herbs can help ensure that you reap the most benefit from your herb harvests while minimizing waste.
Harvesting Herbs At The Right Time
To experience the full flavor and aroma of fresh herbs, it is essential to harvest them at the right time. The best harvesting practices vary depending on the type of herb and its intended use. For instance, leafy herbs like mint, basil, and parsley should be harvested before they start flowering. On the other hand, herbs like chamomile and lavender should be picked just as they begin to bloom.
Preserving herb flavors requires utmost care during harvesting. Cutting the stalks with a sharp knife or scissors is recommended as opposed to pulling them out from the ground. Additionally, it is advisable to harvest herbs in the morning when their essential oils are at their peak concentration. After cutting, make sure that you remove any damaged or diseased leaves before storing your fresh garden herbs.
A crucial aspect of preserving the quality of freshly harvested herbs is cleaning them properly. Cleaning removes any dirt or debris that may affect their flavor or texture. To clean newly picked herbs, gently rinse them under running water but do not soak them as this may cause wilting. Once cleaned, dry them thoroughly using a paper towel or a salad spinner before proceeding to store them appropriately.
Cleaning Freshly Harvested Herbs
Herb cleaning techniques are crucial to ensure that the herbs are free of dirt, insects, and other contaminants before drying. The first step in cleaning freshly harvested herbs is to inspect them carefully for any signs of damage or discoloration. If there are any damaged or discolored leaves, remove them immediately. After that, gently wash the herbs in cold water to remove any dirt or debris.
Preparing herbs for drying involves several steps. First, shake off excess water from the freshly washed herbs and pat them dry with a clean towel. Next, bundle the herbs together by tying their stems with twine or rubber bands. Be careful not to tie them too tightly as this may cause the leaves to bruise and discolor during the drying process. Finally, hang the bundled herbs upside down in a warm, dry place with good air circulation.
The key to successful herb drying is ensuring that they are completely dry before storing them. Air-drying is one of the easiest and most effective methods for drying fresh garden herbs. To air-dry your freshly harvested herbs, simply follow the steps outlined above for preparing your herbs for drying and hang them upside down in a warm, dry place with good air circulation until they are completely dry.
Air-Drying Herbs
- Herbs can be air-dried for storage purposes, but the success of the process depends on the selection of the right variety and quality of herbs, as well as the proper preparation.
- When selecting herbs suitable for air-drying, look for herbs that are mature, undamaged, and free from pests.
- For optimal drying, prepare the herbs by removing any discolored or wilted leaves, and cutting the stems to an appropriate length.
- Air-drying herbs involves exposing them to low temperatures and low humidity for a few days, or up to several weeks depending on the herb and the desired outcome.
- Herbs can be air-dried by hanging them in bunches in a warm, dry, and well-ventilated area, or by spreading them out on a wire or mesh screen in a single layer.
- To store air-dried herbs, keep them in an airtight container in a cool, dark place to preserve their flavor and aroma.
Choosing Herbs
Herbs are an excellent addition to any garden, and they can be used in a variety of culinary applications. When it comes to air-drying herbs, choosing the right plants is essential. It is crucial to select herbs that have been grown under optimal growing conditions for the best results.
The first thing to consider when selecting herbs for air-drying is the growing conditions. Herbs that have been grown in poor soil or have not received adequate water will not produce flavorful leaves. Therefore, it’s recommended to choose herbs that have been grown in well-draining soil and receive plenty of sunlight. Some popular herbs that meet these criteria include basil, thyme, oregano, and rosemary.
Another crucial factor to consider when choosing herbs for air-drying is their culinary uses. Different types of herbs are used in various dishes, so it’s essential to select the right ones for your needs. For example, basil is a popular herb used in Italian cuisine and pairs well with tomatoes and cheese. On the other hand, rosemary is commonly used in meat dishes such as roasted chicken or lamb. By understanding each herb’s unique flavor profile and culinary application, you can select the best ones for your cooking needs.
In conclusion, selecting the right herbs when air-drying them plays an important role in producing flavorful dried leaves for future use. By considering growing conditions and culinary uses, you can ensure that you’re using high-quality herbs perfect for your specific needs. So be sure to pay attention when choosing which plants from your garden to dry!
Preparing Herbs
Herb preservation is an essential aspect of herbalism. Drying herbs is one of the most common and effective methods for preserving them. Proper preparation of herbs before air-drying can significantly affect the final product’s quality, aroma, and flavor. Therefore, it is crucial to learn how to prepare herbs correctly before drying them.
The first step in preparing herbs for air-drying is to harvest them at the right time. Herbs should be harvested when they are at their peak, just before flowering. This ensures that the leaves contain the highest concentration of essential oils and nutrients. When harvesting, choose only healthy-looking leaves and discard any damaged or diseased ones.
After harvesting, gently wash the herbs with cool water and pat them dry with a clean cloth or paper towel. It’s crucial to remove excess moisture from the plants’ surface to prevent mold growth during the drying process. Once dry, tie a small bunch of herbs together using twine or rubber bands and hang them upside down in a warm, dry place with good ventilation.
In conclusion, proper preparation of herbs before air-drying can make a significant difference in their quality and flavor. Harvesting at the right time and washing thoroughly are critical steps in preparing herbs for drying techniques like air-drying. By following these simple guidelines, you can produce high-quality dried herbs that will add flavor and aroma to your cooking for months to come!
Air-Drying Herbs
Air-drying herbs is a common method of preserving herbs that has been used for centuries. It is an easy and effective way to preserve the flavor, aroma, and nutrients of fresh herbs. The benefits of air drying herbs are numerous, including the ability to preserve them without using any chemicals or preservatives. Additionally, it is an inexpensive method that requires minimal equipment and can be done at home.
To ensure successful air drying of herbs, there are several tips to follow. Firstly, it is important to harvest the herbs at the right time when they are at their peak. This ensures that the leaves contain the highest concentration of essential oils and nutrients. When harvesting, it is crucial to choose only healthy-looking leaves and discard any damaged or diseased ones.
After harvesting, gently wash the herbs with cool water and pat them dry with a clean cloth or paper towel. It’s crucial to remove excess moisture from the plants’ surface to prevent mold growth during the drying process. Once dry, tie a small bunch of herbs together using twine or rubber bands and hang them upside down in a warm, dry place with good ventilation. By following these simple guidelines, you can produce high-quality dried herbs that will add flavor and aroma to your cooking for months to come!
Oven Drying Herbs
With the sun beating down on your garden, it’s easy to imagine all the herbs soaking up those rays and growing stronger by the day. But what happens when you have more herbs than you can use? Fortunately, there are several herb preservation techniques that can help you keep your favorite flavors on hand all year round. One of these techniques is oven drying.
Oven drying is a quick and easy way to dry herbs without sacrificing their flavor or aroma. Simply spread your fresh herbs out on a baking sheet and place them in an oven set to low heat (around 150 degrees). Leave them there for a few hours until they are completely dry and brittle. Once they’re done, remove them from the oven and let them cool before storing in an airtight container.
Dried herbs are incredibly versatile, especially when it comes to incorporating them into recipes. Whether you’re adding oregano to your spaghetti sauce or rosemary to your roasted potatoes, dried herbs can take any dish from bland to flavorful with just a pinch. So if you find yourself with an abundance of fresh garden herbs, don’t let them go to waste – try oven drying instead!
Moving on from oven drying, another effective herb preservation technique is microwave drying. By using this method, you can quickly dry your herbs while still retaining their bright colors and flavors. Let’s take a closer look at how this process works in the following section.
Microwave Drying Herbs
- Preparing herbs for drying is an important step to ensure that the herbs are preserved properly.
- Herbs should be washed and patted dry before they are placed in the microwave to dry.
- Microwave drying of herbs should be done at a low power setting and in short intervals to ensure the herbs are not overcooked.
- The herbs should be checked frequently and turned to ensure all sides are evenly dried.
- Once dried, herbs should be stored in airtight containers to ensure they stay fresh and retain their flavor.
- Dried herbs should be stored in a cool and dry place and should be consumed within a year of drying for optimal taste and quality.
Preparing Herbs For Drying
To prepare herbs for drying in the microwave, it is essential to start by selecting the freshest possible herbs. Optimal temperature and drying time are critical factors that determine the quality of the dried herbs. The ideal temperature for drying herbs in a microwave is between 90°F to 110°F. It is best to avoid using high temperatures that may cause the herbs to lose their flavor and aroma.
The next step is to wash and dry the herbs thoroughly before arranging them on a microwave-safe plate or tray. Ensure that there is enough space between each herb to allow for proper airflow. The drying time varies depending on the type of herb, but it typically takes less than five minutes per batch. It is crucial to monitor the drying process closely and check on the herbs every minute or so.
Once the herbs are fully dry, it is important to store them correctly to retain their freshness and potency. Store dried herbs in an airtight container away from direct sunlight, heat, and moisture. Label each jar with the name of the herb and date of drying for easy identification. When it comes time to use your freshly dried garden herbs, simply crumble them into your favorite recipes for added flavor and health benefits.
Drying Herbs In The Microwave
Drying herbs is a common practice for preserving their flavor and medicinal properties. One of the easiest and most convenient ways to dry herbs is in the microwave. Microwave drying herbs is a quick and efficient method that requires minimal effort while retaining the flavor and aroma of fresh herbs.
Microwave safety should be a top priority when it comes to drying herbs in the microwave. It is important to use microwave-safe plates or trays and avoid using any metals or aluminum foil that can cause sparks or fire hazards. Moreover, it is crucial to monitor the drying process closely to prevent overheating and burning of the herbs.
Preserving herb flavor is essential when drying herbs in the microwave. Using high temperatures can cause the loss of essential oils that contribute to their flavor and aroma. Therefore, it is recommended to dry herbs at a low temperature between 90°F to 110°F for optimal results. By following these simple tips, you can successfully dry your garden herbs in the microwave and enjoy their health benefits all year round without sacrificing their delicious flavors.
Storing Dried Herbs
After successfully drying your herbs in the microwave, it’s important to store them properly to maintain their quality and flavor. Herb preservation methods can vary depending on the type of herb and its intended use. Some herbs may need to be stored whole while others can be crushed or ground for easier use in cooking or as a supplement.
When it comes to herb storage containers, there are several options available. Glass jars with tight-fitting lids are a popular choice as they keep out moisture and air, which can cause herbs to degrade quickly. Plastic bags with zip-lock closures can also work well for dried herbs but should be kept in a cool, dry place away from direct sunlight.
It’s important to label your herb containers with the name of the herb and date of drying so you know when they were harvested and how long they’ve been stored. Properly stored dried herbs can last up to one year, but it’s best to use them within six months for optimal flavor and potency. By following these tips for storing dried herbs, you can enjoy the benefits of your garden harvest all year round.
Dehydrator Drying Herbs
Microwave drying is an effective way of preserving your garden herbs. However, if you want a more efficient and reliable method, consider using a dehydrator. Dehydrating herbs using a dehydrator is an excellent way of ensuring that they retain their flavor and nutritional content for long periods.
Dehydrators are easy to use and require minimal maintenance. Nevertheless, it’s essential to ensure that the machine is clean before use. Check for any broken or damaged parts and make sure that they’re replaced before starting the dehydrating process. Additionally, inspect the temperature settings to ensure they’re within the recommended range for drying herbs.
Dehydrating fruits is another popular use of a dehydrator. You can dry fruits like apples, bananas, strawberries, and pineapples for snacks or as ingredients in recipes such as cakes and smoothies. Comparing drying methods can help you choose the most suitable one depending on your preferences and circumstances. For instance, microwave drying may be fast but yields small batches while sun-drying takes longer but preserves the herbs’ color and aroma better.
Comparing Drying Methods
Comparing Drying Methods:
When it comes to drying herbs, there are several techniques to choose from. Each method has its own benefits and drawbacks, so it’s important to evaluate your herb quality and personal preferences before deciding which technique to use. Here are four drying methods that you can compare:
Air-drying: This method is the most traditional way of drying herbs and is often considered the easiest and cheapest. To air-dry your herbs, simply tie them in bundles and hang them upside down in a well-ventilated area. The downside of this technique is that it can take several weeks for your herbs to dry completely, which may result in a loss of flavor.
Oven-drying: If you’re short on time or live in an area with high humidity levels, oven-drying might be a good option for you. To oven-dry your herbs, place them on a baking sheet and set your oven to the lowest temperature setting possible (around 140°F). However, be careful not to overheat your herbs as this can cause them to lose their potency.
Dehydrator: Using a dehydrator is another popular way of drying herbs as it’s quick and efficient. Simply spread your herbs out on the trays of your dehydrator and set it to the appropriate temperature setting (usually around 95°F). The downside of this method is that dehydrators can be expensive, so it may not be worth investing in one if you only plan on drying herbs occasionally.
Microwave: Finally, you can also dry your herbs using a microwave if you’re in a hurry or only have small amounts of fresh herbs available. Place your herbs between two paper towels and microwave them for about 30 seconds at a time until they’re dry. However, keep in mind that this method may result in uneven drying or scorching if not done carefully.
Evaluating herb quality and personal preferences are key when deciding which drying method to use. Consider the time, effort, and cost of each technique, as well as the desired flavor and potency of your herbs. By comparing these four techniques, you can choose the best method for your herbs and enjoy them all year round.
Choosing The Best Method For Your Herbs
After comparing various drying methods, it is time to choose the best one for your herbs. Did you know that herb preservation has been practiced by humans for thousands of years? In ancient times, herbs were used not only for medicinal purposes but also as offerings to gods and goddesses. Today, we still value herbs for their healing properties and culinary uses.
To help you decide which drying technique to use, take a look at the table below. It compares four common methods based on factors such as cost, time required, and flavor retention. Keep in mind that some herbs may be more suitable for certain techniques than others. For example, delicate leaves like basil may benefit from air-drying whereas woody stems like rosemary may require a dehydrator.
| Drying Technique | Cost | Time Required | Flavor Retention |
|---|---|---|---|
| Air-Drying | Low | 1-2 weeks | Good |
| Oven-Drying | Medium | 3-4 hours | Fair |
| Dehydrator-Drying | High | 8-12 hours | Excellent |
| Microwave-Drying | Low-Medium (requires special equipment) | Minutes to hours depending on quantity | Poor |
Once your herbs are dried, it is important to store them properly in airtight containers away from light and moisture. This will ensure maximum flavor retention and prevent mold growth. Glass jars with tight lids or vacuum-sealed bags are good options. Label each container with the herb name and date of drying so you can keep track of freshness.
By considering the pros and cons of each drying method and taking care to store your herbs correctly, you can enjoy the flavors and health benefits of garden-fresh herbs all year round. Next up, we will delve into the art of storing dried herbs in airtight containers without compromising their quality.
Storing Dried Herbs In Airtight Containers
When it comes to storing dried herbs, there are a few key things to keep in mind. First and foremost, you want to make sure that your herbs are completely dry before storing them. Any residual moisture can lead to mold or other forms of spoilage. Once you’ve confirmed that your herbs are fully dried, you have a few options for storage containers. Two popular choices are vacuum-sealed bags and glass jars.
Vacuum sealing is a great option if you want to ensure that your herbs stay fresh for as long as possible. This method removes all air from the bag, which can help prevent oxidation and other forms of degradation. However, it’s important to note that vacuum-sealing can be quite expensive and may not be necessary for everyone. If you do choose this method, be sure to label the bags with the name of the herb and the date they were dried.
Glass jars are another popular choice for storing dried herbs. They’re affordable, widely available, and come in a variety of sizes. When using glass jars, it’s important to make sure that they’re completely clean and dry before adding your herbs. You don’t want any residual moisture or bacteria sneaking into the jar! Additionally, be sure to store your jars in a cool, dark place away from direct sunlight. This will help preserve the flavor and potency of your herbs over time.
Now that you know how to store your dried herbs in either vacuum-sealed bags or glass jars, it’s time to think about labeling them properly. This step may seem small, but it can make a big difference when it comes time to use your herbs later on. Simply write the name of the herb on a label (or directly on the container) along with the date it was dried. That way, you’ll always know what you have on hand and how fresh it is – no more guessing!
Labeling Your Dried Herbs
Herb labeling is an essential aspect of drying and storing fresh garden herbs. Proper identification of each herb you have dried will allow you to use them efficiently when preparing meals. Herb labeling should be done immediately after the herbs are dried, and before they are stored away. It is important to label your herbs correctly so that you can easily distinguish between different types of herbs, especially if you have several varieties growing in your garden.
When labeling your dried herbs, make sure to include the name of the herb, the date it was harvested and dried, and any other relevant information such as its origin or specific variety. Choose a permanent marker or a label maker that will not fade over time. If using paper labels, make sure they are moisture-resistant to prevent them from becoming damaged or illegible.
Proper labeling of your dried herbs will help ensure that you use them at their peak freshness and potency. This way, you can enjoy their unique flavor and aroma for an extended period. In addition, accurate herb identification is essential for those who may be allergic or sensitive to certain plants. With proper herb labeling, you can confidently prepare meals without compromising anyone’s health or wellbeing. Now that we have covered how to label your dried herbs let’s discuss how to store them in the freezer.
Storing Herbs In The Freezer
- Freezing herbs is a great way to preserve fresh garden herbs for later use.
- Preparation of herbs prior to freezing is important to ensure the preservation of their flavor and aroma.
- Herbs should be washed and dried before freezing to reduce the amount of moisture and prevent the growth of bacteria.
- The most commonly used methods for freezing herbs are freezing in an airtight container or packing herbs in ice cube trays with melted butter or oil.
Freezing Herbs
When it comes to herbs preservation, freezing is one of the best methods. Freezing herbs is a great way to extend their shelf life and preserve their flavor and aroma. However, not all herbs are suited for freezing, so it is important to know which ones freeze well and which ones do not.
The best freezing practices for herbs include washing them thoroughly and removing any excess water before placing them in an airtight container or freezer bag. It is also recommended to label the container with the name of the herb and the date of freezing. To ensure maximum flavor retention, it is ideal to freeze herbs when they are at their freshest.
Some of the herbs that freeze well include basil, chives, cilantro, dill, mint, parsley, rosemary, sage, tarragon, and thyme. These can be frozen either whole or chopped. On the other hand, delicate herbs such as basil and cilantro tend to lose their flavor when frozen for long periods of time. Therefore, they are better preserved by making pesto or herb-infused oils instead of freezing them directly. With proper storage in the freezer using these best practices for freezing herbs mentioned above will ensure your herbs retain their quality for a long time.
Preparing Herbs For Freezing
Herb preservation techniques come in handy to make sure that your herbs are fresh and flavorful for a long time. One of the best methods of herb preservation is freezing, which allows for long term storage without compromising the quality of the herbs. However, it is essential to prepare your herbs adequately before freezing them.
Preparing herbs for freezing involves cleaning them thoroughly and drying them well using a paper towel or a clean cloth. This process ensures that there is no excess moisture in the herbs, which can cause freezer burn or mold build-up. Once dried, the herbs can be frozen either whole or chopped depending on personal preference.
When packing your herbs for freezing, it is crucial to use an airtight container or freezer bag to prevent moisture and air from getting in. Labeling each container with the name of the herb and the date of freezing helps you keep track of their shelf life. Properly prepared and stored herbs can last up to six months in the freezer, giving you access to fresh, flavorful herbs all year round.
Using Dried Herbs In Cooking
As the saying goes, “dried herbs are the spice of life”. Using dried herbs for seasoning in cooking is a great way to add flavor to your dishes. Easy to store and use, dried herbs can be kept for months and still retain their flavor and aroma. Here are four reasons why you should incorporate dried herbs into your cooking:
Dried herbs are more concentrated than fresh ones, which means that they provide a more intense flavor to your dishes.
Dried herbs have a longer shelf life compared to fresh ones, which makes them ideal for long-term storage.
Dried herbs are easy to use – just sprinkle them onto your dish or add them to soups and stews.
Dried herbs can also be used in homemade skincare products such as scrubs and masks, as they have anti-inflammatory properties that can help soothe skin irritations.
When using dried herbs in cooking, it’s important to remember that they’re more potent than fresh ones. This means that you should use less dried herb than you would fresh herb when following a recipe. You can also experiment by mixing different types of dried herbs together to create unique blends of flavors.
Incorporating dried herbs into your cooking is not only practical but also beneficial for your health. Their anti-inflammatory properties make them an excellent addition to homemade skincare products as well. In the next section, we’ll explore how you can make herbal infusions and teas with dried herbs for even more health benefits.
Making Herbal Infusions And Teas
Herbal infusions are a great way to enjoy the benefits of herbs in a more concentrated form. Creating tea blends can be a fun and creative way to make the most of the herbs you have on hand. Brewing herbal tea requires paying attention to the temperature, time and ratio of herbs to water in order to extract the optimal amount of flavor and benefits. Once brewed, storing herbal tea in an airtight container and away from direct sunlight will help to maintain its freshness for longer.
Making Herbal Infusions
Herbal tea blends are a wonderful way to enjoy the medicinal properties of herbs. Making herbal infusions is an easy process that involves steeping herbs in hot water for several minutes. The resulting tea can be consumed hot or cold and can be sweetened with honey or other natural sweeteners.
When making herbal infusions, it’s important to use high-quality herbs that have been properly dried and stored. Freshly picked herbs should be washed and then dried thoroughly before being stored in an airtight container. To make the infusion, measure out the desired amount of herbs and place them in a tea strainer or muslin bag. Pour boiling water over the herbs and let steep for 5-10 minutes before removing the strainer or bag.
There are many different combinations of herbs that can be used to create delicious and beneficial herbal tea blends. Some popular options include chamomile and lavender for relaxation, peppermint and ginger for digestion, and nettle and dandelion for detoxification. With a little experimentation, you can find the perfect blend of herbs to suit your taste preferences and health needs.
Teas Blending
Herbal infusions and teas have been used for centuries as a natural remedy for various health issues. The process of making herbal infusions is simple and easy, and it involves steeping herbs in hot water for several minutes. However, creating unique and flavorful herbal tea blends requires a bit more knowledge and skill.
Tea blending techniques involve combining different herbs to create a unique flavor profile that is both delicious and beneficial to one’s health. Herbal tea recipes can be created by blending various herbs with different properties such as anti-inflammatory, digestive, or immune-boosting properties. Careful consideration should be given to the taste and aroma of each herb being used when creating a blend that is both flavorful and therapeutic.
One of the best ways to create your own herbal tea blends is by experimenting with different combinations of herbs. By starting with small batches, you can test out different ratios of herbs until you find the perfect blend. Some popular options include combining chamomile with lemongrass for relaxation or adding rose hips to a blend for an extra boost of vitamin C. Tea blending allows you to create personalized herbal remedies that not only taste great but also provide therapeutic benefits tailored to your specific needs.
Creating Herbal Remedies With Dried Herbs
Herbal remedies have been used for centuries as a natural alternative to conventional medicine. Dried herbs are easy to store and can be used in a variety of ways to create powerful remedies that promote health and wellness. Creating herbal remedies with dried herbs is an excellent way to take advantage of the healing properties of plants.
One way to use dried herbs is by creating herbal sachets. These sachets are small bags filled with a mixture of dried herbs, which can be placed under pillows or hung in closets to provide a pleasant scent while also promoting relaxation and reducing stress. Some popular herbs for sachets include lavender, chamomile, and rose petals.
Another way to use dried herbs is by making homemade tinctures. Tinctures are concentrated liquid extracts made by soaking herbs in alcohol or vinegar for several weeks. They can be taken orally or applied topically to treat a variety of ailments such as digestive issues, anxiety, and pain relief. Popular herbs for tinctures include echinacea, ginger, and valerian root.
Incorporating herbal remedies into your daily routine can provide many benefits for overall health and well-being. By using dried herbs to create sachets or tinctures, you can easily incorporate the healing properties of plants into your life. Experimenting with different combinations of herbs can lead to discovering new remedies that work best for you and your loved ones without harmful side effects often associated with conventional medicine.
Conclusion
Proper herb storage is crucial in preserving their flavor, aroma, and medicinal properties. Harvesting herbs at the right time, cleaning them thoroughly, and drying them properly are important steps in ensuring a successful herb storage process. Air-drying or oven drying herbs are common methods of drying herbs, while storing them in the freezer can extend their shelf life.
Dried herbs can be used in cooking to enhance the taste of various dishes. They can also be brewed as herbal infusions or teas for therapeutic purposes. Herbal remedies such as tinctures and salves can also be made using dried herbs. However, it is important to note that not all herbs are suitable for consumption or medicinal use.
In conclusion, proper herb storage is essential in maintaining their quality and potency. As herbalists or lovers of herbalism, we must appreciate the value of fresh garden herbs and take pride in preserving their natural benefits through proper storage techniques. By doing so, we ensure that our future generations have access to these natural wonders that have been used for centuries for both culinary and medicinal purposes alike.
Image Credits
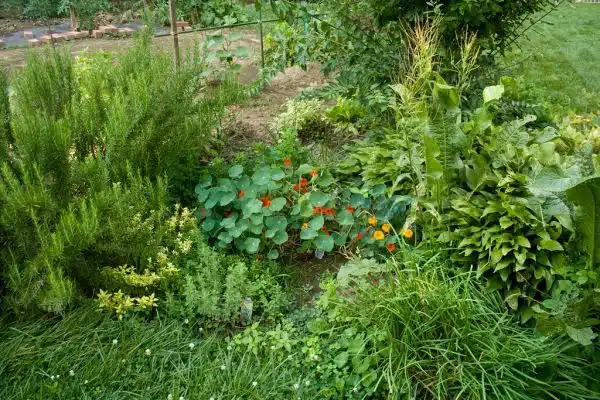
- “secret summer herb garden” by woodleywonderworks (featured)

