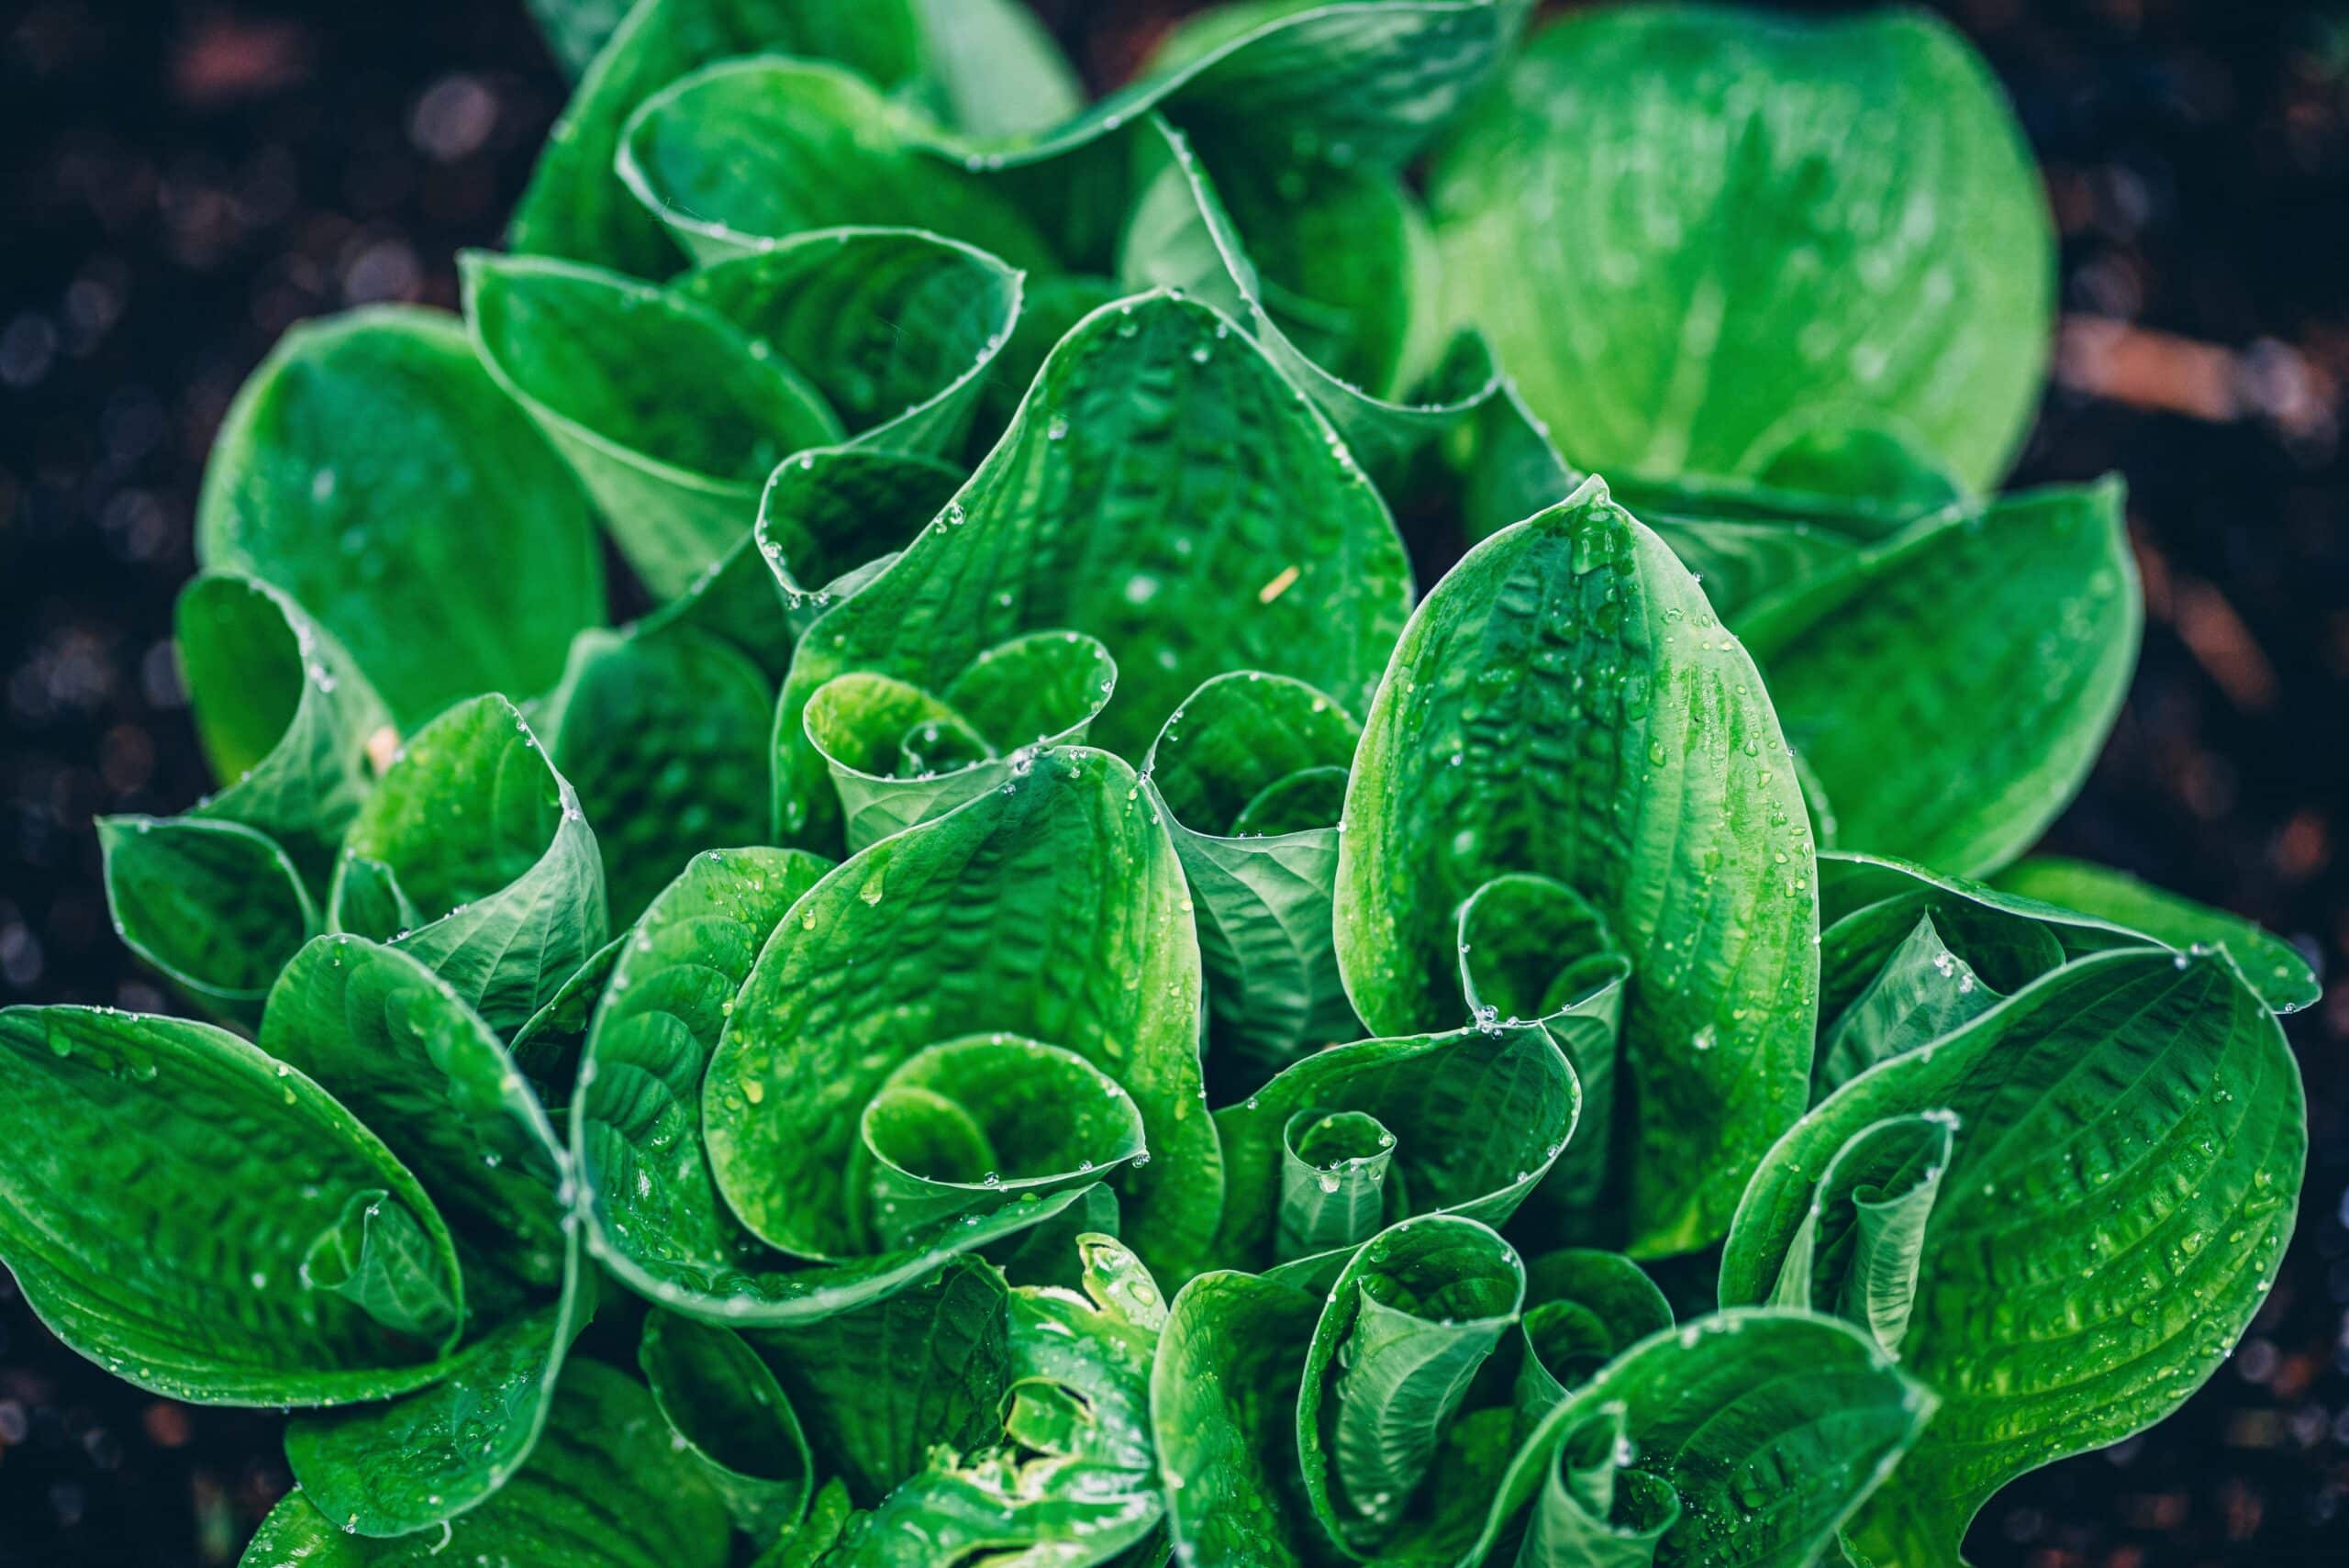
Imagine a garden full of lush, vibrant plants that draw in the eye with their beauty and charm. That picture is now a reality with hostas! Hostas have become one of the most popular garden plants, and for good reason. These stunning perennials offer an array of colors and shapes that are simply breathtaking! From bright greens to rich blues, these plants bring a touch of elegance to any outdoor space. If you’re looking for the ultimate garden showstopper, read on to learn how to grow the most stunning hostas.
Hostas are easy-to-grow perennials that come in a multitude of shapes and sizes. They require very little maintenance, making them perfect for beginner gardeners or those short on time. With proper care and attention, hostas can thrive in any type of soil or climate and will last for years to come. Whether you want to create an eye-catching border around your house or just fill in some empty spaces in your garden, hostas are the perfect choice!
If you’re ready to get started growing hostas, there are some important steps you need to take. From choosing the right variety to preparing the soil and planting correctly, we’ll guide you through it all so you can have beautiful blooms all season long! So what are you waiting for? It’s time to start growing the most stunning hostas today!
Choose A Sunny Or Shady Spot
When it comes to growing hostas, the first step is to choose a spot that’s sunny or shady. The amount of light exposure will affect how well your hostas grow and bloom. If you have an area that gets some sun in the morning but shade in the afternoon, that would be ideal. Alternatively, if your garden is mostly shaded, that’s okay too; just try to find a spot with the most filtered light possible.
It’s also important to consider soil conditions when selecting where to plant your hostas. Make sure you choose an area with plenty of organic matter and good drainage. Adding compost or other organic matter to the soil prior to planting will help ensure healthy growth for your hostas. Plus, adding mulch around plants can help retain moisture and deter weeds from growing in the same space.
After choosing the perfect spot for your hostas, next up is selecting a size that’s right for you. There are many varieties of hosta plants available, so make sure you pick one that fits both your garden space and desired aesthetic. Once you’ve chosen the perfect size and variety, it’s time to get planting!
Select The Right Plant Size
Choosing the right size of hosta plants is a crucial step in growing stunning specimens. By doing so, you can ensure that your garden is filled with beautiful, lush foliage for years to come. To accomplish this, one must understand the difference between small and large hostas.
Ascertaining the appropriate size of a hosta plant requires knowledge of its growth habits. For example, small hostas typically stay between six and twelve inches tall and wide; whereas large varieties can reach up to three feet in height and width. Additionally, the smaller plants tend to have more delicate leaves while larger ones are more substantial and require more maintenance.
Therefore, when selecting a hosta plant for your garden, it’s important to consider how much space you have available as well as how much maintenance you’re willing to undertake. If you’re looking for something low-maintenance but still visually pleasing, then a smaller variety might be best; however if you want something that will provide an eye-catching display in your garden then opt for a larger variety. Ultimately, choosing the right size will guarantee that your garden looks stunning all season long.
Armed with this knowledge about plant size selection, you’re now ready to prepare your soil for planting these lovely plants.
Prepare Your Soil
Did you know that the hosta plant is one of the top ten most popular plants in the United States? With their stunning foliage and ease of care, it’s no surprise that they’re so adored by gardeners. If you want to grow the most beautiful hostas, one important step is to prepare your soil before planting.
Creating an optimal environment for your hosta plants requires amending the soil with organic matter like compost or aged manure. This will help provide the right combination of air and water retention, as well as essential nutrients for healthy growth. You can also add some slow-release fertilizer for added nutrition when planting.
To ensure successful growth and prevent disease, be sure to check your soil’s pH level. Hostas prefer a slightly acidic soil with a pH of 5.5 to 6.5; if your soil is too alkaline, try adding sulfur or other acidifying amendments according to package directions. Once you’ve successfully prepped your soil and set up a hospitable environment, you’re ready to start planting your hostas in the ground!
Planting Hostas In The Ground
Planting hostas in the ground is like painting a picture: done right, it can bring something beautiful to life. It’s not as hard as you might think; with a few simple steps, you can create a stunning display of hostas that will make your garden the envy of all your neighbors.
Start by choosing a spot in your yard that gets at least four hours of sun each day and dig holes that are twice as wide and deep as the root ball. Then, loosen the roots and set the plants into the ground so they’re slightly higher than the soil line. Finally, water them in deeply and give them an additional dose of mulch to help keep their roots moist and sheltered from extreme temperatures.
By taking these steps, you’ll be setting up your hostas for success and providing them with ideal growing conditions. With just a bit of effort on your part, you’ll soon see gorgeous foliage emerging from the soil and filling out your garden bed.
Planting Hostas In Containers
Planting hostas in containers is an ideal option for gardeners who don’t have the space to plant them directly in the ground. Containers provide a great way to cultivate and display these stunning plants, while still allowing you to reap their many benefits. To get started, you’ll need some basic materials: a container of your choice, potting soil, compost, and of course – hostas!
The first step is to prepare your container by lining it with landscape fabric or newspaper before adding potting soil. Next, add one part compost to two parts soil before planting your hosta rhizomes. Make sure they’re planted at least six inches apart and that the rhizomes are covered with soil. Once planted, water them well and then place the container in a sunny spot where it can receive partial shade.
It’s important to keep in mind that containers dry out faster than ground-planted hostas so make sure you’re monitoring moisture levels regularly. Without enough water, your hostas will become weak and start to die off. Fortunately, there are several ways you can keep them hydrated without over-watering them such as using soaker hoses or installing drip irrigation systems. With the proper care and support, you’ll be able to grow beautiful hosta plants in no time! As we move on to the next section on watering hostas, remember that they need plenty of water but not too much!
Watering Hostas
Watering hostas is like giving them a hug – it’s essential for their health and growth. To ensure your hostas get the hydration they need, there are some simple steps to follow.
First and foremost, never let the soil dry out completely between waterings. It should remain moist at all times for best results. When you do water, make sure to give your hostas a thorough soaking so that the water reaches down deep into the roots. A drip irrigation system or soaker hose can be very beneficial for this purpose.
Next, keep an eye on weather conditions in your area. If it’s an especially hot summer, your hostas may require more frequent watering than usual. Additionally, if you live in a humid climate, you may need to adjust your watering schedule accordingly since humidity increases evaporation from the soil.
With just a bit of care and attention to detail, you can keep your hostas healthy and growing strong all season long. Ready to take things up a notch? Then let’s move on to fertilizing!
Fertilizing Hostas
Fertilizing hostas is like giving them a much-needed vitamin boost. It’s akin to providing them with a refreshing drink of nutrient-rich tonic that helps the plants flourish and reach their full potential. It’s an essential part of gardening maintenance, but it doesn’t have to be difficult; just remember to fertilize the hostas twice during their growing season.
When fertilizing, use a balanced 10-10-10 fertilizer or an organic one that will help create strong, healthy plants. Sprinkle the fertilizer around each plant and lightly work it into the soil using your hands or a small shovel. Water it after applying to ensure the nutrients are absorbed by the hosta roots.
It’s important to avoid over-fertilizing as this can cause too much growth, which can weaken the plant and make it vulnerable to disease. Follow directions on the package carefully and apply fertilizer in moderation for best results; it’s not necessary to treat every single hosta every time you fertilize. With regular care and attention, your hostas will reward you with beautiful foliage all season long!
Mulching Hostas
Adding mulch to your hosta garden could be the key to growing the most stunning plants. It’s an often overlooked part of gardening, but there’s theory that it can help keep weeds at bay and retain moisture for optimal growth. To find out if this theory holds true, let’s explore how mulching can benefit hostas.
Mulch helps hostas by creating a layer of protection around their sensitive root systems. The barrier of mulch can protect them from changes in temperature and humidity, making it easier for the plant to flourish in any environment. Additionally, mulch helps reduce the spread of weeds, which compete with your hostas for nutrients and water.
Finally, adding a thick layer of mulch around your hosta plants will help retain moisture in the soil. This is especially beneficial during dry spells or extreme temperatures when you may not be able to water as often as necessary. By keeping the soil consistently moist, you will give your hostas the best chance at achieving maximum growth potential.
Mulching is an important step to take when looking to grow stunning hostas in your garden. With its many benefits and ease of use, it is worth considering when starting a new garden or revamping an existing one.
Controlling Weeds
Studies show that weeds are responsible for up to 50% of crop losses in vegetable gardens. Controlling weeds is a crucial part of growing hostas, so it’s important to understand what methods work best. Weed control can be achieved through both manual and chemical means.
Manual weed control involves removing the weeds from the area by hand or with garden tools such as hoes and rakes. This method is labor-intensive but effective, particularly when used in combination with mulching. Mulching reduces weed growth by blocking sunlight from reaching the soil surface, which inhibits germination and growth of most weeds.
Chemical control of weeds is another option, although it should be used sparingly due to potential environmental risks. Herbicides may be used to kill existing weeds, while pre-emergent herbicides can be applied before germination occurs in order to prevent new weed growth. There are many different types of herbicides available, so it’s best to consult a horticultural professional before using them on your hostas.
By implementing proper weed control techniques, you can ensure that your hostas have the best opportunity to grow and thrive without competition from invasive species. Taking this step will allow you to enjoy healthy and stunning hosta plants year after year. Moving forward, controlling pests and diseases should be the next step towards cultivating the perfect garden bed for your beloved hostas.
Controlling Pests And Diseases
It is a commonly held belief that controlling pests and diseases is essential for growing the most stunning hostas. While this may be true, it is also important to note that proper care and maintenance throughout the entire process of growing hostas will ensure the best quality results. Taking steps such as avoiding wet leaves, using insecticidal soaps and horticultural oil sprays, rotating mulch annually, and providing adequate space between plants can all help protect your hostas against pests and disease.
Gardeners should also be aware of common pests such as slugs and snails, which may attack the foliage or leave slime trails on the leaves. To prevent damage from these creatures, setting out beer traps or applying slug bait can help reduce their presence in your garden. Additionally, treating any fungal diseases with fungicides or copper-based products can help keep your plants healthy.
Given all this information, incorporating pest control and disease prevention into your gardening plan is a great way to create beautiful hostas that will last for many years to come. By following these tips you will be well on your way to successfully propagating your own hostas.
Propagating Hostas
What’s the best way to ensure your garden is filled with an abundance of the most stunning hostas? It’s easy – just propagate them! Sure, it may sound like a daunting task at first, but trust us, it’s not. We’ll walk you through it.
First things first: get yourself some potting mix, and a container or two. Now that you’ve got your supplies ready to go, it’s time to start propagating those hostas. It might seem like an impossible task at first, but fear not–it’s actually quite simple. All you need to do is take a cutting from your existing plants and place it in the potting mix. With just a little bit of water and sunshine, those cuttings will soon become beautiful new plants.
So that’s it! You’ve now got all the tools you need to create a garden full of majestic hostas. Just remember – patience is key when propagating hostas! So don’t give up if you don’t see results right away – eventually they’ll come out more beautiful than ever before. Now let’s move on to deadheading those hostas for even better growth…
Deadheading Hostas
Deadheading hostas is an important step in keeping your plants healthy and looking their best. It involves removing spent flower stalks, as well as leaves that have become discolored or withered. This practice encourages new growth and can also help the plant to conserve energy. Deadheading will also keep the foliage looking lush, making your garden stand out.
When deadheading, be sure to use sharp pruning shears or snips to cleanly cut away the affected parts of the plant. Doing so helps them heal quickly and reduces the risk of infection from bacteria or fungi. Additionally, you should wear gloves when deadheading since some species of hostas may contain irritants on their stems and leaves.
After deadheading, you’ll be ready to move onto dividing and moving hostas if necessary. Dividing allows you to spread out existing plants and create new ones, while moving them can help keep them healthier by providing a more suitable environment for growth. Both tasks are great ways to produce beautiful results in your garden!
Dividing And Moving Hostas
Division and relocation of hostas is a great way to expand your garden. It’s an easy process that can be done every few years to ensure healthy growth and strong plants. First, dig up the hosta carefully and make sure to get the entire root system. After this, you can divide the plant into smaller sections with each section having its own root system. The divisions should be planted in a hole twice as wide as the root ball and about one inch deeper than it was before.
When replanting, make sure to fill in any gaps between roots and soil with more soil. Water generously after planting to ensure that the divisions have enough moisture to settle in successfully. If you’re relocating hostas instead of splitting them, use a shovel or spade to carefully dig up the plant and place it into its new home with plenty of soil around the root ball.
Transitioning your hosta plants into their new environment is key for success. Soil conditions, light exposure, and temperature changes can all affect how well they take to their new spot. Keep an eye on them for a few weeks to make sure they are settling in properly before giving them full access to your garden’s nutrients.
Foliage Color Changes
Foliage color changes can be likened to a butterfly emerging from its cocoon – it is a metamorphosis into something greater, more beautiful. Hostas come in various hues and shades, but the most stunning of all are those that transition between different colors throughout the seasons. While some may remain green throughout the year, others can take on darker shades of blue or vibrant purple and yellow highlights during certain times of the year.
This color change usually happens when temperatures drop and days become shorter. As winter approaches, many hostas will begin to yellow or bronze and become dormant until springtime when they return to their original hue. Additionally, some hostas may even produce multicolored foliage, with each leaf boasting two distinct colors that look like an abstract painting.
The visual interest created by these foliage color changes adds texture to your garden beds and creates a captivating landscape that will draw attention from passersby. If you want to create stunning displays full of splashes of color all year round, incorporating hostas into your garden is a great way to do so.
Winter Care For Hostas
As the sun sets on autumn, gardeners must prepare their hostas for winter. With the right care, the stunningly beautiful foliage will perk up again in the spring. Like a blanket of protection, winter care for hostas can help them survive even the coldest temperatures.
Winterizing these plants is vital to their survival and requires special attention. Gardeners should mulch around their hostas to provide insulation and apply a layer of leaves or evergreen boughs for extra protection. They should also water them well before the first freeze and remove any dead or diseased foliage that may have accumulated during summer months.
As an added bonus, these steps will also help enhance the beauty of the plant come springtime! So don’t be afraid to give your hostas some TLC this winter—it’s sure to pay off in spades when they bloom again in all their glory.
Frequently Asked Questions
How Far Apart Should I Plant Hostas?
It’s easy to see why hostas are such a popular garden plant – they’re hardy, low-maintenance and come in a range of sizes and colors. To get the most out of your hostas, though, you need to know how far apart to plant them. It can be tricky to gauge spacing when planting multiple hostas in the same bed.
For optimal growth, you should space your hostas at least 18 inches apart from each other. This gives the plants enough room to spread out and grow without competing for resources like sunlight and water. If you want smaller plants with less foliage, then you can reduce the spacing between them even further. However, if you want larger plants with more foliage, then make sure there is at least 24 inches between them.
How wide your hosta beds should be depends on the size and number of hostas that you’re planting. Generally speaking, it’s best to allow roughly 18 inches around each individual plant so that they have plenty of space to develop their roots and reach their full potential. That way, you can ensure your garden has plenty of beautiful blooms come summertime!
How Often Should I Water Hostas?
Watering hostas is an important part of their care. If you want to grow the most stunning hostas, it’s essential to understand how often they should be watered.
Hostas need to be watered regularly in order to thrive. Generally, they need at least one inch of water per week. However, this can vary depending on your climate and the amount of rainfall that your area receives. During dry periods, you may need to water your hostas every other day or even daily if the weather is particularly hot and dry. It’s also important to ensure that the soil around your hostas stays moist but not soggy.
In addition, you should consider using a mulch such as shredded bark or straw around your hostas to help retain moisture in the soil and reduce weeds. This will also help keep your hostas’ roots cool during hot days and protect them from extreme temperatures. With proper watering and mulching, you can keep your hostas looking healthy and vibrant all season long!
How Do I Know When It’s Time To Divide My Hostas?
If you want to enjoy the most stunning hostas in your garden, proper care is essential. But how do you know when it’s time to divide them? It’s a key process that can help you optimize their growth and ensure they reach their full potential.
One of the most important indicators for division is size – if your hostas are getting too large for the space, or if you’re noticing several smaller divisions within a single clump, then it’s likely time to divide them up. You’ll also want to pay attention to overcrowding, as this can affect the health of your hostas and reduce their beauty.
If you don’t divide your hostas regularly, they may experience stunted growth or become more susceptible to disease. To keep them healthy, split them apart every three to five years. Dividing will also give you the opportunity to replant sections in other parts of your garden or share with friends and family! Taking these steps will ensure that your hostas stay lush and vibrant for years to come.
What Kind Of Fertilizer Should I Use For Hostas?
Did you know that hostas are the most popular perennial in America? Their popularity is likely due to their stunning foliage and ease of care. But if you want your hostas to be truly show-stopping, when it comes to fertilizing them, you need to choose the right kind.
The best fertilizer for hostas is a balanced one with an even ratio of nitrogen, phosphorus, and potassium. A 10-10-10 fertilizer works well because it provides all three of these essential nutrients at a steady rate over time. Alternatively, you could use a slow-release fertilizer like 5-10-5 that will slowly feed your hostas for several months.
When applying fertilizer to your hostas, make sure not to overdo it – too much nitrogen can burn the roots and leaves of the plant! It’s important to water them after application as well, so that the nutrients can reach the soil and absorb into the plants’ root systems. Additionally, look out for signs of nutrient deficiency such as yellowing leaves or stunted growth. These may indicate that your plants need more nutrients or that they are receiving too much of something else in their environment.
Hosta care doesn’t have to be complicated – with the right knowledge and supplies, you can get beautiful results! By selecting an appropriate fertilizer and taking care not to overdo it, you’ll be sure to have healthy and vibrant hostas no matter what season it is.
How Do I Prevent Animals From Eating My Hostas?
When gardening, it’s important to know how to protect your hostas from animals who may want to take a bite. It can be frustrating to tend to your garden only for wildlife to come and feed on the fruits of your labor. Fortunately, there are some strategies you can use to help keep animals away from your hostas.
One way to deter animals from eating your hostas is by surrounding them with natural barriers. Stones, wood chips, or even thorny plants like holly are all good choices for this purpose. You could also try using repellents such as coyote urine or predator scents. These smell unpleasant for animals, so they’ll usually stay away from any area with these scents lingering around.
Finally, if you notice that certain animals are targeting your hostas more than others, you can create specific deterrents tailored towards them. For example, if rabbits are the problem, you could install a fence around the plants or place chicken wire under the soil surface. If deer are the culprits, an electric fence or motion-activated sprinkler system might do the trick. Protecting your prized plants doesn’t have to be complicated – just take a few extra steps and you’ll be able to keep all sorts of critters away!
Conclusion
Hostas are an easy to grow perennial that will add beauty and texture to any garden. With the right attention, they can be the most stunning plants in your garden. With a few tips and tricks, you can easily have gorgeous hostas year after year.
When planting hostas, space them out appropriately so they have room to grow without crowding each other. Water them regularly, especially during dry periods, and fertilize with a balanced plant food when needed. If your hostas are getting too large or begin to look overgrown, divide them in the spring or fall. Taking these steps will help you keep your hostas looking lush and healthy all season long!
Finally, protecting your plants from animals is essential if you want them to remain healthy and beautiful for years. There are several methods for doing this such as fencing off beds or using repellents like garlic spray or cayenne pepper on the leaves. With a bit of extra effort, you can make sure that your stunningly beautiful hostas don’t become a tasty snack for hungry critters!

