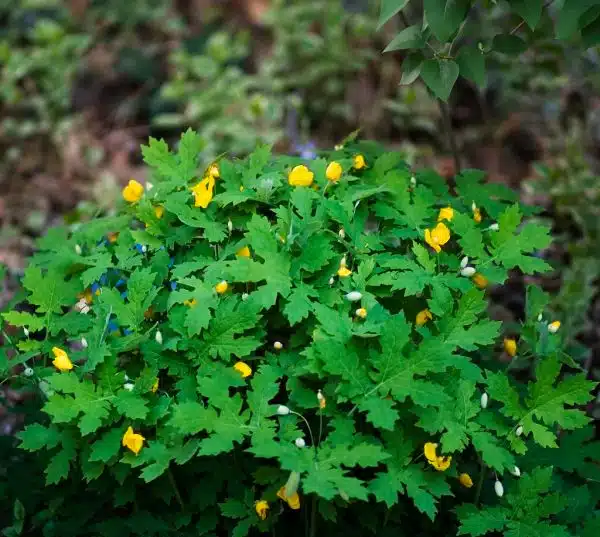
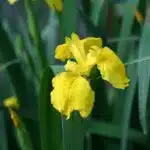
Yellow Wood Poppies, also known as Stylophorum diphyllum, are a beautiful addition to any garden or landscape. These hardy perennials are native to the eastern United States and can be found growing wild in wooded areas, making them an excellent choice for shaded gardens. The bright yellow flowers of the Yellow Wood Poppy are a welcome sight in early spring when they begin to bloom and continue to flower through mid-summer.
When it comes to plant care, the Yellow Wood Poppy is relatively low maintenance. However, there are certain steps that should be taken to ensure that they thrive in your garden. In this article, we will provide you with a comprehensive guide on how to care for and grow these delightful plants. From choosing the perfect location to fertilizing and watering techniques, we will cover everything you need to know so that you can enjoy the beauty of Yellow Wood Poppies in your garden year after year.
An Introduction To Yellow Wood Poppies
Picture a garden adorned with bright yellow flowers that bloom from late spring to early summer, adding a burst of color amidst the greenery. This is what you can achieve by growing yellow wood poppies (Stylophorum diphyllum). These stunning perennials are native to North America and belong to the Poppy family (Papaveraceae). With their unique appearance and easy-to-care-for nature, they are a popular addition to any landscape.
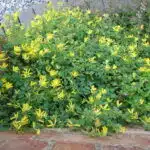
Identification tips for yellow wood poppies include their bright yellow petals, which grow up to two inches wide. The center of each flower has four bright orange stamens surrounded by a single pistil. The leaves of this plant grow in pairs and are typically blue-green in color, with rounded edges and deep lobes. Yellow wood poppies can reach a height of 18-24 inches and spread up to two feet wide, making them perfect for borders or as standalone plants.
Benefits of growing yellow wood poppies are numerous. Apart from their striking beauty, these plants require minimal care and attention, making them ideal for novice gardeners or those with busy schedules. They also attract bees, butterflies, and birds with their nectar-rich flowers. Additionally, yellow wood poppies have medicinal properties and have been used in traditional medicine for centuries due to their analgesic and anti-inflammatory effects.
Understanding the anatomy of yellow wood poppies is essential if you want your plants to thrive. In the next section, we will delve into the parts that make up this beautiful perennial plant species. By learning about its structure, you can gain insight into how it functions and tailor your care accordingly.
Understanding The Anatomy Of Yellow Wood Poppies
- The leaves of yellow wood poppies are a deep green color and are deeply lobed with a jagged edge.
- The flowers of yellow wood poppies are bright yellow and have a unique cup-shaped petal and dark center.
- The roots of yellow wood poppies are shallow and require frequent watering to keep them moist.
- Stems of yellow wood poppies are strong and upright and are often used in cut flower arrangements.
- Pollination of yellow wood poppies is accomplished by bees and other insects.
- Seeds of yellow wood poppies need to be fertilized and watered regularly in order to germinate successfully.
Leaves
As a plant care specialist, it is essential to understand the anatomy of yellow wood poppies. One crucial aspect of this understanding is their leaves. The leaf structure of yellow wood poppies features deeply lobed, palmate leaves that are reminiscent of maple leaves. They have five to seven lobes and grow up to 6 inches long, with a similar width. These leaves sit on long petioles that attach them to the stem.
Yellow wood poppy’s leaf coloration is another interesting feature. The top surface of the leaves is a bright green hue, while the underside has a silvery-white sheen that appears almost metallic in the right light. This unique coloring makes them stand out from other plants in any garden or landscape setting.
Overall, it’s clear that understanding yellow wood poppies’ leaf structure and coloration can help ensure they receive proper care and thrive in any environment. By providing an ideal growing environment and following proper maintenance techniques such as watering and fertilizing, these beautiful flowers can flourish for years to come without issue.
Flowers
Understanding the anatomy of yellow wood poppies is essential for any plant care specialist. Aside from their unique leaf structure, these flowers also boast impressive flower characteristics. Yellow wood poppies have large, showy flowers that bloom in the spring and summer months. Their blossoms are typically a bright, lemon-yellow color and feature four to six petals that surround a central cluster of stamens.
When it comes to growing techniques, yellow wood poppies require a moist but well-draining soil and partial shade to full shade conditions. They thrive in woodland settings and make excellent groundcovers for shaded areas of the garden. These flowers prefer acidic soils with a pH between 5.0 and 6.5 and benefit from regular watering during dry spells.
One of the most interesting flower characteristics of yellow wood poppies is their unusual seed pods. After blooming, the flowers give way to elongated seed pods that resemble small bananas or cucumbers. These seed pods can be harvested and dried for use in floral arrangements or left on the plant to release seeds for future growth. By understanding these unique features of yellow wood poppies’ flowers, plant care specialists can provide optimal growing conditions and ensure they thrive in any environment.
Roots
Understanding the anatomy of yellow wood poppies is crucial for plant care specialists to provide optimal growing conditions. While their unique leaf structure and showy flowers are impressive, the roots of these flowers play an essential role in their overall health and growth. Yellow wood poppy’s root system is shallow, but they spread far from the base of the plant. The roots grow horizontally in a mat-like pattern that helps them absorb nutrients efficiently.
Root growth is dependent on soil health, which is why it’s crucial to provide a well-draining yet moist environment for yellow wood poppies. These flowers prefer acidic soils with a pH between 5.0 and 6.5, which aids in root development and nutrient absorption. Proper soil drainage ensures excess water does not accumulate around the roots, causing rot or disease.
Healthy roots lead to healthy plants, and understanding how to maintain soil health promotes optimum conditions for yellow wood poppy growth. Regular watering during dry spells is beneficial as it ensures sufficient moisture levels in the soil while also preventing overwatering, which can cause root rot. With proper care and attention to their root systems’ needs, yellow wood poppies will thrive and produce beautiful blooms year after year.
Choosing The Right Location For Your Plants
Understanding the anatomy of yellow wood poppies is crucial to ensure proper care and growth. Now that you have a good grasp of their structure, it’s time to choose the right location for your plants. Yellow wood poppies thrive in areas with partial shade to full sun exposure. However, too much direct sunlight may cause the leaves to wilt, so it’s best to provide some shade during the hottest part of the day.
When selecting a spot for your yellow wood poppies, consider soil type and microclimate considerations. These plants prefer well-draining soil that is rich in organic matter. If your soil is heavy or compacted, loosen it up by mixing in compost or sand. Additionally, take note of any microclimates in your garden that may affect plant growth. For example, areas near buildings or large trees may offer more shade and cooler temperatures than open spaces.
Drainage needs are also important when choosing a location for your yellow wood poppies. These plants require consistent moisture but do not tolerate waterlogged soil. To prevent standing water around your plants, make sure the area has adequate drainage or create raised beds if necessary.
As you prepare to plant your yellow wood poppies, keep these factors in mind when choosing a location for them. By considering sun or shade exposure, soil type and microclimate considerations, and drainage needs, you can set yourself up for success in growing healthy and vibrant plants that will bring beauty to your garden space. In the next section, we’ll discuss preparing the soil for planting to ensure optimal conditions for growth.
Preparing The Soil For Planting
- Soil testing is essential for assessing the pH of the soil.
- Fertilizer should be added to the soil in order to provide the yellow wood poppies with adequate nutrients.
- Soil compaction should be avoided as it can limit the growth of the yellow wood poppies.
- The ideal pH for growing yellow wood poppies is between 6.0 and 7.0.
- To remedy soil compaction, aeration or the addition of organic matter is recommended.
- A slow-release fertilizer should be used to ensure steady nutrient supply for the yellow wood poppies.
Testing Soil Ph
Before planting yellow wood poppies, it is essential to test the soil pH. Soil testing methods are critical in determining the suitability of your soil for growing plants. Knowing the pH level of your soil will help you choose the right fertilizers and other amendments that will improve the growth and health of your plants.
Interpreting soil pH results is not rocket science, but it requires a bit of knowledge about what pH levels mean for plant growth. A pH range of 6.0 to 7.5 is ideal for growing most plants, including yellow wood poppies. If your soil’s pH level falls outside this range, you can adjust it by adding lime to increase alkalinity or sulfur to increase acidity.
To get accurate results when testing your soil pH, collect samples from different parts of your garden and mix them thoroughly before sending them to a reputable lab for analysis. Once you receive your results, interpret them carefully and take appropriate measures to adjust the pH level if necessary. By doing so, you’ll create an optimal growing environment that will help yellow wood poppies thrive and bloom beautifully.
Adding Fertilizer
To ensure that yellow wood poppies grow healthy and produce beautiful blooms, it is important to prepare the soil properly. One essential aspect of soil preparation is adding fertilizer. Fertilizers provide plants with the necessary nutrients for growth and development, which is particularly important for yellow wood poppies as they require a nutrient-rich environment.
When choosing a fertilizer, there are two main types to consider: organic and synthetic fertilizers. Organic fertilizers are derived from natural sources such as compost, manure, or fish emulsion. They release nutrients slowly over time and improve soil health by promoting microbial activity. Synthetic fertilizers, on the other hand, are made from chemical compounds and provide plants with a quick boost of nutrients. However, they can also harm beneficial microorganisms in the soil if used excessively.
To determine how often to fertilize your yellow wood poppies, it is crucial to understand their specific needs. These plants prefer a steady supply of nutrients throughout their growing season but do not require excessive amounts of fertilizer. Over-fertilization can cause rapid growth at the expense of flowering or even damage the plant’s roots. As a general rule, it is recommended to apply fertilizer once every four to six weeks during the growing season.
Overall, adding fertilizer is an essential step in preparing the soil for planting yellow wood poppies. It provides them with the necessary nutrients for healthy growth and development while promoting soil health. By choosing appropriate fertilizers and applying them at the right frequency, gardeners can create an optimal growing environment that will help these beautiful flowers thrive.
Loosening Compacted Soil
Another important aspect of preparing the soil for planting yellow wood poppies is loosening compacted soil. Compacted soil can impede root growth, limit nutrient uptake, and reduce water infiltration, which can negatively affect plant health and growth. Soil aeration is a process that helps to loosen compacted soil by creating air pockets that allow roots to breathe and nutrients to flow freely. This is achieved by using tools such as garden forks or aerators to pierce the soil surface and create holes.
In addition to improving soil aeration, loosening compacted soil also helps to improve soil drainage. Poor drainage can lead to waterlogging, which can cause root rot and other fungal diseases in plants. By creating air pockets in the soil, excess water can drain away more easily, reducing the risk of waterlogging and promoting healthy root growth.
It is important to note that while loosening compacted soil is beneficial for most plants, it should be done with care as excessive tilling or digging can damage beneficial microorganisms in the soil. Therefore, it is recommended to only aerate or till the soil when necessary and avoid overworking it. By properly preparing the soil through techniques such as loosening compacted soil and adding fertilizer, gardeners can create an ideal growing environment for yellow wood poppies and other plants.
Planting Your Yellow Wood Poppies
When planting your yellow wood poppies, it is important to choose a location that offers the right conditions for their growth. The ideal spot for these plants is an area that receives partial shade and plenty of moisture. They can also tolerate full sun as long as the soil remains moist. Avoid planting them in areas that receive intense afternoon sunlight or where there is poor drainage.
Soil preparation is essential when it comes to planting yellow wood poppies. These plants prefer well-draining soil that is rich in organic matter. You can amend your garden bed with compost or other organic materials to improve soil fertility and structure. Additionally, make sure the soil pH level ranges from 6.0 to 7.5, which is optimal for the growth of these plants. It’s advisable to test your soil before planting by using a pH tester kit available at most gardening stores.
Once you have chosen the perfect location and prepared the soil, it’s time to plant your yellow wood poppies. Dig a hole in the ground that is twice as wide and deep as the root ball of your plant. Place your plant in this hole and backfill it with soil so that the top of the root ball sits slightly above ground level. Tamp down gently around the base of the plant to remove any air pockets, then water thoroughly to help settle soil around roots.
As you’ve just learned how to properly plant your yellow wood poppies, it’s crucial to know how much water they need after planting. Overwatering can lead to fungal diseases and root rot, while underwatering can cause wilting or even death of your plants. In our next section, we will discuss how often and how much water these plants require for optimal growth and health.
Watering Your Plants Correctly
After planting your yellow wood poppies, it’s important to ensure that they receive adequate water to thrive. In fact, a common reason for these plants failing is due to improper watering techniques. Watering frequency will depend on the climate and season, but as a general rule of thumb, aim to keep the soil consistently moist without over-saturating it.
To achieve optimal soil moisture levels for your yellow wood poppies, consider these tips. First, avoid letting the soil dry out completely between watering sessions. This can lead to stress on the plants and negatively impact their growth and development. Instead, aim to water them regularly and deeply so that the roots have access to ample moisture. Additionally, be mindful of how much water you use at each session – too much can cause root rot and other issues.
Proper watering habits are essential for ensuring your yellow wood poppies stay healthy and vibrant throughout their lifecycle. However, it’s important to remember that this is just one aspect of plant care – fertilizing your plants is also crucial for supporting their growth and development. In the next section, we’ll explore some best practices for fertilizing your yellow wood poppies to help you get the most out of these beautiful flowers.
Fertilizing Your Yellow Wood Poppies
- Yellow wood poppies benefit from regular fertilizing, and there are several types of fertilizer that can be used for optimal growth.
- A balanced slow-release fertilizer or organic fertilizer is recommended for yellow wood poppies, as it provides a steady supply of nutrients to the plant throughout the season.
- Fertilizing should be done at the start of the growing season and every six weeks thereafter, to provide an adequate supply of nutrients.
- The amount of fertilizer applied should be based on the size of the plant and adjusted according to the label directions.
- Fertilizer can be applied by hand-broadcasting, top-dressing, or side-dressing the plant, or by using a liquid fertilizer.
- When fertilizing yellow wood poppies, it is important to keep the fertilizer away from the crown of the plant and to water the plant after application.
Types Of Fertilizer
To ensure the healthy growth of your yellow wood poppies, fertilization is a crucial aspect to consider. Choosing between organic and synthetic fertilizers is an important decision that can impact the health of your plants. Organic fertilizers are derived from natural sources and provide nutrients through slow-release mechanisms, making them a better choice for long-term soil health. Synthetic fertilizers, on the other hand, are chemically manufactured and provide quick-release nutrients but may have negative impacts on soil quality over time.
When it comes to frequency of fertilization, it’s important not to overdo it. Applying too much fertilizer can lead to excessive growth and potentially harm your yellow wood poppies’ roots. A general rule of thumb is to apply fertilizer once in early spring before new growth appears and again in mid-summer if necessary. However, this can vary depending on factors such as soil quality, weather conditions, and plant size. It’s always best to monitor your plants closely and adjust accordingly.
In conclusion, choosing the right type of fertilizer and proper application frequency are key factors in ensuring optimal growth for your yellow wood poppies. Organic fertilizers provide long-term benefits for soil health while synthetic fertilizers offer quick-release nutrients. Be sure not to over-fertilize and monitor your plants closely for any signs of stress or nutrient deficiencies. With proper care and attention, you’ll be able to enjoy a beautiful display of yellow wood poppies year after year!
Timing Of Fertilizing
When it comes to fertilizing your yellow wood poppies, timing is crucial. The best time to fertilize these plants is during the early spring before new growth appears. This will provide the necessary nutrients for healthy growth and development throughout the growing season. Additionally, if necessary, a mid-summer application may be beneficial.
Choosing the best fertilizer for your yellow wood poppies is also important in determining when to fertilize. Organic fertilizers are a great option as they release nutrients slowly over time, promoting long-term soil health. Synthetic fertilizers, on the other hand, offer quick-release nutrients but can have negative impacts on soil quality over time.
It’s important not to over-fertilize your yellow wood poppies and to monitor them closely for any signs of stress or nutrient deficiencies. Adjusting fertilizing frequency based on factors such as soil quality, weather conditions, and plant size is also recommended. With proper care and attention, including timely fertilization with appropriate products, you can ensure optimal growth and stunning displays of yellow wood poppies year after year.
Application Methods
As discussed earlier, fertilizing your yellow wood poppies is essential for their growth and development. But how you apply the fertilizer is just as important as when you do it. Two common methods of applying fertilizers are spray application and soil application.
Spray application involves mixing the fertilizer with water and spraying it directly onto the leaves of the plant. This method is ideal for quick nutrient uptake, especially for plants that have shallow root systems or have been stressed by weather conditions or pests. However, it’s important to avoid over-saturating the leaves with the solution, which may result in burning or damage to the plant.
Soil application, on the other hand, involves adding fertilizer directly to the soil around the base of the plant. This method allows for slow-release nutrients that can benefit plants over a longer period of time. It also prevents nutrient runoff and leaching into nearby water sources. However, it’s crucial to ensure that the fertilizer is evenly distributed in the soil and not concentrated in one spot to prevent root burn or other plant stressors.
Mulching Techniques For Optimal Growth
Mulching is a great way to keep your yellow wood poppies healthy and thriving. Using organic materials like compost, leaves, straw, or grass clippings will help retain moisture in the soil and suppress weed growth. Apply a layer of mulch about 2-3 inches deep around the base of your plants but be sure not to cover the crown or any new shoots.
Companion planting is another technique that can enhance the benefits of mulching. Consider planting herbs like chamomile, lavender, or thyme near your yellow wood poppies. These companion plants can attract beneficial insects that will help pollinate your flowers and control pests naturally.
A few things to keep in mind when mulching:
- Don’t use too much mulch – this can lead to waterlogging and root rot.
- Avoid using synthetic materials as they may contain chemicals harmful to your plants.
- Mulch regularly – adding a fresh layer every season will provide ongoing benefits.
- Keep an eye out for any signs of disease or pest infestations – early detection and treatment are key to maintaining healthy plants.
By implementing these mulching techniques and companion planting strategies, you’ll be well on your way to cultivating a healthy and vibrant yellow wood poppy garden.
Looking ahead, pruning and deadheading your plants will also play an important role in maintaining their health and appearance over time.
Pruning And Deadheading Your Plants
To ensure that your yellow wood poppies thrive in your garden, it is essential to maintain their health through proper care and pruning techniques. Pruning and deadheading are two of the most effective methods for promoting a healthy growing environment for your plants.
Deadheading is the process of removing spent flower heads from the plant. Benefits of deadheading include encouraging the plant to produce more flowers, improving overall appearance, and preventing seed production. This method also prevents self-seeding, which can lead to overcrowding and decreased plant vigor over time.
Pruning is another essential technique that promotes healthier plants. By cutting back overgrown or diseased branches, you can encourage new growth and improve the overall shape of your plant. Pruning also increases air circulation around the plant’s foliage, reducing the risk of fungal diseases. Be sure to use clean, sharp tools when pruning to prevent damage to the plant tissue.
Now that you understand the benefits of deadheading and pruning for healthier plants let’s move on to dealing with common pests and diseases in our next section. By being proactive in caring for our yellow wood poppies, we can ensure they thrive in our gardens for years to come.
Dealing With Common Pests And Diseases
Preventative measures are essential when it comes to dealing with common pests and diseases in yellow wood poppies. One of the most effective methods is to ensure that the soil is well-draining, as waterlogged soil can lead to root rot and other fungal diseases. In addition, it is crucial to maintain proper spacing between plants to prevent overcrowding, which can contribute to the spread of disease.
Despite preventative measures, pests and diseases may still occur. Fortunately, there are a variety of organic remedies that can be used to treat these issues without resorting to harsh chemicals. For example, spraying a mixture of neem oil and water on leaves can help control aphid infestations. Additionally, introducing beneficial insects (such as ladybugs) into the garden can help control pest populations naturally.
Overall, taking proactive steps such as preventative measures and utilizing organic remedies will help keep your yellow wood poppies healthy and vibrant. However, if you do encounter persistent issues or are unsure how to proceed with treatment, consulting a horticultural expert or plant care specialist can provide valuable guidance in resolving any problems that arise.
Transition: Now that you have learned about preventing and treating common pests and diseases in your yellow wood poppies, let’s explore how you can propagate these beautiful flowers in your own garden.
Propagating Your Yellow Wood Poppies
If you’re looking to propagate your yellow wood poppies, there are a few techniques that you can use. One of the most common methods is by division. This involves digging up an established clump of plants and separating it into smaller sections, each with their own roots and shoots. Make sure to use a sharp, clean knife or garden shears for this process, and be careful not to damage any of the roots or stems.
Another propagation technique that you may want to try is by taking stem cuttings. To do this, select a healthy stem from your plant that is around 4-6 inches long and has several leaves attached. Cut the stem just below a set of leaves using a sharp knife or scissors, then remove any lower leaves so that only one or two remain at the top. Dip the cut end of the stem in rooting hormone powder before planting it in a pot filled with moist potting soil.
The best season for propagating your yellow wood poppies is in early spring or late summer when temperatures are mild and rainfall is steady. During these times, the soil is still warm enough for new roots to develop quickly, but not too hot that they will dry out too fast. With proper care and attention, your newly propagated plants should start growing within a few weeks.
Transitioning into Overwintering Your Plants:
Now that you know how to propagate your yellow wood poppies successfully, it’s essential to ensure they survive through the winter months. Overwintering your plants will help them thrive once the weather warms up again. Here are some tips on how to do this effectively without causing any harm to your plants.
Overwintering Your Plants
After successfully propagating your yellow wood poppies, it is important to ensure that they survive the winter. Proper winter protection is crucial for their survival. These plants are native to woodland areas and are adapted to cooler temperatures, but they still need adequate protection from extreme weather conditions.
One way to protect your plants is by choosing the right container. The container should be large enough to accommodate the plant’s root system and have good drainage. It is also important to choose a container made of a durable material that can withstand freezing temperatures without cracking or breaking.
Another method of winter protection is by covering the plant with a layer of mulch. This will help insulate the roots against freezing temperatures while also providing additional moisture retention. It is recommended to use organic mulch such as straw or leaves rather than synthetic materials. Synthetic materials may cause damage to the plant and may not decompose properly over time.
As horticultural experts suggest, providing proper winter care for your yellow wood poppies will ensure their survival through even the coldest months. Choosing the right container and using organic mulch are just some effective ways you can protect your plants from harsh winter conditions. In the next section, we will explore companion planting ideas for yellow wood poppies that will enhance their beauty and provide benefits for other plants in your garden as well.
Companion Planting Ideas For Yellow Wood Poppies
- Yellow Wood Poppies thrive in nutrient rich soil, and benefit from occasional top-dressing with compost or manure.
- When planting Yellow Wood Poppies, they should be located in a spot that receives full sun exposure, or at least 6 hours of direct sunlight a day.
- To ensure healthy growth, water the plants at least once a week and ensure the soil is kept moist but not waterlogged.
- If the soil is dry, water the Yellow Wood Poppies more frequently, but be sure to avoid overwatering.
- To retain moisture in the soil, applying a layer of mulch is beneficial.
- In periods of extreme heat, it is important to water the plants more regularly.
Nutrient Rich Soil
In order to successfully grow yellow wood poppies as companion plants, it is important to provide them with nutrient-rich soil. Composting is a great way to enrich your soil naturally and inexpensively. By adding compost to your garden beds, you can increase the amount of organic matter in the soil, which provides essential nutrients for plants like yellow wood poppies.
When creating your own compost, it is important to follow some basic composting tips. First, make sure you have a good balance of carbon-rich materials (like dried leaves or straw) and nitrogen-rich materials (like kitchen scraps or grass clippings). You should also make sure that your compost pile stays moist but not too wet, as excess moisture can cause the pile to become anaerobic and produce unpleasant odors. Organic alternatives like blood meal or bone meal can also be added to the soil for an extra boost of nutrients.
Using nutrient-rich soil is key when growing yellow wood poppies as companion plants. Providing them with the proper nutrients will help ensure that they grow strong and healthy, which in turn will benefit any neighboring plants in your garden. With some basic composting knowledge and a little bit of effort, you can create a thriving ecosystem in your own backyard.
Sunlight Exposure
When it comes to companion planting ideas for yellow wood poppies, sunlight exposure is a crucial factor to consider. Yellow wood poppies prefer partial shade, making them an ideal candidate for planting under taller plants or trees that can provide some shelter from direct sunlight. Maximizing bloom for yellow wood poppies means finding the right balance between adequate sun exposure and shade tolerance.
Yellow wood poppies are known for their ability to thrive in shaded areas with dappled sunlight. This makes them a great addition to gardens with taller plants or trees that can provide some natural shade. Planting yellow wood poppies under larger plants can also help protect them from harsh afternoon sun, which can cause wilting and leaf scorching. However, it’s important to note that too much shade can also be detrimental to these plants, as they still need some direct sunlight in order to produce blooms.
When selecting companion plants for yellow wood poppies, it’s essential to consider their shade tolerance levels. Some great options include ferns, hostas, and astilbes – all of which thrive in partial shade environments. It’s also important to avoid planting companions that require full sun exposure, as this could potentially harm the yellow wood poppies’ growth and development. By choosing compatible companion plants and providing adequate sun exposure for your yellow wood poppies, you can create a beautiful and thriving garden ecosystem.
Watering Strategies
When it comes to companion planting for yellow wood poppies, understanding their watering needs is crucial. Yellow wood poppies prefer consistently moist soil, but not waterlogged conditions that can lead to root rot. Watering frequency will depend on factors such as temperature, humidity levels, and soil type – sandy soils may require more frequent watering than clay soils. To ensure optimal growth and bloom, it’s important to monitor soil moisture levels regularly and adjust your watering schedule accordingly.
One effective watering strategy for yellow wood poppies is to water deeply and infrequently. This means providing a thorough soaking once or twice a week instead of light watering every day. Deep watering encourages deeper root growth, which helps the plant withstand periods of drought better. It’s also essential to water at the base of the plant rather than overhead, as wet leaves can increase the risk of fungal diseases.
When selecting companion plants for yellow wood poppies, it’s important to consider their respective watering needs. Plants with similar moisture requirements are ideal companions because they can be grouped together and watered at the same time. Some great options include ferns, hostas, and astilbes – all of which prefer consistently moist soil like yellow wood poppies. By choosing compatible companion plants and implementing effective watering strategies, you can create a thriving garden ecosystem that benefits all your plants in the long run.
Using Yellow Wood Poppies In Floral Arrangements
A popular choice among florists and garden enthusiasts, yellow wood poppies are versatile flowers that can be used in various floral arrangements. These delicate blooms are ideal for adding a touch of color and texture to any bouquet or centerpiece. With their soft yellow petals and intricate center, they make a stunning addition to any arrangement.
When creating floral arrangements with yellow wood poppies, it is essential to consider color combinations. These flowers pair well with other pastel shades such as pink, lavender, and light blue. They also look great when combined with bolder colors like red or orange for a more dramatic effect. To create a cohesive look, choose complementary colors that will enhance the beauty of your yellow wood poppies.
Whether you’re creating a small bouquet or an elaborate centerpiece, incorporating yellow wood poppies into your floral arrangements is sure to add a touch of elegance and charm. With their delicate appearance and vibrant color, these flowers are perfect for any occasion. Experiment with different color combinations to find the perfect match for your next event.
Conclusion: Enjoying The Beauty Of Your Yellow Wood Poppies
Garden design enthusiasts find yellow wood poppies as an excellent addition to their gardens. Their bright yellow blooms add a pop of color to any garden bed, and their unique foliage adds texture and interest. These plants prefer shaded areas with well-draining soil, making them perfect for woodland gardens or shady borders. They also work well in rock gardens, adding a splash of color amongst the rocks.
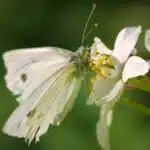
If you’re looking to capture the beauty of your yellow wood poppies through photography, there are a few tips to keep in mind. First, consider the lighting conditions. Early morning or late afternoon light provides soft and warm tones that enhance the natural beauty of your flowers. Second, experiment with different angles and compositions – get up close for macro shots or step back for wider views of your garden bed. Lastly, try incorporating other elements into your photos such as bees or butterflies that are attracted to the flowers.
In conclusion, growing and caring for yellow wood poppies is not only easy but rewarding as well. With its stunning blooms and unique foliage, these plants add interest and beauty to any garden design. And if you’re interested in capturing their beauty through photography, follow these tips to create stunning images that showcase the natural appeal of these lovely flowers.
Conclusion
Yellow Wood Poppies are a delightful addition to any garden, with their vibrant yellow blooms and delicate foliage. Understanding their anatomy and planting requirements is essential for their successful growth. These plants thrive in partial shade, with well-draining soil that is rich in organic matter. They require regular watering during the growing season but can tolerate dry spells once established.
When planting Yellow Wood Poppies, it is important to prepare the soil by adding compost or other organic matter to improve drainage and fertility. Planting should be done in early spring or fall, spacing the plants at least 12 inches apart. Overwintering requires cutting back dead foliage and mulching around the base of the plant.
Companion planting with ferns, hostas, or other shade-loving plants can enhance the beauty of Yellow Wood Poppies while providing additional benefits such as natural pest control. These plants also make stunning additions to floral arrangements.
One interesting statistic about Yellow Wood Poppies is that they are native to North America and have been used medicinally by indigenous peoples for centuries. They contain alkaloids that have been shown to have anti-inflammatory and pain-relieving properties.
In conclusion, Yellow Wood Poppies are a wonderful choice for gardeners looking to add color and interest to shady areas of their yard. By following proper care guidelines and companion planting suggestions, these plants can flourish and provide both aesthetic value and potential health benefits.
Image Credits
- “Yellow wood poppy” by bcostin (featured)

