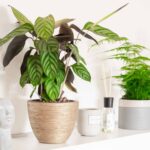
The Elephant’s Ear (Alocasia) is a symbol of majesty and beauty, with its impressive leaves that resemble the ears of a gentle giant. From its majestic appearance, to its ability to thrive in many different environments, it’s no wonder why Alocasia are so popular.
However, growing these magnificent plants can be intimidating for first-time gardeners. If you’ve ever dreamed of having an Elephant’s Ear in your home or garden, don’t worry! With the right tips and tricks, anyone can learn how to grow and care for one with ease.
In this article, we’ll discuss everything you need to know about growing and caring for an Alocasia plant indoors. We’ll cover topics such as proper light requirements, soil needs, ideal temperatures, and how to water your plant correctly. So if you’re ready to take on the challenge of growing an Elephant’s Ear plant, keep reading!
Overview Of Elephant’s Ear (Alocasia)
Ah, the majestic elephant’s ear – a symbol of power and grandeur. Who hasn’t looked upon its giant leaves, shaped like the ears of an elephant, and been awestruck? But let us not forget that this imposing plant requires a bit of care to stay healthy. To ensure that your alocasia thrives, let’s explore how to grow and care for it.
First off, alocasias are tropical plants so they need plenty of indirect sunlight, warmth and humidity. If you’re growing it indoors, make sure to place it near a window with bright light. Keep in mind that direct sunlight is too intense for alocasias; instead give them bright but diffused light. Additionally, water your alocasia when the soil is dry about two inches down and reduce watering during winter months since alocasias are dormant then. You can also mist them regularly to increase the humidity levels around your plant.
Finally, fertilize your alocasia every couple of weeks throughout the growing season (spring through fall) with liquid fertilizer at half strength or use slow-release pellets once a month. Also make sure to check for pests frequently as they may attack alocasias if given the chance! With these simple steps in mind, you’ll be able to keep your elephant’s ear looking magnificent all year round. Now let’s look into selecting and purchasing an alocasia plant…
Selecting And Purchasing An Alocasia Plant
Picking the perfect potted plant for your personal paradise is a process that requires patience and precision. Whether you are looking for an alocasia or another type of greenery, the key to success is to start with a strong foundation. Before you purchase an elephant’s ear (alocasia), it is essential to know exactly what kind of care it needs and how best to provide it.
The first step in selecting an alocasia is to look for healthy leaves and branches. The leaves should be vibrant green, without any yellow spots or wilting, and the stems should be sturdy. This will ensure that your new plant is already off to a good start and has plenty of energy reserves. Be sure to avoid plants with patches of mold or other signs of disease, as they may not survive after being transplanted into your home.
Once you have found a healthy specimen, take some time to inspect the soil in which it is growing. Alocasias prefer loose, well-draining soil with plenty of organic material mixed in for nutrition. If the pot does not have adequate drainage holes at the bottom, or if there are excessive amounts of fertilizer or pesticide residue on top of the soil, it’s best to find another plant. With all these considerations taken into account, you can be sure that when you bring your alocasia home, it will thrive under your care.
Armed with this knowledge, you can confidently move forward in finding the right alocasia for your space. Now it’s time to prepare a suitable pot so that your new plant can flourish in its new home!
Preparing A Suitable Pot For Alocasia
Preparing a suitable pot for Alocasia is like building a palace for a king. Just as with any living thing, the environment in which it lives must be tailored to its needs. Selecting an appropriate container for your Alocasia is critical to ensure it grows healthy and thrives.
When it comes to choosing the right pot, there are several considerations that should be taken into account. Firstly, make sure the pot has enough drainage holes at the bottom to allow excess water to escape without causing root rot. It’s also important to pick one that is slightly bigger than the plant’s root system so it has room to grow. You can also use two pots: one slightly smaller than the other, and place the plants’ root ball in between them as this will help increase drainage and aeration of the roots.
Finally, you’ll need to think about what type of material you want your pot to be made from. Terracotta pots are porous, allowing water vapor and oxygen through them which helps keep roots healthy; whereas plastic or ceramic pots are not porous so you’ll need to keep an eye on their moisture levels more closely. Whichever material you choose, make sure it’s durable enough to withstand extreme temperatures and conditions so your Alocasia can thrive indoors or outdoors year-round.
The next step is selecting the right soil for Alocasia; but with the right pot in hand and a few easy steps followed, you’re well on your way towards creating an ideal home for this majestic plant!
Choosing The Right Soil For Alocasia
When it comes to soil for an elephant’s ear (Alocasia), the right choice is crucial. According to experts, well-draining soil helps reduce the risks of root rot and other soil-borne diseases. This is important as Alocasia plants are prone to root rot if their roots are sitting in water-logged soils. So, let’s take a look at what type of soil works best for this plant.
When choosing a suitable potting mix for Alocasia, opt for a lightweight material with plenty of aeration and good drainage. A quality commercial potting mix or a combination of peat moss, perlite and compost should work just fine. Additionally, adding some slow-release fertilizer into the soil will give your Alocasia an extra boost of nutrients throughout its growing season.
Finally, make sure to add some organic matter such as mulch or leaf mould to promote healthy growth. These materials will help retain moisture and provide sustenance for beneficial organisms that can further improve your plant’s health over time. With these tips, you’ll be able to pick the perfect soil for your elephant’s ear so that it can grow strong and healthy! Now let’s move on to planting and repotting your Alocasia so we can get started on helping it flourish!
Planting And Repotting Alocasia
Did you know that the Alocasia plant can grow up to 3 feet tall? This amazing plant not only looks beautiful in any home, but is easy to care for and repot. Planting and repotting Alocasia is an important step in caring for this resilient tropical beauty.
When planting Alocasia, it’s important to use a potting soil that is well-draining and high in organic matter. Mix in a handful of perlite or vermiculite to create more air pockets in the soil which will help with drainage. Ensure there are drainage holes at the bottom of the pot so excess water can escape. You can place a layer of gravel at the bottom of the pot before adding your soil mix, then add about one inch of soil mix over the root ball when planting. Water your Alocasia well after planting it, but don’t leave it sitting in water.
It’s also important to consider repotting your Alocasia every couple years as its roots tend to spread quickly throughout its pot. When repotting, choose a slightly larger pot than its current one with plenty of drainage holes at the bottom. Gently remove your plant from its old pot being careful not to damage any of its roots and lightly loosen them if necessary before placing it into its new pot filled with fresh soil mix and gently firming it down around the roots without compacting the soil too much. Water your plant well after repotting and discard any excess water that collects in the saucer beneath your pot.
Ensuring your Alocasia is planted correctly and repotted regularly is essential for helping this beautiful houseplant thrive indoors! After caring for these steps, positioning and lighting will be key factors in keeping your plant healthy and happy!
Positioning And Lighting For Alocasia
Once you have planted and repotted your alocasia, it’s important to consider its positioning and lighting. The ideal spot for an alocasia is in bright, indirect light. Too little light can cause the leaves to droop, while too much direct sun can scorch them. If your alocasia isn’t getting enough sunlight, try rotating it every now and then to ensure all sides of the plant are exposed to some light.
When it comes to temperature, alocasia likes warm conditions throughout the year. Keep temperatures between 65 and 85 degrees Fahrenheit; any cooler than that could stunt its growth or cause damage. In addition, make sure you avoid placing your plant near drafts or heating vents as these can dry out the foliage too quickly.
Finally, be mindful of humidity levels around your alocasia – high humidity is key for a happy plant! If you notice that the leaves start curling or yellowing at the tips, that’s usually a sign of low humidity. You can increase moisture levels by misting the plant every few days and placing it on a pebble tray filled with water so that it’s surrounded by evaporating moisture.
Watering Requirements For Alocasia
Watering is an essential part of caring for your elephant’s ear plant. It’s important to keep the soil consistently moist, but not soggy. To do this, water the alocasia when the top inch of soil has dried out. You can check this by sticking your finger into the potting soil. If it feels dry, it’s time to water. When watering, be sure to use room temperature water and pour it slowly over the entire surface of the soil until you see some excess draining from the bottom.
It’s also important to avoid overwatering your alocasia, as this can cause root rot and eventual death of the plant. To make sure you don’t overwater, allow all of the excess water to drain out after each watering session. You should also allow any standing water in the saucer or tray under your potted alocasia to fully evaporate before re-watering again. This will ensure that there are no soggy spots in your potting mix which could lead to root rot problems later on down the line.
Sometimes it can be tricky to know whether you’ve watered enough or too much, so take some time observing your plant and its environment before deciding when and how much you should be watering it with. With a bit of practice and observation over time, you’ll soon get a feel for what works best for your particular alocasia plant! Now that we have discussed proper watering requirements for alocasia plants let’s move onto fertilizing them for optimal health and growth.
Fertilizing Alocasia
What does it take to keep an alocasia plant healthy? Fertilizing is just as important as watering for maintaining the health of this beloved houseplant. So, how should you go about fertilizing your alocasia?
The most important thing when fertilizing alocasia is to be mindful of the quantity you are using. Too much fertilizing can damage the leaves and even cause the plant to die. On the other hand, not enough fertilizer will prevent growth and development. The best way to ensure optimal results is to use a balanced ratio of nitrogen, phosphorus, and potassium that is specifically formulated for foliage plants. You can find these pre-mixed solutions at garden stores or online retailers.
It’s also important to use a diluted form of fertilizer when feeding your alocasia. This will help ensure that you get just the right amount without overloading the soil with too much nutrients. A good rule of thumb is to mix one part fertilizer with two parts water and then water your plant with this solution every two weeks during its growing season (spring and summer). During winter, you can reduce feeding frequency to once a month as this is when alocasia enters its dormant period.
By following these steps, you’ll be well on your way to keeping your alocasia healthy and happy! Now let’s take a look at controlling pests and diseases on alocasia which may occur due to improper care or environmental conditions.
Controlling Pests And Diseases On Alocasia
Although Alocasia is generally a pest-free plant, it can still be subject to attack from the occasional pest. From time to time, you may find that your Elephant’s Ear is being attacked by aphids, mealybugs, mites, thrips or scales. All of these pests can be controlled with insecticidal soap or horticultural oil. It’s important to follow the instructions on the label and make sure that all parts of the plant are treated thoroughly.
If you’re growing Alocasia indoors, it’s also important to keep an eye out for diseases such as stem rot, leaf spot and root rot. These can be caused by overwatering or too much humidity. To help prevent these issues, make sure your Elephant’s Ear is planted in a well-draining potting mix and avoid getting the foliage wet when watering. In addition, try not to let water sit on the leaves for too long.
It’s also important to make sure that your Alocasia has adequate air circulation in order to prevent fungal diseases. If you notice any signs of disease on your plant, remove the affected areas and treat with a fungicide according to the instructions on the label. Taking steps like this will help keep your Elephant’s Ear healthy and thriving for many years to come! With proper care and attention, your Alocasia can grow into a magnificent houseplant! Now let’s look at how we can take care of our Elephant’s Ear by pruning it back if necessary.
Pruning Alocasia
Pruning your Alocasia is like giving it a trim to keep it looking fresh and healthy. It’s an easy task, but one that should be done with care and precision. Like a good hairstylist, you’ll want to make sure each snip of the scissors is precise and thoughtful.
The first step in pruning is to identify any yellowing or browning leaves. These will have to be carefully removed with pruning shears as they are no longer providing any benefit to the plant. Make sure you get rid of all the dead leaves before you begin cutting away at the stems. You should also cut away any stems that have become too long or are flopping over due to their weight. This will help keep your Alocasia looking neat and tidy.
Once you’ve finished removing all the dead foliage, it’s time to focus on the new growth. Start by trimming off any stems that are growing too close together in order to give them enough space for air circulation and light exposure. You may even want to pinch off some excess shoots so that your Alocasia doesn’t become overcrowded or top-heavy with foliage. This will ensure that your plant remains full, but not overgrown. With these simple steps, your Alocasia will be looking its best in no time!
Propagating And Growing New Alocasias
Propagating and growing new alocasias may seem daunting, but it doesn’t have to be. In fact, it can be quite rewarding when done properly! With a few simple steps, you’ll be able to propagate an Alocasia and grow a beautiful new plant in no time.
First, the best way to propagate your Alocasia is through division. When your plant has grown large enough, simply separate the rhizomes with a sharp knife or spade. Make sure each section has at least one healthy leaf. Plant each section into its own pot with moist soil and keep the soil moist until the roots are fully established.
Once you have planted your divisions, you’ll need to provide them with plenty of light and water. Keep the soil evenly moist but not soggy and make sure they’re in a well-lit area where they will get at least 4 hours of sunlight per day. Fertilize monthly during active growth periods for optimal growth and health of the plants.
Propagating and growing new Alocasias isn’t as difficult as it sounds – all it takes is patience and care! With proper care, your Alocasias will produce stunning foliage that will last for many years to come. Now that we’ve covered propagating and growing new plants, let’s take a look at some of the common problems that arise when caring for these beautiful plants.
Common Problems With Alocasia
Despite the relatively low maintenance of alocasia, common problems may still arise that require attention. In this section, we’ll discuss how to identify and address these issues.
One of the most common problems with alocasia is root rot, which can occur due to too much watering or insufficient drainage. Signs of root rot include yellowing leaves and black or slimy roots. To treat this problem, you’ll need to remove all affected roots and repot the plant in fresh soil with better drainage. It’s important to be careful when handling affected plants as the rotting roots can spread quickly to other parts of the plant.
In addition to root rot, another issue that can affect alocasias is pest infestations such as mealybugs or spider mites. These pests often hide in hard-to-reach areas of the plant and can cause discolored patches on leaves or stunted growth if left untreated. If you notice any signs of infestation, it’s important to take action immediately by applying an insecticide or insecticidal soap solution directly onto the affected area.
By keeping an eye out for these common issues and taking quick action when needed, you can ensure your alocasia remains healthy and vibrant for years to come. Next up, let’s take a look at some signs of unhealthy alocasia so you know what to look out for in future!
Signs Of Unhealthy Alocasia
Well, here we are at the final stretch of our journey to becoming alocasia experts! It’s been no easy feat, but I think we can all take a moment to bask in the glory of what we’ve achieved so far. Now let’s dive into the signs of an unhealthy alocasia plant and make sure our little buddy is happy and healthy.
First off, let’s break down the symptoms of an unhealthy alocasia into 4 key points:
- Yellowing or browning leaves
- Wilted or drooping leaves
- Edema (blisters) on leaves
- Slow growth or stunted growth
If you spot any of these issues with your alocasia, it may be time to troubleshoot! To begin, try examining the environment that your plant is living in – does it have enough light? Is it getting watered correctly (not too much or too little)? If this doesn’t seem to help, then you may want to consider repotting it into fresh soil and possibly adjusting its positioning so it’s receiving more light or less shade.
No matter what issue you’re dealing with, remember that alocasias are resilient plants and with some TLC they can bounce back quickly! So don’t get discouraged if you find yourself facing some challenges – just stay focused on providing the best care possible for your plant and soon enough you’ll reap the rewards of a lush green oasis right in your own home.
Troubleshooting Alocasia Care
Did you know that Alocasia, also known as Elephant’s Ear, is one of the most popular houseplants in the world? This tropical plant with its large glossy leaves is an ideal choice to add a touch of beauty and warmth to any home. But when it comes to growing and caring for Alocasia, there are some key considerations. In this article, we’ll look at troubleshooting Alocasia care.
The first step in troubleshooting Alocasia care is to inspect the plant for signs of unhealthy growth. Yellowing or browning leaves can be a sign of too much water or not enough sunlight. Wilting leaves or droopy stems can indicate a lack of water or too much sun. Additionally, white spots on the foliage may be a sign of pests or fungal diseases.
Once you’ve identified potential problems with your plant, you’ll need to adjust your care accordingly. Too little water can be remedied by increasing the frequency of watering, while too much should be solved by reducing how often you water your Alocasia. If your plant seems to be getting too much direct sunlight, move it to an area with more indirect light. Conversely, if your plant isn’t getting enough sun, move it closer to a window where it can receive more light throughout the day. TIP: If possible try to keep your alocasia away from cold drafts or radiators as this could cause them stress and harm their overall health over time!
Tips For Growing And Caring For Alocasia
A stitch in time saves nine – proper care and maintenance of Alocasia plants will not only keep them looking healthy, but also reward you with a beautiful display. Growing and caring for Alocasia doesn’t have to be difficult – just remember a few key tips. Here’s what you need to know:
First, when it comes to light, Alocasia prefers bright indirect sunlight and will do best when placed near an east-facing window or in an area with filtered natural light. If the leaves begin to yellow or droop, provide it with more light. Secondly, keep the soil moist but not soggy by watering once a week – more often during hot weather. Lastly, keep temperature consistent as too much fluctuation can cause damage; ideal temperatures range from 65°F (18°C) to 75°F (24°C).
Now that you know the basics of growing and caring for Alocasia, here are some additional tips that may help: • Fertilize your plant every two to three weeks during spring and summer months using liquid houseplant fertilizer diluted to half strength. • Increase humidity around your plant by misting it regularly or placing it on top of a tray filled with pebbles and water. • Repot your plant every two years in fresh potting mix combined with slow-release fertilizer granules.
With these simple tips in mind, you can easily enjoy the beauty of an Alocasia indoors all year round!
Frequently Asked Questions
What Is The Best Temperature For Alocasia?
When growing Alocasia indoors, one of the most important things to consider is the temperature. This tropical plant thrives best in warm and humid conditions, so it’s essential to make sure your indoor environment meets its needs. Fortunately, Alocasia plants do quite well in a range of temperatures, as long as you follow a few tips for keeping them happy and healthy.
First off, Alocasia prefers temperatures between 65–90 degrees Fahrenheit during the day and 55–70 degrees at night. Keep your house on the cooler side if you can – when temperatures exceed 90 degrees, Alocasia will start to suffer from stress. The plant also prefers high humidity levels of around 60-70%, so consider investing in a humidifier if you don’t live in a naturally humid climate.
Finally, be sure to keep your plants away from direct sunlight or any other sources of intense heat. While some indirect sunlight is beneficial for promoting growth, too much direct sunlight can cause leaf scorching or yellowing leaves. Alocasia also doesn’t like being exposed to cold drafts or sudden changes in temperature, so keep them away from air conditioners and open windows whenever possible.
By following these simple guidelines on temperature and humidity levels for Alocasia, you’ll ensure that your plant enjoys all the warmth and moisture it needs to thrive indoors!
How Often Should I Feed My Alocasia?
Caring for an Alocasia can be a rewarding experience. From its lush green foliage to its ability to transform any room, this plant has so much to offer. To ensure your Alocasia thrives, it’s important to understand how often you should feed it.
Feeding your Alocasia is essential for keeping it healthy and thriving:
- Feed the plant once a month with a balanced liquid fertilizer during spring and summer.
- Reduce feeding frequency in autumn and winter, when growth slows down naturally.
- If you notice yellow leaves or stunted growth, increase the fertilization rate slightly until the plant returns to its healthy state.
Regular fertilization keeps your Alocasia strong and lush; however, overfeeding can cause salt buildup in the soil that can be deadly for this tropical beauty. When used correctly, liquid fertilizer helps promote new growth and vibrant colors year-round!
To keep your Alocasia looking its best, monitor the soil moisture levels as well as when you feed it. If the soil feels dry an inch below the surface, it’s time for some water – but don’t overwater either! Too much moisture can result in root rot that can be difficult to repair without killing the plant altogether. With proper care and attention, you’ll have a beautiful alocasia that will bring life into any room of your home!
Is Alocasia Toxic To Pets?
As an elephant’s ear (alocasia) lover, it’s important to know if the plant can be hazardous for pets. The answer is yes– pets can be affected by the toxins in alocasia. It’s essential to be aware of this before bringing the plant into your home.
It’s easy to think that all plants are pet-friendly, but toxicity levels vary among species. Alocasia contains calcium oxalate crystals that release a toxin when ingested, causing discomfort and possible harm to cats and dogs. Symptoms of ingestion include drooling, vomiting, and difficulty swallowing.
Therefore, it’s best to take precautions such as keeping alocasia out of reach of pets or placing it out of sight in a secure area like a greenhouse or sunroom. As a bonus, these areas have better temperature control and humidity levels than other parts of the house– both factors important for growing alocasias with ease!
If you do decide to bring an alocasia into your home, keep in mind that taking care of one requires regular watering and feeding every two weeks or so. So don’t forget about your furry friends’ safety while tending to your beloved plant!
How Long Can An Alocasia Plant Live?
It’s no secret that plants bring life to any room. They’re vibrant, colorful, and can even purify the air! But how long do they last? Specifically, how long can an Alocasia plant live? Ironically, this beautiful houseplant has the potential to outlive us all!
Alocasias are known for their robustness and longevity. Depending on their growing conditions, these plants can live up to 5 years or more. To get the most out of your Alocasia, it’s important to provide adequate sunlight and water. While direct sun will cause its leaves to burn, indirect light is just what it needs. As for watering, if you make sure the soil stays moist but not soggy – your Alocasia will thrive.
Caring for an Alocasia is easy and rewarding; with a little effort you can enjoy its beauty for many years to come. By providing proper sunlight and water, you’ll be able to experience the joy this plant has to offer in all its stages of life. So go ahead – get one today and make your home a little greener!
How Do I Propagate Alocasia?
Propagating Alocasia, also known as Elephant’s Ear, is an excellent way to ensure your plant will thrive and live a long life. In fact, some species of Alocasia can live up to 15 years if properly cared for. To propagate your plant, you’ll need to understand the basics of how it grows and what it needs. Let’s take a look at how to do this successfully.
When propagating any type of Alocasia, there are five important steps you’ll need to follow:
- Cut a healthy stem from the mother plant using sterilized scissors or pruners
- Plant the stem in moist soil or potting mix
- Place the pot in bright, indirect light
- Water regularly but don’t over-water
- Fertilize once a month during the growing season.
Following these steps can help ensure that your new plant has everything it needs to survive and thrive in its new home. It’s important to pay attention to the soil moisture level and make sure that you don’t over-water or under-water your new plant as this can lead to root rot or other issues. Additionally, try not to move the pot too much after planting — Alocasias prefer stability and may become stressed if moved too often. With proper care and attention, your propagated Alocasia should be able grow strong roots and establish itself in its new environment in no time!
Conclusion
Alocasia is a beautiful and unique tropical plant that not many people know how to take care of properly. When cared for correctly, an Alocasia can be a show-stopper in any home or garden. With the right combination of temperature, nutrients, and water, your Alocasia can become the conversation piece of your home.
Caring for Alocasia is much like gardening in general; it requires patience and dedication. With just a little bit of effort, you’ll be rewarded with lush leaves that stand out from the rest of your plants like a beacon in the night sky. Properly caring for your Alocasia will ensure it grows strong and healthy for years to come.
With the right knowledge, anyone can become an expert in growing and caring for their elephant’s ear (alocasia). By following the steps outlined in this article, you’ll be able to provide your Alocasia with all the love and attention it needs to thrive – just like a mother nurturing her child.


