Wheat is one of the world’s staple foods and has been cultivated for thousands of years. It is a versatile crop that can be ground into flour for bread, pasta, and other baked goods. Planting and harvesting wheat in your own garden can be a rewarding experience, but it requires some knowledge and preparation. In this article, we will provide you with essential tips on how to plant, grow, and harvest wheat in your own garden.
Wheat is a member of the grass family and is an annual crop that grows best in cool temperatures. The planting season for wheat varies depending on the climate zone, but generally occurs in late fall or early spring when soil temperatures are between 40°F to 60°F. Wheat requires well-drained soil with a pH level between 6.0 to 7.5 and full sun exposure for optimal growth. Proper soil preparation is crucial in ensuring healthy growth of wheat plants. By following these guidelines, you can increase your chances of success when growing wheat in your own garden.
Choosing The Right Variety Of Wheat
Selecting the right variety of wheat is crucial to ensure a successful harvest. When it comes to choosing between organic, heirloom wheat varieties and conventional options, there are several benefits to opting for the former. Organic wheat is grown without the use of synthetic pesticides and fertilizers, making it a healthier option for both consumers and the environment. Additionally, heirloom wheat varieties are typically more resilient and adaptable to changing weather conditions than conventional options.
Factors such as climate and region must also be taken into consideration when selecting wheat for your garden. Some varieties may not thrive in certain conditions or may require specific soil types or pH levels. It is important to research which varieties will perform best in your particular area and microclimate before making a selection.
Another factor to consider is what you plan on using the harvested wheat for. Different varieties have different protein contents, which can impact their performance in baking or other culinary applications. By taking all of these factors into account, you can select a variety of wheat that will yield an optimal harvest for your specific needs and growing conditions. This will help ensure that your efforts result in a bountiful crop come harvest time.
As you move forward with planting, the next step is preparing the soil for optimal growth and yield potential.
Preparing The Soil For Wheat Planting
Just like baking a cake, growing wheat requires the right ingredients in order to produce a successful outcome. One of the key components is the soil. Before planting, it is important to prepare the soil by tilling and composting. Tilling loosens the compacted soil and allows for better root growth while adding compost enriches the soil with nutrients that will aid in plant development.
When selecting seeds for planting, it is important to consider whether you want to grow heirloom or hybrid varieties. Heirloom varieties are non-genetically modified and have been passed down from generation to generation, while hybrids are created by crossing two different types of wheat to create a more desirable plant with specific traits such as disease resistance or higher yields. Your choice will depend on your personal preferences and goals for your wheat crop.
Once you have prepared your soil and selected your seeds, it is time to test the pH level of your soil. This will help determine if any additional amendments need to be added before planting. A pH level between 6 and 7 is ideal for growing wheat. Testing your soil pH level can be done using a simple at-home kit or by sending a sample to a laboratory for more detailed results.
Transitioning into the subsequent section about testing soil ph levels: Understanding the pH level of your soil is essential for growing healthy crops.
Testing Soil Ph Levels
Measuring acidity in soil is a crucial step to ensuring that your wheat plants will thrive. The optimal pH level for wheat growth is between 6.0 and 7.5, meaning that the soil should be slightly acidic to neutral. If the pH level is too low or too high, it can cause nutrient deficiencies and hinder plant growth. It is recommended to test the soil’s pH level before planting and periodically throughout the growing season.
The importance of alkalinity cannot be overstated when it comes to growing wheat. Soil with a high alkalinity level can lead to poor plant growth due to mineral imbalances, as well as increased weed pressure and susceptibility to pests and diseases. To combat this issue, adding organic matter such as compost or manure can help increase acidity levels and improve soil structure.
Testing soil pH levels may seem like an additional task, but it is essential for successful wheat cultivation in your own garden. By measuring acidity, you can ensure that your plants are receiving the necessary nutrients they need to grow strong and healthy. In the next section, we will discuss the best time of year to plant wheat for optimal results.
Best Time To Plant Wheat
Ah, the best time to plant wheat. It’s almost like asking for the perfect time to go on a date – it depends on a few factors. But unlike dating, planting wheat requires more than just an affinity for romance. You’ll need to consider climate requirements, seed selection, and sowing depth before you can even think about the best season to plant.
Firstly, let’s talk about climate requirements. Wheat thrives in cool temperatures and moderate rainfall conditions. The ideal temperature range is between 60-70°F during the day and 40-50°F at night. If you’re living in an area with hot summers or harsh winters, then planting wheat might not be feasible for you. In addition, make sure your soil has good drainage to prevent waterlogging.
Secondly, seed selection is crucial when it comes to wheat farming. Choose high-quality seeds from a reputable source that are well-adapted to your region’s climate and soil type. These seeds should also have high germination rates so that you get maximum yield per acre of land.
Lastly, sowing depth is another critical factor that affects wheat growth and development. The general rule of thumb is to sow at a depth of one to two inches deep into well-prepared soil for optimum results.
Now that we’ve covered the basics of the best season, sowing depth, climate requirements, and seed selection – it’s time to move onto planting wheat seeds!
Planting Wheat Seeds
To start growing wheat in your own garden, selecting the right seeds is crucial. Choose a variety that is suitable for your climate and soil type. There are two types of wheat: spring wheat and winter wheat, with the former being planted in early spring and the latter in late fall. Additionally, make sure to purchase certified seeds from a reputable supplier to ensure better germination rates.
Once you have selected your seeds, it’s time to begin the germination process. Soak the seeds in water for 24 hours before planting them. This will help soften the outer layer of the seed and promote faster germination. Plant the seeds about an inch deep into well-draining soil, spaced about four inches apart from each other. Water gently immediately after planting to help settle the soil around the seeds.
After planting your wheat seeds, be patient as they begin to grow. Germination typically takes 7-10 days at temperatures between 60-75°F (15-23°C). As soon as your plants emerge, thin them out so each plant has enough space to grow properly. Keep monitoring their growth and provide enough sunlight and water to encourage healthy development.
Moving on from planting wheat seeds, watering and fertilizing are critical aspects of ensuring a bountiful harvest.
Watering And Fertilizing Wheat Plants
As the old saying goes, water is life. This is especially true when it comes to growing wheat plants in your own garden. Wheat plants require ample amounts of water to thrive, especially during their critical growth stages. To ensure that your wheat plants are getting enough water, consider using drip irrigation. Drip irrigation systems deliver water directly to the roots of your plants, minimizing evaporation and runoff.
In addition to proper watering techniques, it’s important to provide your wheat plants with the nutrients they need to grow healthy and strong. Using organic fertilizers is a great way to achieve this goal. Organic fertilizers are made from natural materials like animal manure, compost, and bone meal. They release nutrients slowly over time, providing a steady supply of food for your wheat plants without the risk of over-fertilizing or burning them.
When using organic fertilizers, it’s important to follow the manufacturer’s instructions carefully. Applying too much fertilizer can result in stunted growth or even death of your wheat plants. It’s also important to avoid using chemical fertilizers or pesticides, which can harm beneficial insects and other organisms in your garden.
Now that you know how to properly water and fertilize your wheat plants, it’s time to move on to the next step: controlling pests and diseases. By taking these steps to care for your garden, you’ll be rewarded with a bountiful harvest of delicious homegrown wheat.
Controlling Pests And Diseases
Controlling pests and diseases is an important aspect of wheat production. It is crucial to prevent or manage pest and disease infestations to ensure a healthy crop. There are several natural remedies that can be used to control pests and diseases without harming the environment. Integrated pest management (IPM) is also an effective way to control pests without the use of harmful chemicals.
One natural remedy for controlling pests is using neem oil. Neem oil is an organic insecticide that can be sprayed on plants to control aphids, spider mites, and other insects. Another natural remedy for controlling diseases is using compost tea. Compost tea contains beneficial microorganisms that help plant roots absorb nutrients and fight off diseases.
Integrated pest management involves using a combination of methods to control pests and diseases. This may include crop rotation, planting resistant varieties of wheat, and using biological controls such as ladybugs or predatory mites. By implementing IPM practices, farmers can reduce their reliance on chemical pesticides while still achieving high yields.
Proper weed management is also essential for preventing the spread of pests and diseases in wheat crops. Weeds can provide a habitat for pests, which can then move onto the wheat plants. Therefore, it is important to remove weeds in a timely manner through cultivation or by hand-pulling. In the next section, we will discuss proper weed management techniques to ensure a successful wheat harvest.
Proper Weed Management
As any experienced gardener knows, weed management is essential to ensure the health and growth of your wheat plants. This involves a variety of techniques to eliminate unwanted weeds that can compete with your crop for water and nutrients. The use of mulching techniques can be particularly beneficial, as it helps to suppress weed growth while also retaining moisture in the soil. By covering the soil around your wheat plants with a layer of organic material such as straw or leaves, you can reduce the amount of sunlight reaching the soil surface, which will discourage weed seed germination.
In addition to mulching, companion planting strategies can also be used to reduce weed growth around your wheat plants. Many gardeners choose to plant companion crops such as clover or alfalfa alongside their wheat, as these crops have deep roots that help to break up compacted soil and prevent weed growth. Other companion plants such as marigolds or chives have natural pest-repelling properties that can help protect your wheat from harmful insects.
By implementing these weed management techniques in your own garden, you can help ensure a healthy and bountiful harvest of wheat. Just be sure to monitor your plants regularly for signs of stress or disease and adjust your management practices accordingly. With proper care and attention, you’ll be able to enjoy a thriving garden full of delicious, homegrown wheat!
Monitoring Growth And Development
Proper weed management is essential to ensure that your wheat plants can grow and develop without any competition. Once you have taken care of the weeds, it’s time to monitor the growth and development of your wheat plants. Measuring progress is essential to determine if the plant is growing at a healthy rate or if there are any issues that need troubleshooting.
One way to measure progress is by looking at the height of the wheat plant. A healthy wheat plant should be between two to three feet tall by the time it reaches maturity. Additionally, you can check for the presence of tillers or side shoots, which indicate that the plant is developing properly. However, if you notice stunted growth or yellowing leaves, this could be a sign of nutrient deficiency or pest infestation.
Troubleshooting issues in your wheat garden may involve identifying potential pests and diseases that could harm your plants. Common pests include aphids, mites, and grasshoppers. You can prevent these pests from attacking your plants by regularly inspecting them and using natural remedies such as neem oil or insecticidal soap. If you notice any signs of disease such as fungal growth or wilted leaves, remove infected areas immediately to prevent further spread.
As you continue monitoring the growth and development of your wheat plants, keep an eye out for signs of maturity. These may include changes in color from green to golden brown or drooping heads indicating full seed formation inside. With proper care and attention throughout its growth cycle, your wheat plants will mature into a bountiful harvest ready to be harvested and enjoyed by all.
Signs Of Maturity In Wheat Plants
As the saying goes, “You reap what you sow.” This is especially true when growing wheat in your own garden. It’s important to know when your plants have matured so that you can harvest them at the right time. Factors affecting maturity include weather conditions, soil quality, and planting techniques.
One way to determine if your wheat plants are mature is by looking at the color of the heads. As they turn from green to yellow or brown, it means that the grains inside are drying out and becoming ready for harvesting. Another indicator is the hardness of the grain. You can test this by rubbing a few grains between your fingers. If they feel hard and don’t crush easily, then they’re likely ready to be harvested.
Harvesting timing is crucial to getting good yields from your wheat plants. Harvest too early and you risk losing potential growth and yield; wait too long and you risk losing some of your harvest due to birds or other animals eating it before you get there! The best time to harvest is when about 80% of the heads have turned yellow or brown, but before they start falling over. By doing so, you’ll ensure that you get a good yield while still allowing for some natural drying on the plant itself.
| Factors affecting maturity | Harvesting timing |
|---|---|
| Weather Conditions | When about 80% of heads have turned yellow or brown |
| Soil Quality | Before they start falling over |
| Planting Techniques | – |
Now that we’ve discussed signs of maturity in wheat plants, let’s move on to harvesting techniques.
Harvesting Techniques
Harvesting Techniques:
When it comes to harvesting wheat, timing is everything. The best time to harvest wheat is when the crop has fully matured and turned a golden color. If you wait too long, the crop may start to deteriorate or fall over due to the weight of the grains. Therefore, it is important to keep an eye on your crop and be ready for harvesting as soon as it’s ready.
Harvesting tips: One way to test if your wheat is ready for harvesting is to pinch a kernel between your fingers. If the kernel is firm and not milky, then it’s time for harvest. A sickle or scythe can be used for small-scale harvesting while a combine harvester can be used on larger scales. Once harvested, you should thresh the wheat immediately to separate the grain from chaff.
Grain storage: After harvesting and threshing, you need to store the grains properly. Wheat grains should be stored at cool temperatures in a dry place with good ventilation. Moisture content should be kept around 12% or less to prevent fungal growth and insect infestation. It’s advisable to use air-tight containers such as metal bins or plastic bags with small holes punched in them for ventilation.
As we have seen, harvesting wheat involves careful monitoring of maturity levels and prompt action once ready. Threshing immediately after harvest ensures that grains are separated from chaff effectively. Proper grain storage further ensures that your hard work doesn’t go down the drain due to pest infestations or fungal growths. The next step after proper storage would be drying and storing wheat grains which we will explore in detail in the subsequent section.
Drying And Storing Wheat Grains
As the saying goes, “A stitch in time saves nine.” This adage holds true when it comes to drying and storing wheat grains. After harvesting your wheat, it is crucial to dry it properly before storage to prevent mold growth and insect infestation. The best way to ensure this is by using a grain dryer or spread the grains out in a thin layer on a clean surface with good air circulation. Once dried, you can store the wheat in airtight containers such as plastic bags or glass jars.
Storing techniques play an essential role in maintaining the quality of your harvested wheat grains. It is necessary to keep them away from moisture, heat, and light as they can cause mold growth and spoilage. You can use food-grade oxygen absorbers or dry ice to remove excess oxygen from storage containers for long-term storage. Moreover, you should label each container with the date of harvest and type of wheat for easy identification.
After storing your wheat grains correctly, you will need to mill them into flour before use. The milling process typically involves separating the bran from the endosperm through grinding or crushing. You can use either manual or electric mills depending on your preference and budget. However, ensure that you clean your mill thoroughly after every use to prevent contamination by other crops or pests.
Moving forward from drying and storing wheat grains; common wheat growing problems and solutions are essential knowledge for any gardener cultivating this crop.
Common Wheat Growing Problems And Solutions
Wheat is a staple crop that can be grown in any garden with proper care and attention. However, growing wheat is not without its challenges. One of the most common wheat-growing problems is the onset of diseases that can significantly reduce yields. Common wheat diseases include powdery mildew, rust, and Fusarium head blight, which can cause significant damage to crops.
To prevent these diseases from affecting your wheat crop, it is essential to maintain proper soil health and use organic pest control methods. Soil should be well-draining and rich in organic matter to provide the right conditions for healthy plant growth. Additionally, using natural pesticides like neem oil or insecticidal soap can help control pests without harming beneficial insects like bees or ladybugs.
Another issue that commonly affects wheat crops is nutrient deficiencies. If you notice yellowing leaves or stunted growth, it may be due to a lack of essential nutrients like nitrogen, phosphorus, or potassium. To address this problem, consider fertilizing your plants with organic amendments like compost or well-rotted manure.
In conclusion to ensure a successful wheat harvest in your garden, it’s important to address potential issues before they become major problems. By maintaining healthy soil conditions and using organic pest control methods, you can prevent common wheat diseases from taking hold while also ensuring your plants have access to the essential nutrients they need. In the next section we will discuss tips for maximizing wheat yields through careful planting and harvesting techniques.
Tips For Maximizing Wheat Yields
Despite the challenges that come with growing wheat, many gardeners still choose to plant this crop in their own garden. It’s not just because of its nutritional value, but also because of the satisfaction that comes from seeing it grow and harvesting it on your own land. In fact, according to a recent survey, more than 70% of home gardeners have successfully grown wheat in their backyard.
To ensure a bountiful harvest, there are several strategies that can be employed. Using crop rotation is one of them. This involves planting different crops in alternating years to prevent soil-borne diseases and pests from building up over time. This way, the soil remains healthy and fertile for growing wheat year after year. Additionally, seed treatment is another important factor in maximizing yields. Treating seeds with fungicides and insecticides before planting can help protect them from diseases and pests that can significantly reduce yields.
By following these methods, you can increase your chances of success in growing wheat in your own garden. A well-planned crop rotation strategy combined with effective seed treatments will not only result in healthier plants but also higher yields. And when harvest time comes, you’ll feel proud as you celebrate the fruits of your labor – freshly harvested wheat that you grew yourself!
Celebrating The Fruits Of Your Labor
As an agricultural expert, it gives me great pleasure to advise you on how to celebrate the fruits of your labor after planting, growing, and harvesting wheat in your own garden. One way to do this is by throwing a garden party with family and friends. This is a great opportunity to showcase your hard work and share the bounty with those around you.
To prepare for the garden party, start by harvesting your wheat and cleaning it thoroughly. You can then use a threshing machine or beat the stalks against a hard surface to separate the grain from the straw. Once you have separated them, store the grain in an airtight container until you are ready to use it. For the party itself, consider baking bread or other baked goods using your freshly harvested wheat as an ingredient. This will allow your guests to taste the fruits of your labor firsthand.
Sharing the bounty of your harvest is not only rewarding but also fulfilling. By inviting others to partake in what you have grown, you are serving them in a unique way that fosters community and gratitude. Whether it’s through sharing recipes or giving away some of your harvest as gifts, spreading joy through food is one of life’s greatest pleasures. So go ahead and celebrate all that you have accomplished – there’s no better way to enjoy the fruits of your labor than by sharing them with others!
Frequently Asked Questions
How Much Wheat Can I Expect To Harvest From My Garden?
The wheat yield estimation of a garden depends on several factors, including the size of the garden and soil preparation techniques. The ideal soil for planting wheat should be well-drained with a pH level between 6.0 to 7.5. Soil structure and composition can also affect wheat yield estimation, and it’s recommended to add organic matter like compost to improve soil fertility. Planting wheat using the right spacing and depth is also crucial for optimal growth and yield estimation. On average, a mature wheat plant in a garden can produce up to three or four heads, which can contain up to 50 grains each. Hence, it’s possible to harvest around 150-200 grains per plant in your own garden if proper soil preparation techniques are followed, resulting in an abundant yield of fresh homegrown wheat for consumption or sharing with others.
Can I Grow Wheat In A Container Or Does It Need To Be In The Ground?
When it comes to growing wheat, there are a few factors to consider, including whether it can be grown in a container or needs to be in the ground. While wheat is typically grown in fields, it is possible to grow wheat in a container as long as certain conditions are met. Wheat requires deep soil with good drainage and plenty of nutrients, so choosing the right type of container and soil is critical. Ideally, the container should be at least 12 inches deep and filled with a high-quality potting mix that has been amended with compost or other organic matter. However, keep in mind that growing wheat in a container may limit its yield compared to growing it directly in the ground. Regardless of where you choose to grow your wheat, providing ideal soil conditions will help ensure a successful harvest.
How Often Do I Need To Fertilize My Wheat Plants?
When it comes to fertilizing wheat plants, there are a few things to keep in mind. First and foremost, organic fertilizers tend to work best for this crop. These types of fertilizers provide the necessary nutrients without introducing harmful chemicals into the soil. Additionally, crop rotation is an important consideration for maintaining healthy soil and avoiding depletion of key nutrients. As for frequency, wheat typically requires one or two applications of fertilizer per growing season. However, it’s important to pay attention to the specific needs of your plants and adjust accordingly. With proper care and attention to soil health, your wheat plants should flourish and produce a bountiful harvest.
What Are Some Natural Pest Control Methods For Wheat Plants?
When it comes to natural pest control methods for wheat plants, companion planting and DIY pest repellents are two effective options. Companion planting involves growing certain plants alongside your wheat that will help repel pests naturally, such as marigolds or garlic. DIY pest repellents can also be made using ingredients like neem oil or vinegar to create a spray that will deter pests without harming your wheat or the environment. As an agricultural expert, it is important to consider these natural methods before resorting to chemical pesticides, which can have negative impacts on soil health and overall plant growth. By incorporating these techniques into your gardening routine, you can protect your wheat crop from harmful pests while still maintaining a healthy and sustainable garden.
Can I Use My Home Oven To Dry And Store Wheat Grains?
Using an oven to dry and store wheat grains is a common practice among farmers and agricultural enthusiasts alike. It provides a convenient and cost-effective way to preserve the quality of harvested grains for long-term storage, while also reducing the risk of spoilage or infestation during transport. However, it is important to note that there are certain precautions that must be taken when using an oven for grain drying, such as ensuring proper ventilation and temperature control. Additionally, there are various long-term wheat storage options available depending on the desired shelf life and usage requirements, such as storing in airtight containers or using specialized grain silos. As an agricultural expert, it is essential to stay informed on the latest techniques and best practices for wheat cultivation and preservation, in order to serve others effectively in this field.
Conclusion
Wheat is a vital crop that has been cultivated for thousands of years. Planting, growing, and harvesting wheat in your own garden is a rewarding experience that can provide you with fresh flour for baking bread, cakes, and other baked goods. The amount of wheat you can expect to harvest from your garden will depend on factors such as soil quality, climate conditions, and the size of your garden.
Wheat can be grown in containers or in the ground. However, it requires adequate amounts of sunshine, water, and nutrients to grow successfully. Fertilizing your wheat plants regularly with natural fertilizers will help them grow healthy and produce abundant yields. To protect your wheat plants from pests and diseases, natural pest control methods such as companion planting and crop rotation are recommended.
When it comes to drying and storing harvested wheat grains, using a home oven may not be the most effective method. Instead, consider using a dehydrator or air-drying the grains before storing them in an airtight container. By following these simple steps for planting, growing, and harvesting wheat in your own garden, you can enjoy the benefits of fresh flour while contributing to sustainable agriculture practices.
Image Credits
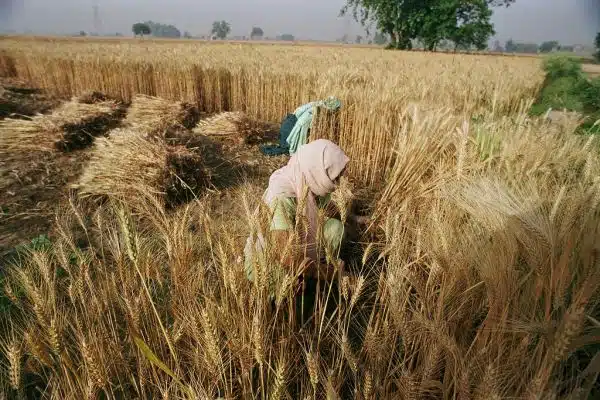
- “Harvesting wheat” by World Bank Photo Collection (featured)

